IBM Integration PoT Labs Home page
IBM App Connect Enterprise
App Connect Kafka Designer Event flow
Table of Contents
- 1. Introduction
- 2. Setup connection to Smart connectors for this lab
- 3. Create API to publish message to topic and event flow to consume topics.
- 4. Testing the Kafka flows
- 5. Deploying Your Designer Flow to App Connect Dashboard
1. Introduction
React to events in real time to deliver responsive and personalized experiences for applications and customer experience. Built on open source Apache Kafka, IBM Event Streams is an event-streaming platform that helps you build smart applications that can react to events as they happen.
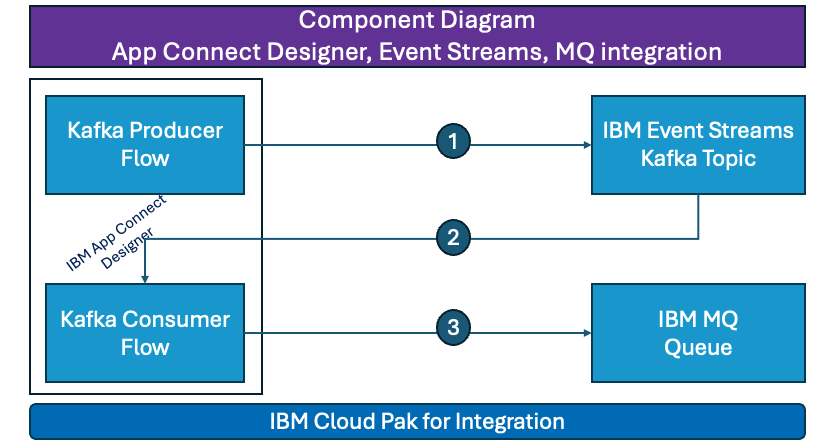
- The purpose of this LAB is to show how to publish messages on to the Kafka broker to be consumed by other applications that are listening to a topic. We will create a simple API that will create messages and then publish them to our topic. We will also then create an event driven flow that will be listening to the topic and will put the message on to a MQ queue.
If you need to review logging in to the Platform Navigator review the steps in the Return to main lab page
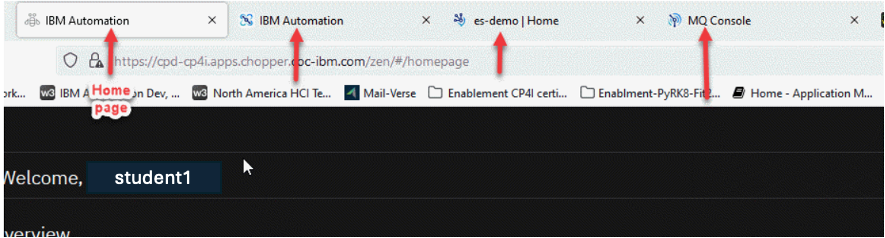
1. From your home page in the upper left it will show your login name and you can always click on IBM Automation to get to this home page.
- For this lab we will be using App Connect Designer, under Integration Messaging we will use MQ, and under Event Streaming we will use es-demo for our Kafka broker.

2. You can right click on each of these capabilities and open them in a new tab.
You wil then have a tab open for each of them to help save time.
2. Create the Kafka topic and MQ Queue for this lab.
2.1 Create the Kafka topic
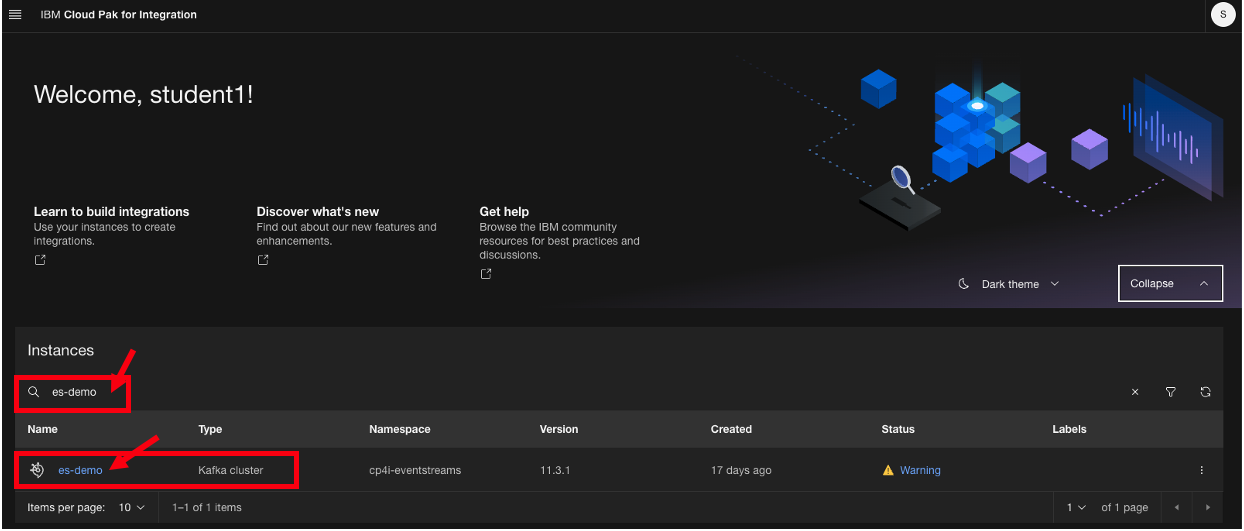
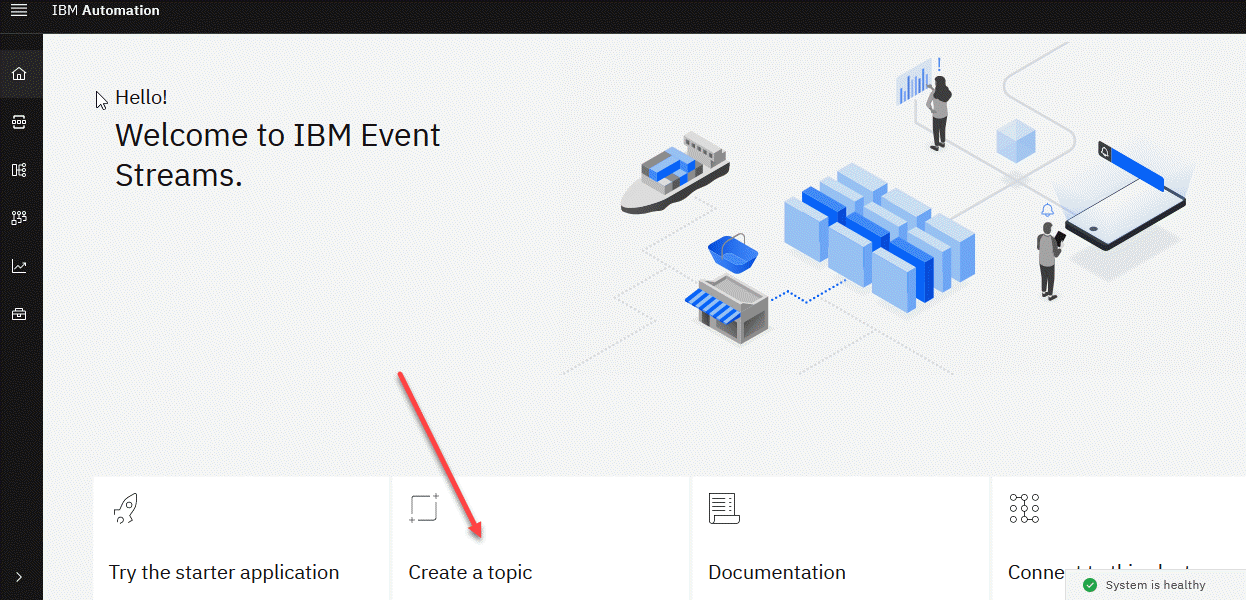
1. Now go to the tab for es-demo or you can click on the link from the home page and this will take you to the IBM Event Streams home page.
2. Now we will create our topic. Click on the Create a topic tile.
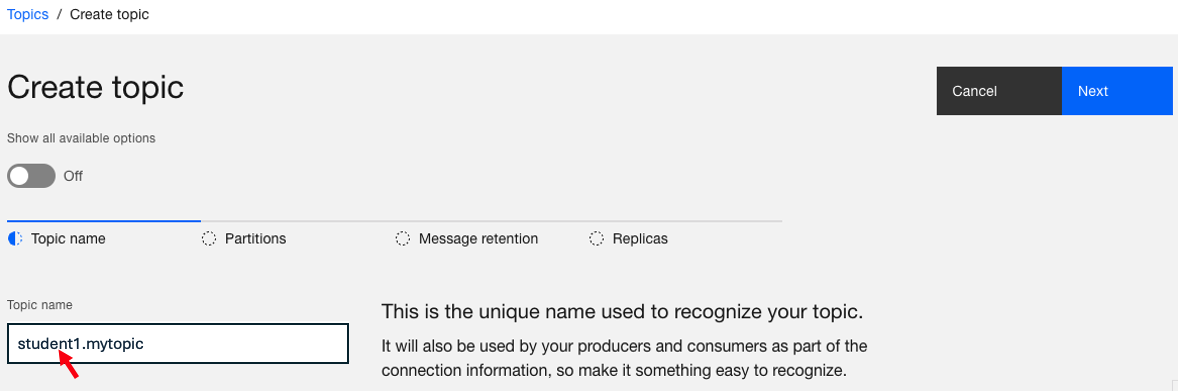
3. Now enter the name of your topic. Since this is a shared Kafka broker, use your userid as part of the topic name. In this example, we are logged in as student1 so the topic name is student1.mytopic. Click Next.
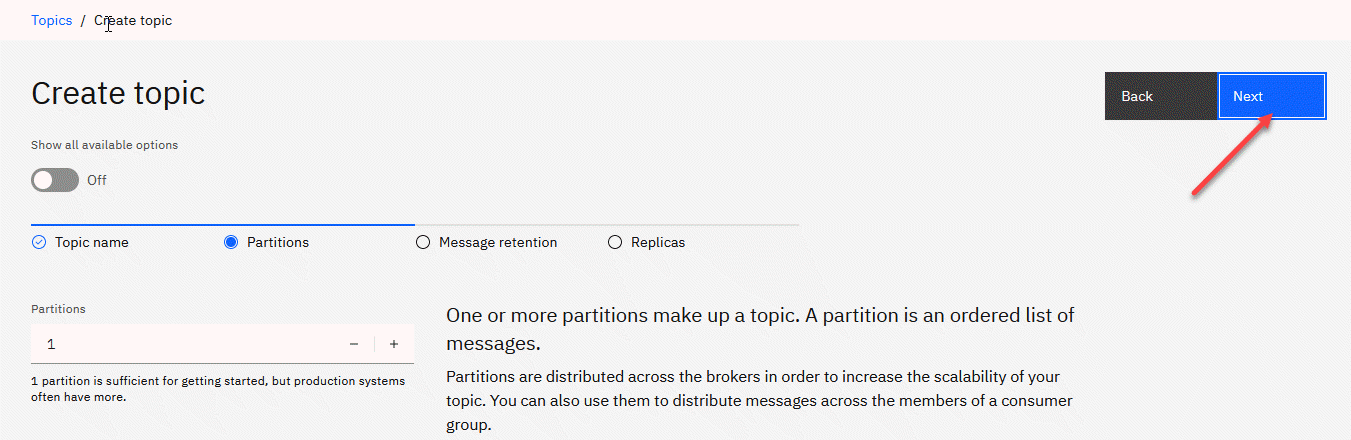
4. Leave the partitions at 1 and click Next.
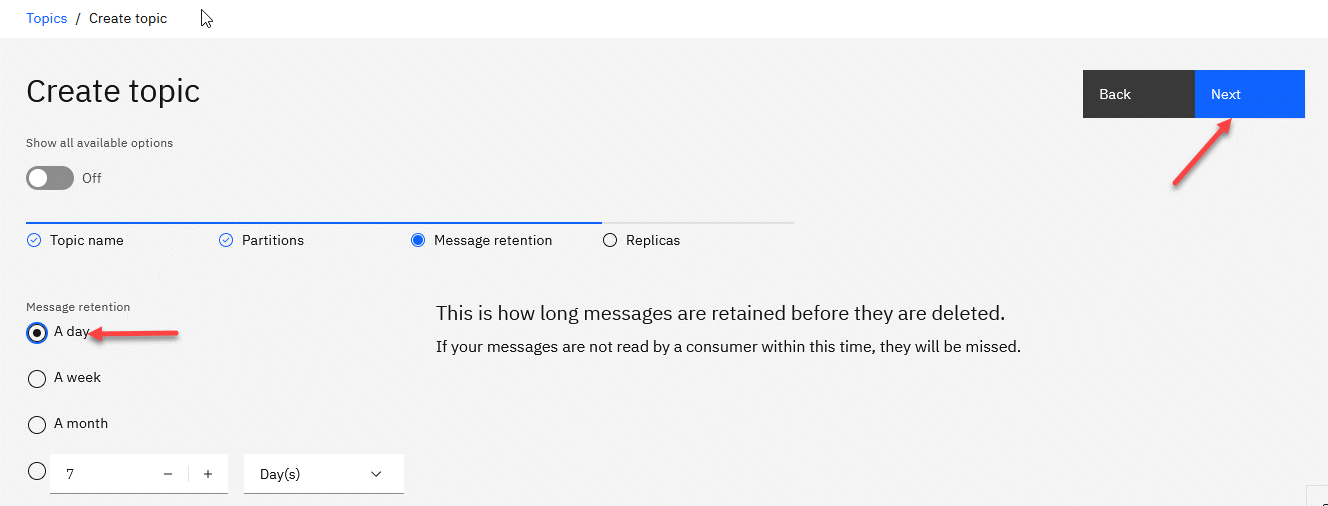
5. Since this is for a lab, change the Message retention to A day and click Next. Note: If we wanted to retain message longer we could change this to meet those needs.
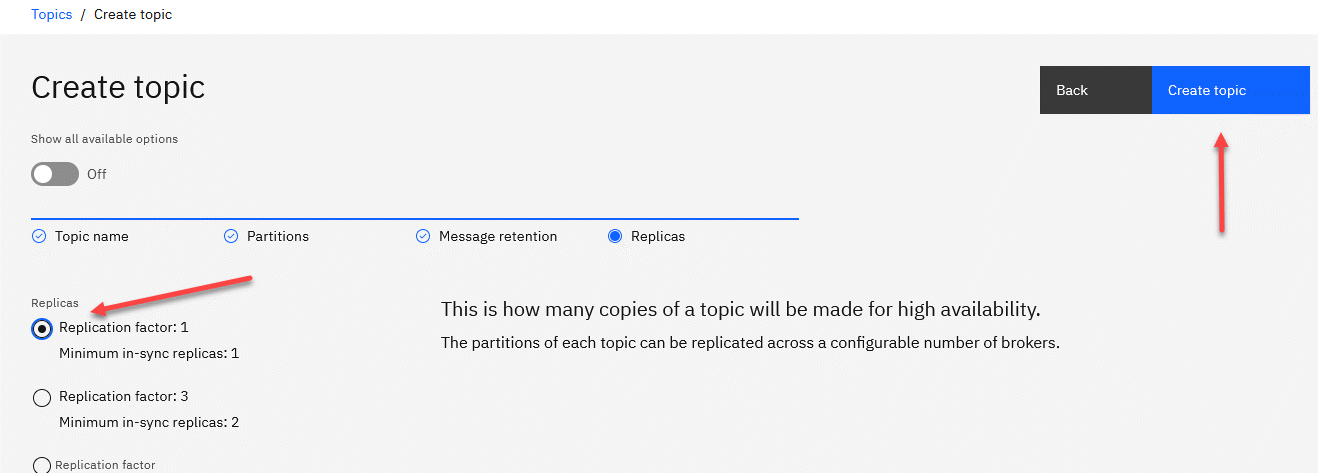
6. For the Replicas, we will change the Minimum in-sync replicas to 1 and select Replication factor:1. Note: Make sure that the radial button next to Replication factor:1 is selected before clicking Create topic.
7. Now you will be back on the Topics screen. You may see other users topics in the list but make sure you see your topic you just created.
2.2 Create MQ Queue for the consumer
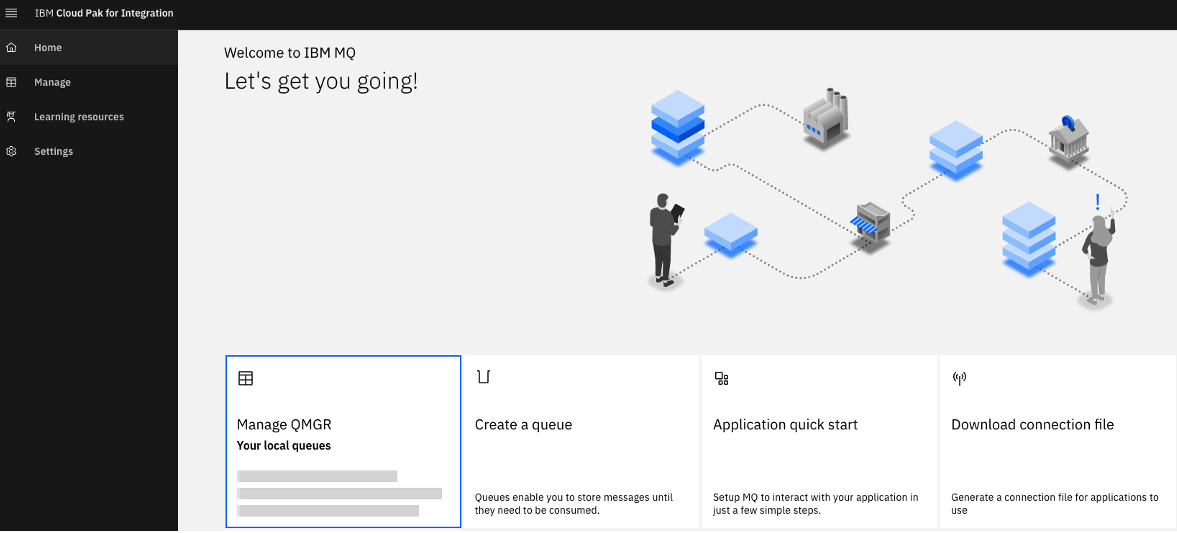
1.Now go to the tab for MQ Console
Or you can click on the link from the home page and this will take you to the IBM MQ Console home page.

2. Now click on your Queue Manger tile.
3. The name of your Queue Manager will be MQGRX where X = the number of your userid. In this example we are using student1. Save this for later use.
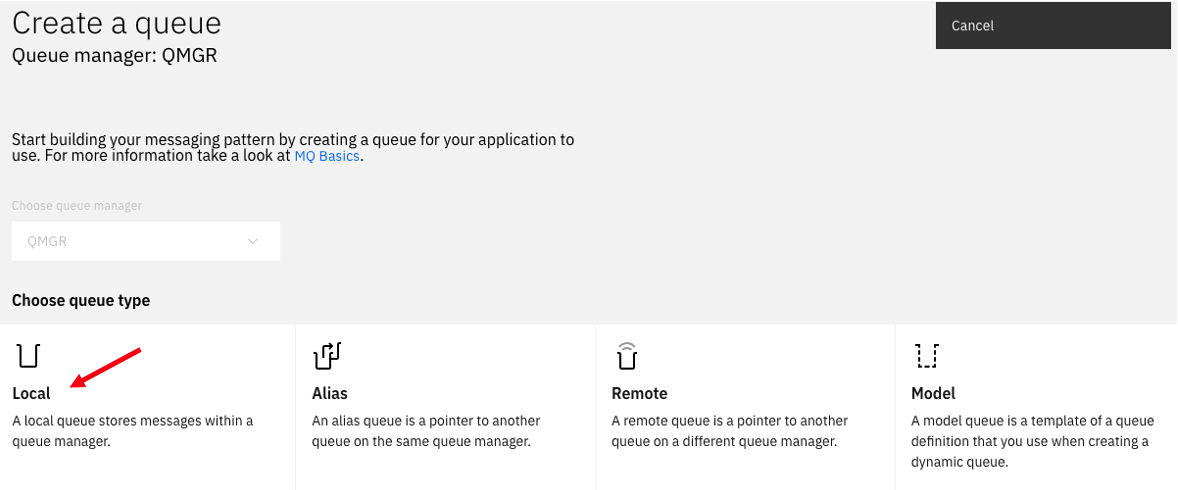
We will be creating a new local Queue for this lab. Click on Create

4. Click on the local Queue tile.
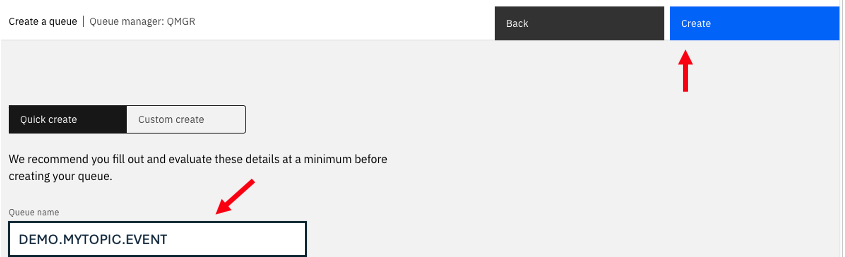
5. Now enter the Queue name. In the example we used DEMO.MYTOPIC.EVENT then click Create.
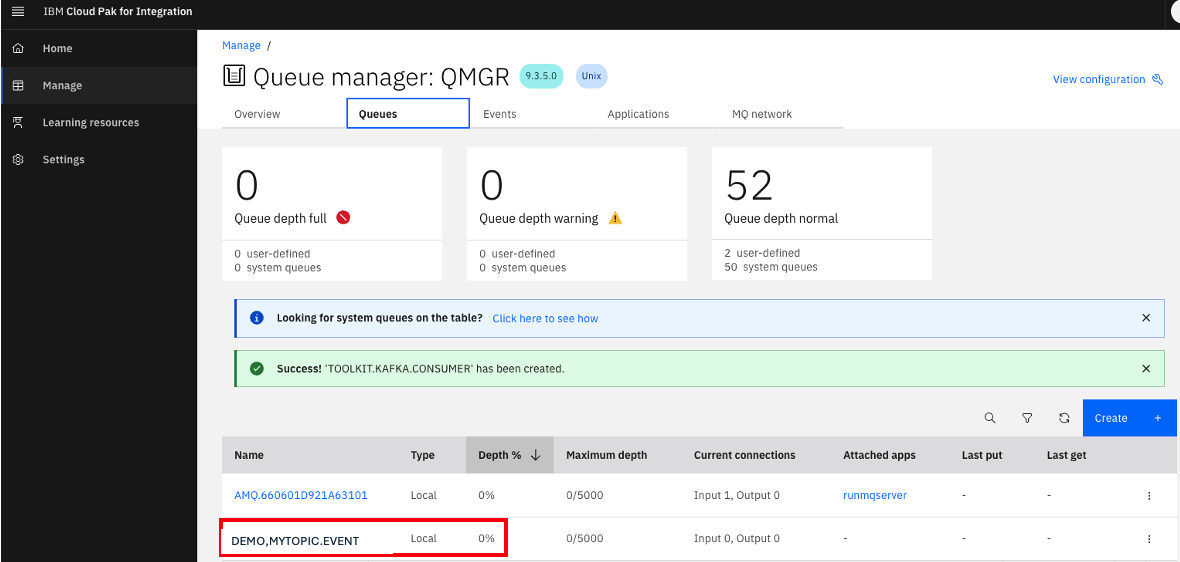
6. We now have your Queue defined. Click on the IBM Automation on the upper left to go back to the homepage.
3. Create API to publish message to topic and event flow to consume topics.
In this section, we will create a simple API that will create messages and then publish them to our topic. We will also then create an event driven flow that will be listening to the topic and will put the message on to a MQ queue.
Note: We are just building the one flow to put the events to a queue but you could also build additional flows for other business units to react to the same message and send email, Slack, etc.
3.1 Create API to publish message to Kafka topic
1.Now go to the tab for IBM Automation
Or you can click on the link from the home page and this will take you to the IBM ACE Designer page.

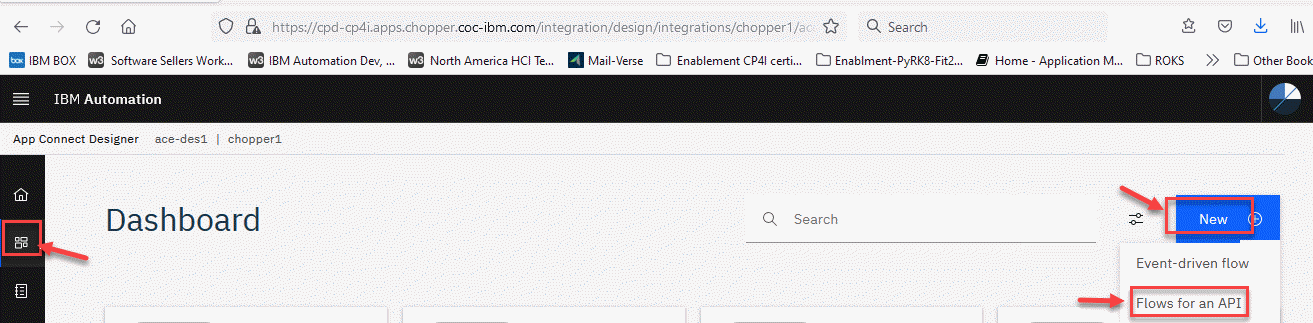
2. You should be on the App Connect Designer home page. On the left menu select the Dashboard icon. Once on the Dashboard page on the right side select *New** and click on Flows for an API.
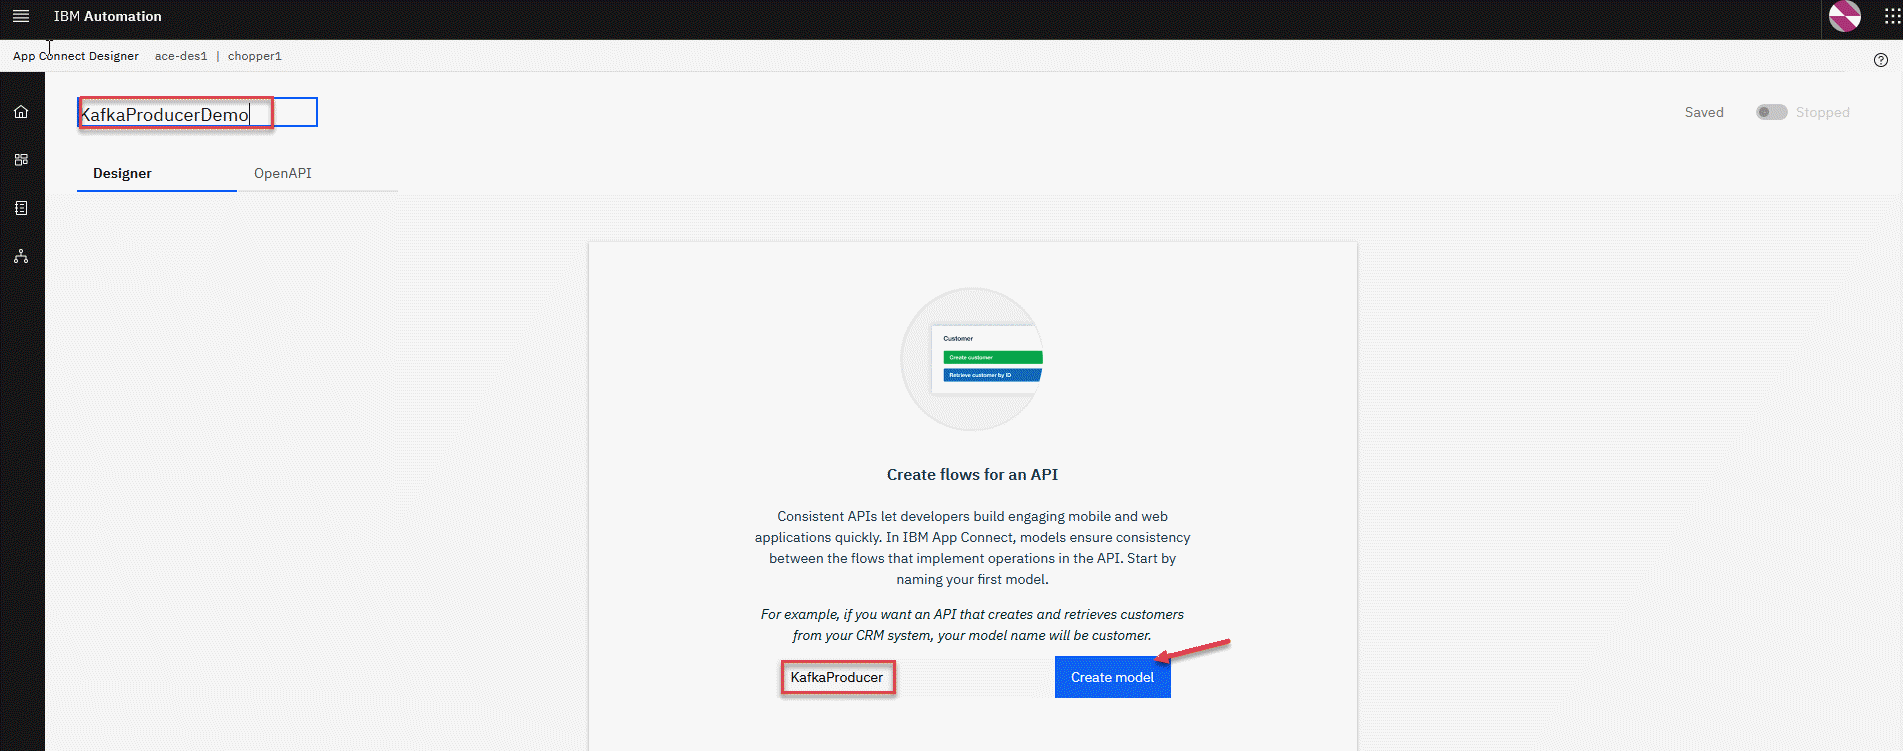
3. First thing we will do is create the model for this. We will call the model KafkaProducer
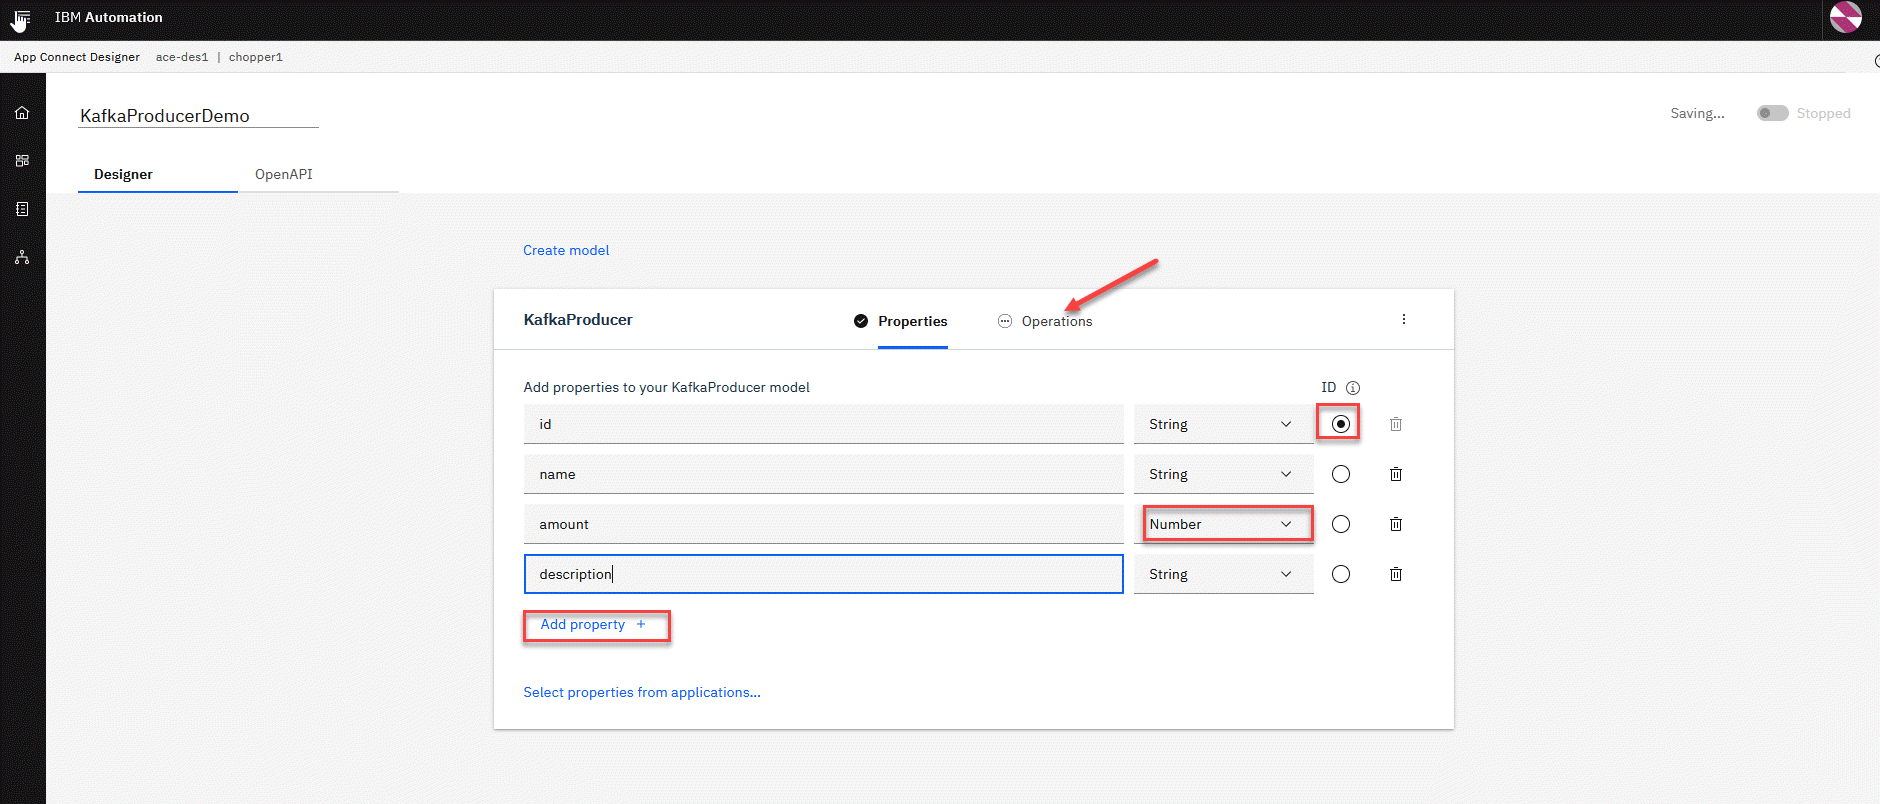
4. For this example, we will map the following properties these will all be data type String except for amount we will change that to number.
Note: The “Add property +” is used to add additional property fields.
- id
- name
- amount
- description
When done click on the Operations tab.
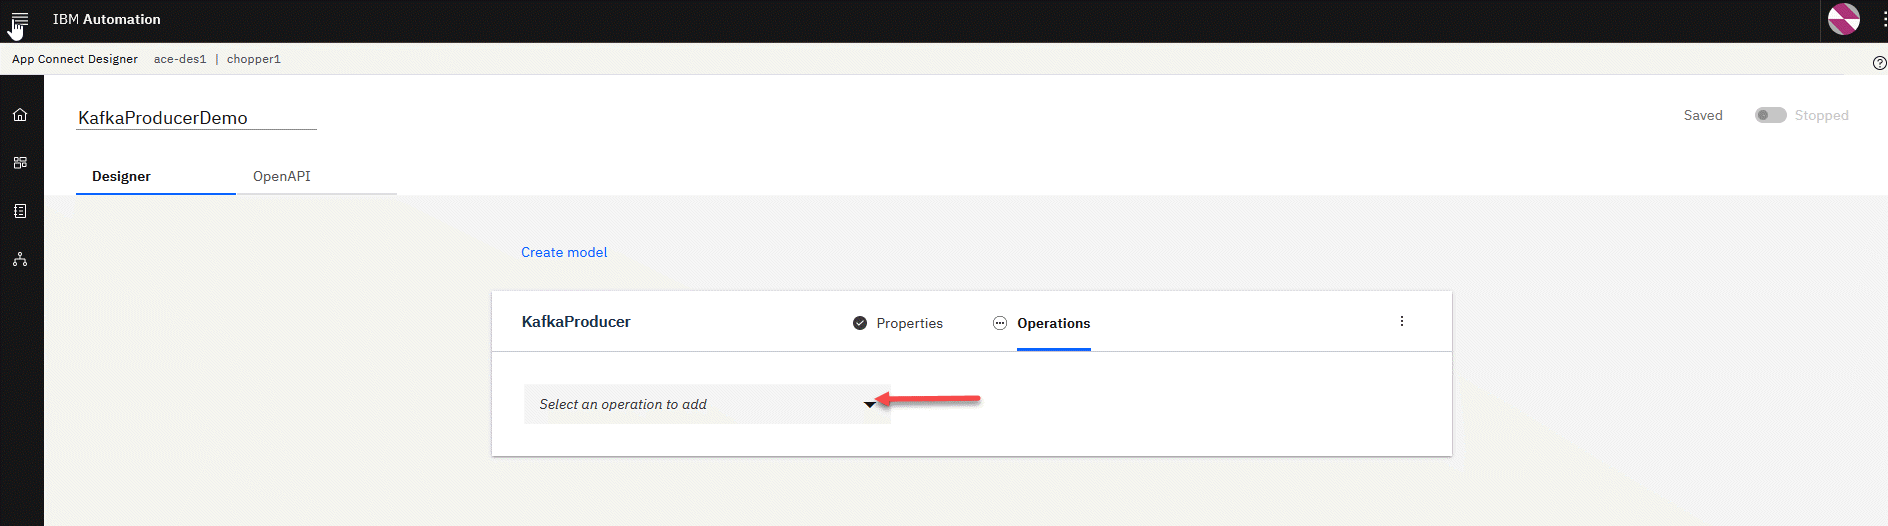
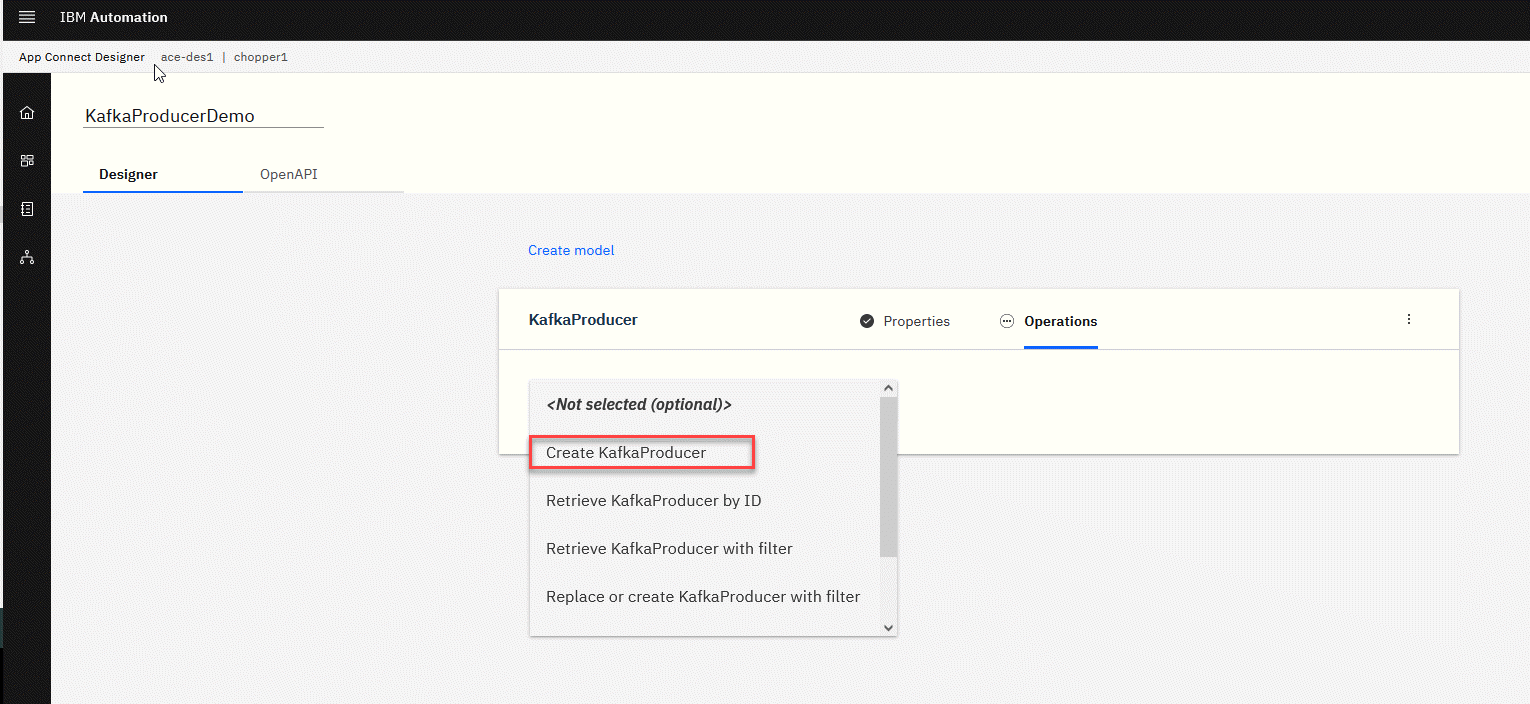
5. We will now select the operation we will build for this API.
Click on the drop down to add an operation.
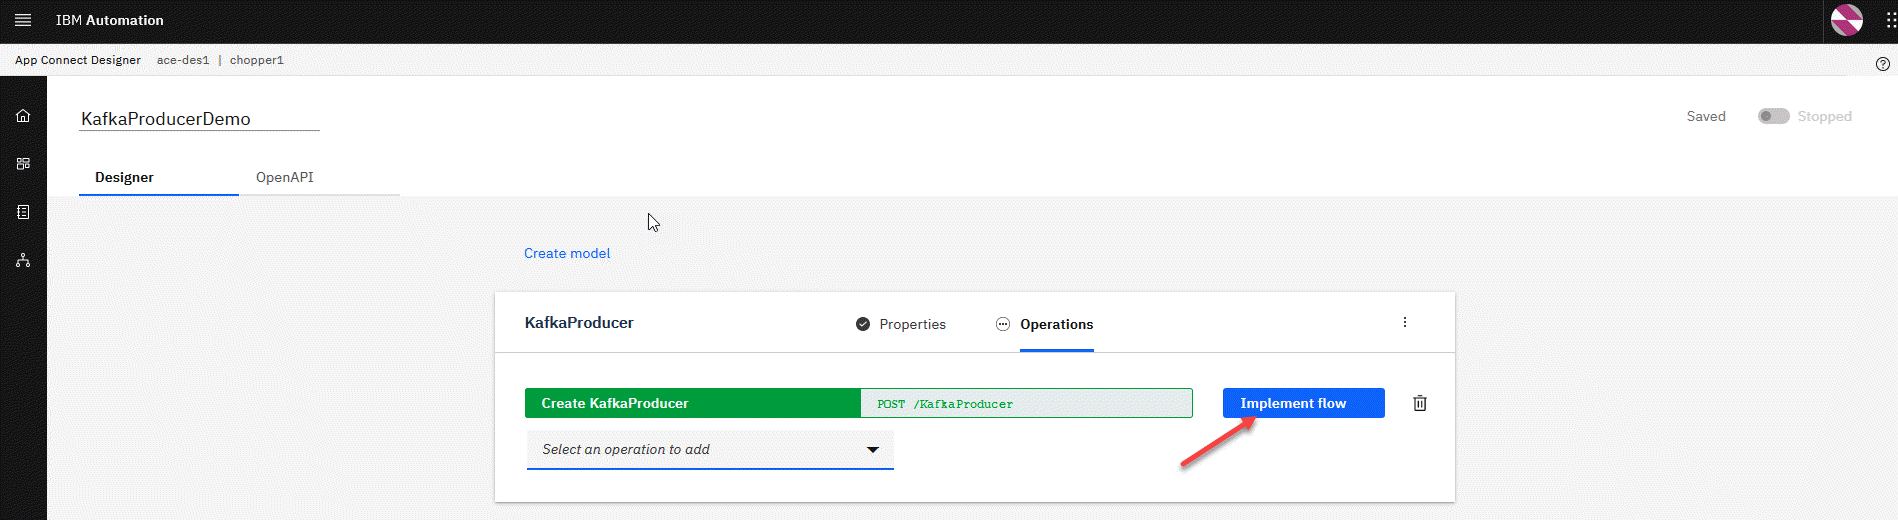
6. We will use the Create operation for this. Click on that.
7. We now have the POST operation ready and will implement our flow. Click on the Implement Flow button. This will take us to the flow designer.
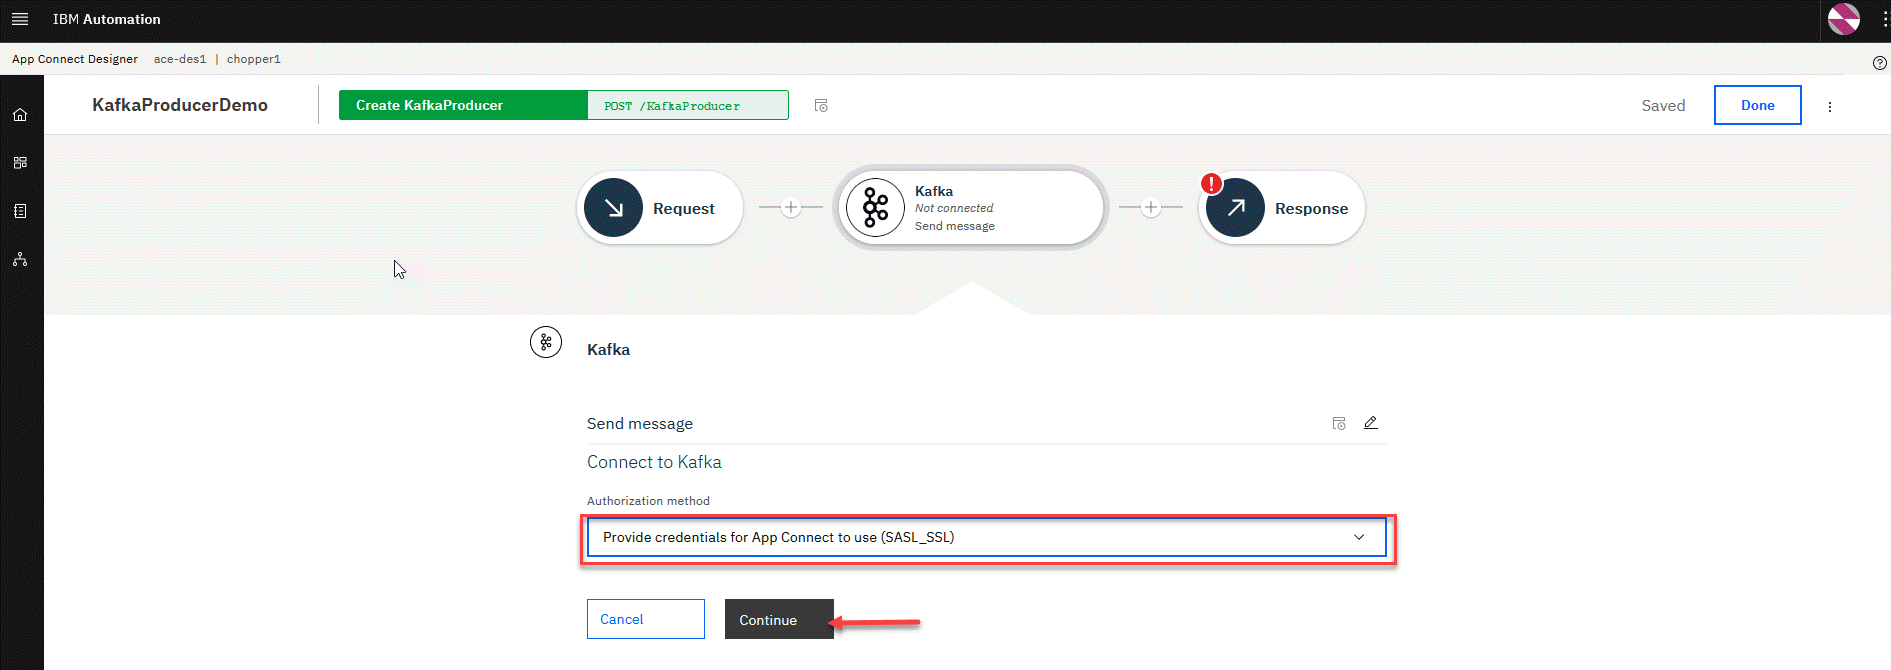
8. Now click on the blue + and enter Kafka on the search line or scroll down to the Kafka connector. Select the Send message.

9.If you already have a connection you can skip to Step 12 If not, click on Connect.

10. For the Authorization method, make sure to select (SASL_SSL) from the dropdown. Click Continue.
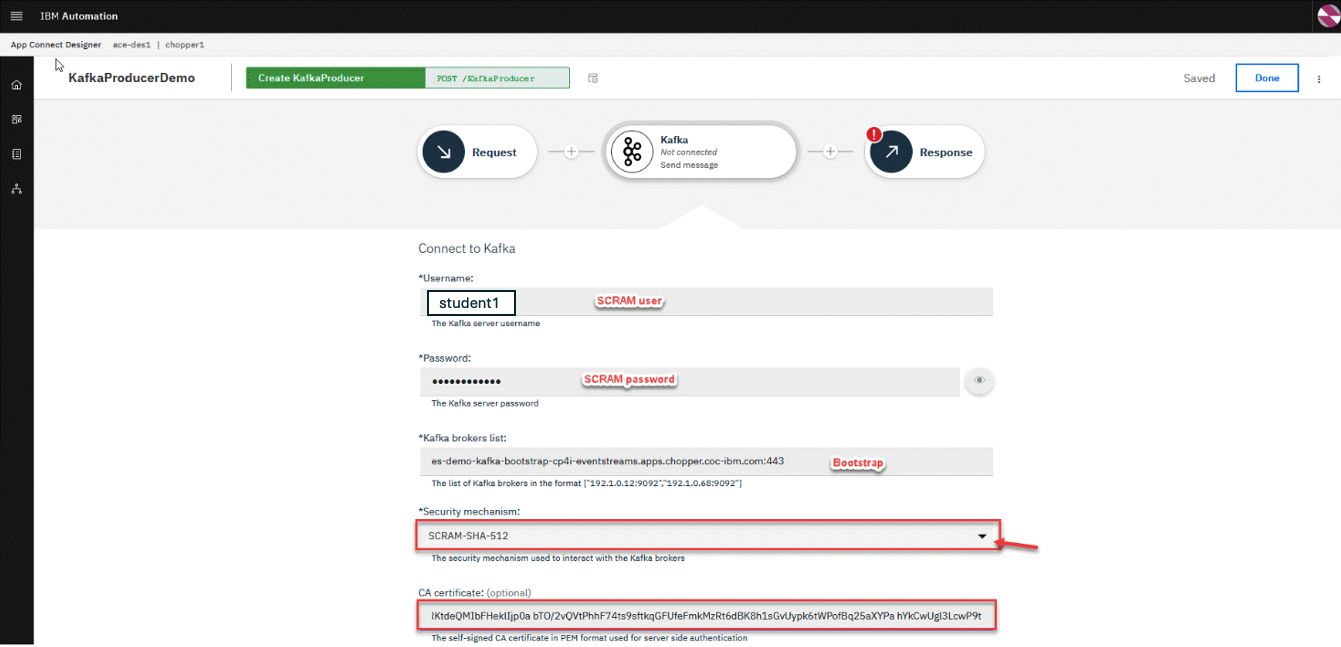
11. Now fill in the fields. We will use the SCRAM credentials we saved earlier in the Kafka Pre-Req.
Return to main lab page and goto the Create Connection to shared Kafka cluster
- a. Kafka broker list: bootstrap URL of the cluster
- b. username: SCRAM username
-
c. password: SCRAM password
- For the Security mechaniam: make sure to select the 512
- Open the es-cert.pem file we downloaded. Copy the whole thing and paste in the CA certiticate. Scroll to the bottom and Click Connect.
12. Now select the topic for your userid that you created in the last section. For the payload, we will fill it in with the mapping the input to the API.

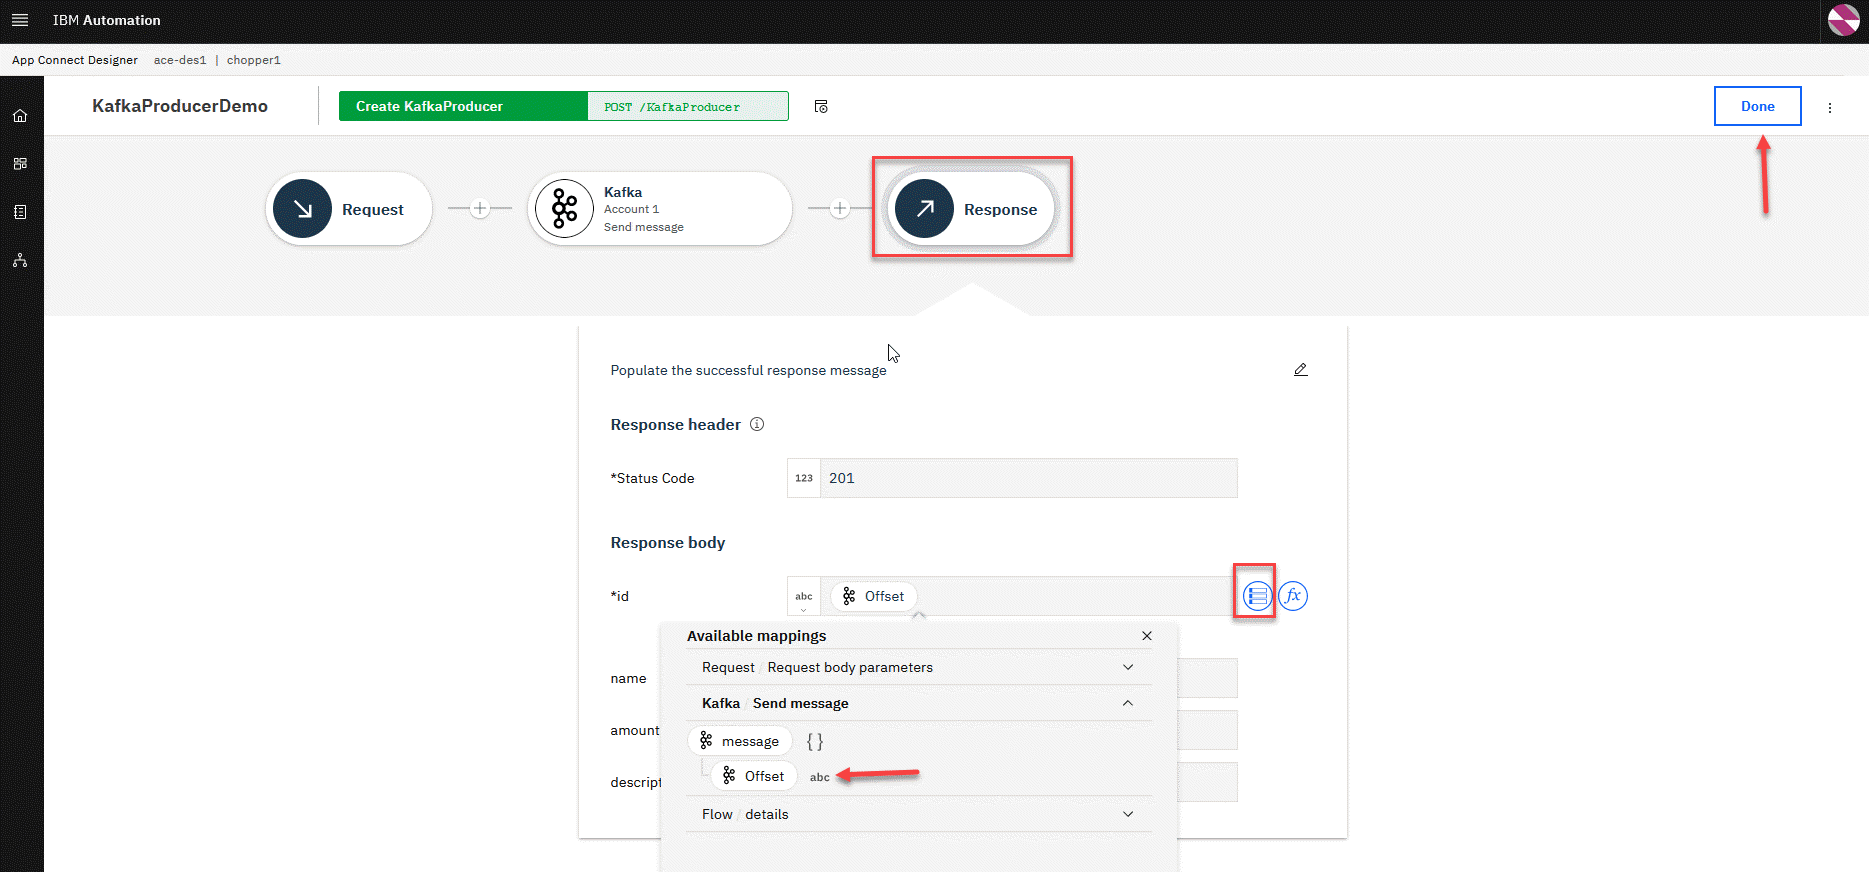
13. We will complete the API by updating the Reponse. Click on the Reponse.
We will map the Kafka Offset to the id in the reponse of the API.
When done click on the Done button in the upper right.
3.2 Create Event-driven flow to consume Kafka messages.
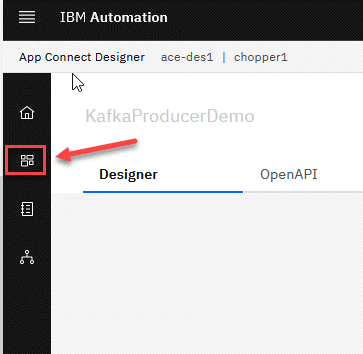
1. Now go to the App Connect Designer Dashboard by clicking on the left hand menu icon
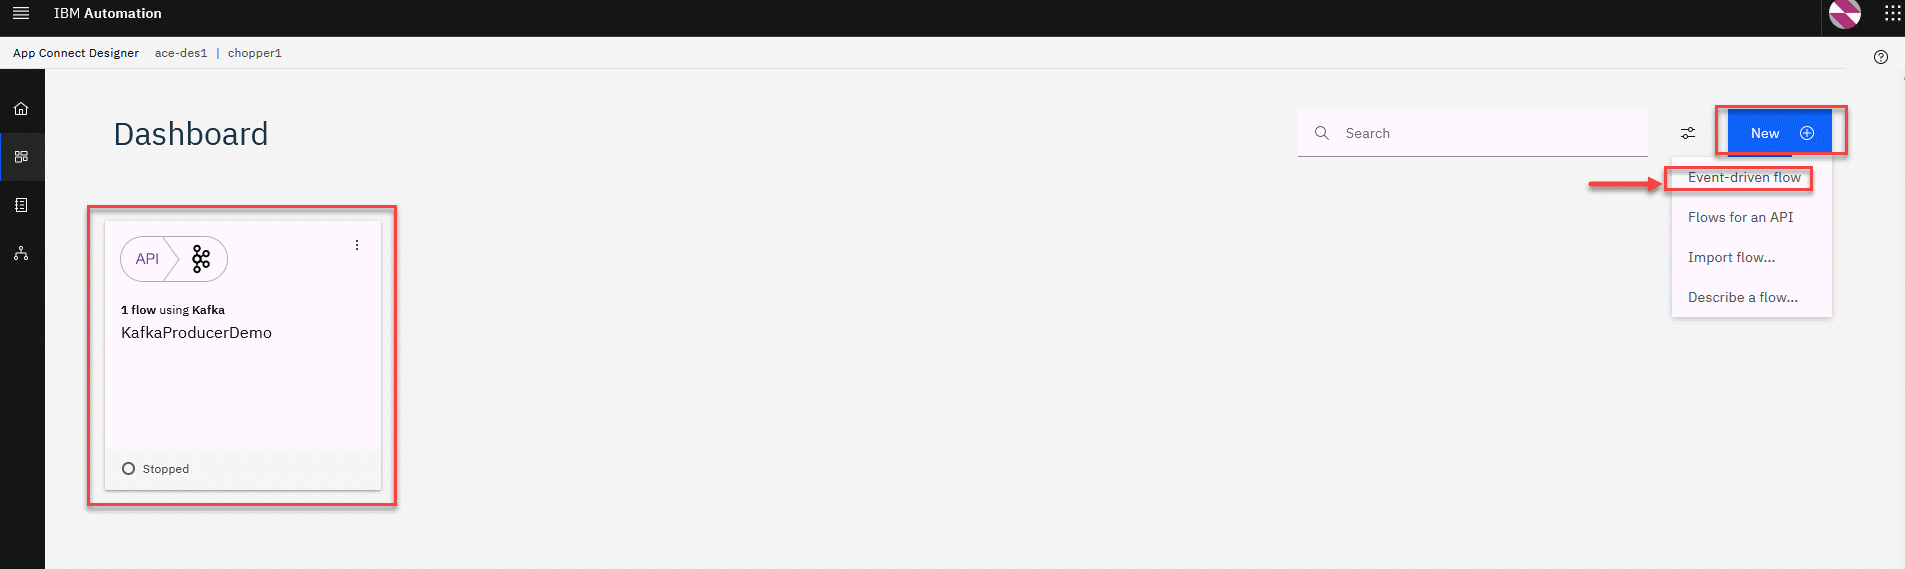
2. You will now see the API flow you just created for producing Kafka messages to your topic. Next, we will click on New - Event-driven flow to create the consumer flow.
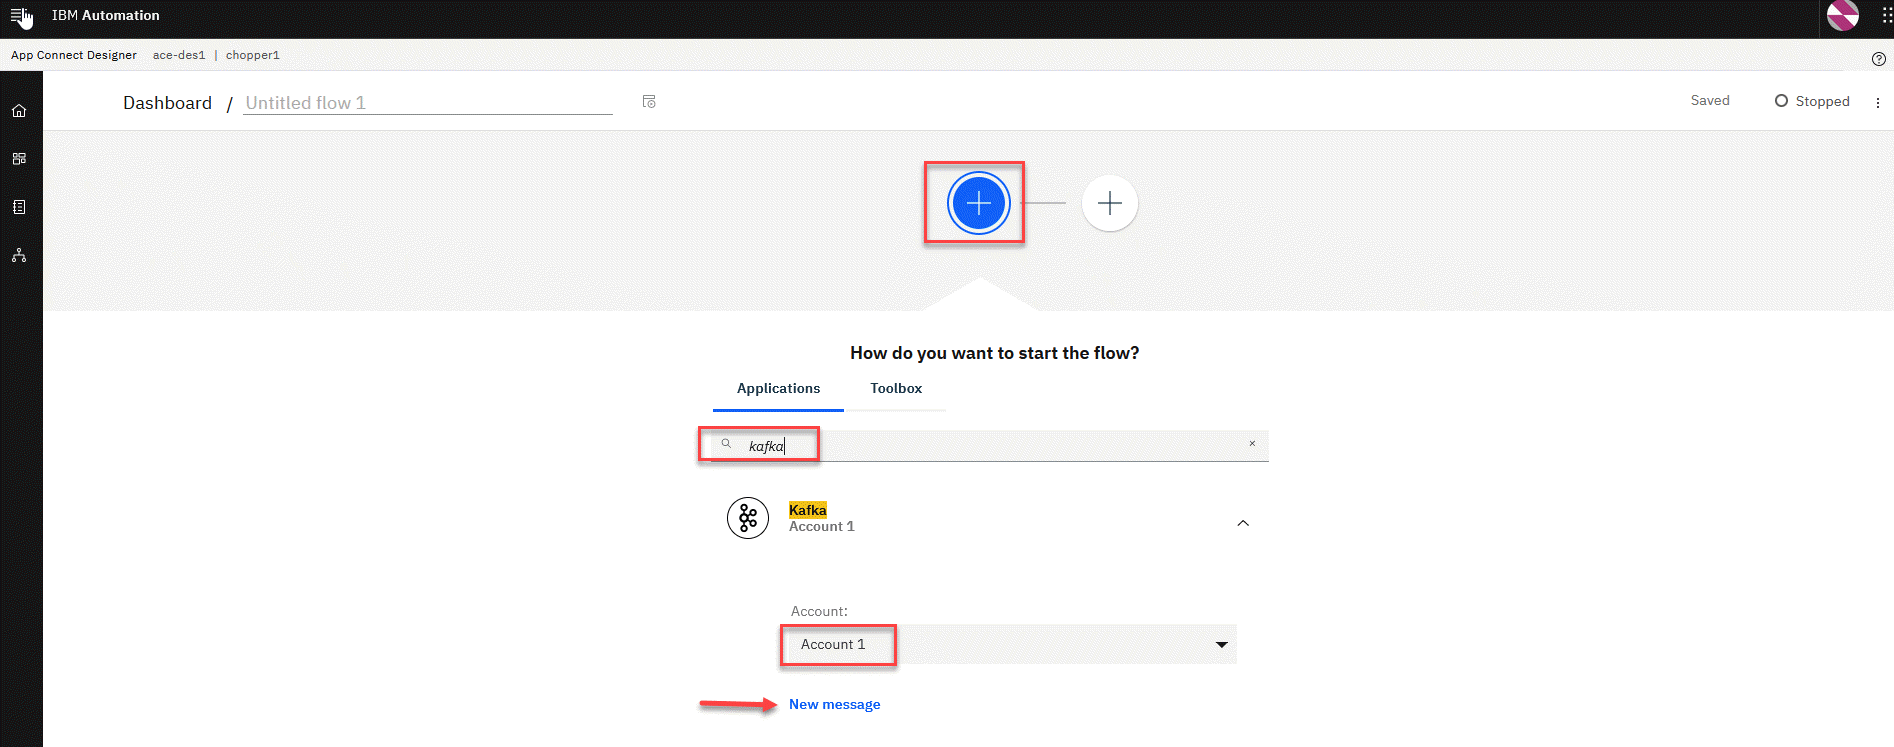
3. Now click on the blue + and scroll down to the Kafka connector or just start typing in the search field. Select the New message. You should already have an Account setup from the last section.
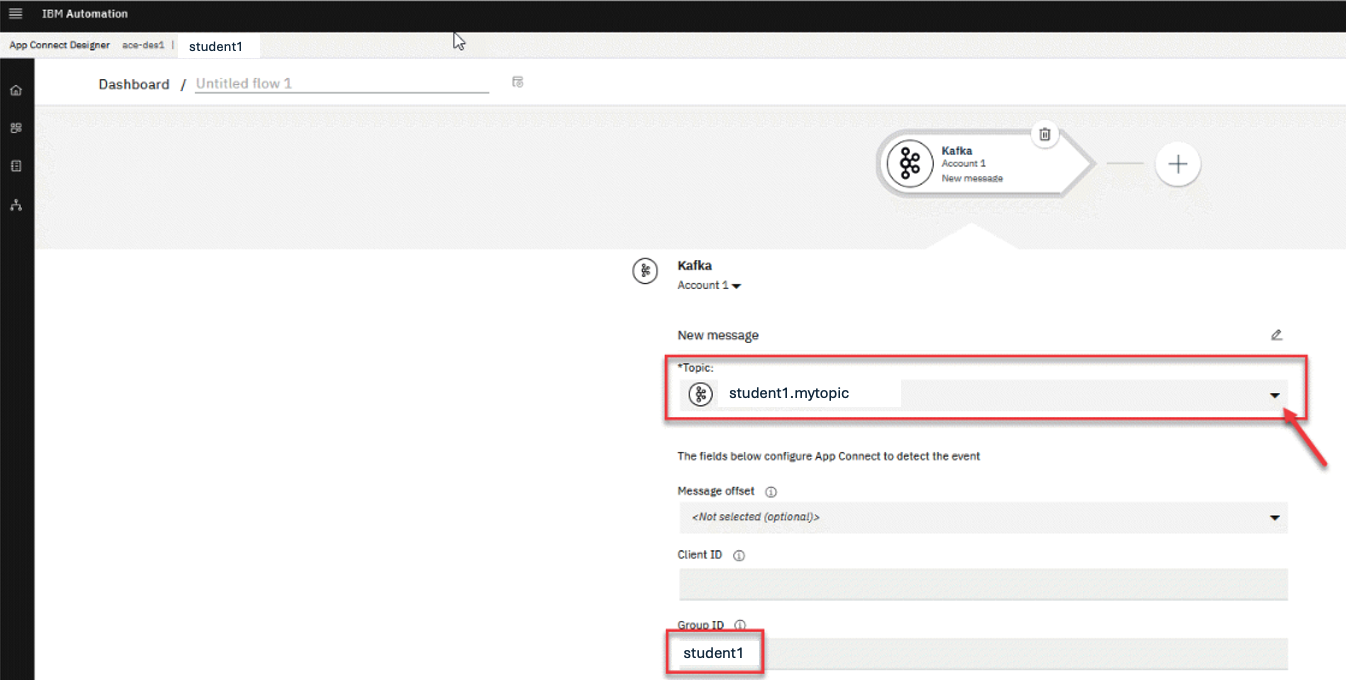
4. Now we will see the configuration screen for the Kafka connector. Now select the topic for your userid that you created in the previous section. For the Group ID, we will use your userid as the unique ID. In this case, we are using student1.
Note: Make sure you use your userid for this.
Note: For the Message offset you can select the latest which will start to consume messages at that point. If you select eariler then you will get all messages that had been produced already for the offset.
Do not leave Message offset blank
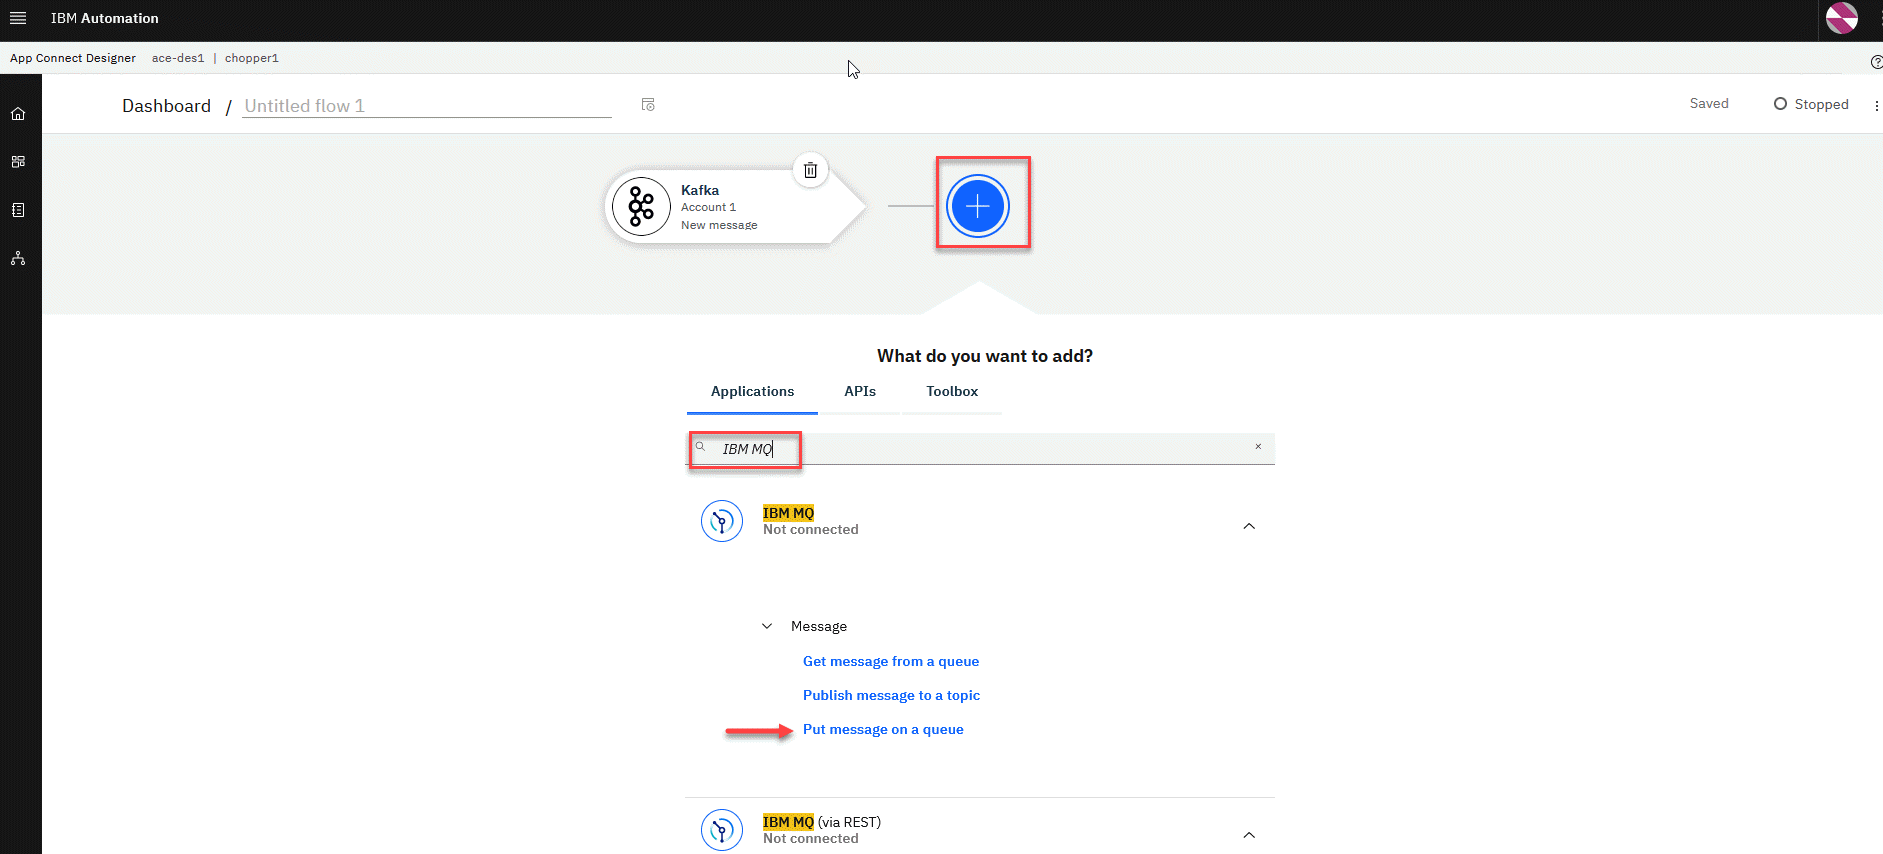
5. Now click on the blue + and scroll down to the IBM MQ connector or just start typing in the search field. Select the Put message on a queue.
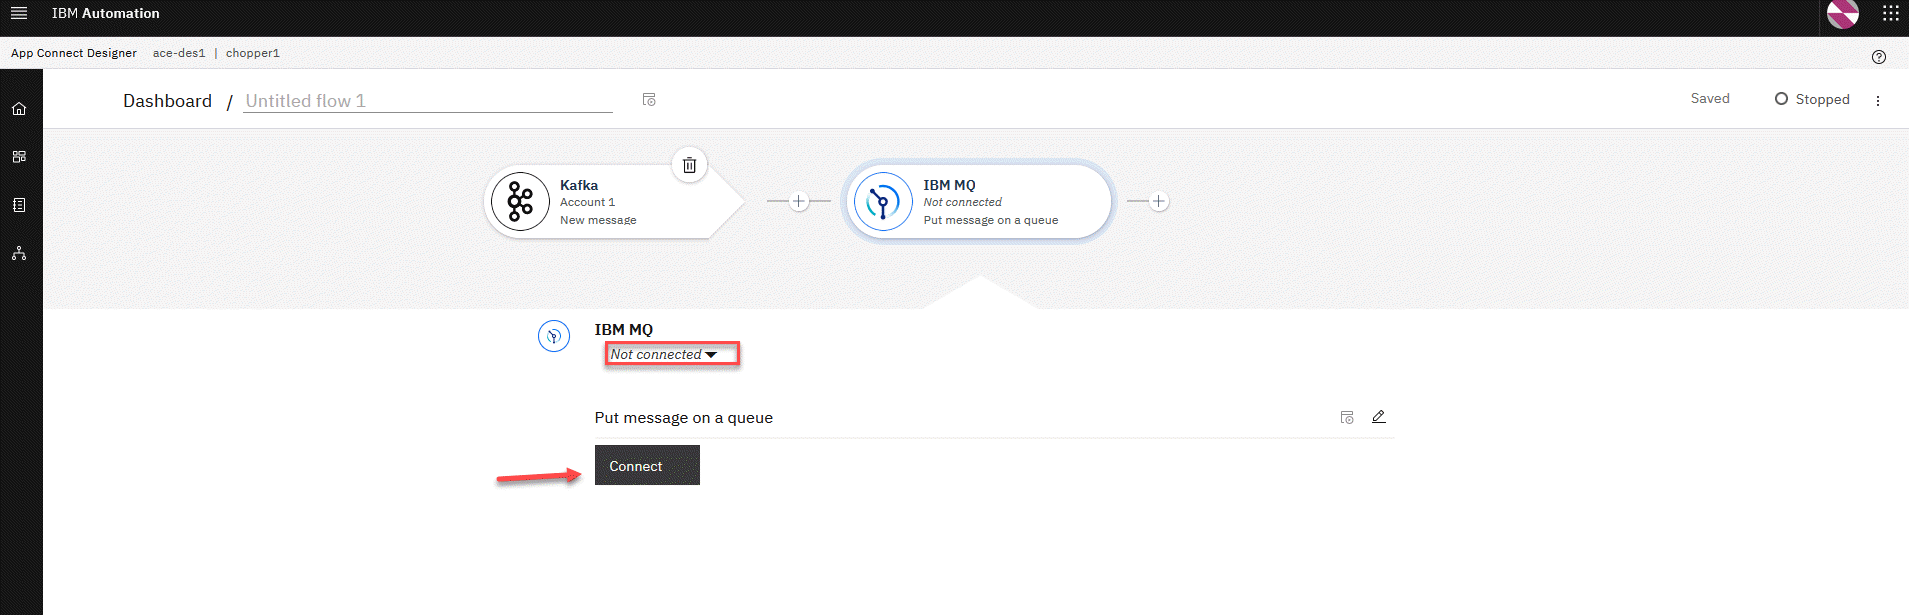
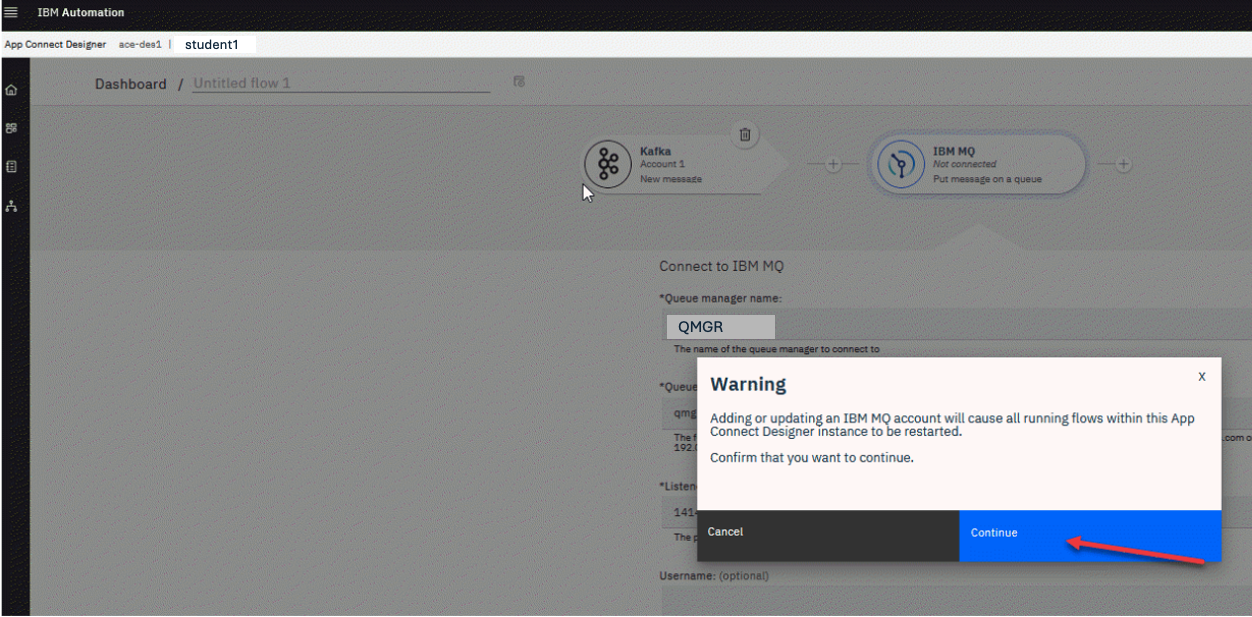
6. Select the Put message on a queue. If you don’t have an Account already setup for your MQ connector click on Connect If you have a Account already setup skip to Step XX
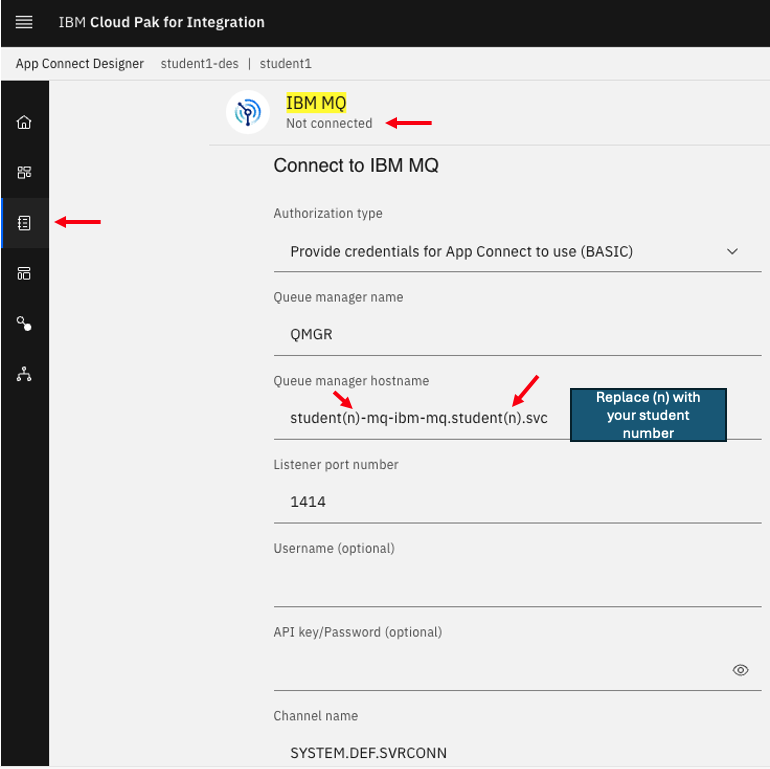
7. Now you will fill in the connection details from the MQ-Pre-Lab where you should have saved your Queue Manager Name and Hostname.
- Enter the QMgr name
- For the QMgr host we will use the service name student(n)-mq-ibm-mq.student(n).svc where the (n) is the student number.
- Port is 1414
- Channel SYSTEM.DEF.SVRCONN
Click Connect
7. Click Continue
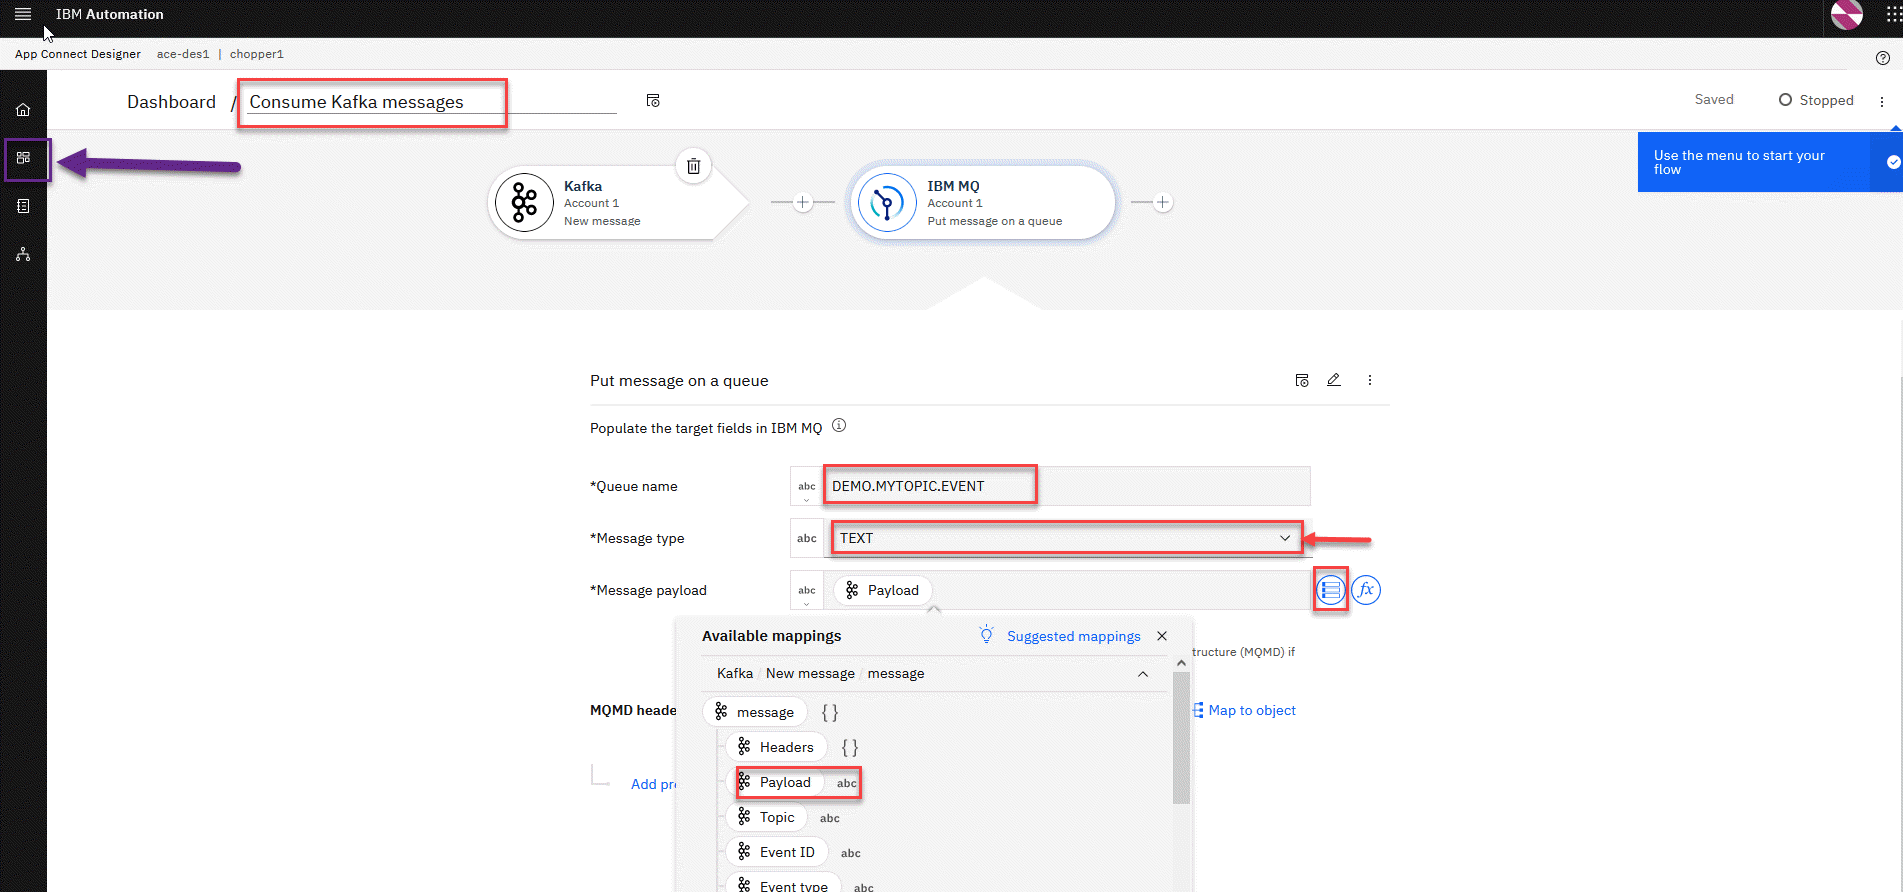
8. Now we will complete the mapping for our MQ connector.
- Queue name: DEMO.MYTOPIC.EVENT
- Message type: TEXT
- Message payload: If you click in the box the suggested mapping is displayed. Select the Payload.
We will also give the flow a meaningful name. In this example we can use Consume Kafka messages.
When done click on the Dashboard in the upper left corner.
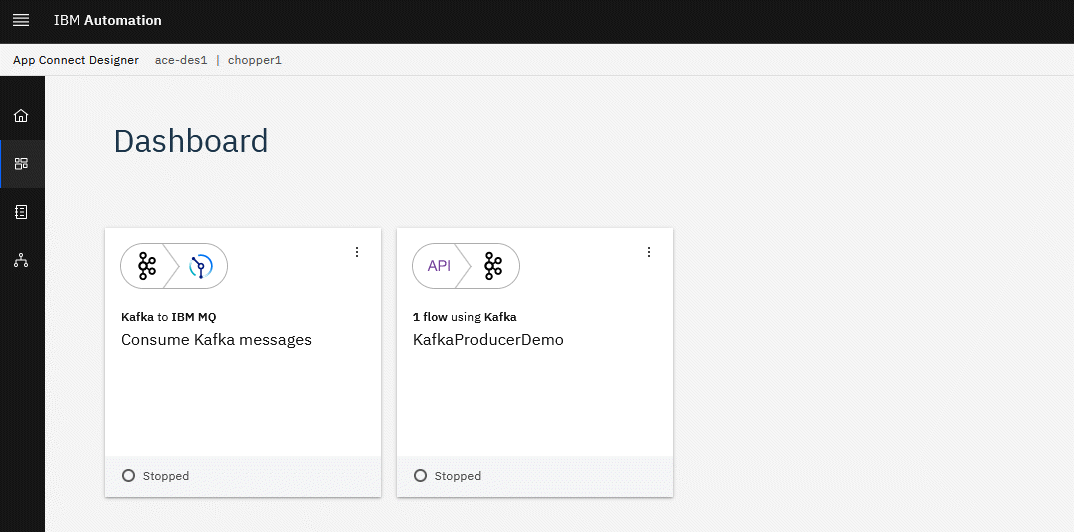
9. Now from the Dashboard we see our two flows we created. Now continue to the next section to test the flows.
4 Testing the Kafka flows
We will now test the new Kafka flows.
1. You will now be on your home page and in the upper left it will show your login name and you can always click on IBM Automation to get to this home page.
- For this lab we are using App Connect Designer, under Integration Messaging we will use MQ, and under Event Streaming we will use es-demo for our Kafka broker.
2. To make testing easier you should right click on each of these capiblities and open them in a new tab.
You will then have a tab open for each of them to help save time.
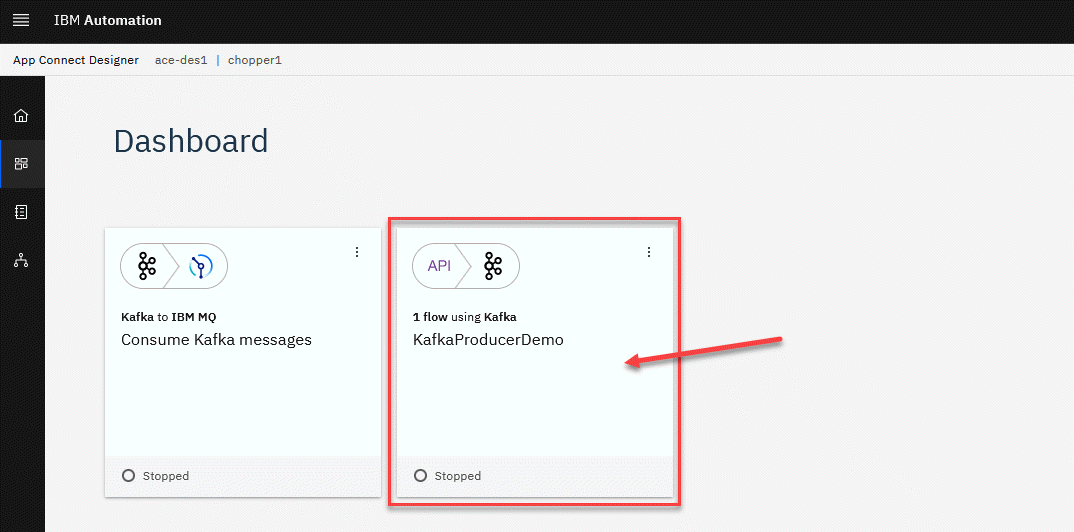
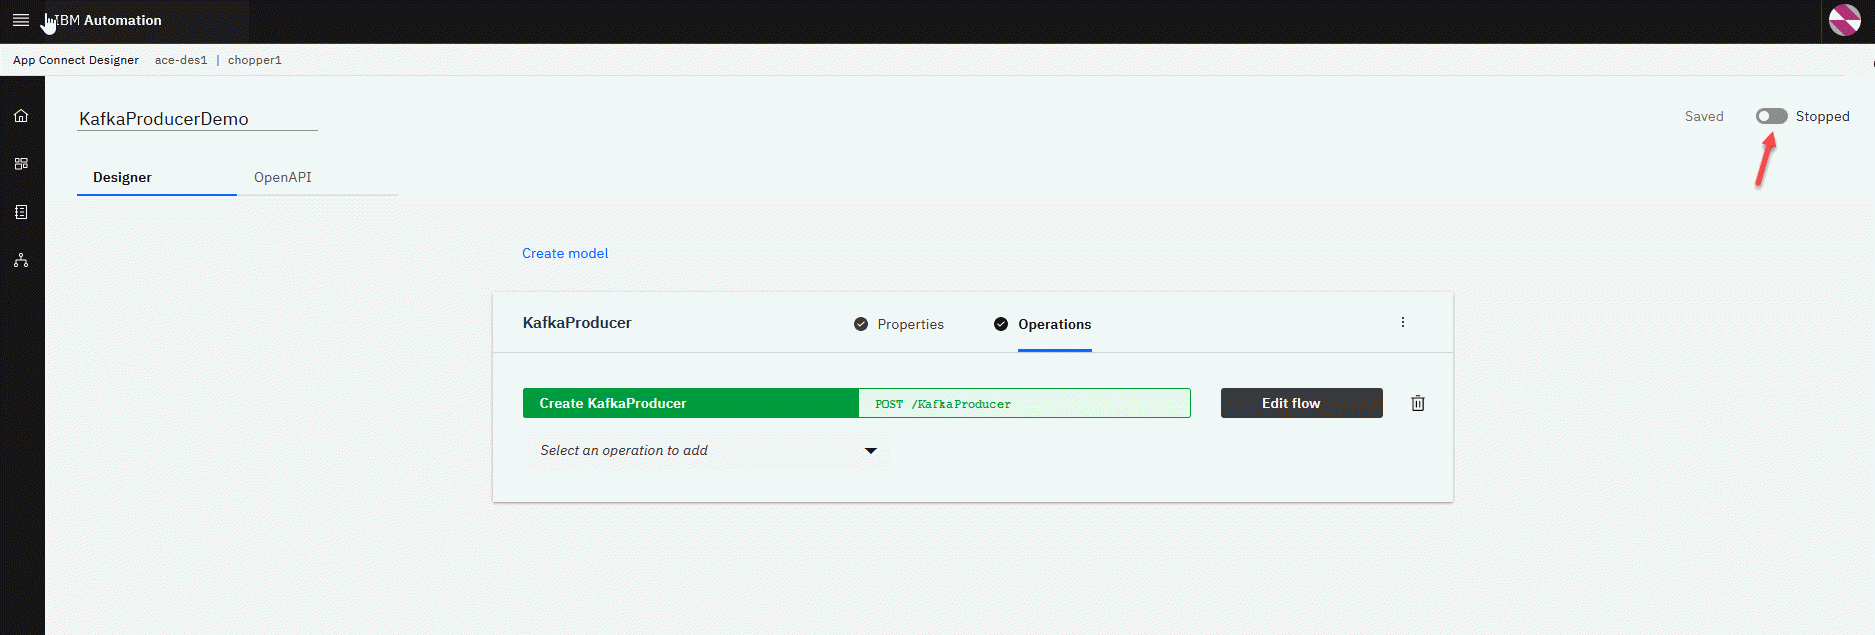
3. Let’s first go to the App Connect Dashboard. Here you will see your Kafka flows created. We will start with the Kafka Producer API click on the tile to open it.
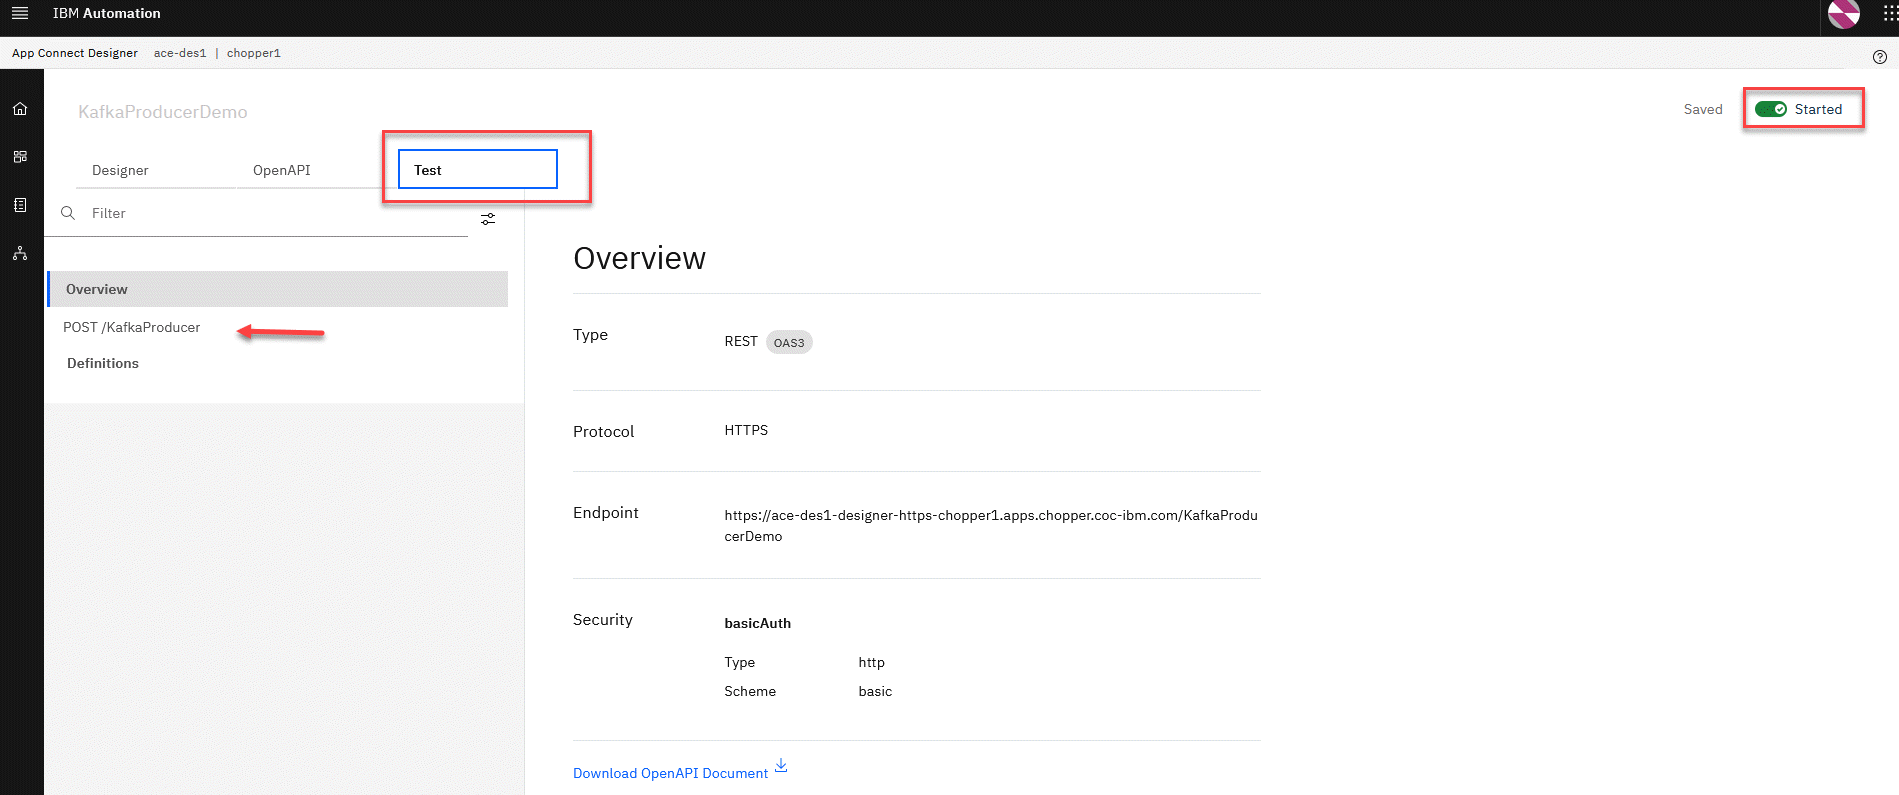
4. Now in the upper right corner we will click on the switch to start the API.
5. You will now see that the Test button is on the menu. Click on the Test Button and you will see the API test page. Click on the POST operation.
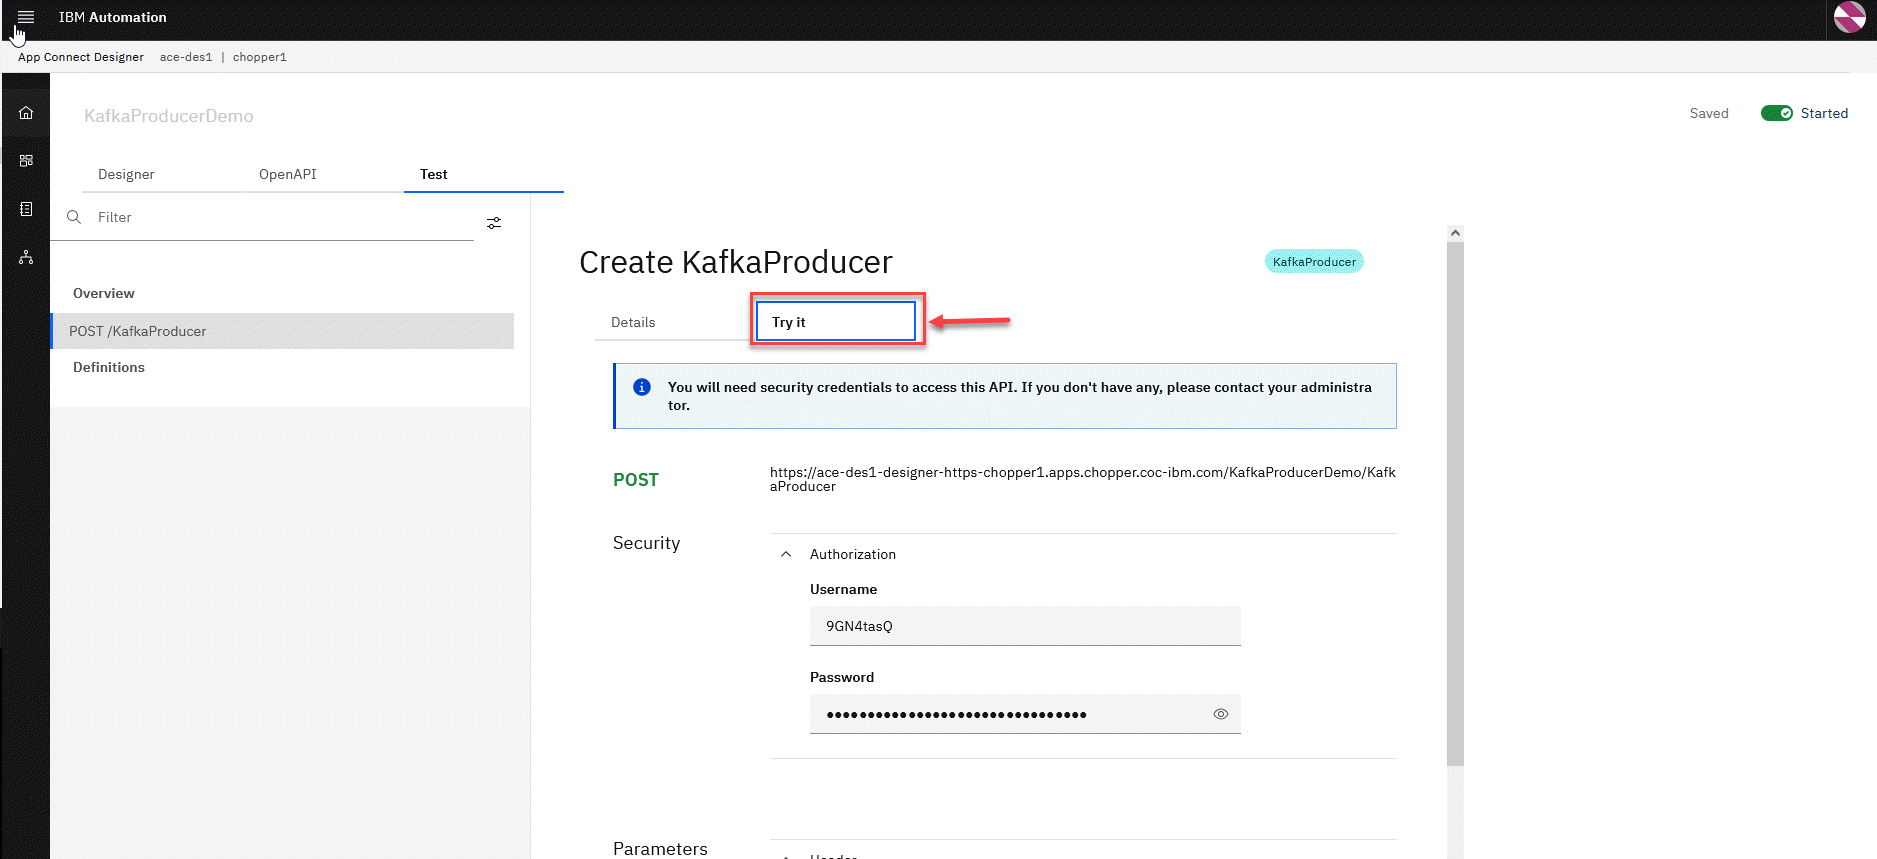
6. Next we will click on the Try it button.
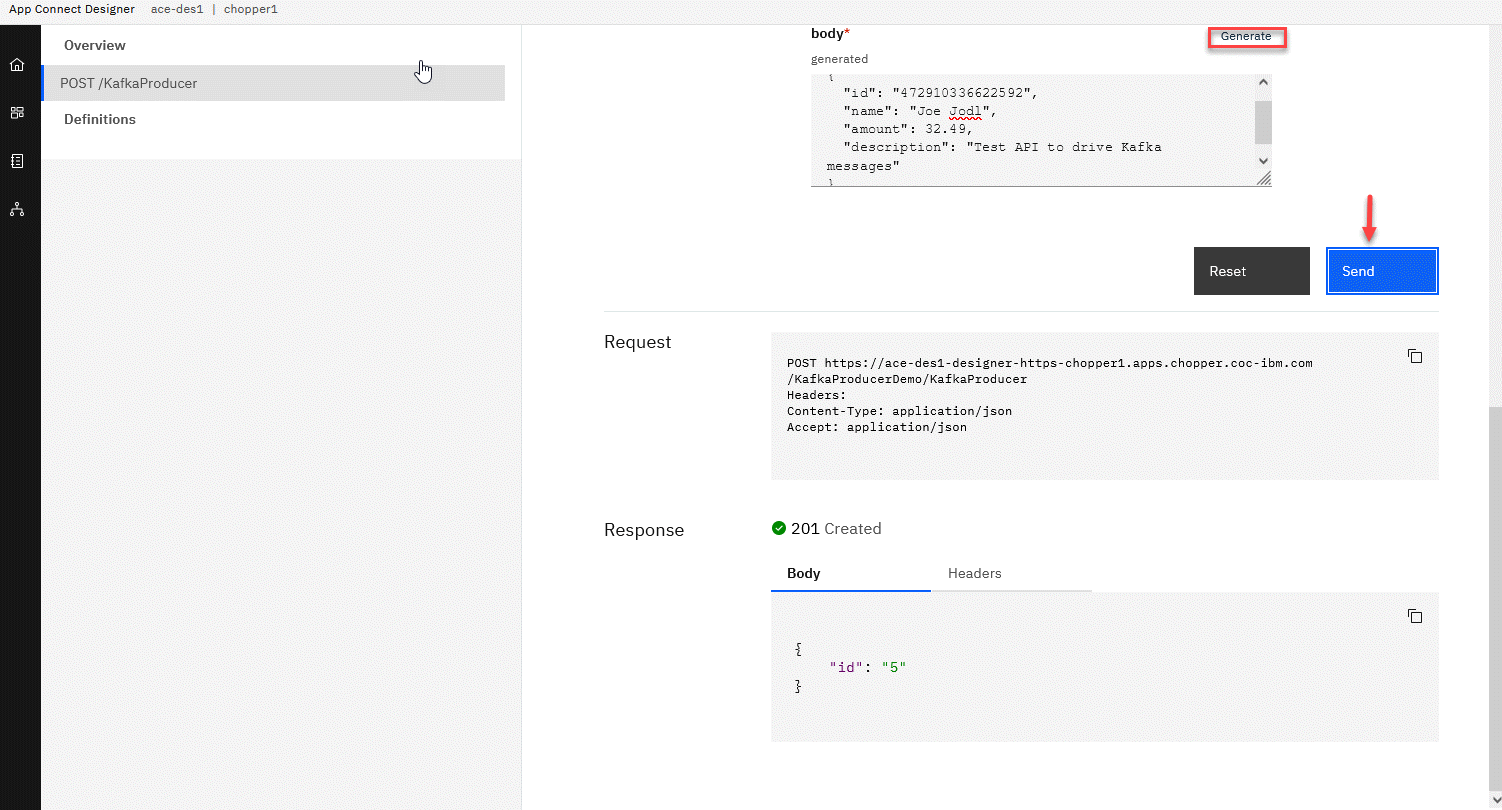
7. Now scroll down the API test page and you can click on Generate to populate the body of the API. This will show all the fields for the API call. You can change the fields if you like as in this example. Click Send button.
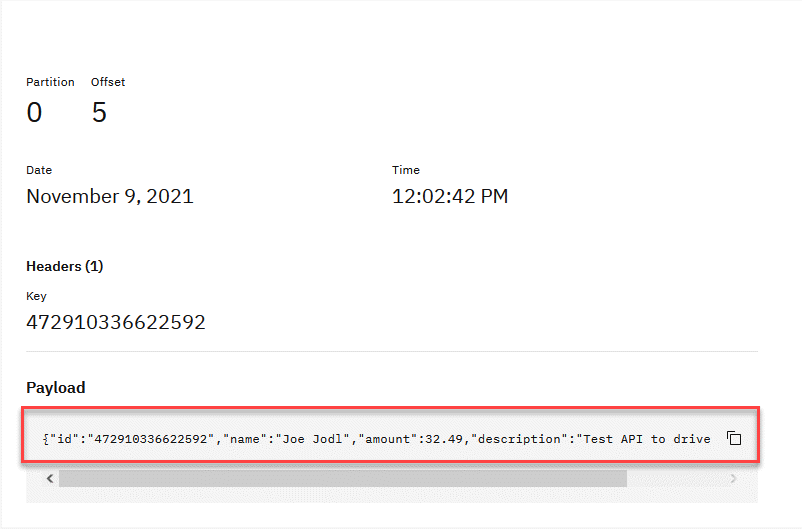
YOu will then see the API Request and the Reponse to the API call. We have just produced a kafka message and the offset is 5 which is returned in the API call.
8. Now let’s go to the Event Streams tab and click on the left menu to open the topics. You should see your topic that you created in the first section of this lab. In this example it is student1.mytopic.
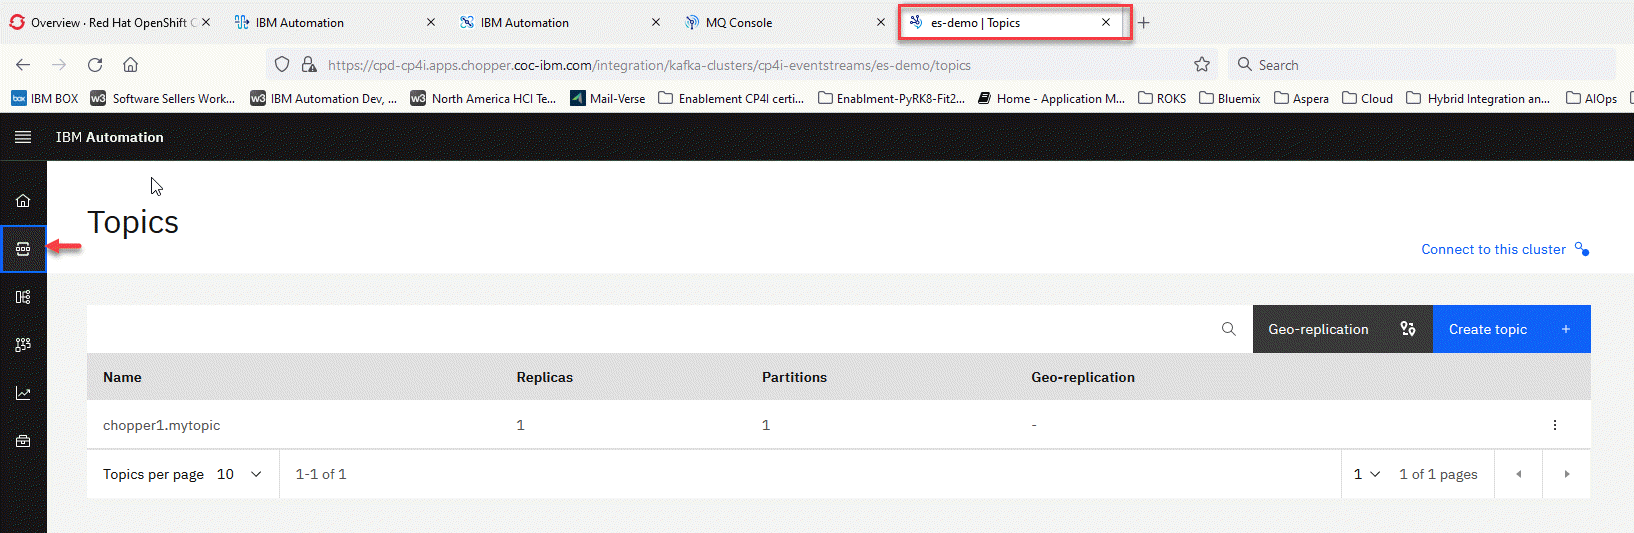
9. Click on your topic to open your topic. On your topic page click on the Message button and this will show the message you just created.
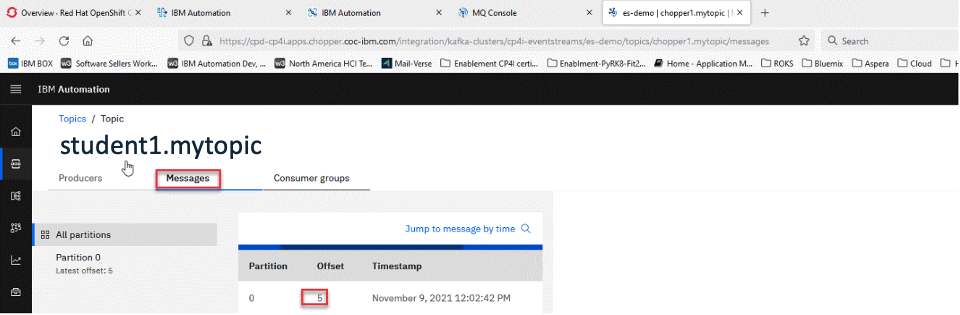
You can click on the message to open it and see the content.
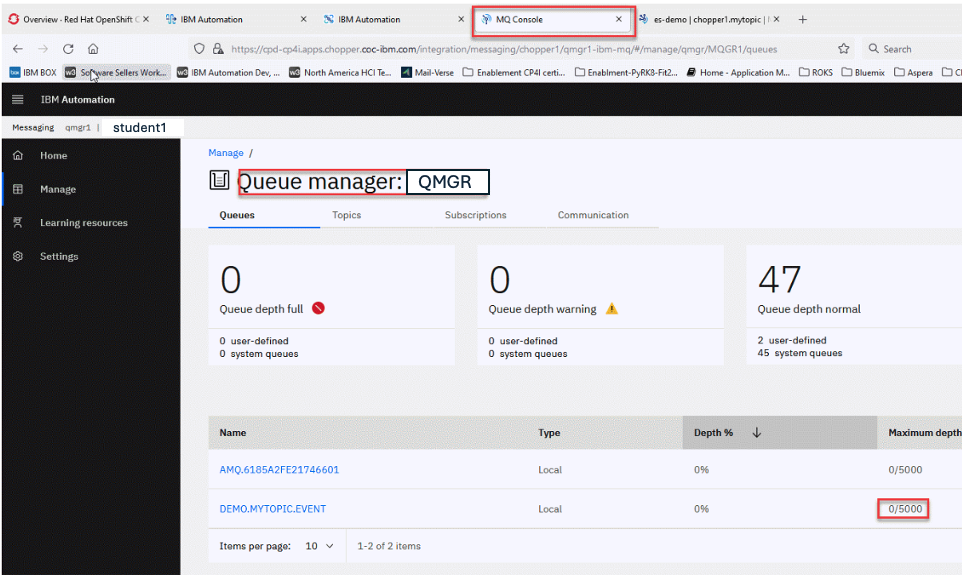
10. Now let’s go to the MQ Console tab and click on your Queue Manager title, in this example it is MQGR1. You will see that your queue should show zero messages. This is since we didn’t start the consumer flow yet to put the kafka messages to the queue.
11. Now let’s go back to the to the App Connect Dashboard. You will see that the Consumer flow is not running. Click on the 3 dots of the tile and select start to start the flow.
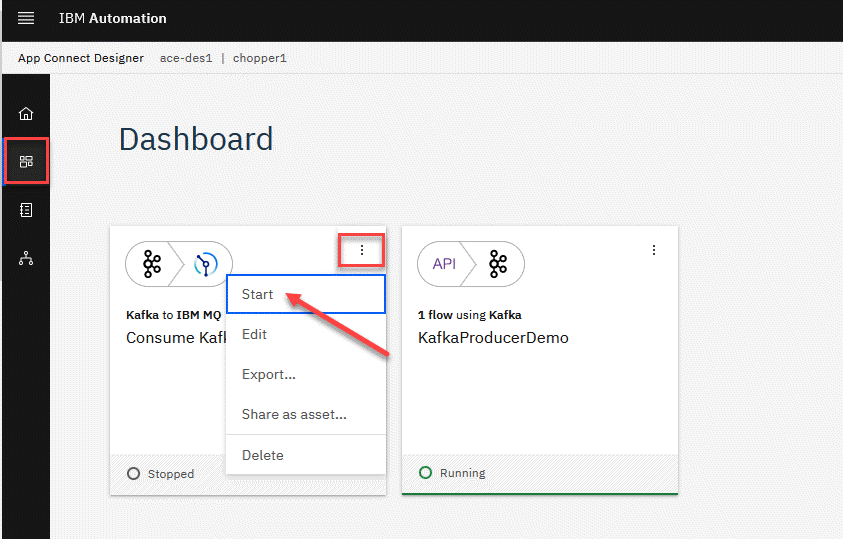
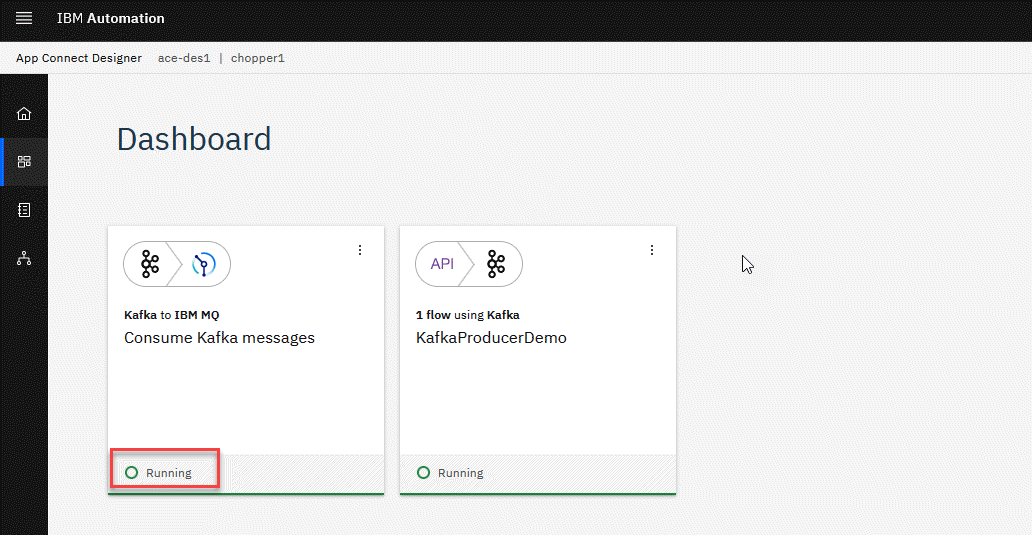
12. You now should see the consumer flow Running.
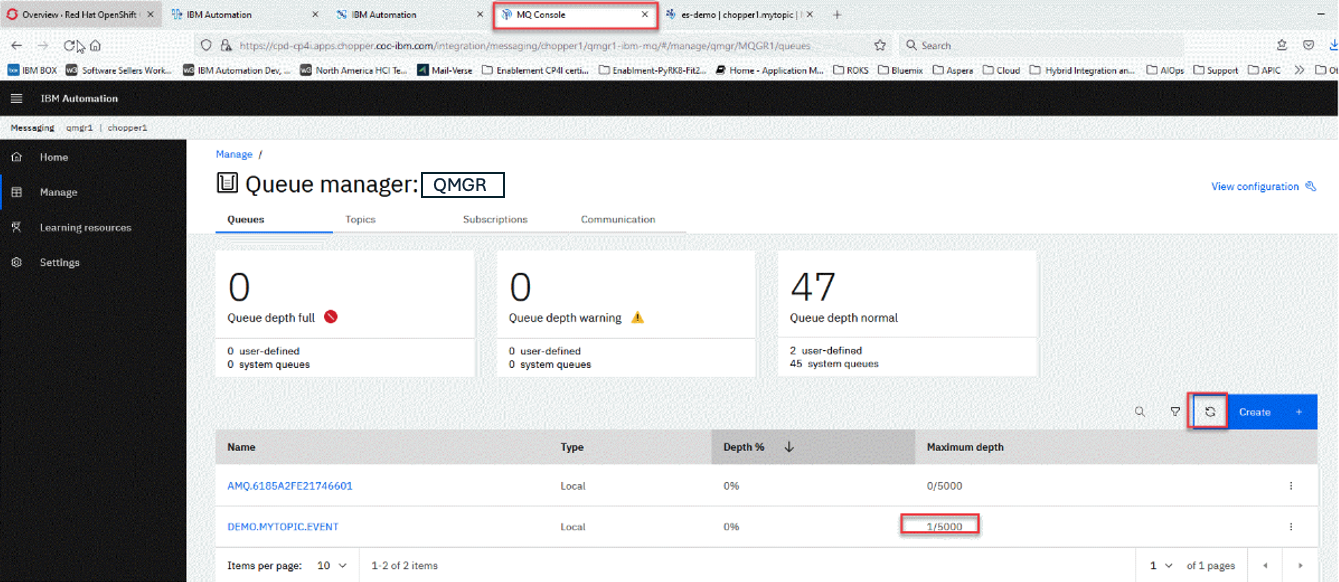
13. Now let’s go back to the MQ Console tab and click on your Queue Manager title, in this example it is MQGR1. Click on the Refresh Icon and you should see a message on your queue now. Note This is due to Kafka broker keeping the messages available so when applications start up they can go back and pick up messages that have already been produced.
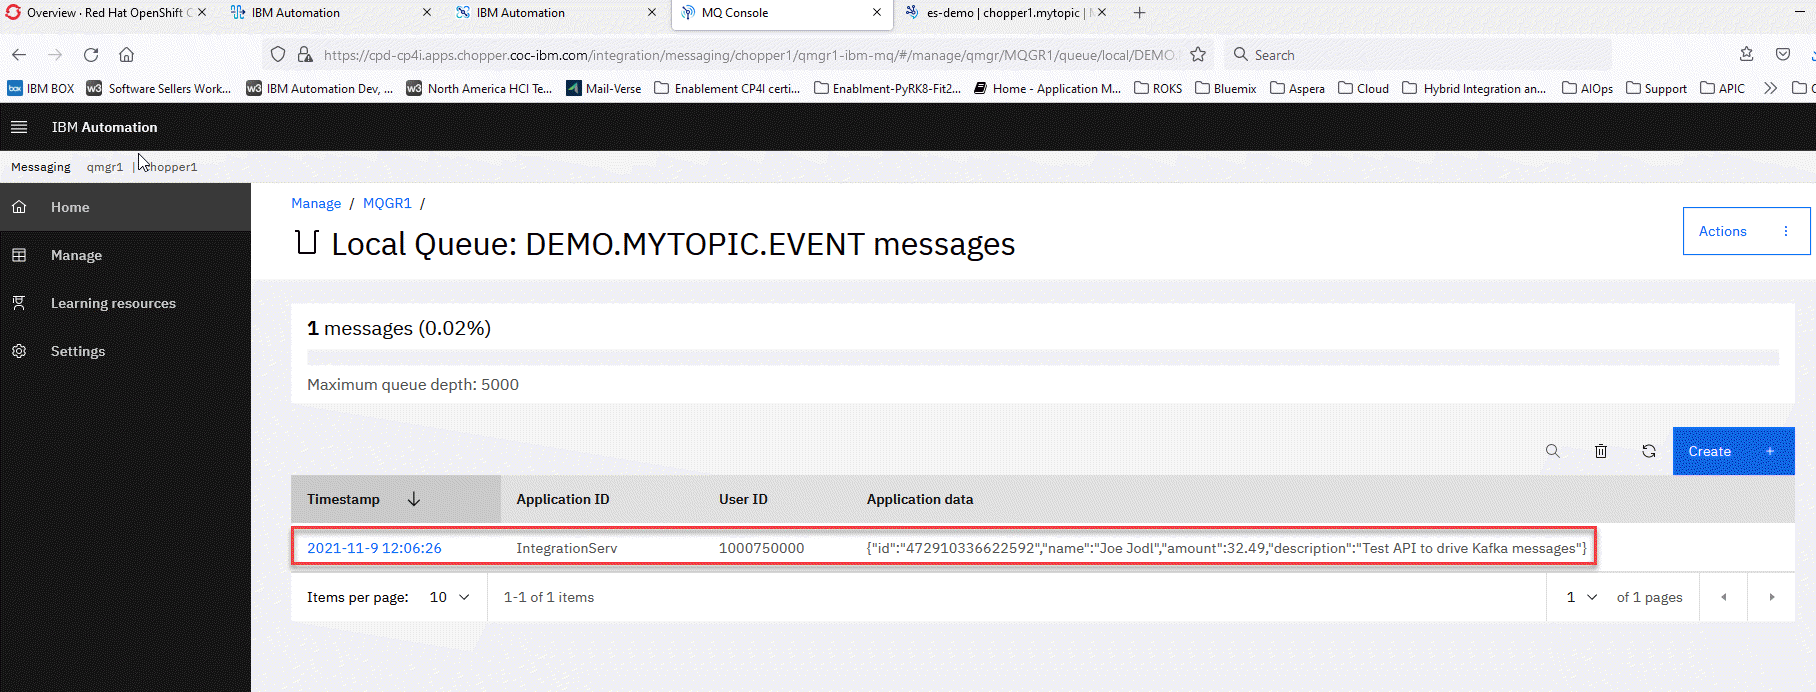
14.You can click on the queue to view the message and the data.
Summary
You can go back and produce more messages using the API flow and stop and start the consumer flow as well.
5. Deploying Your Designer Flow to App Connect Dashboard
As in other labs, we can export our Designer flow as a bar file and deploy to App Connect Dashboard on Cloud Pak for Integration. We will not do that in this lab.