IBM Integration PoT Labs Home page
IBM App Connect Enterprise
Distributing workload using ACE v12 Callable Flows
Featuring:
- Callable Flows
- IBM App Connect on Cloud Pak for Integration (CP4I)
-
IBM App Connect Enterprise v12
Table of Contents
- 1. Introduction
- 2. Create MyLoggerCF
- 3. Deploying Your Designer Flow to App Connect Dashboard
1. Introduction
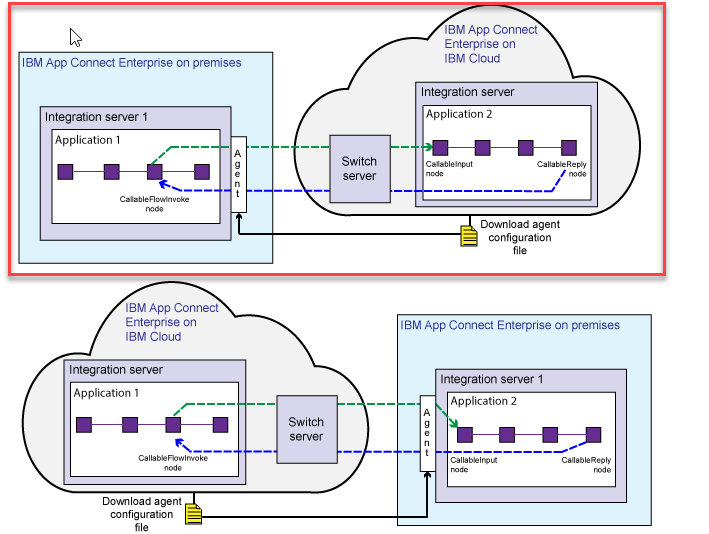
The purpose of this LAB is to show the configuration needed to distribute workload using IBM App Connect Enterprise Callable Flows.
This lab we will show a message flow in IBM App Connect running in CP4I calling a message flow in IBM App Connect Enterprise running on prem. But you could also call a flow running in CP4I from an on prem flow as well.
2. Create MyLoggerCF
1. Open the IBM App Connect Enterprise Toolkit.
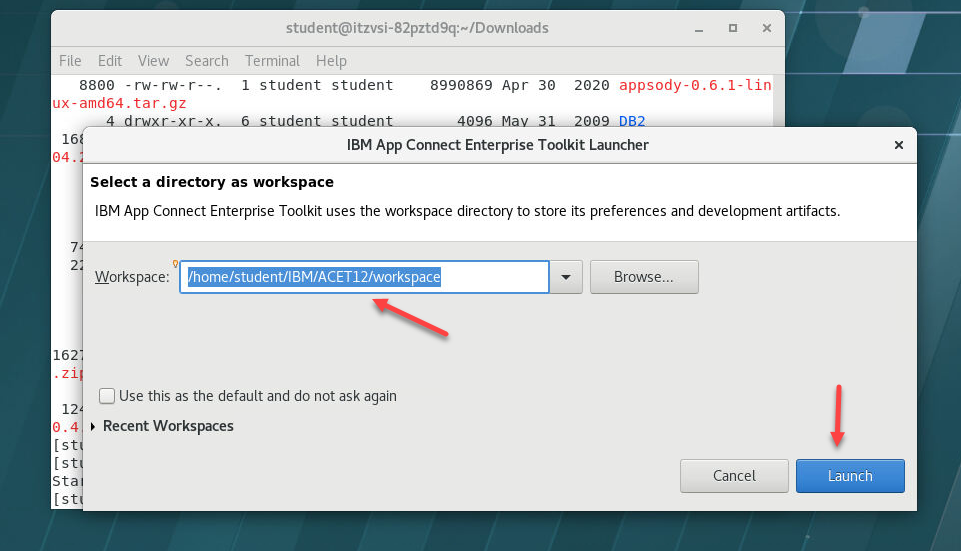
If you already have the toolkit open continue to step 3. From the virtual Desktop image that you were assigned for the PoT login and then open a Terminal window. This will land you in your home directory. Enter ace toolkit From the Workspace Launcher we will create a new workspace for the work in this lab guide enter the Workspace name and click OK. If you already have created a Workspace use that.
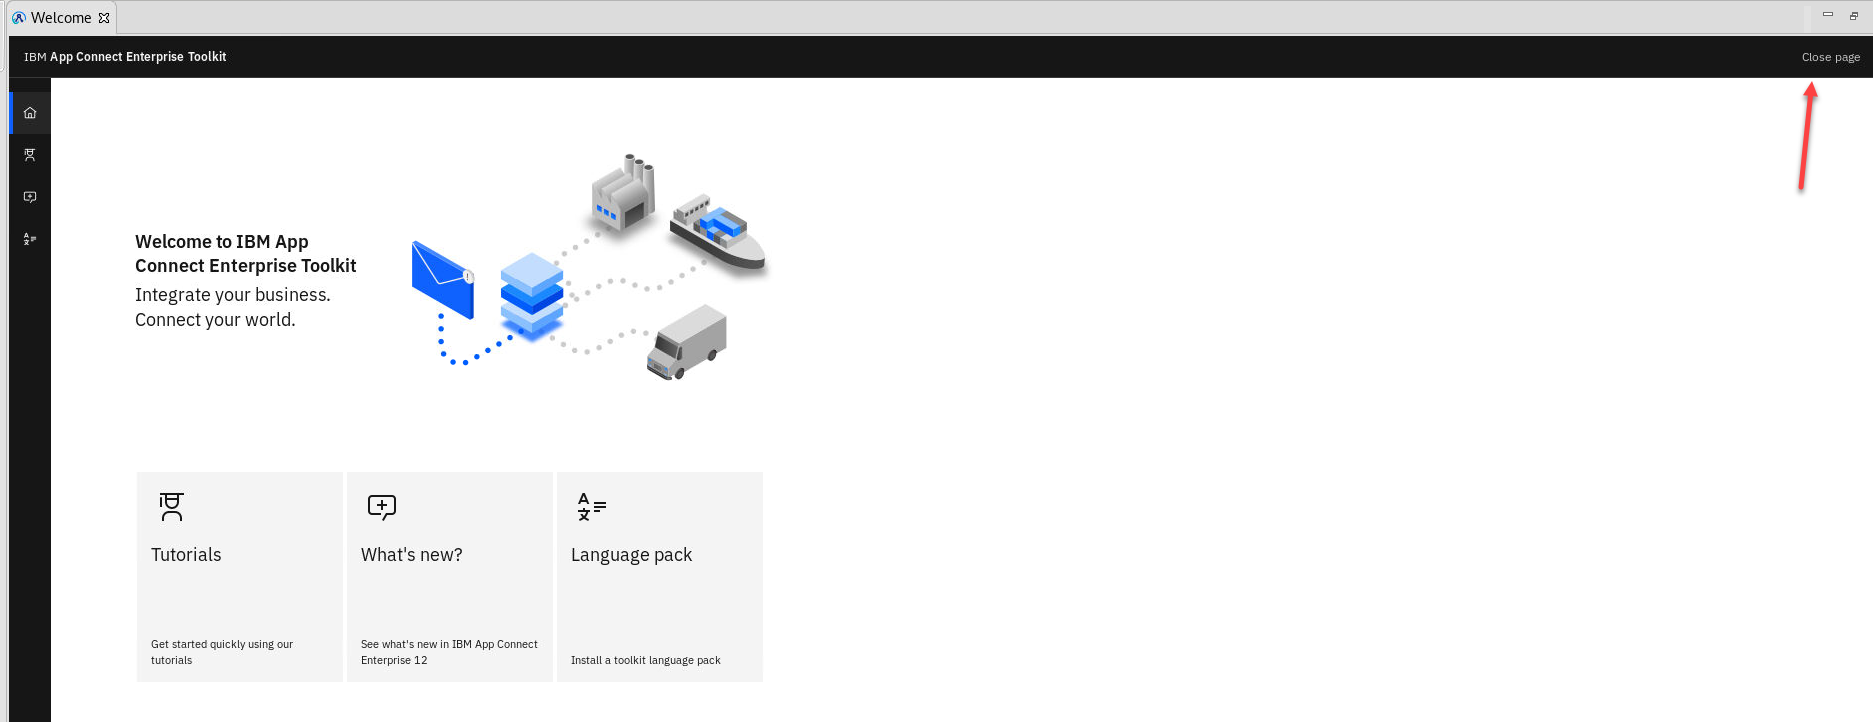
2. In the “Welcome to IBM App Connect Enterprise Toolkit” window click the arrow on the top right of the screen to go to the Integration Toolkit:
2.1 Putting integration servers to work!
2.1.1 Import MyCallableFlows
In this section we use the App Connect Enterprise Toolkit (Enterprise Toolkit) to develop and deploy a simple callable flow into an on-premises ACE integration server so that the flow is visible in Cloud Pak for Integration.
Now download the MyCallableFlows-PI.zip Click here and save the zip file - MyCallableFlows-PI.zip
The sample we will be using a Trace node to write a copy of the incoming payload to a file and a Compute node to modify the incoming message to add a status element. In this next section you will import the application into your workspace so that you can review what it will do.
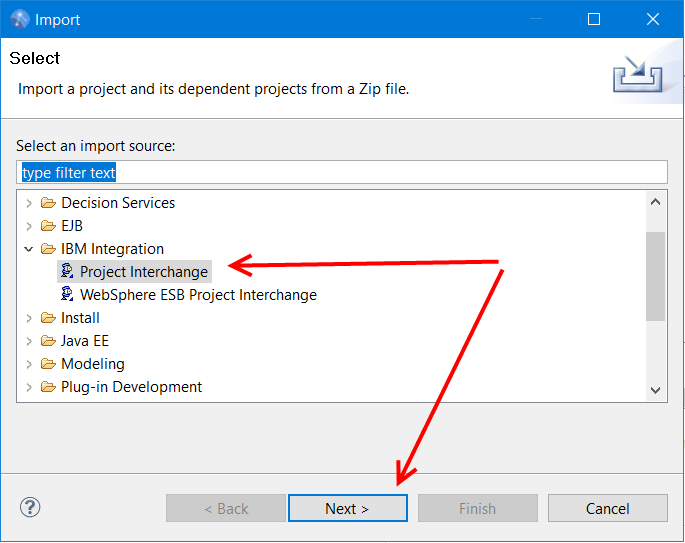
1. With your mouse right click on the background of the Application Development window and select “Import”
2.\ Select IBM Integration > Project Interchange then click the Next button:
3. Use the browse button to import the file MyCallableFlows-PI.zip from where you had downloaded it.
Click Finish:
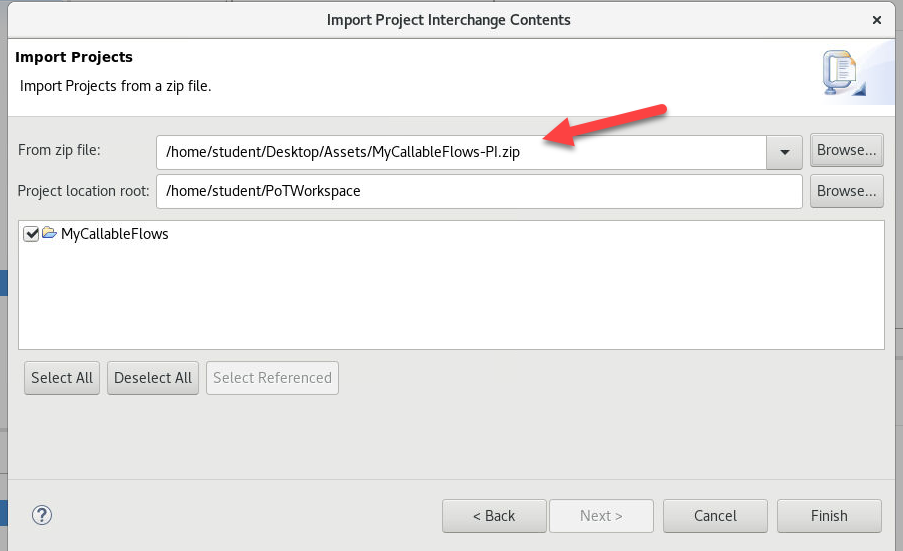
4. The MyCallableFlows Application will be imported into your workspace, expand the application to see the message flow:
2.1.2 Review MyCallableFlows
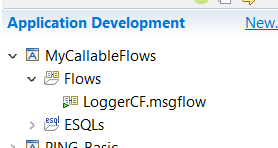
1. Double click on LoggerCF.msgflow, this will open the message flow in window (B).
This flow has two paths. For this lab the input node is a CallableInput node that will allow this flow to be invoked from the cloud.

2. Here if you click on the CallableInput you will see the Endpoint Name that will invoke this flow. Next click on the Node Trace this will write the in coming payload to the file name logger.out.
Note: This is showing a Unix directory but the artifacts have a windows directory. Change this to match the enviroment you are running the Toolkit in.
Click on the ModifyMessage Compute node and it shows we add a status of ‘done’
2.1.3 Deploy MyCallableFlows
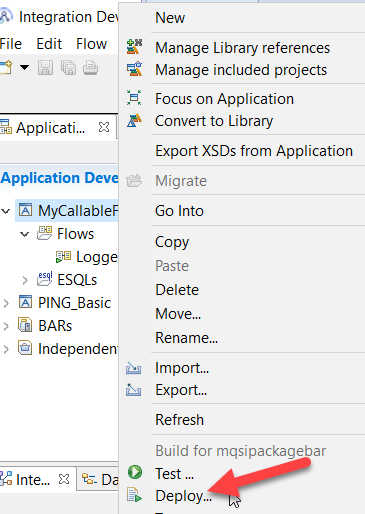
1. Right click on the MyCallableFlow and select Deploy
2. Select the Integration Servers TEST_SERVER to deploy our flow
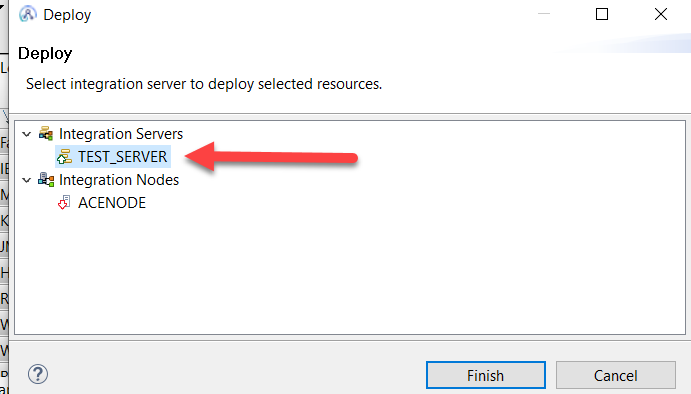
3. Review the deploy messages and dismiss the Progress information window by pressing the close button.
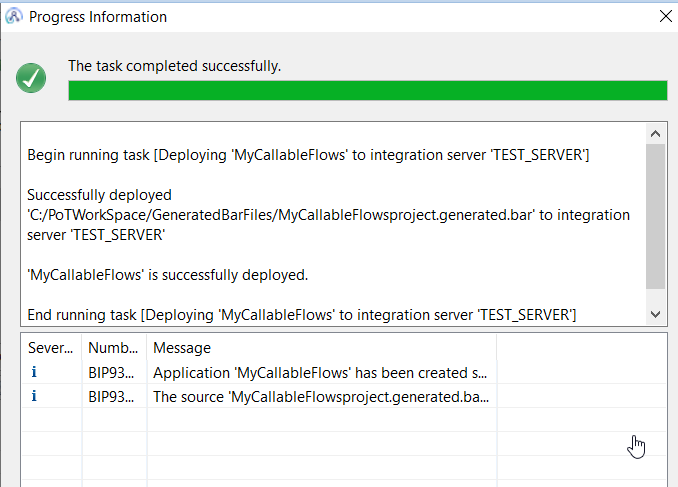
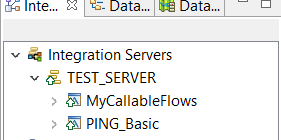
4. We now have our Callable flow deployed and running on the local Integration Server
2.2 Configure the Callable Flows in Cloud Pak for Integration (CP4I)
In this section we use App Connect Designer to configure callable flows, to enable secure connectivity between flows running in IBM App Connect on IBM Cloud and in an integration server in your on-premises App Connect Enterprise.
1. Open a Firefox browser window and enter the Cluster Homepage that was provided to you by the instructor. The URL will take you to the CP4I Platform Navigator. The URL should look similar to this one which is to the chopper cluster: https://cpd-cp4i.apps.chopper.coc-ibm.com/zen/#/homepage
Note: if you already have the CP4I Platform Navigator page open go to step 4
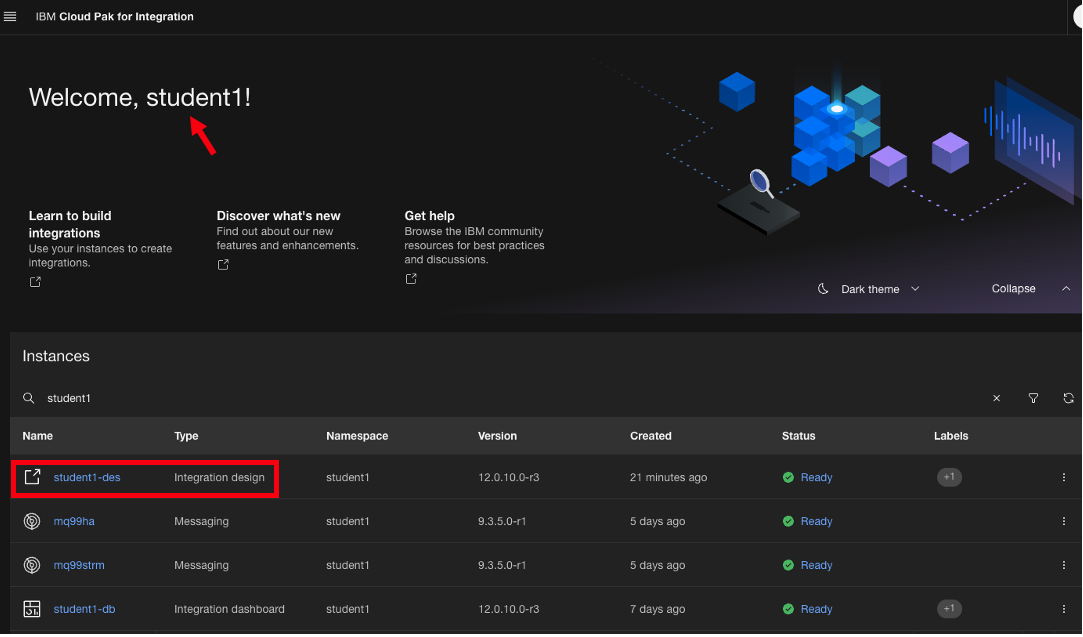
2. Login to Cloud Pak for Integration platform navigator

3. When prompted use the username and password provided to you for this lab. In this example we are using student1.
4. Click on the App Connect Designer link to take you to the designer interface.”
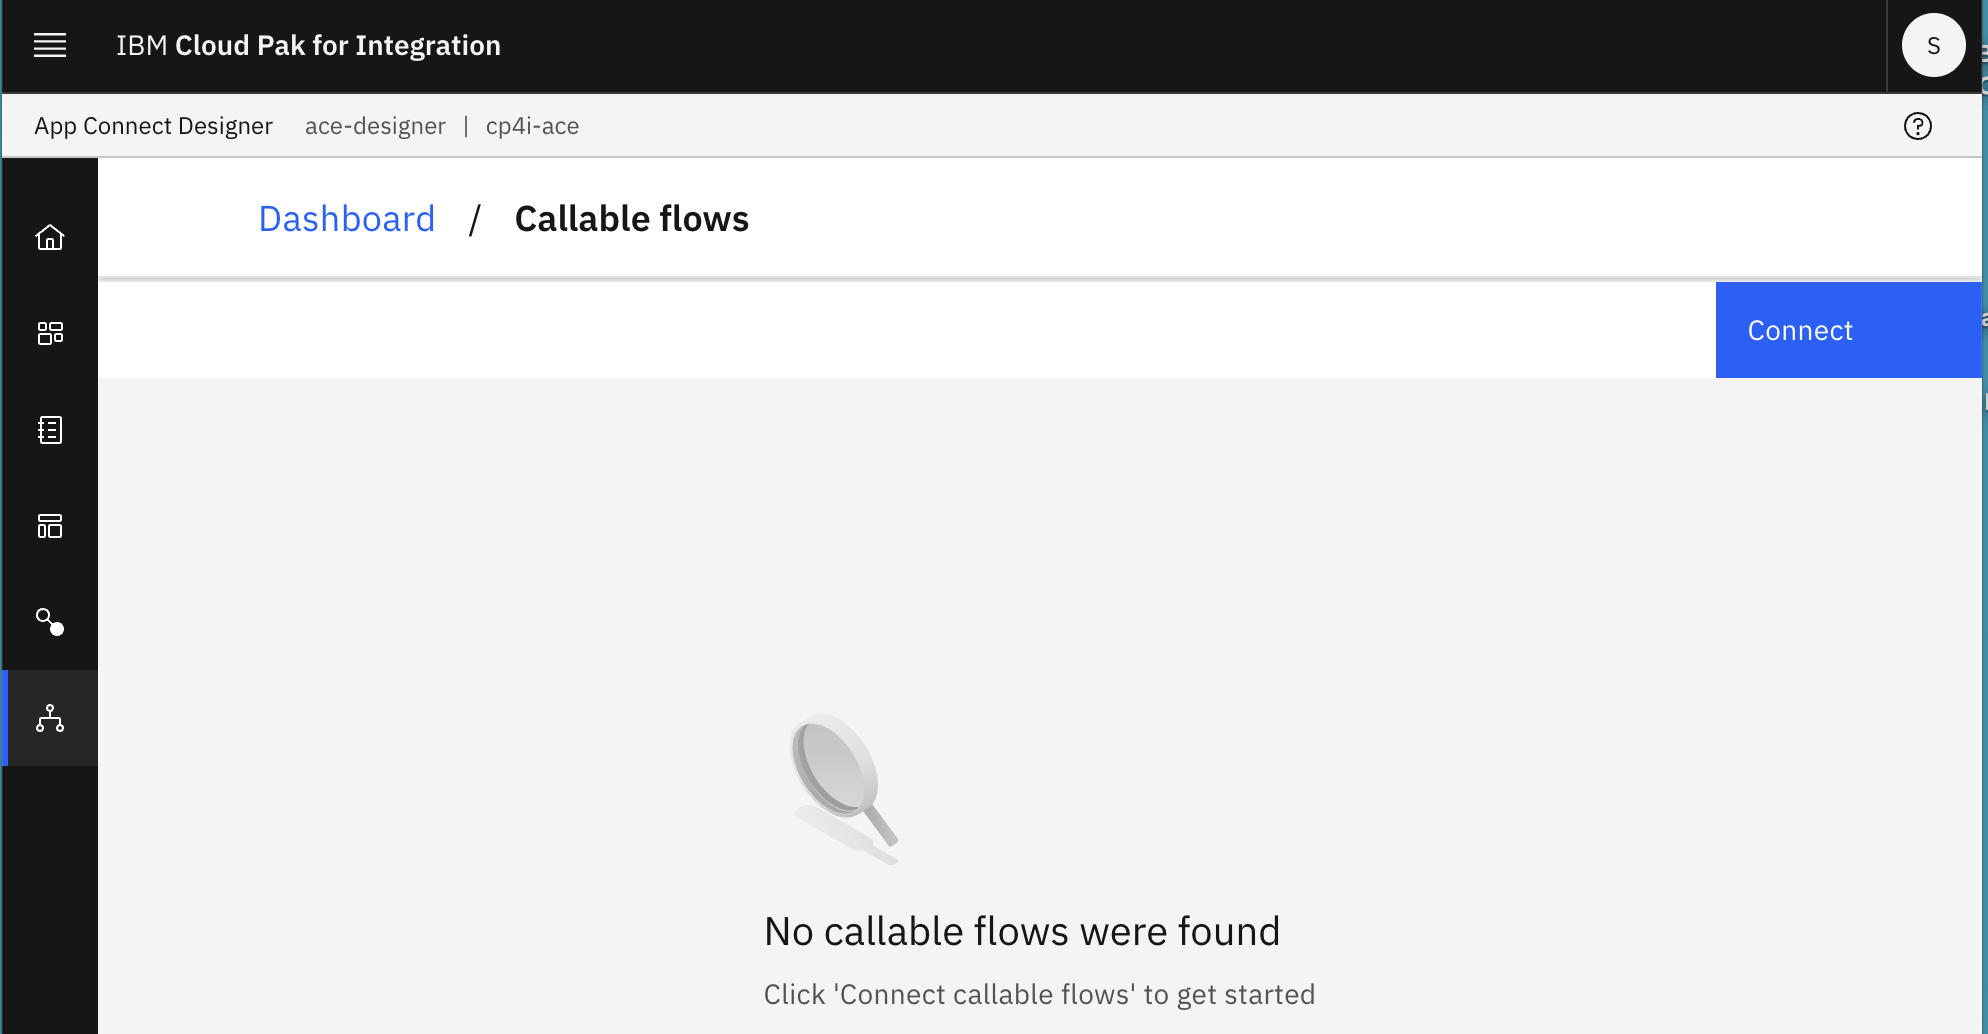
5. Click on the Callable flows icon:

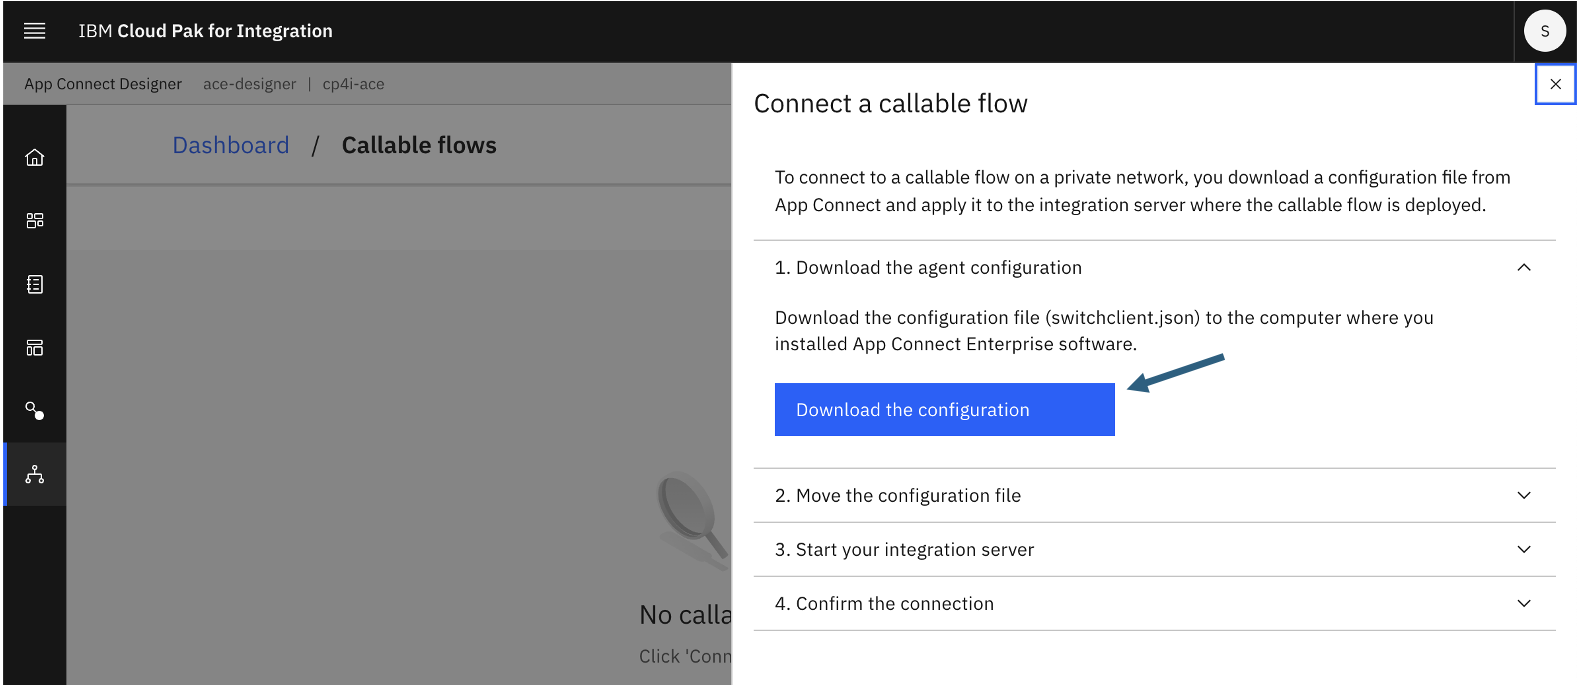
6. This is the configure callable flow page. Click on the Connect callable flows to get to the download page.
7. Now we will need to download the agent configuration json file that we will add to the on prem server to create the secure connection between the onprem and CP4I.
Note: don’t close this window we will use it to test the connection
8. Take the agentx.json file we just downloaded and copy to the TEST_SERVER config location. From the home directory /home/student run the following command to move the json file to the location in the server directory in the agentx directory.
cp Downloads/agentx.json IBM/ACET12/workspace/TEST_SERVER/config/iibswitch/agentx/
The logging file will then be created:
9. Stop and start the Test_Server
10. Now return to the window that you opened in CP4I designer to download the json file. Close the "Connect to Callable Flow" window.
Refresh CallableFlows page. You shoud see the CallableFlow you deployed into the TEST_SERVER.

2.3 Create a Designer flow in CP4I to call on-prem flow
In this section we use App Connect Designer to configure callable flows, to enable secure connectivity between flows running in IBM App Connect on IBM Cloud and in an integration server in your on-premises App Connect Enterprise.
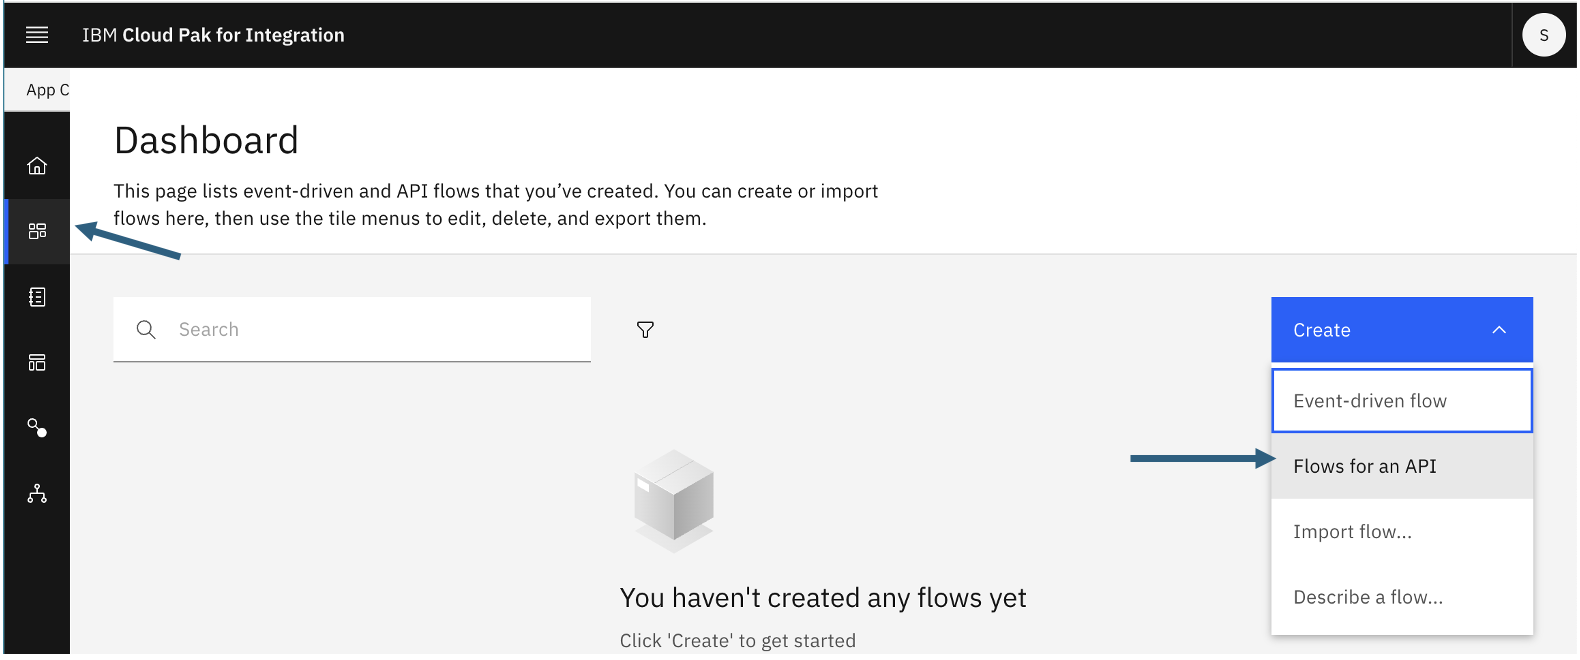
1. Click on the App Connect Designer dashboard icon:
2. Select from the New drop down to create a new API flow:
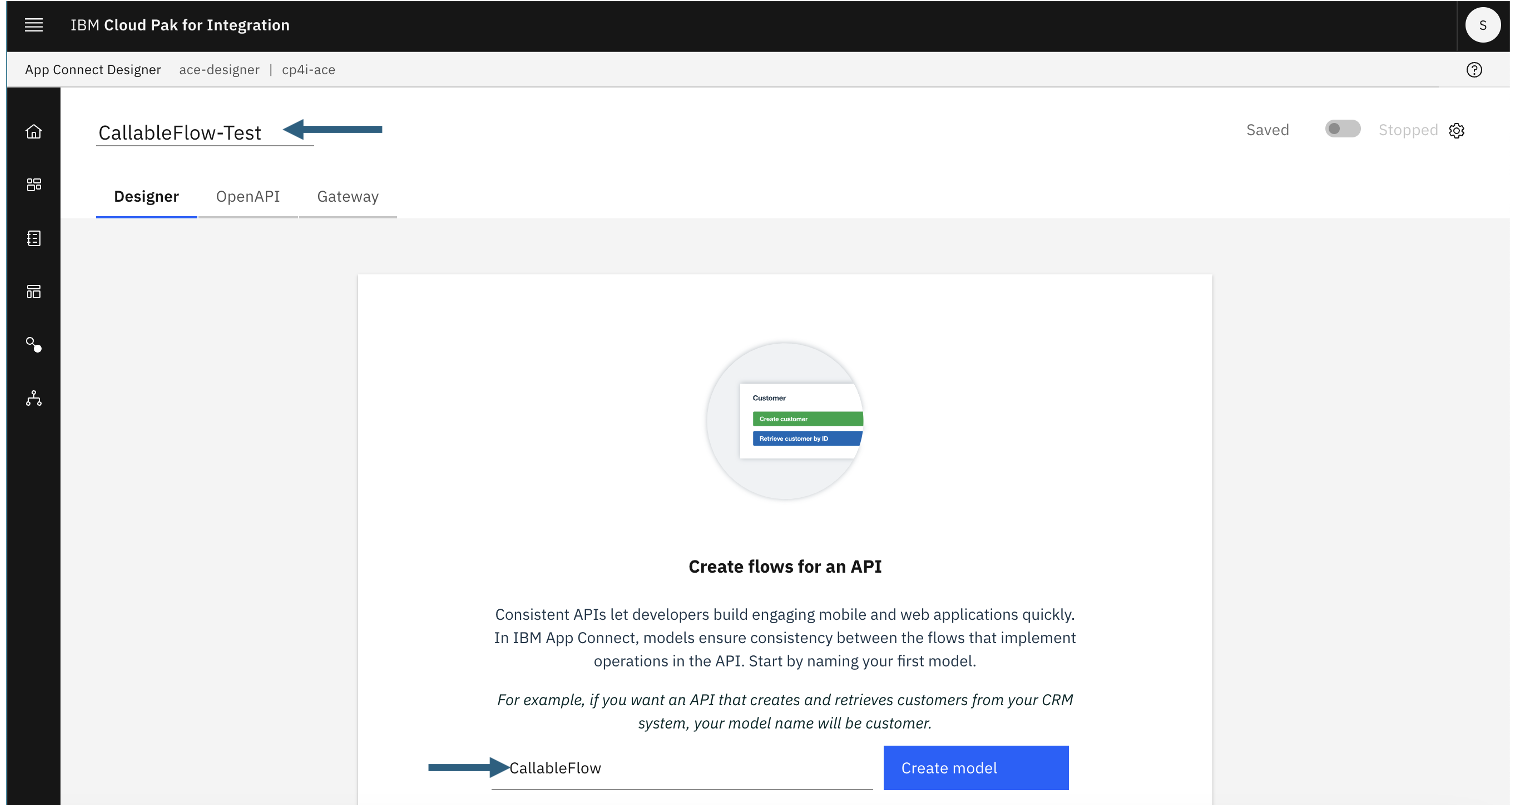
3. First thing we will do is create the model for this. We will call the model CallableFlow, and name of the flow CallableFlow-Test
4. We will add 3 properties to this model: Name, Message, and Status

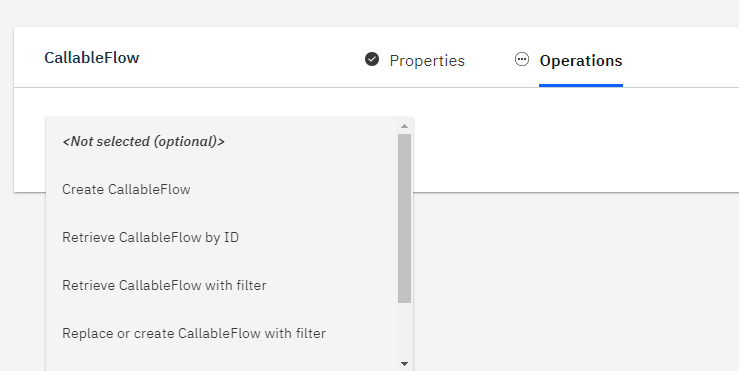
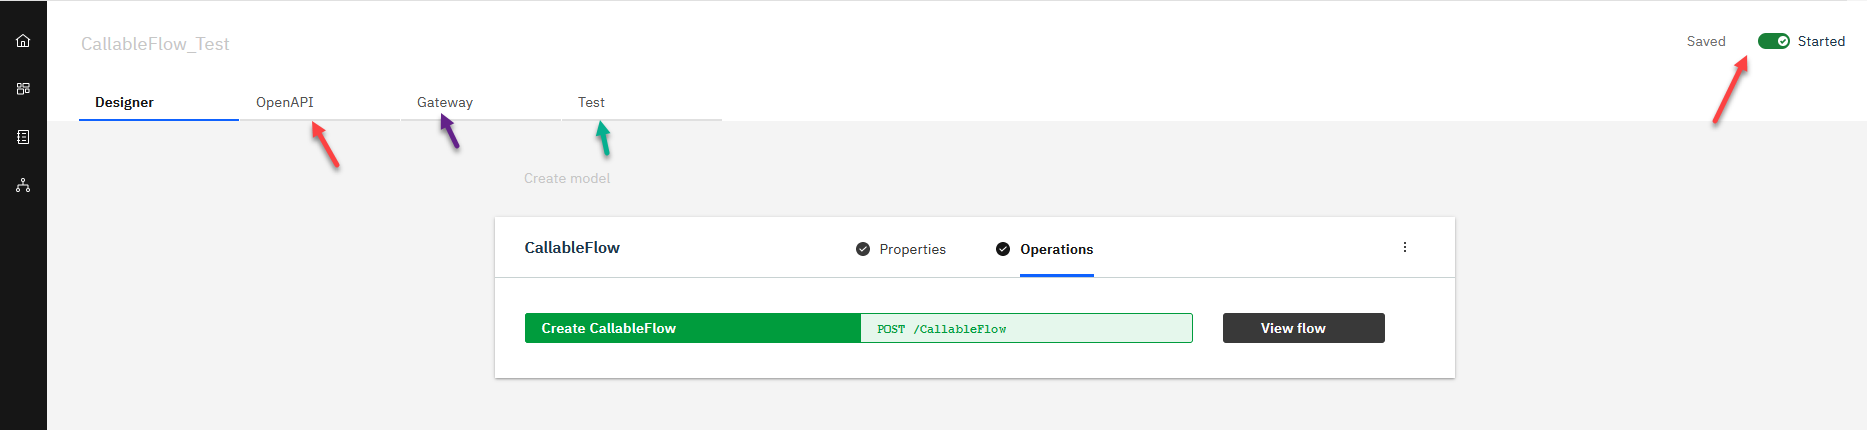
5. Now that we have the model we will select the Operations tab and select the Create CallableFlow.
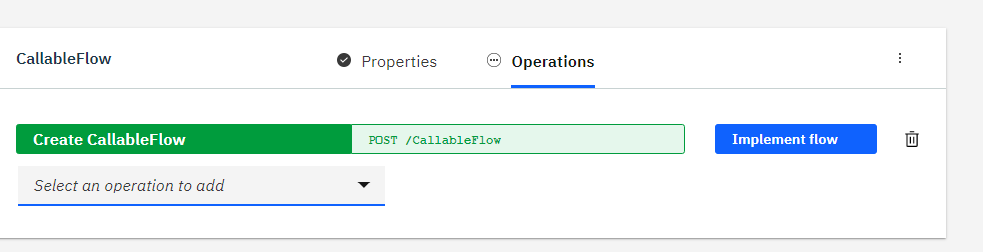
6. Now select the Implement flow button and that will open the flow editor.
7. 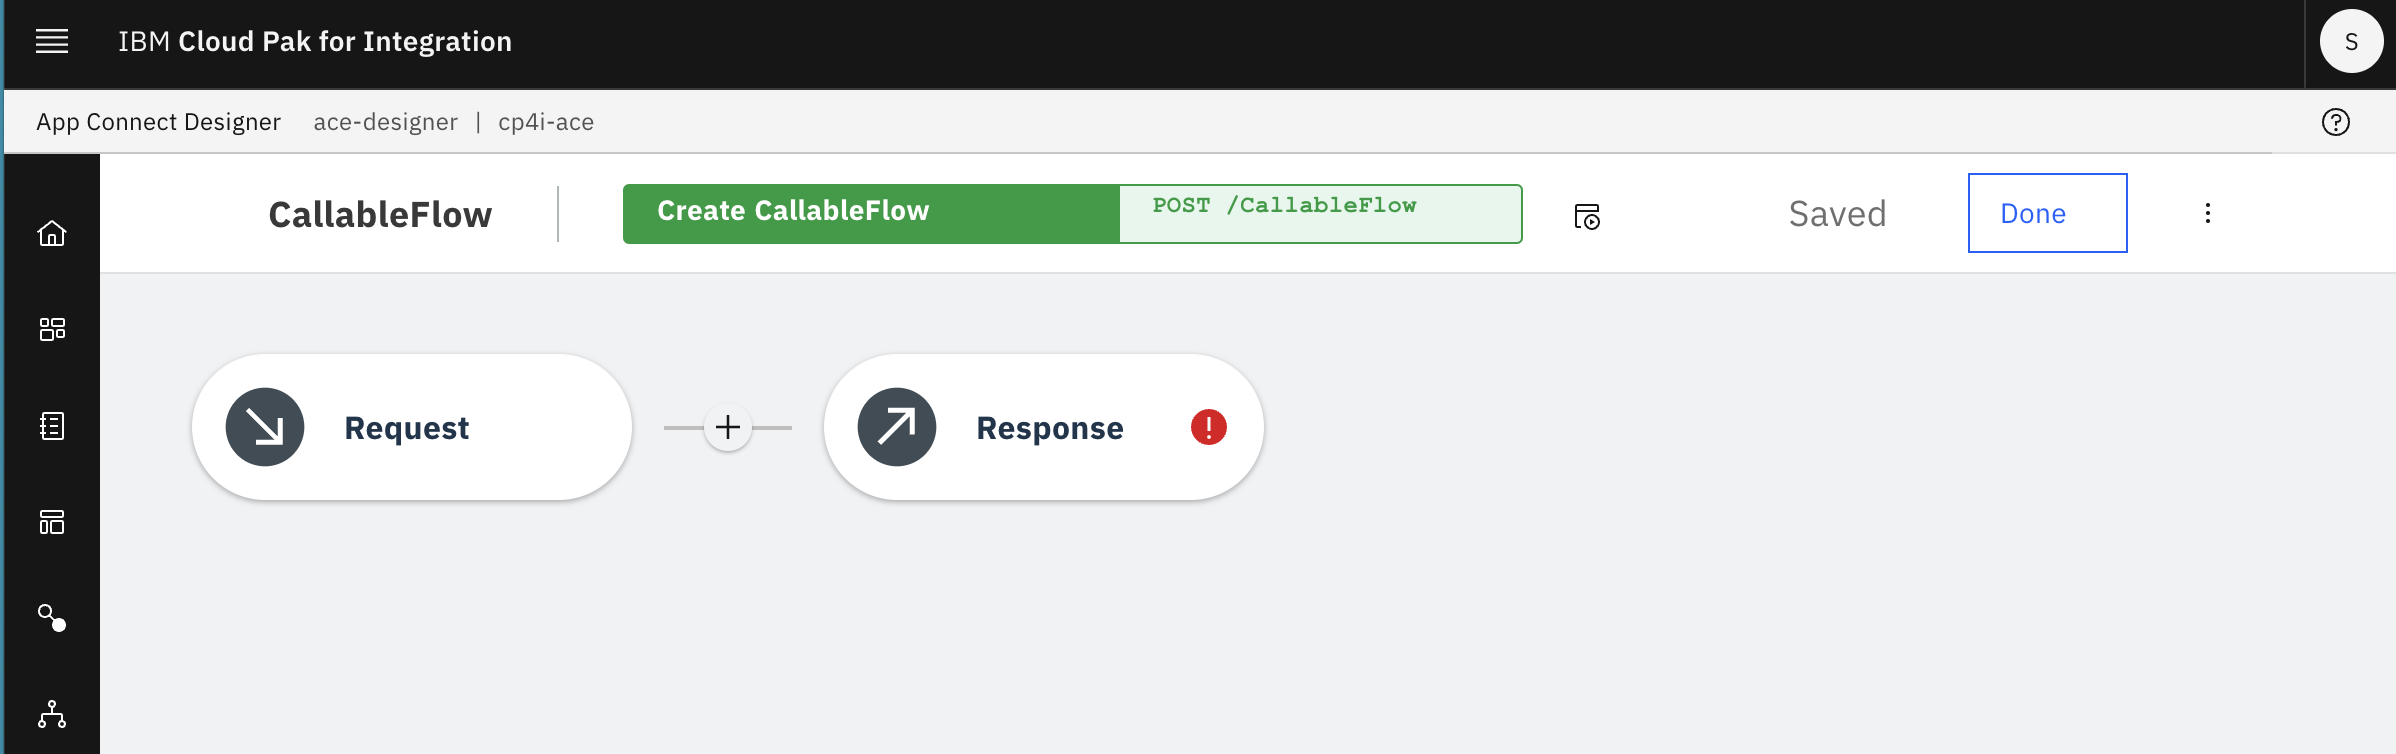
Click the (+) sign between the Request and Response Nodes.
Search for "Callable".
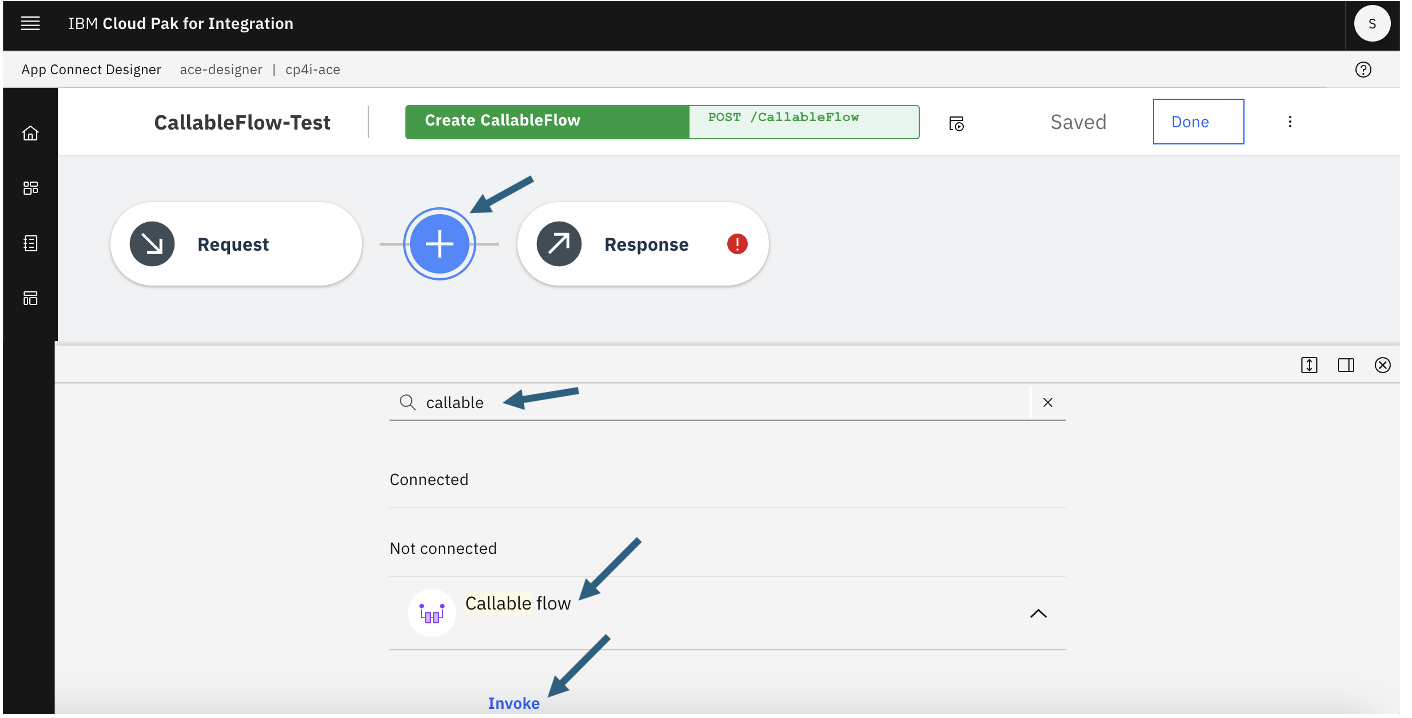
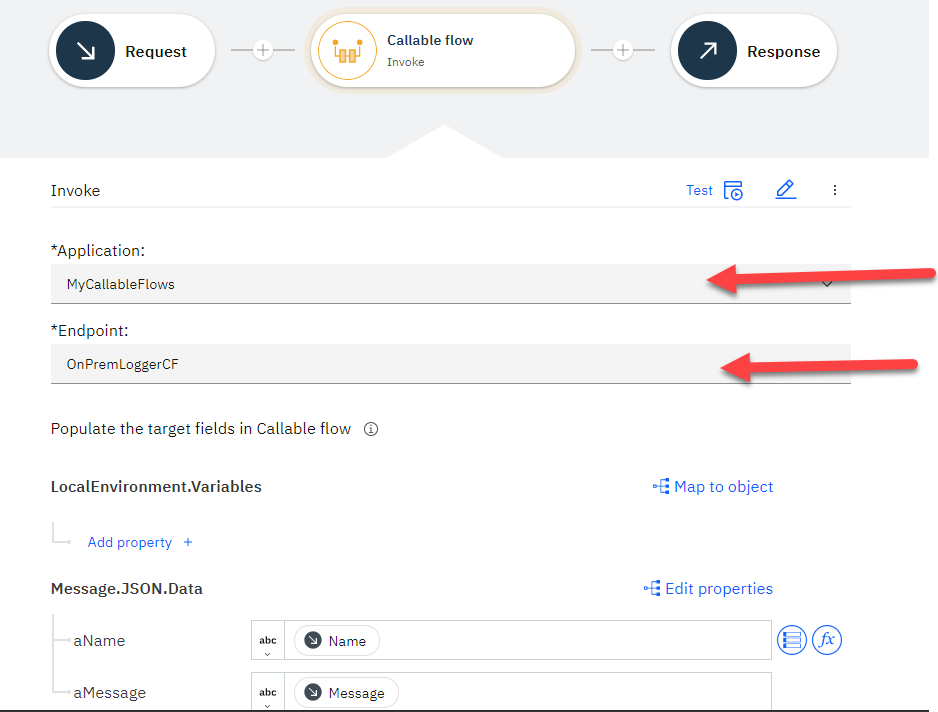
8. Here we will select the MyCallableFlows for the application. This is the integration running on-prem. The endpoint is the name of the CallableInput node in the flow.
We will add the data objects aName and aMessage that will pass data to the on-prem flow.
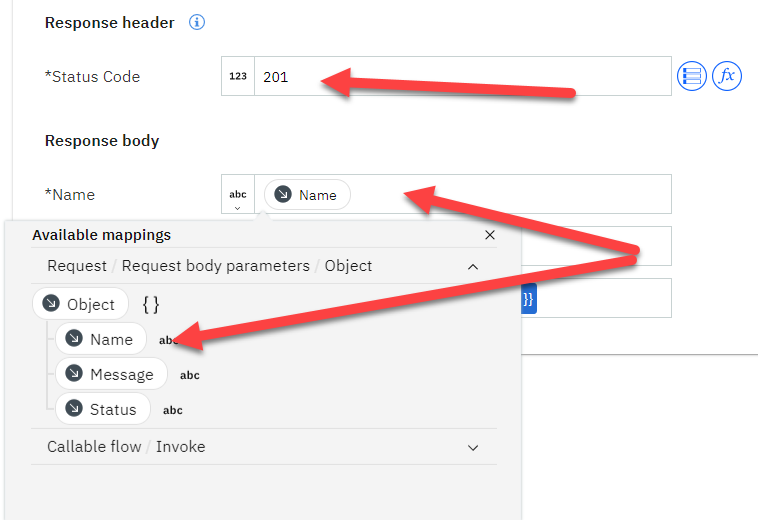
9. Now we will select the Response and update the Reponse body.
We will leave the Reponse header as 201.
For the Response body will add the Name that we input to the API call.
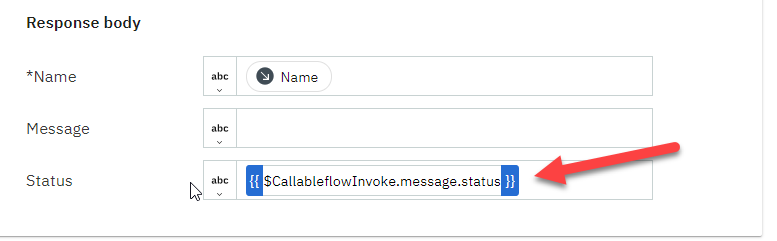
10. For the status we will take the update that was made in the compute node on the on-prem flow. Cut and paste this into the Status field: {{$CallableflowInvoke.message.status}}
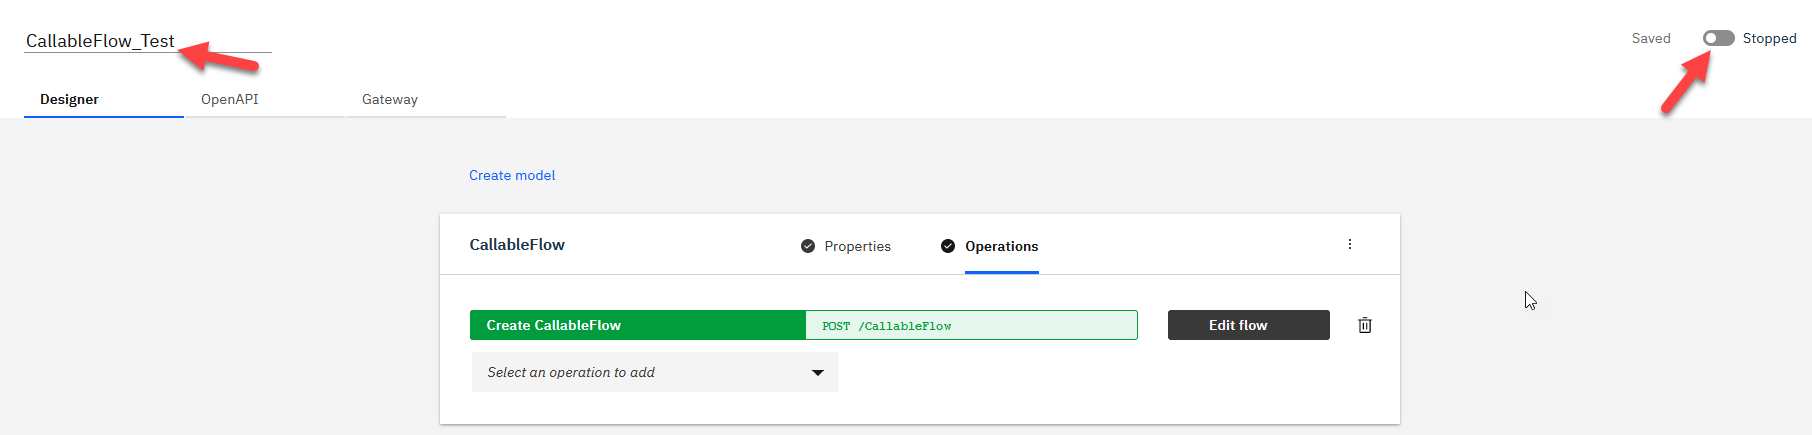
11. We are now ready to start and Test the API but first need to give it a meaningful name. In this example we used CallableFlow_Test This will automatically be saved. We will now start the API and this will make the Test button visible on the menu bar. This will also deploy the API into the APIC sandbox workspace so that this can be all tested from a single screen. Click in the upper right cornor on the Stopped switch and it will turn green and show started.
2.4 Test from the Designer Test tab
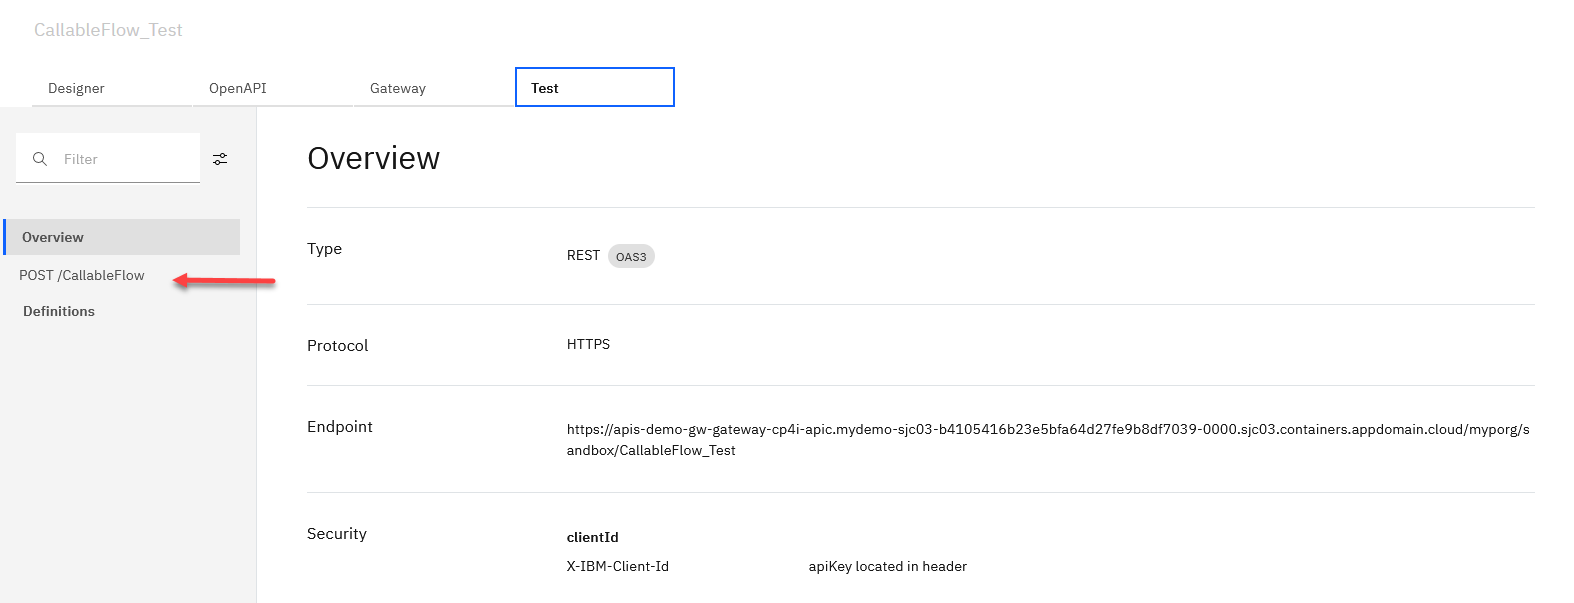
1. We will NOT go into details on all the items on the menu bar but you will see all these when we are working in the APIC UI. For now we will focus on the Test button. Click on the Test button that is visible now that we started the API.
2. Now click on the Post operation on the left side under Overview. This will take you to the Details page for this operation. Scroll down and review the info. When ready to Test the API click on the Try it
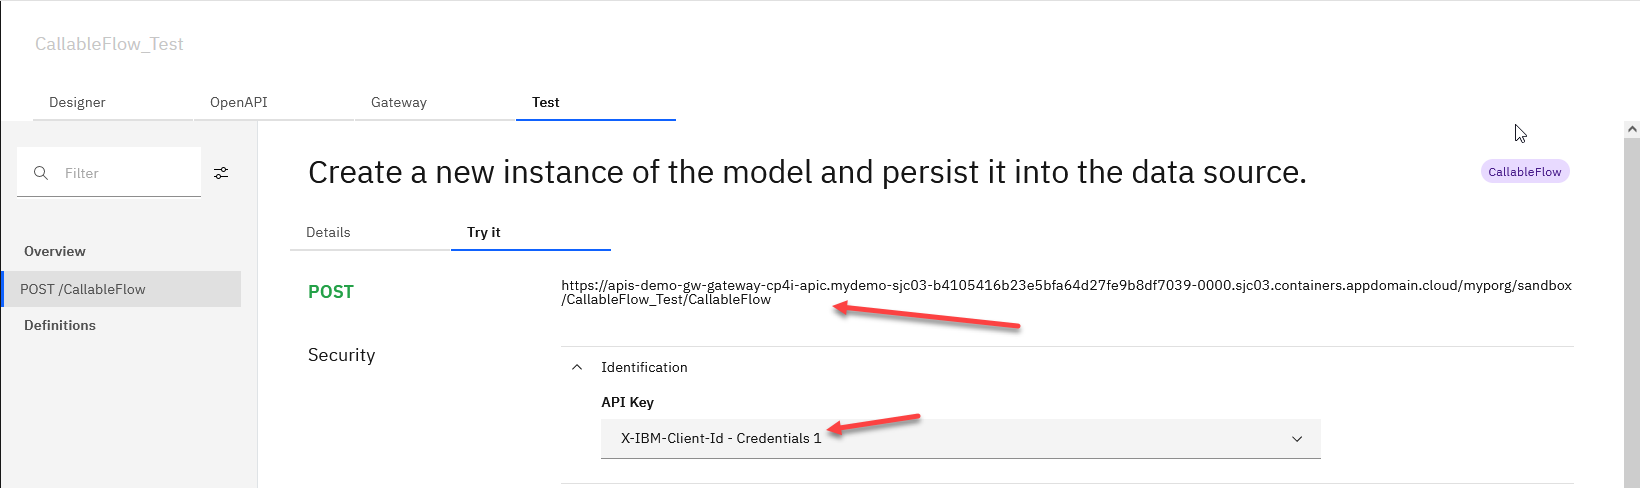
3. Now you will see the Post Url for our API and the Security key. Scroll down and for the body you can click Generate to see sample data. For this Post we will not have status in the request since that is what is returned when the API is called. below:
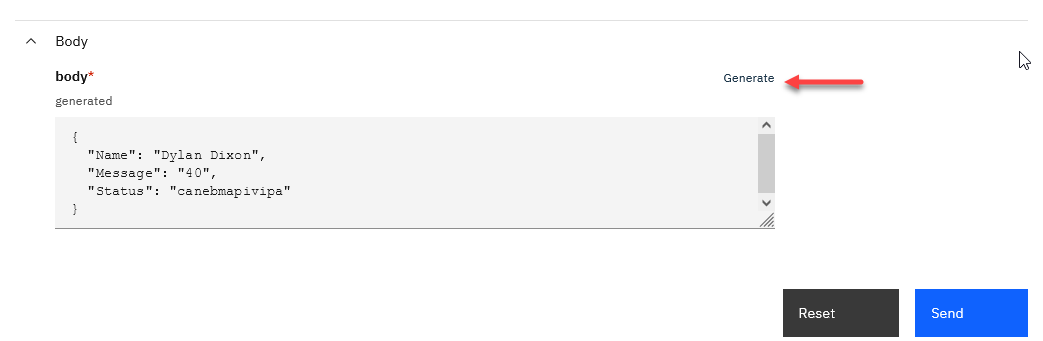
4.The followings is an example of what you can enter for the body of the API call.
{
    "Name": "Joe Jodl",
    "Message": "Test my on-prem callable flow from CP4I"
}
</code>
5. Click the Send button and you will see the results of the call.
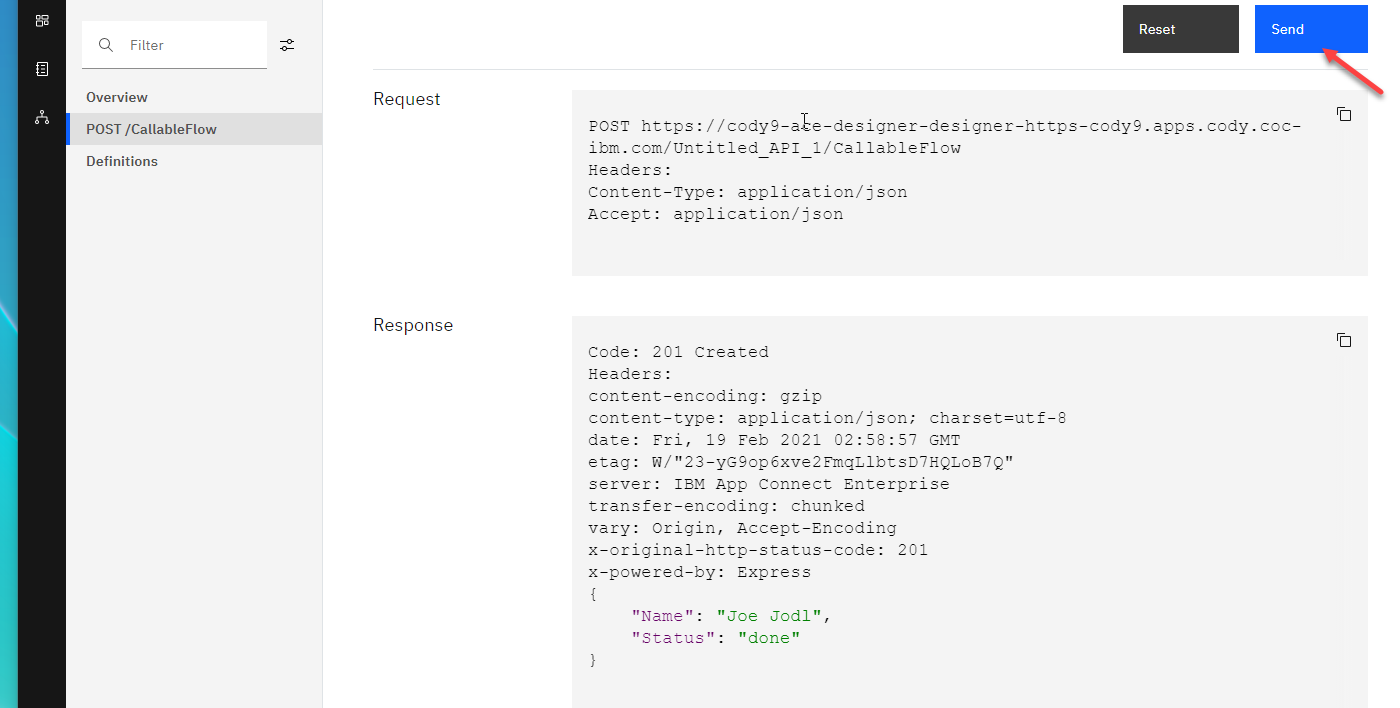
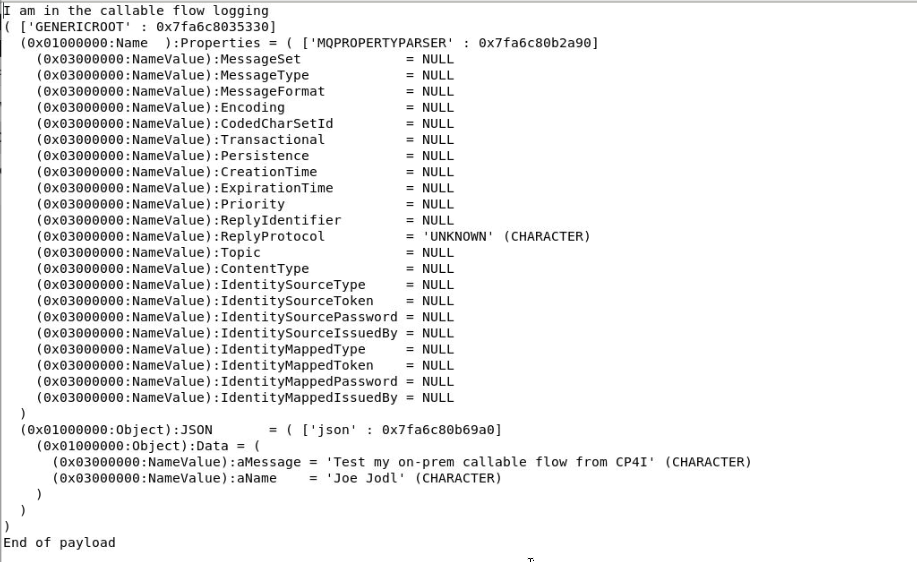
6. Go back to your on-prem server where you set the trace node to log info.
From a terminal window go to /home/student/tmp and run the gedit command which will open the logger file.

3. Deploying Your Designer Flow to App Connect Dashboard
As in other labs we can export our Designer flow as a bar file and deploy to App Connect Dashboard on Cloud Pak for Integration. We will not do that in this lab.