IBM Integration PoT Labs Home page
IBM App Connect Enterprise
App Connect Enterprise Basics
Featuring:
- Integration Servers
- Integration Servers managed by Integration Nodes
- Running simple message flows and REST APIs
Table of Contents
- 1. Introduction
- 2. Integration Servers
- 3. Deploy BAR file to Cloud Pak for Integration (CP4I)
Return to main ACE lab page
1. Introduction
The purpose of this LAB is to show how to create a default Integration Server and then we will build a very simple application that we will deploy to the integration server to test.
2. Integration Servers
2.1 Configure a Local Integration Server
The ability to create a local integration server from the Integration Toolkit was introduced in fix pack 8 of IBM App Connect Enterprise. In the next section you will create a local integration server using this feature. The following diagram shows what you will set up on your local integration server.

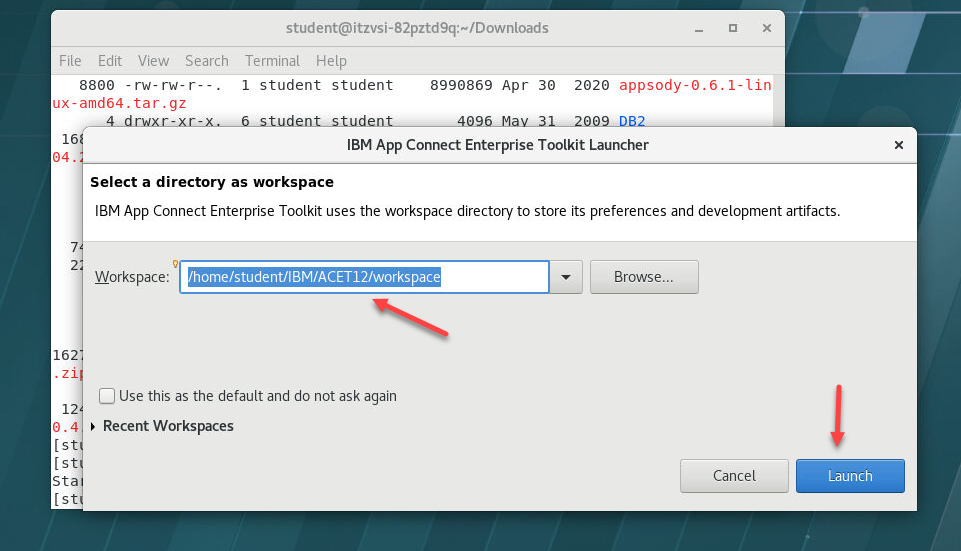
1. Open the IBM App Connect Enterprise Toolkit. From the virtual Desktop image that you were assigned for the PoT login and then open a Terminal window. This will land you in your home directory. Enter ace toolkit
From the Workspace Launcher we will create a new workspace for the work in this lab guide enter the Workspace name and click OK.
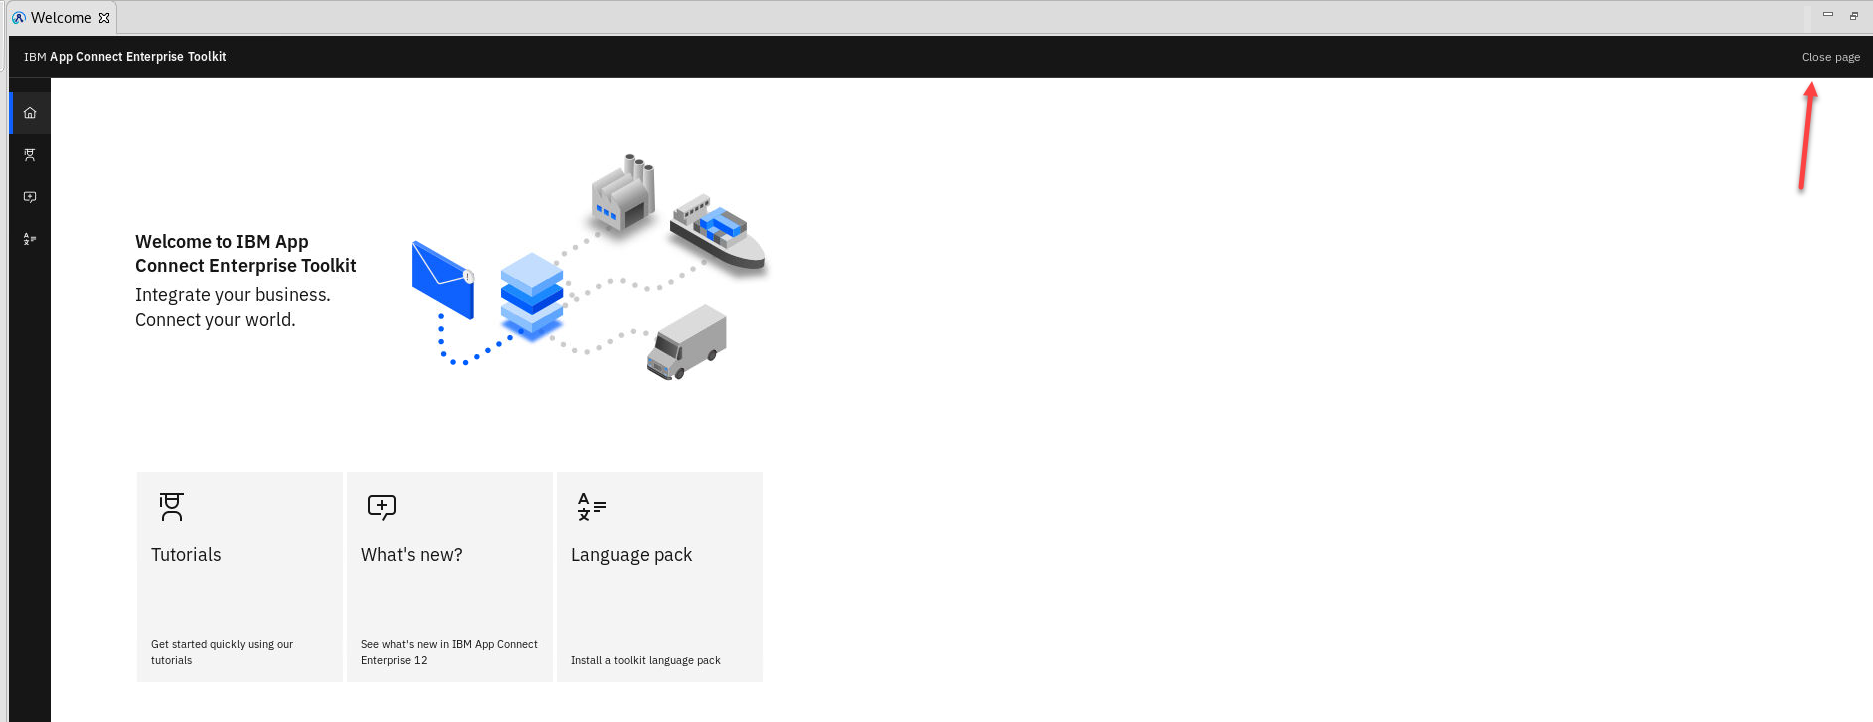
2. In the “Welcome to IBM App Connect Enterprise Toolkit” window click the arrow to go to the Integration Toolkit:
3. The Eclipse based Integration Toolkit will open:
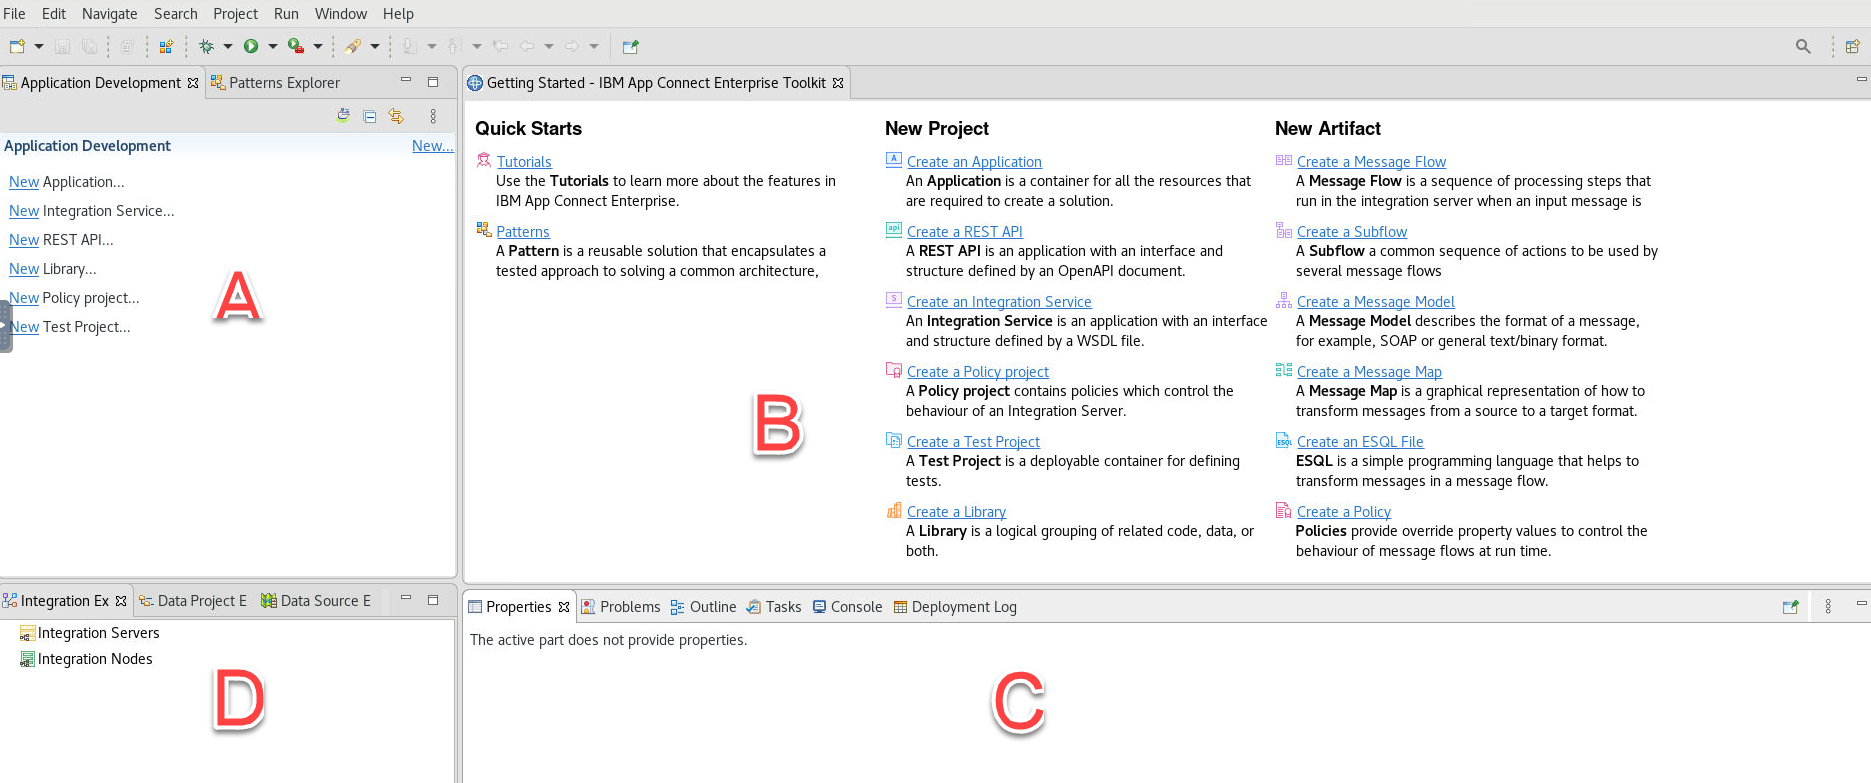
A) The Application Development window (A) is where your Applications, REST APIs, etc. will be shown in your workspace
B) Window (B) is where resources that you open (for example message flows) will be shown.
C) Window (C) is where properties of resources that you highlight in window (B) can be viewed
D) The Integration Explorer Window (D) is where you can view and manage deployed assets (for example Applications and Message flows). Note assets are deployed to Integration Servers that are optionally managed by an Integration Node. When they are managed by an integration node the integration servers will appear “under” an integration node in this view. When not managed by an integration node they will be found under the “Integration Servers” view in this window.
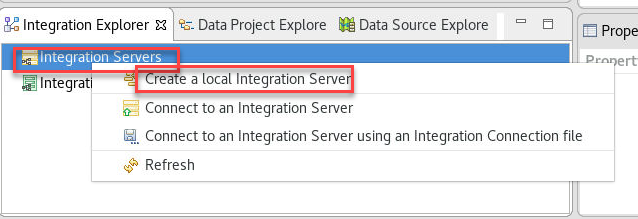
4. In the Integration Explorer window (D) right click on Integration Servers and select “Create a local Integration Server”:
5. Accept the defaults in the “Create and start a local Integration Server” window and select Finish:
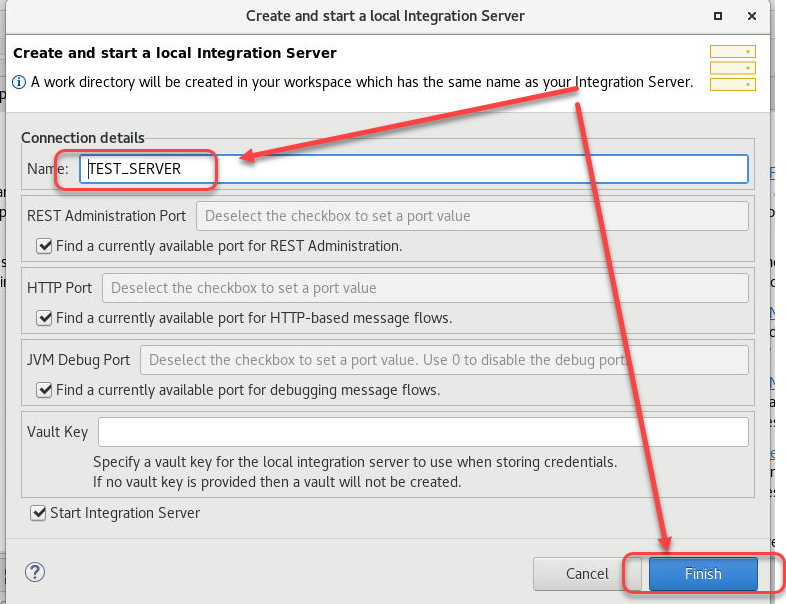
This will trigger a process to configure a <local> integration server (not managed by a node) and to start it.
Note: the default port for Administration of the server is 7600. Since the “Find a currently available port for REST administration” is ticked, the process will add one to this port number until an available port is found (this is also the logic for the HTTP Port and JVM Debug Port).
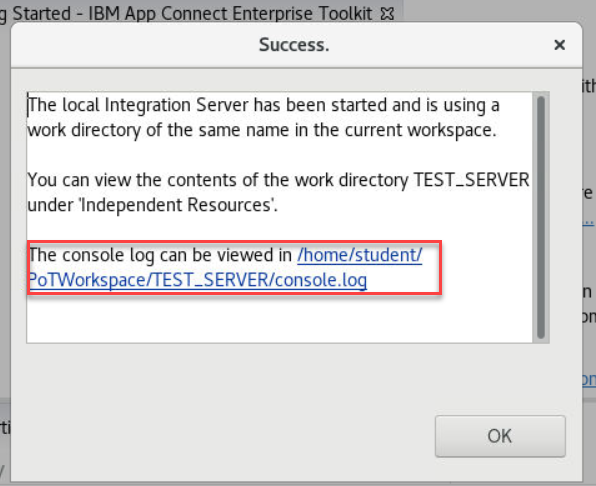
6. On successful start of the local Integration Server you will see a message similar to the following. <Before> dismissing the message, note the location of the console.log file.
Note If using the POT VDI defaults then the location will be this /home/student/IBM/ACET12/workspace/TEST_SERVER/console.log
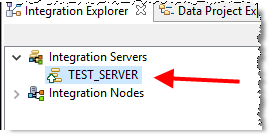
7. A connection to your new local Integration Server will appear in the Integration Explorer window – the green arrow (pointing upwards) to the left of the server name indicates that the server is running:
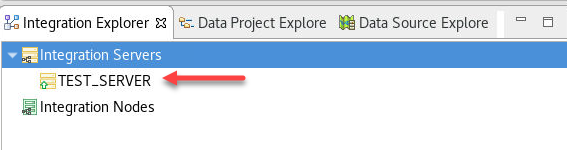
The local Integration Server should be started (if the server isn’t started there is likely to be a problem with the default ports configured in your server.conf.yaml)
2.2 Stopping and starting a local integration server
In this section you see different ways of how a local Integration Server can be stopped stopped and started.
2.2.1 Using Integration Toolkit
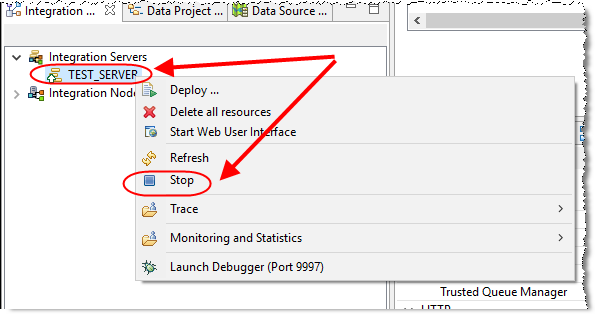
1. The integration server that you created in the previous section will be up and running (it will have a green arrow facing upwards in the Integration Explorer window. Right click on the server name and select Stop (this will stop the integration server):
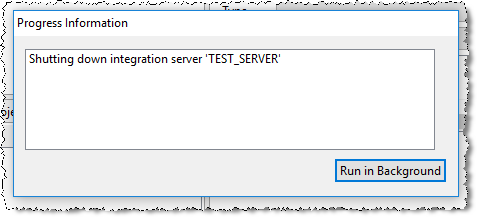
2. A message will appear explaining that the integration server is shutting down:
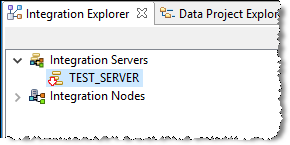
3. When the integration server has shutdown, the Integration Explorer will show the TEST_SERVER with a red arrow pointing downwards:
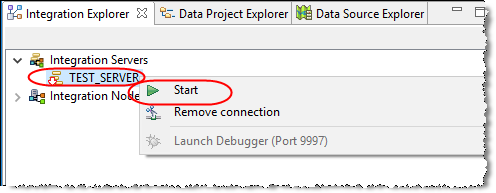
4. In the Integration Explorer right click on the integration server and <note> the option to start the integration server.
2.2.2 Using the Administration REST API
IBM App Connect Enterprise has an extensive administration REST API that enables you to control running Servers as well as server objects and resources. In this next section you see how to review the API documentation and get details of a running local integration server using this REST API.
1. Using the Integration Explorer, Start TEST_SERVER (check the arrow is green and facing upwards):
2. Open a Firefox browser window and go to the following URL: http://localhost:7600/apidocs
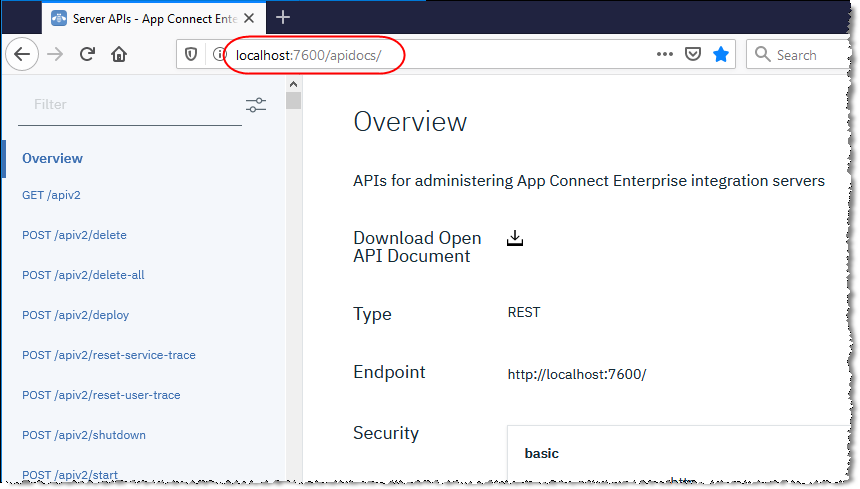
3. Note the API operations on the left of the window with details of the right.
Use the filter to show the operations relating to shutdown and select the resulting GET/apiv2 operation to show the details of the API operation:
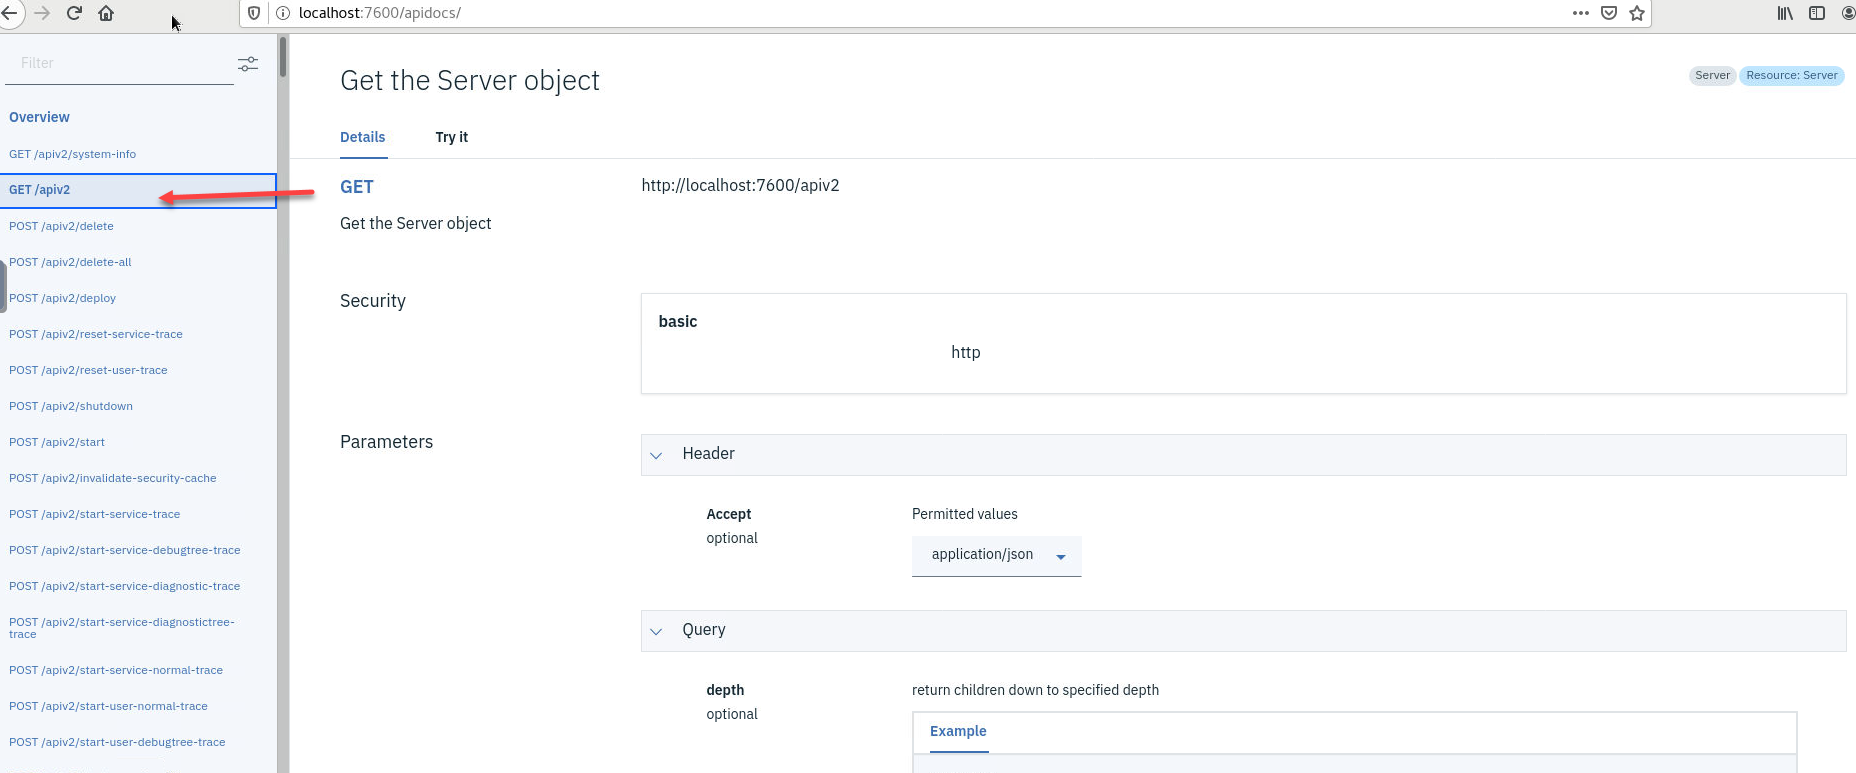
Note the Example request and Responses.
4. Click curl in the Example request to see examples of how to call the operation using different methods:
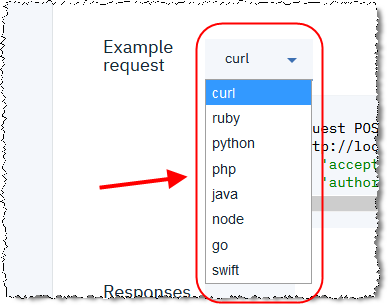
For example python:
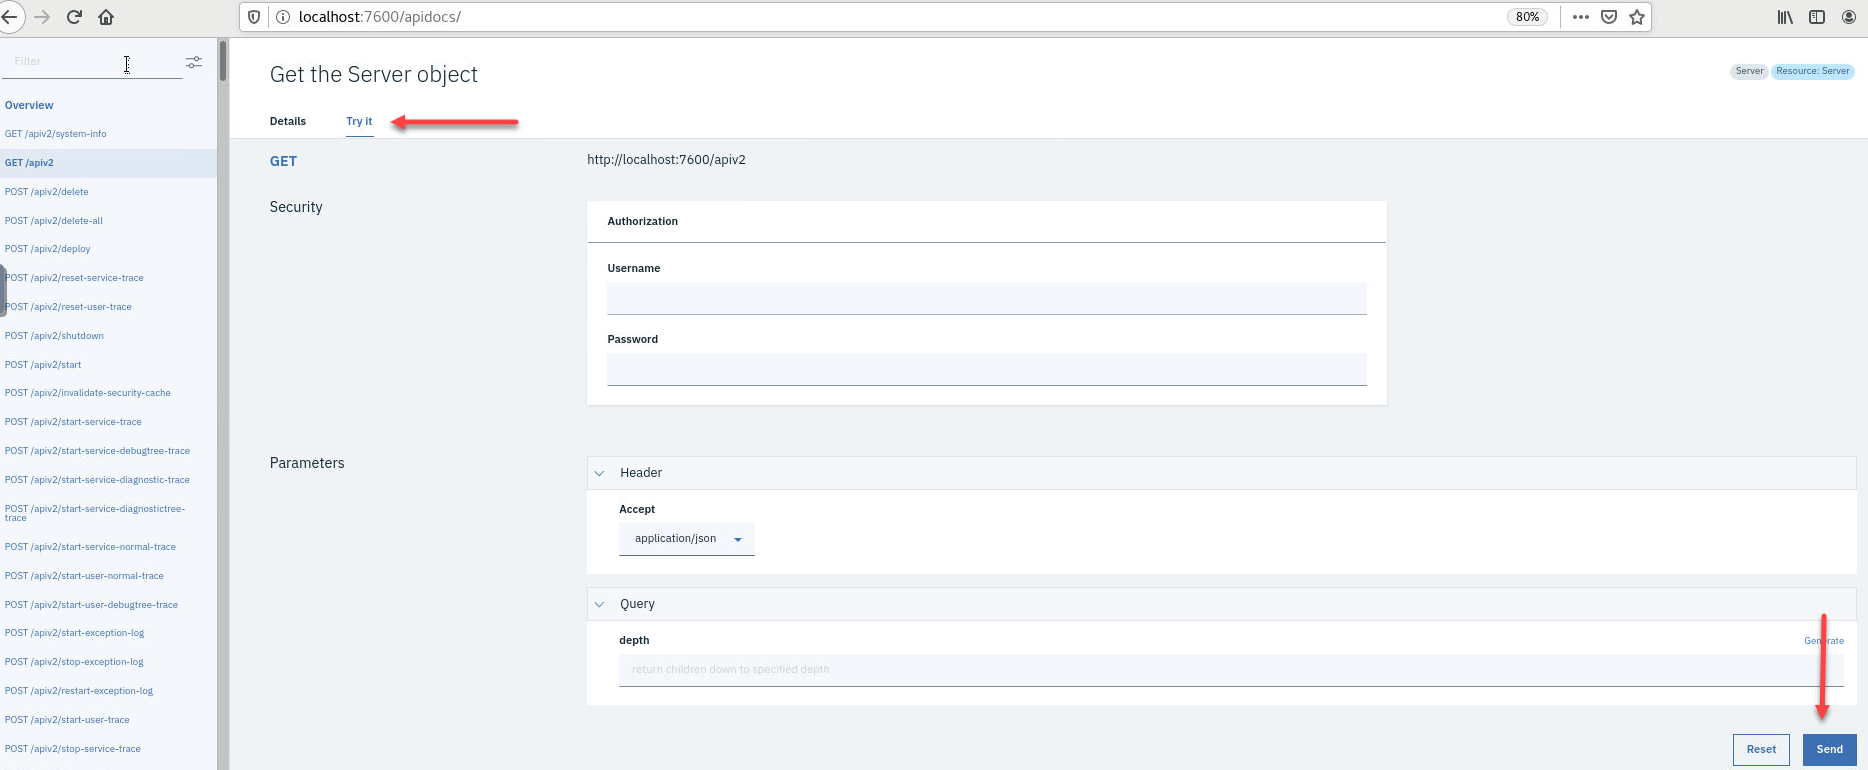
5. Click the “Try it” tab and then select the Send button (this will send the API request to the administration port on TEST_SERVER. The integration server will then shutdown:
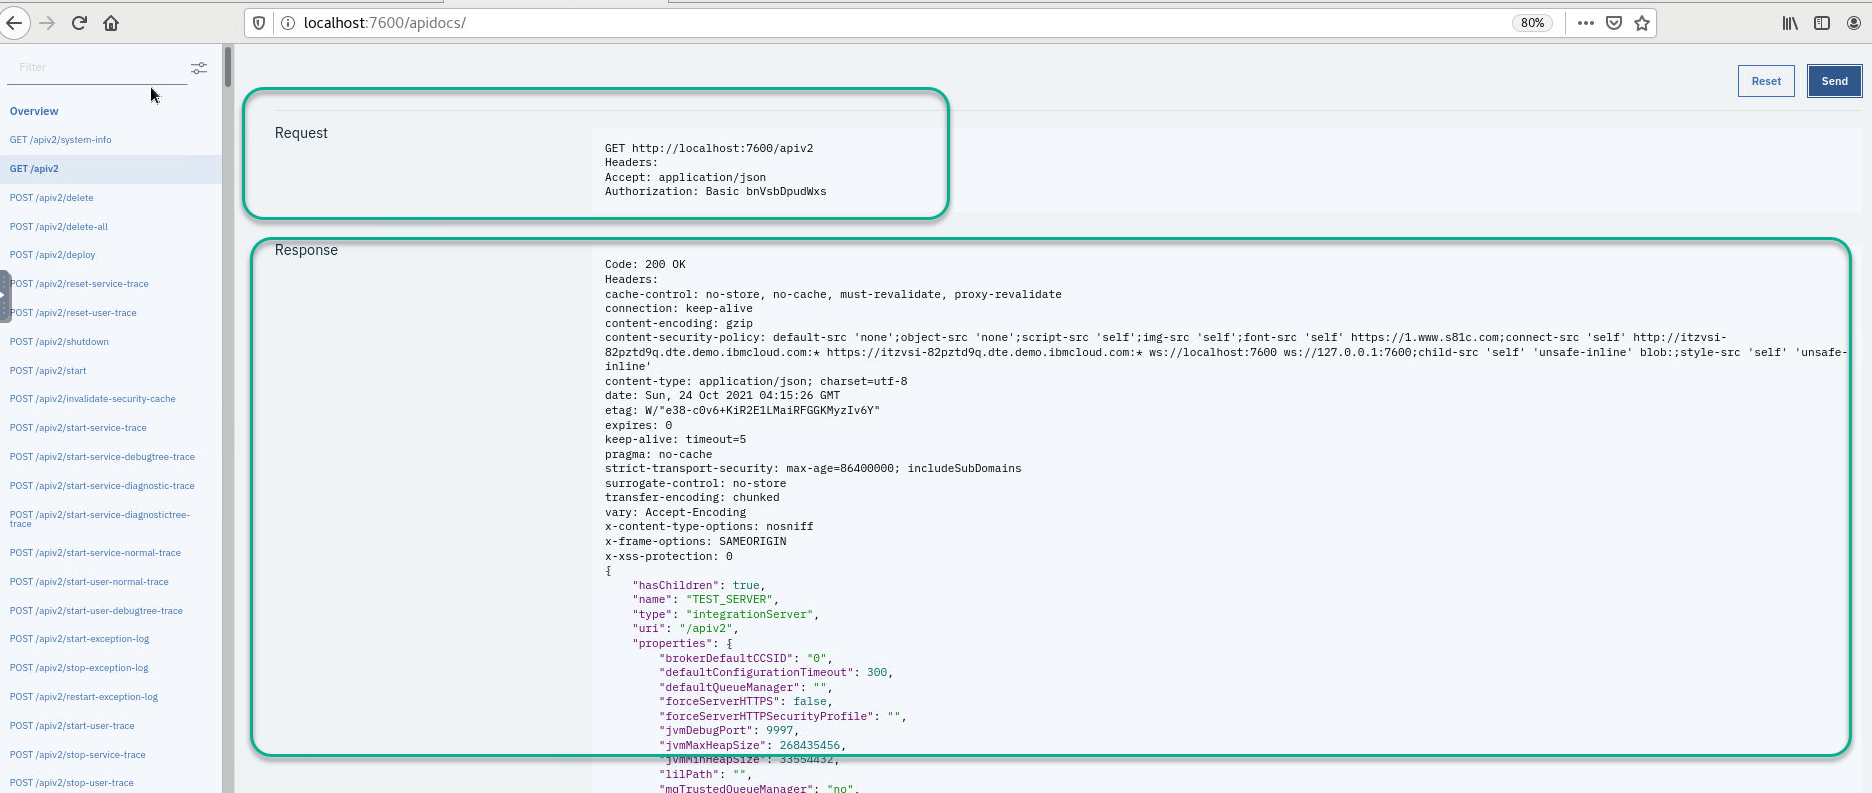
6. You will see the request that was sent followed by the server’s response at the bottom of the “Try it” web page:
In this section you have seen how to create a local integration server from within Integration Toolkit and various options to manage integration server using the administration REST API.
2.3 Putting integration servers to work!
You now have a integration servers running: TEST_SERVER running with defaults settings; You will now review a very simple application called PING_Basic and deploy it to integration servers you have running in your environment.
Now download the PING_Basic_PoT_PIF.zip Click here and save the zip file - PING_Basic_PoT_PIF.zip
2.3.1 Import PING_Basic
PING_Basic is a very simple application that you will now use to see an application running on the servers you have created. In this next section you will import the application into your workspace so that you can review what it will do.
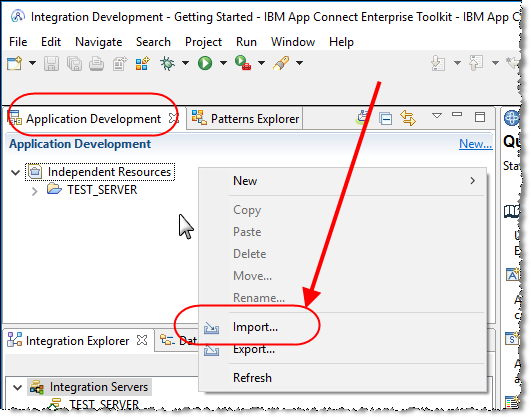
1. With your mouse right click on the background of the Application Development window and select “Import”
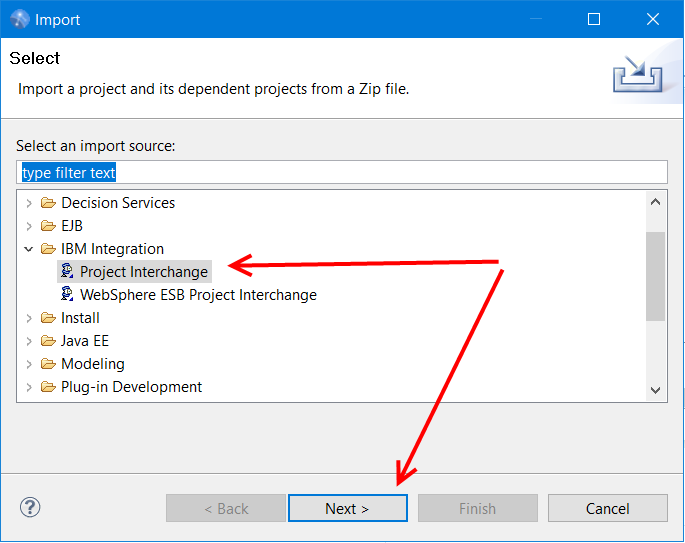
2. Select IBM Integration > Project Interchange then click the Next button:
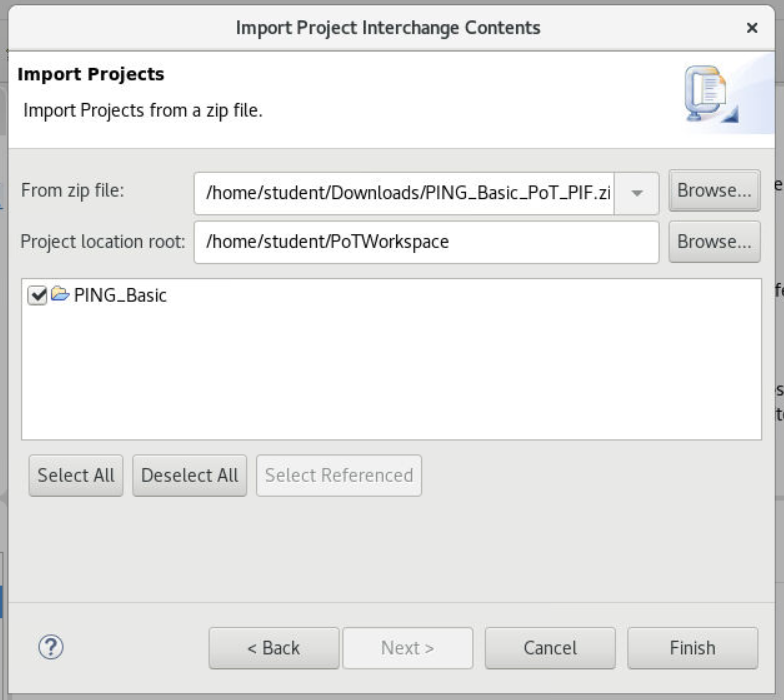
3. Use the browse button to import the file PING_Basic_PoT.zip from where you had downloaded it.
Click Finish:
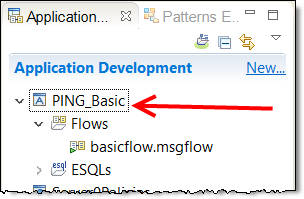
4. The PING_Basic Application will be imported into your workspace, expand the application to see the message flow:
2.3.2 Review PING_Basic
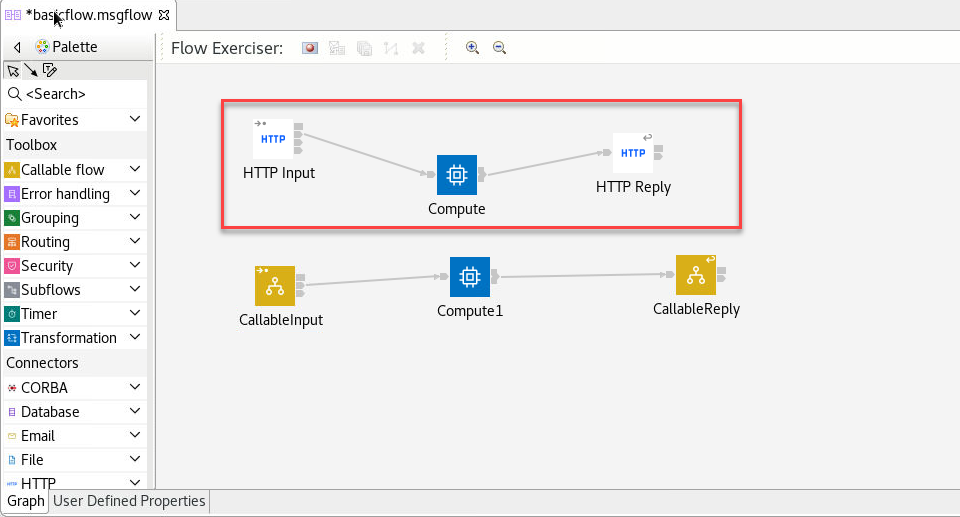
1. Double click on basicflow.msgflow, this will open the message flow in window (B). This flow has two paths. For this lab we will be focused on the HTTP Input.
2. Double click on the node called “Compute” to see the data that will be returned from the http request when the message flow is called:
The flow will return the following:
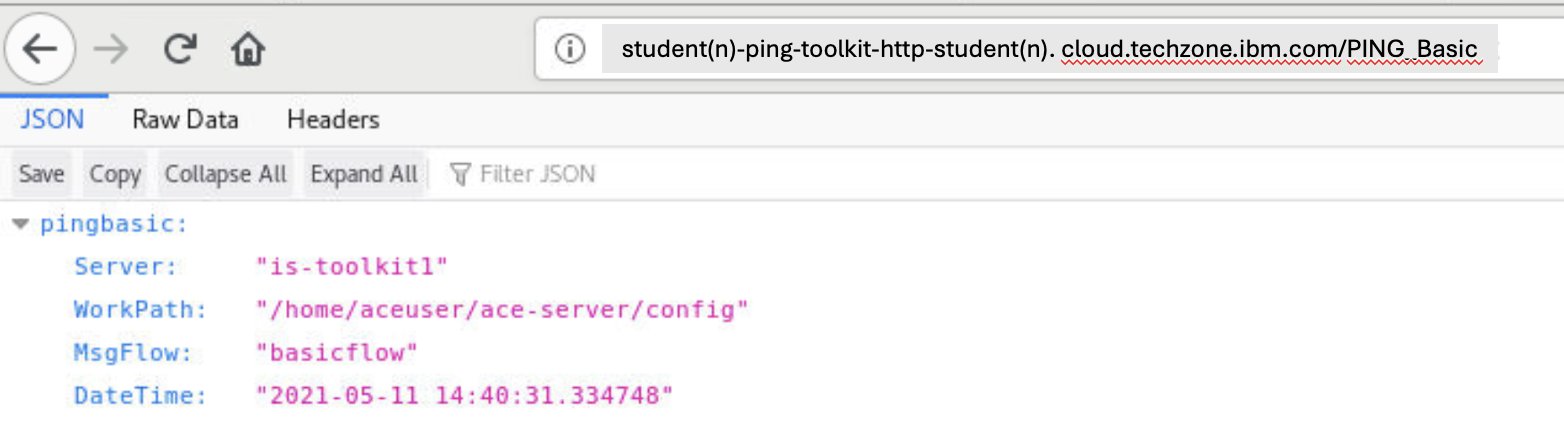
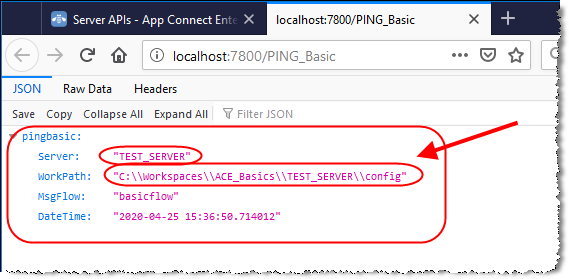
Set OutputRoot.JSON.Data.pingbasic.Server = ExecutionGroupLabel;
Set OutputRoot.JSON.Data.pingbasic.WorkPath = WorkPath;
Set OutputRoot.JSON.Data.pingbasic.MsgFlow = MessageFlowLabel;
Set OutputRoot.JSON.Data.pingbasic.DateTime = CURRENT_TIMESTAMP;
ie The server name that the flow is running on;the WorkPath of the server; the message flow name; the current time stamp;
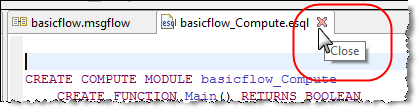
3. Close the esql editor and the message flow without making any changes:
2.3.3 Deploy PING_Basic
1. Right click on the PING_Basic application and select Deploy.
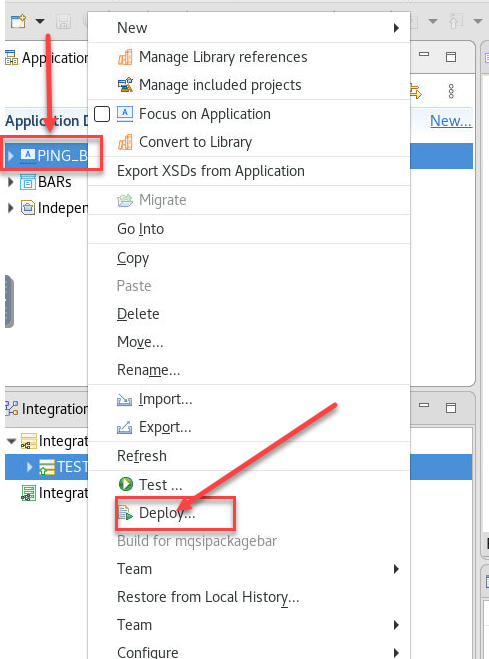
2. When prompted to choose an integration server, deploy the application to TEST_SERVER.

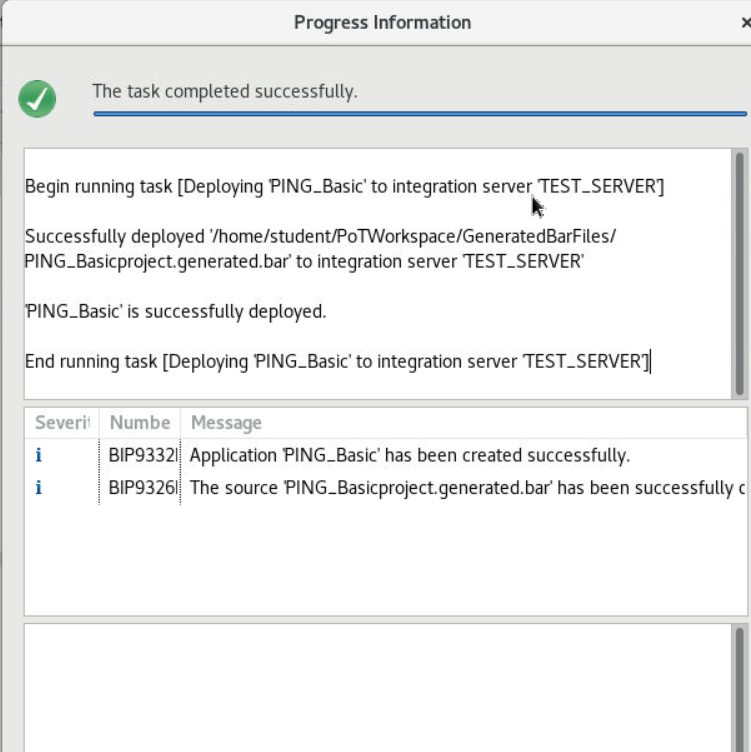
3. Review the deploy messages and dismiss the Progress information window by pressing the close button (note this new window in FP8 is very useful if you receive errors on the deploy):
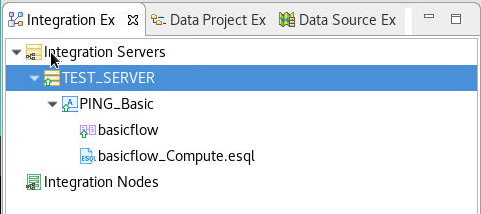
4. The PING_Basic application will appear in the TEST_SERVER :
2.3.4 Test PING_Basic
1. Open a new tab in your Firefox browser window, and go to the followin URL:
http://localhost:7800/PING_Basic
the request should return details of TEST_SERVER:
2.3.5 Build PING_Basic BAR file
Create a BAR file in order to deploy the solution to the Cloud Pak for integration server
1. In the ACE Toolkit, right click on the Application Development window and select New> BAR file. Call the BAR file PING_BasicBAR. Click Finish to create the BAR file.
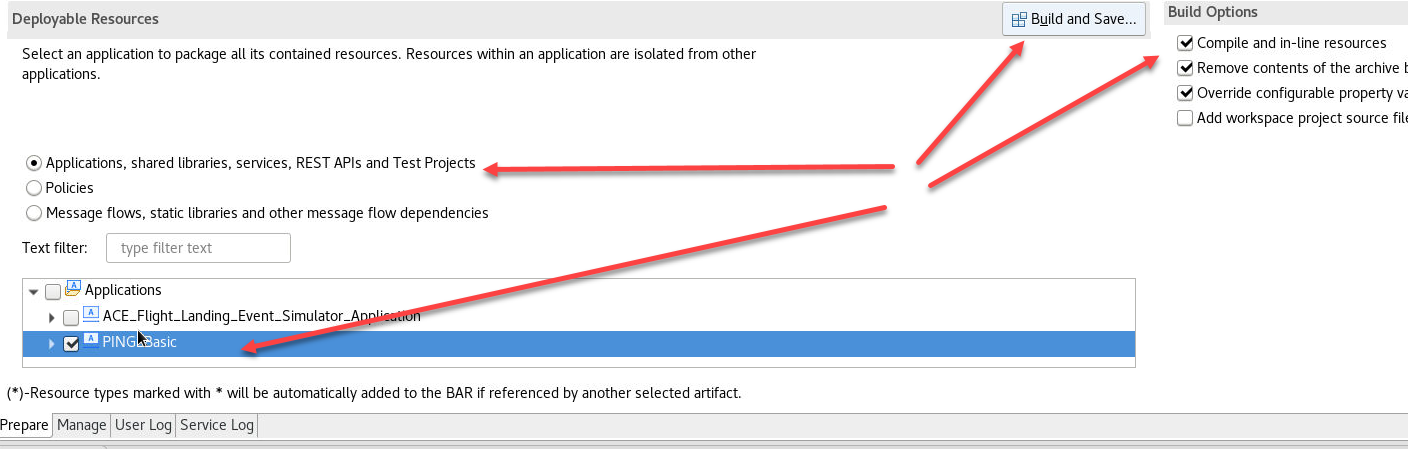
2. When the BAR file editor opens, select the PING_Basic Application, select the compile and in-line resources, then click “Build and Save”:
3. Ensure the build completes successfully and dismiss the message:
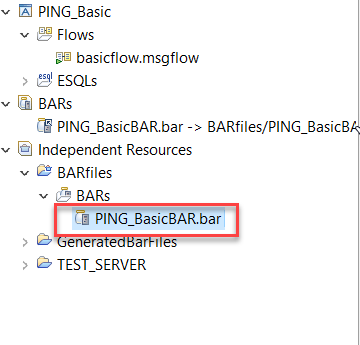
4. Save the bar file you build. We will upload this to the Cloud Pak for Integration in the next lab.
3. Deploy the BAR file to Cloud Pak for Integration
With the Toolkit you can build powerful and complex integration applications, services, and APIs quickly and easily using a visual designer. Your integration solutions can be directly deployed to the Cloud Pak for Integration on IBM Cloud Pak running on-premises, in any cloud, or combinations of both.
In this next section you will deploy the PING_Basic bar file created and tested in the toolkit in the last section to the Cloud Pak for Integration.
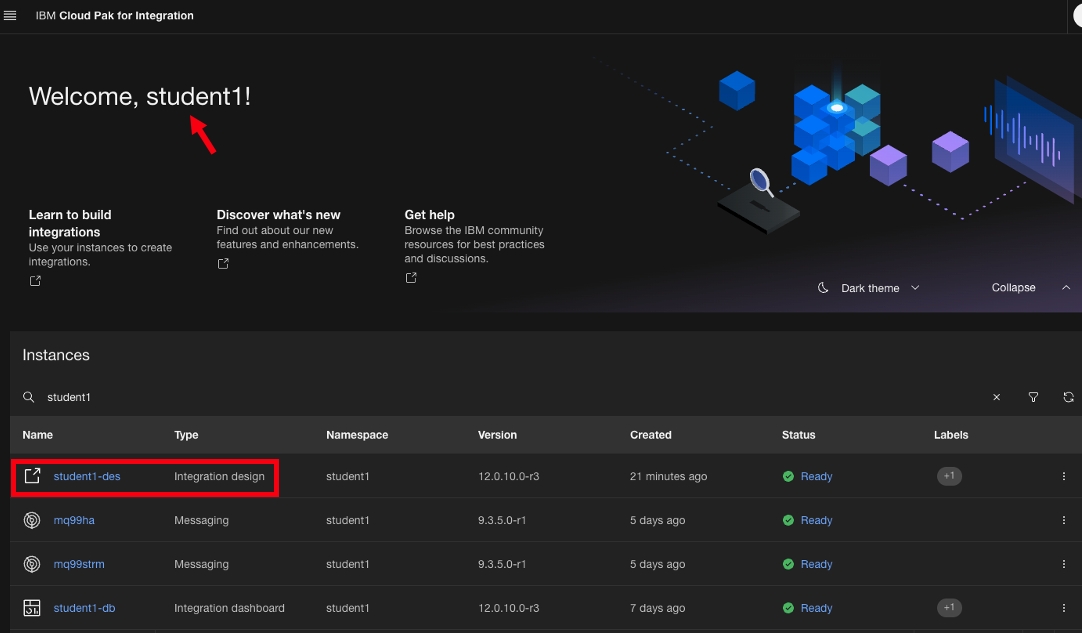
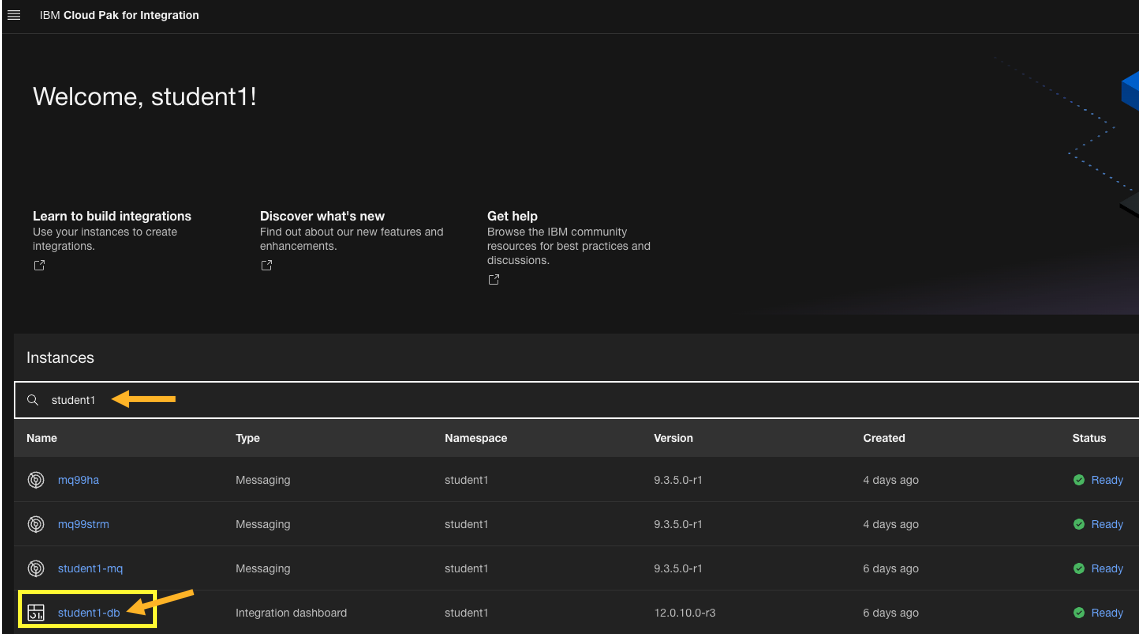
1. This is the CP4I Platform Navigator page and shows all the capabilities that are installed:
Find student(n) instances, and right click on student(n)-db Integration Dashboard.
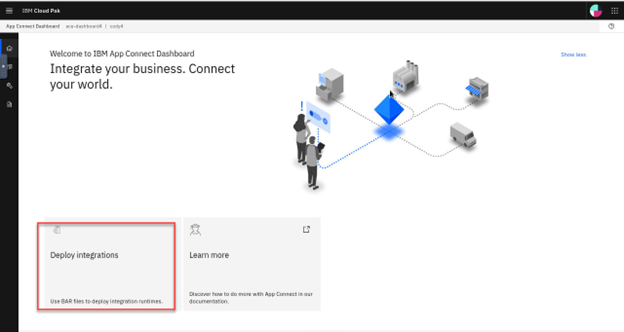
5. This will take you to the IBM App Connect Dashboard Home page. Select the Create a server tile
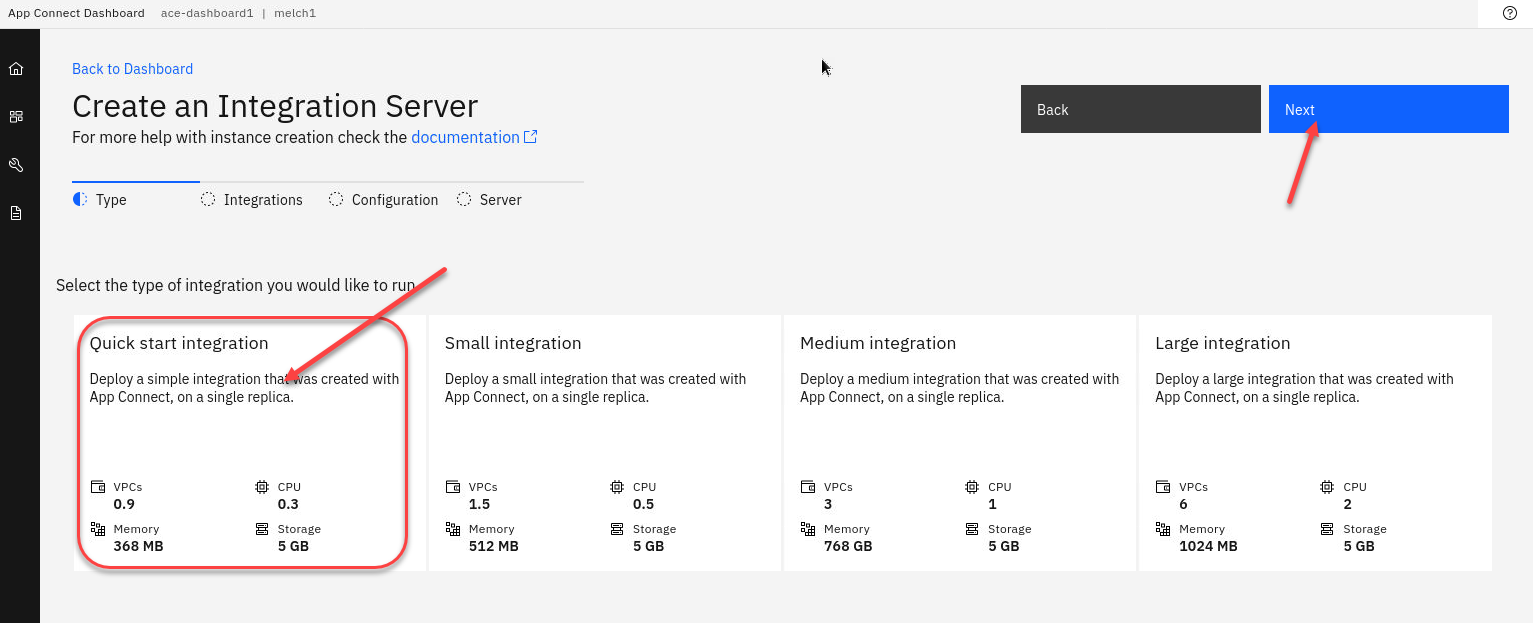
6. This will take you to the first step of creating an integration server. We will select the Toolkit integration and clidk Next: (We will cover the Designer Integration in other labs)
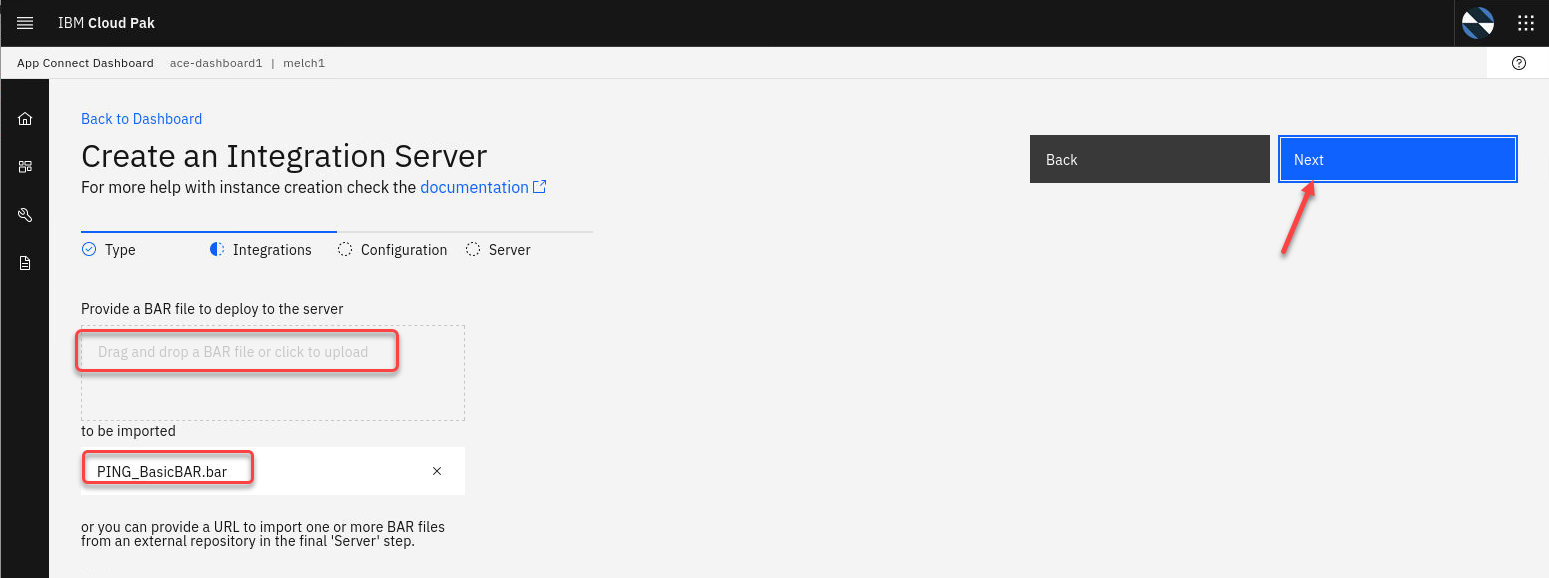
7. We will now select our BAR file either by drag and drop it or upload it. Then click next
8. The next page is for any configurations that need to be applied to the integration server. For this one just click “Next”
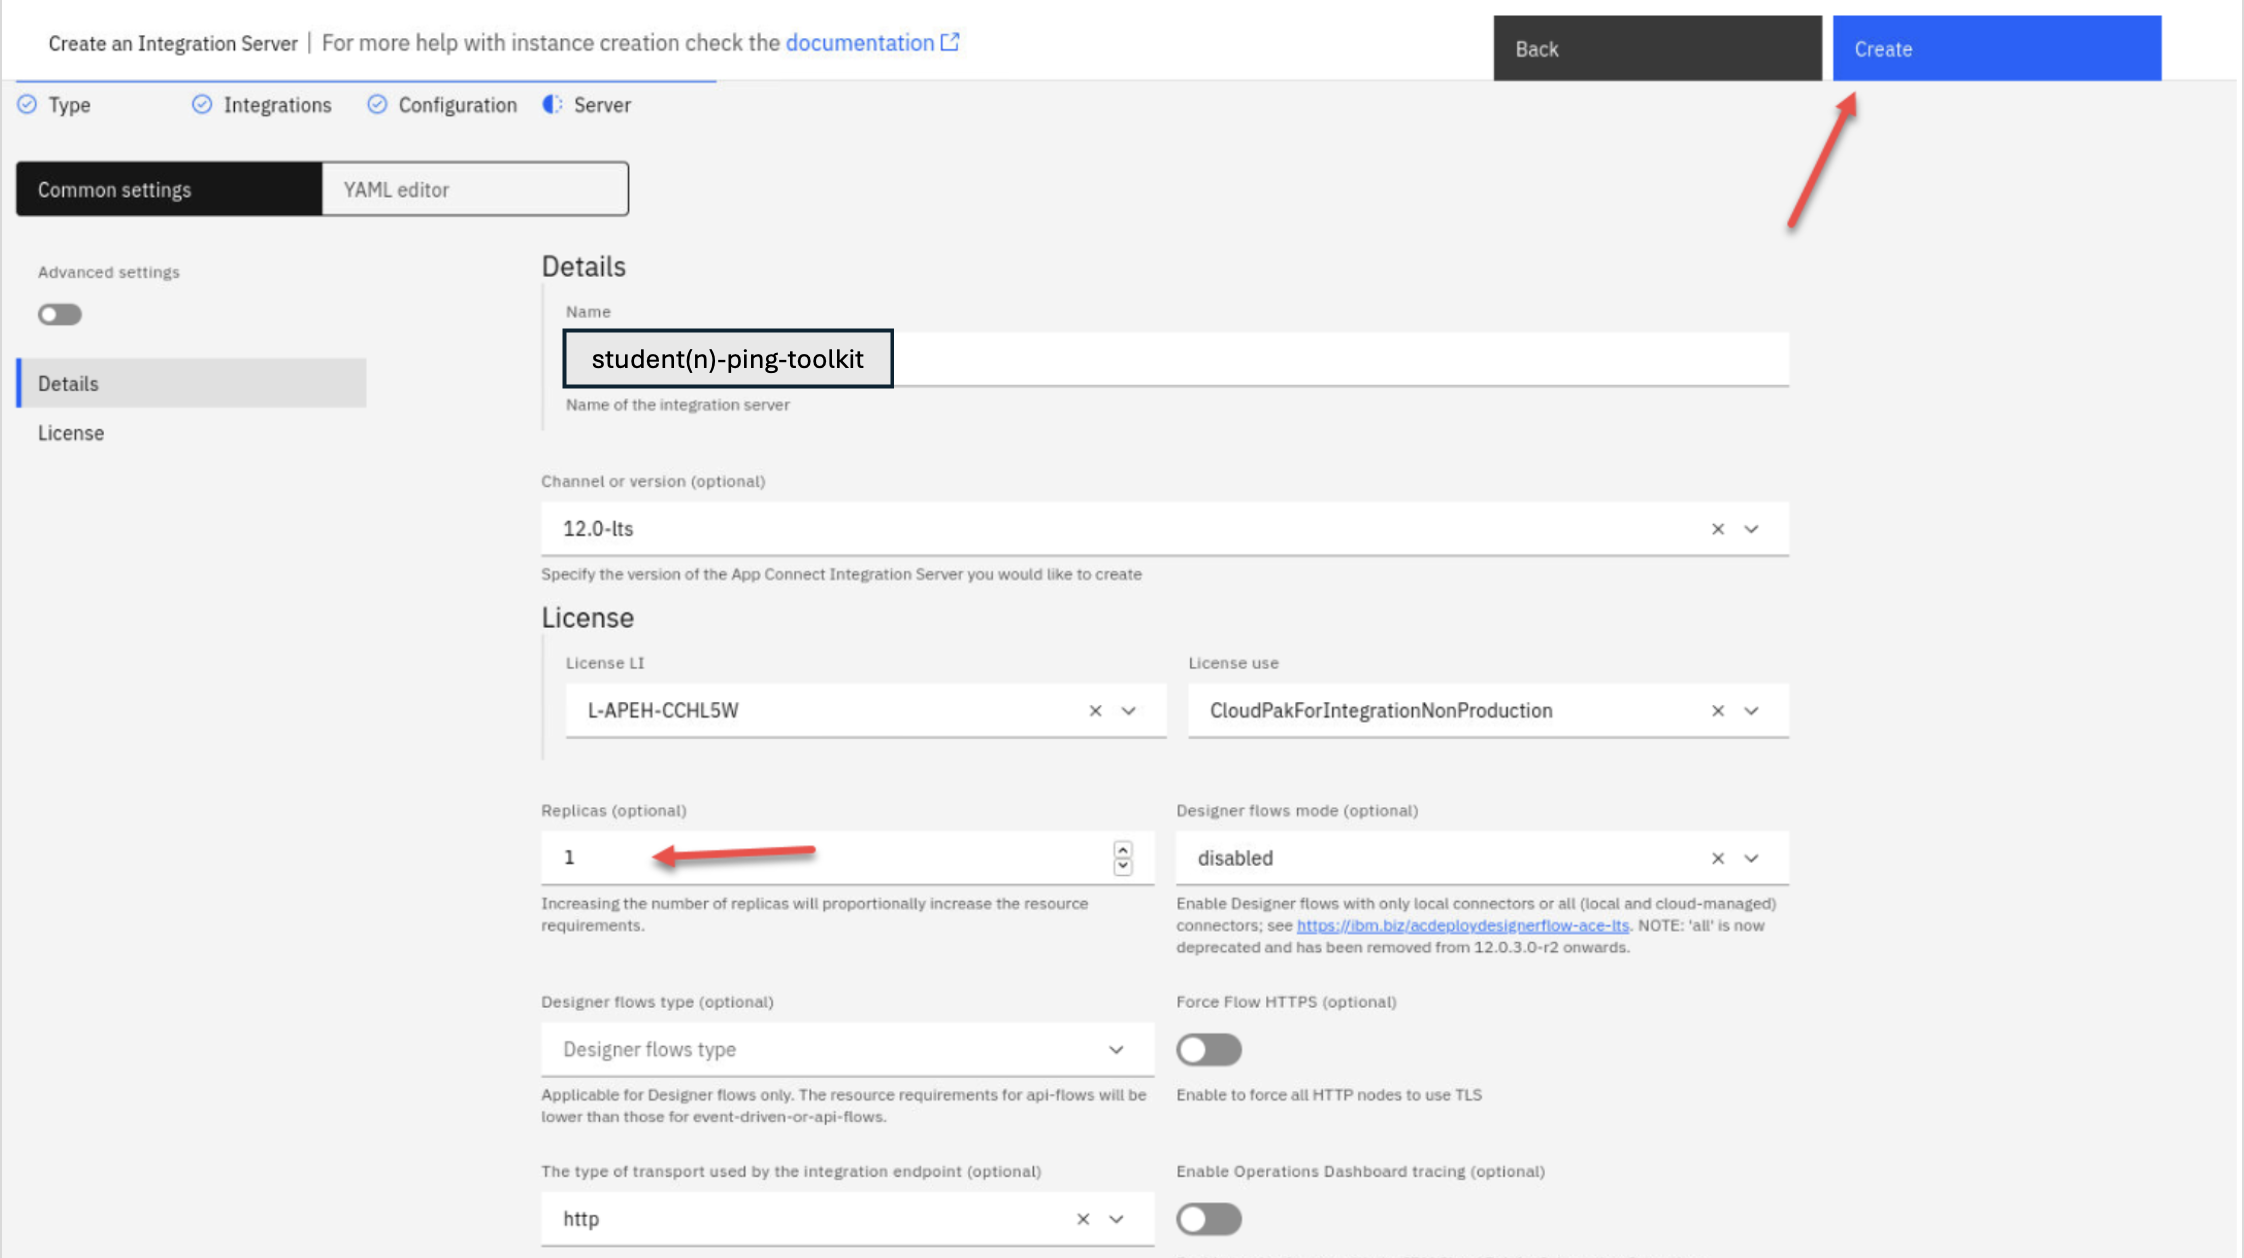
9. Now we will use the UI to set all the details for this integration server. We will set the name to is-toolkit1, Replicas to 1 and then select Create
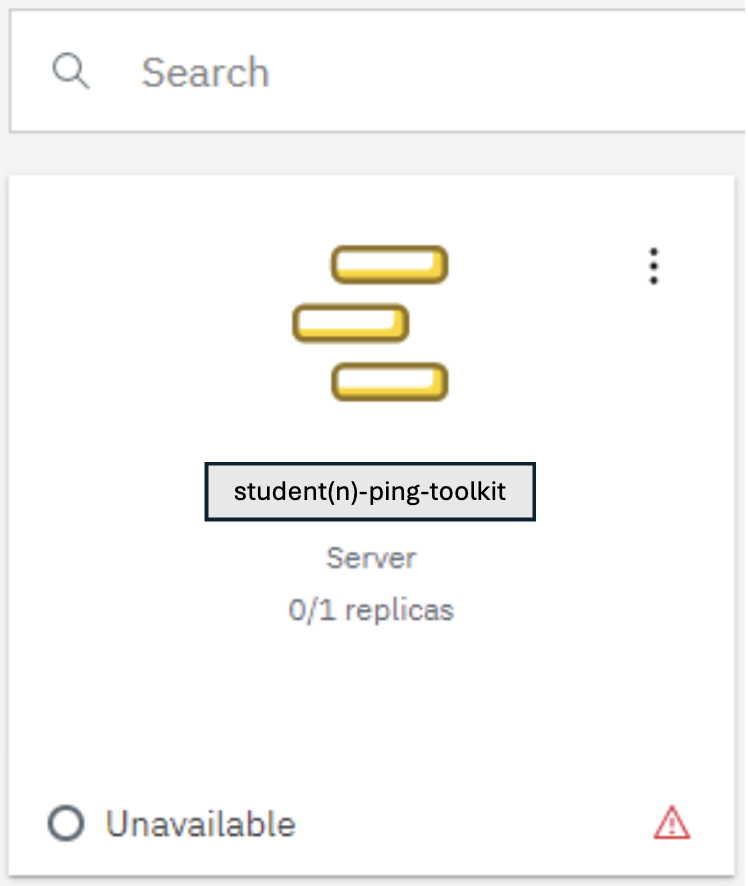
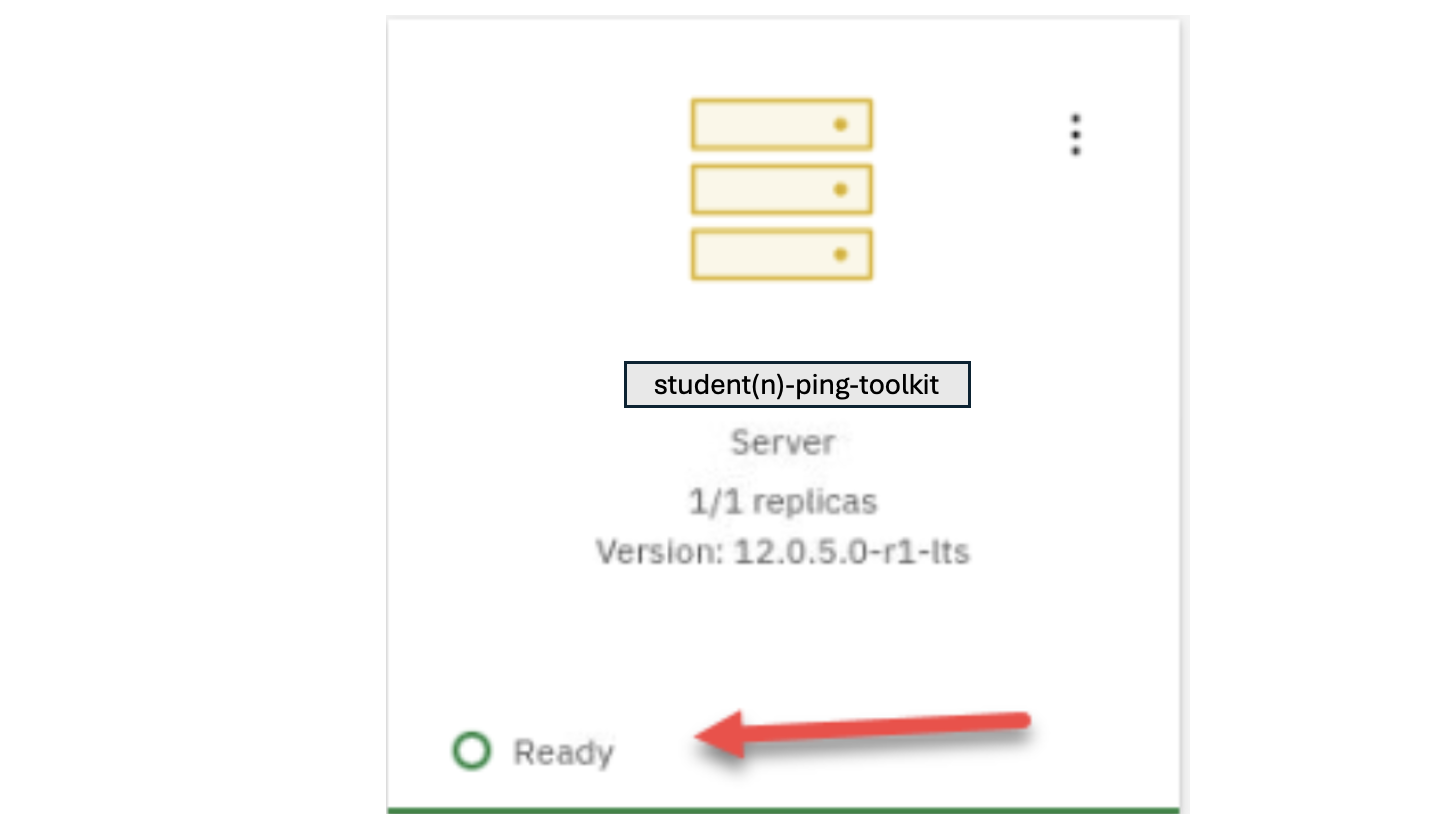
10. This will take you to the Servers page. You will see the integration server we just created and it will show Unavailable till the containers are started. After a little bit refresh the page. Once the server is up and running it will show as Started
Note: This will take a few minutes to spin up the needed containers so move on to the next section and we will login to the OCP console to get the route to our service.
3.1 Test PING Basic flow on CP4I
We will now test the PING_Base flow we just deployed to CP4I in the Integration Server. First we will need to get the route to our service from the OCP console.
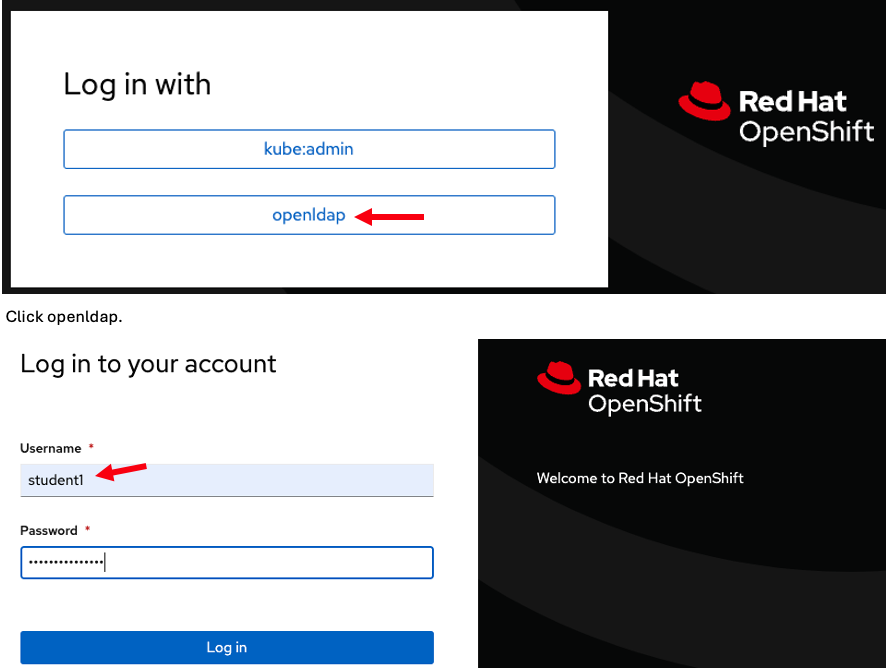
1. Open a Firefox browser window and enter the OpenShift console (OCP) URL provided to you by the instructor.
2. When prompted use the username and password provided to you for this lab. In this example we are using student(n).
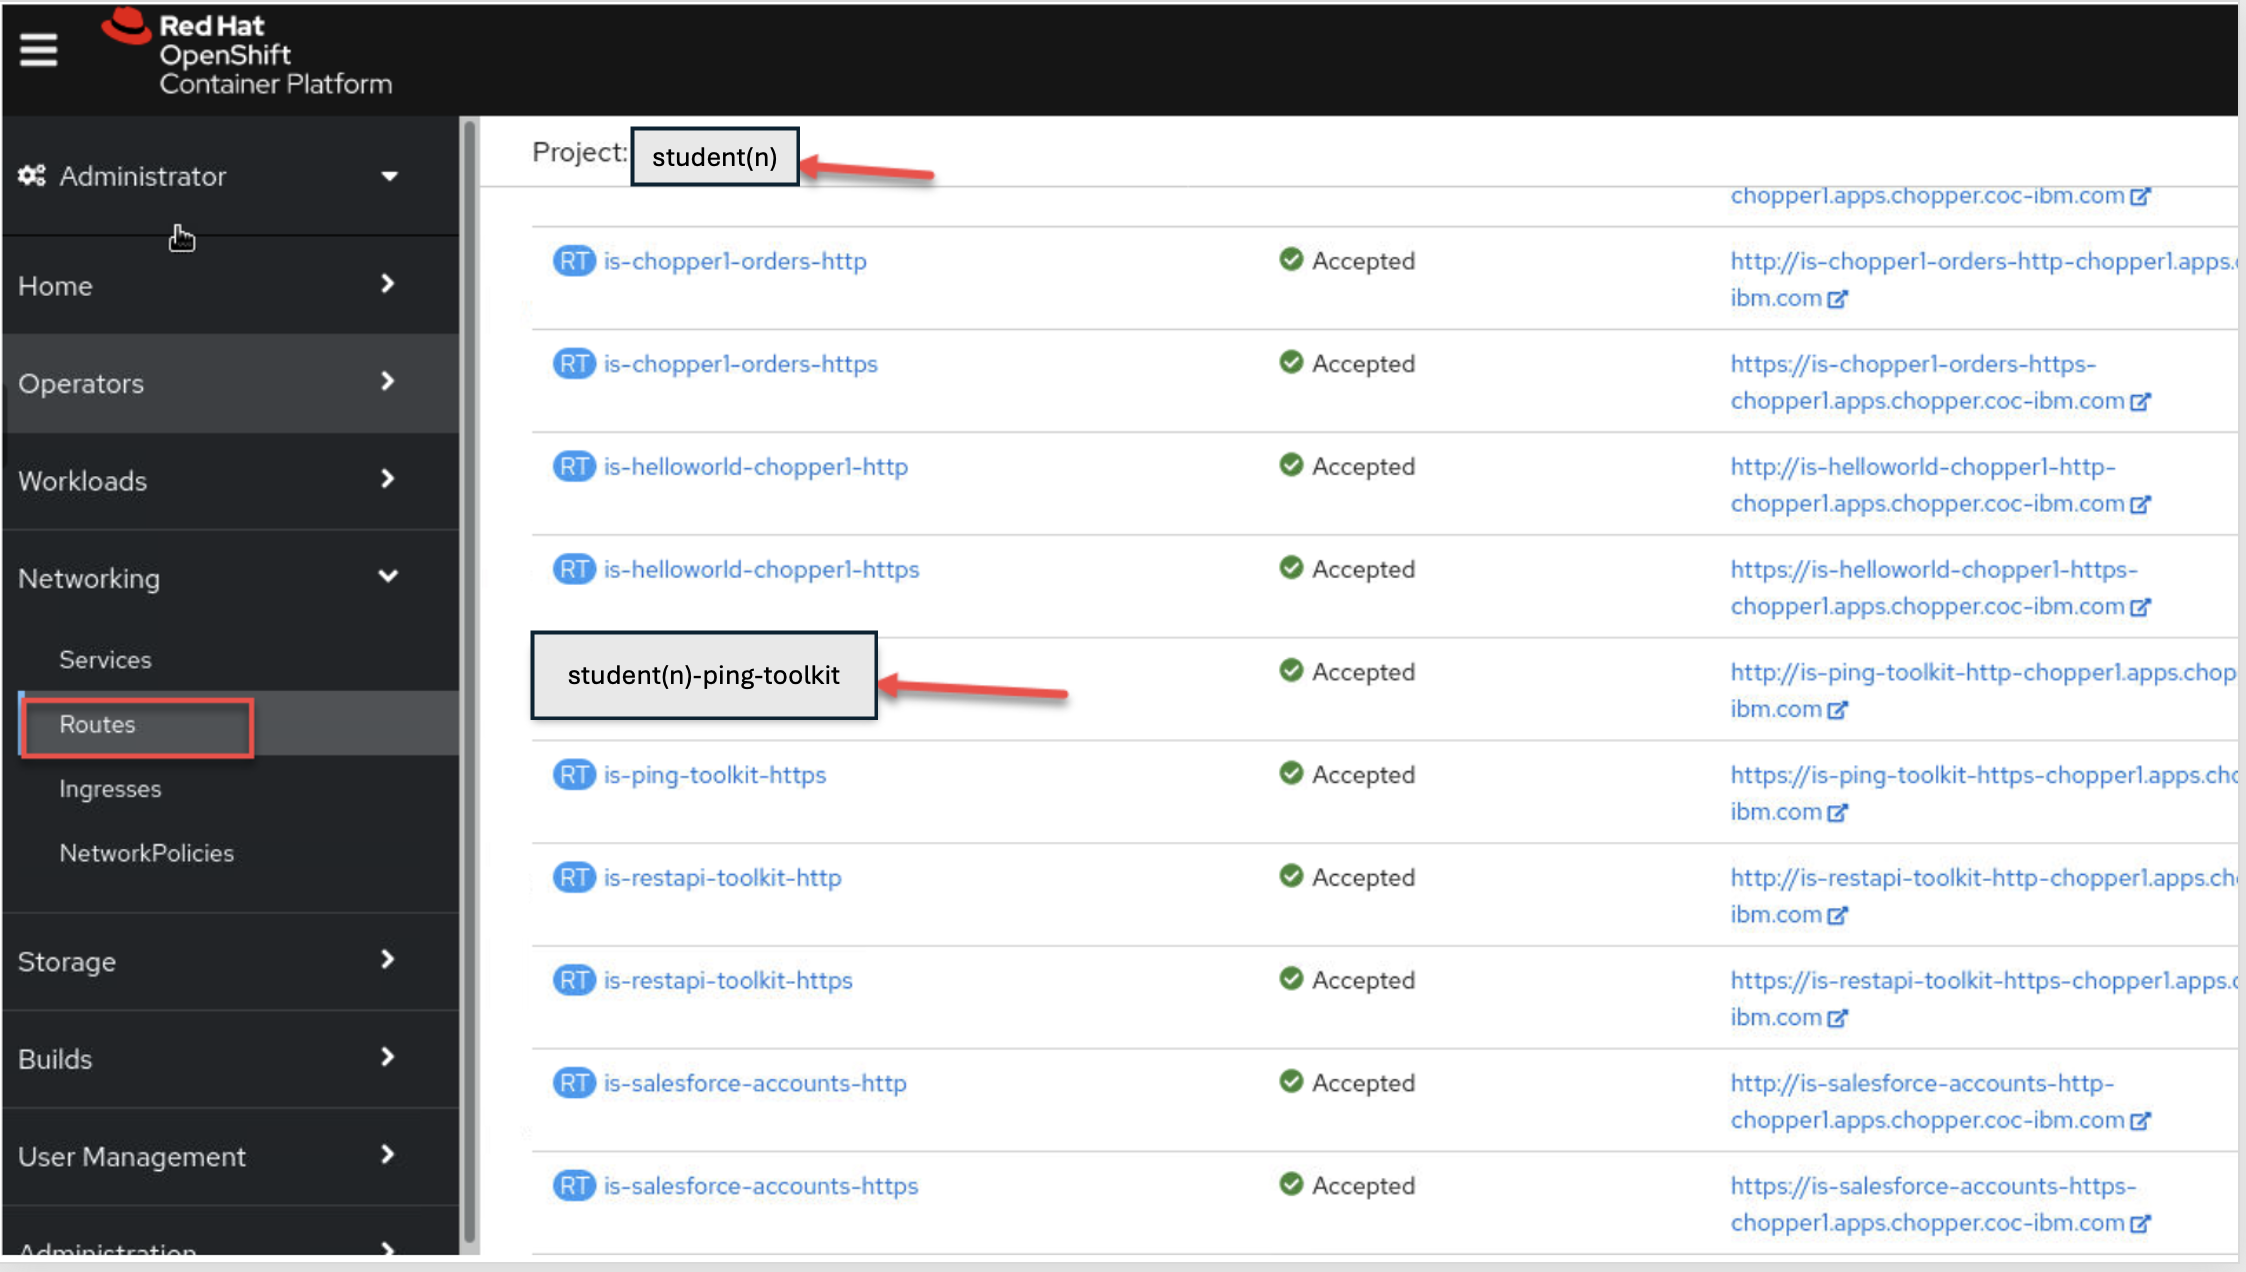
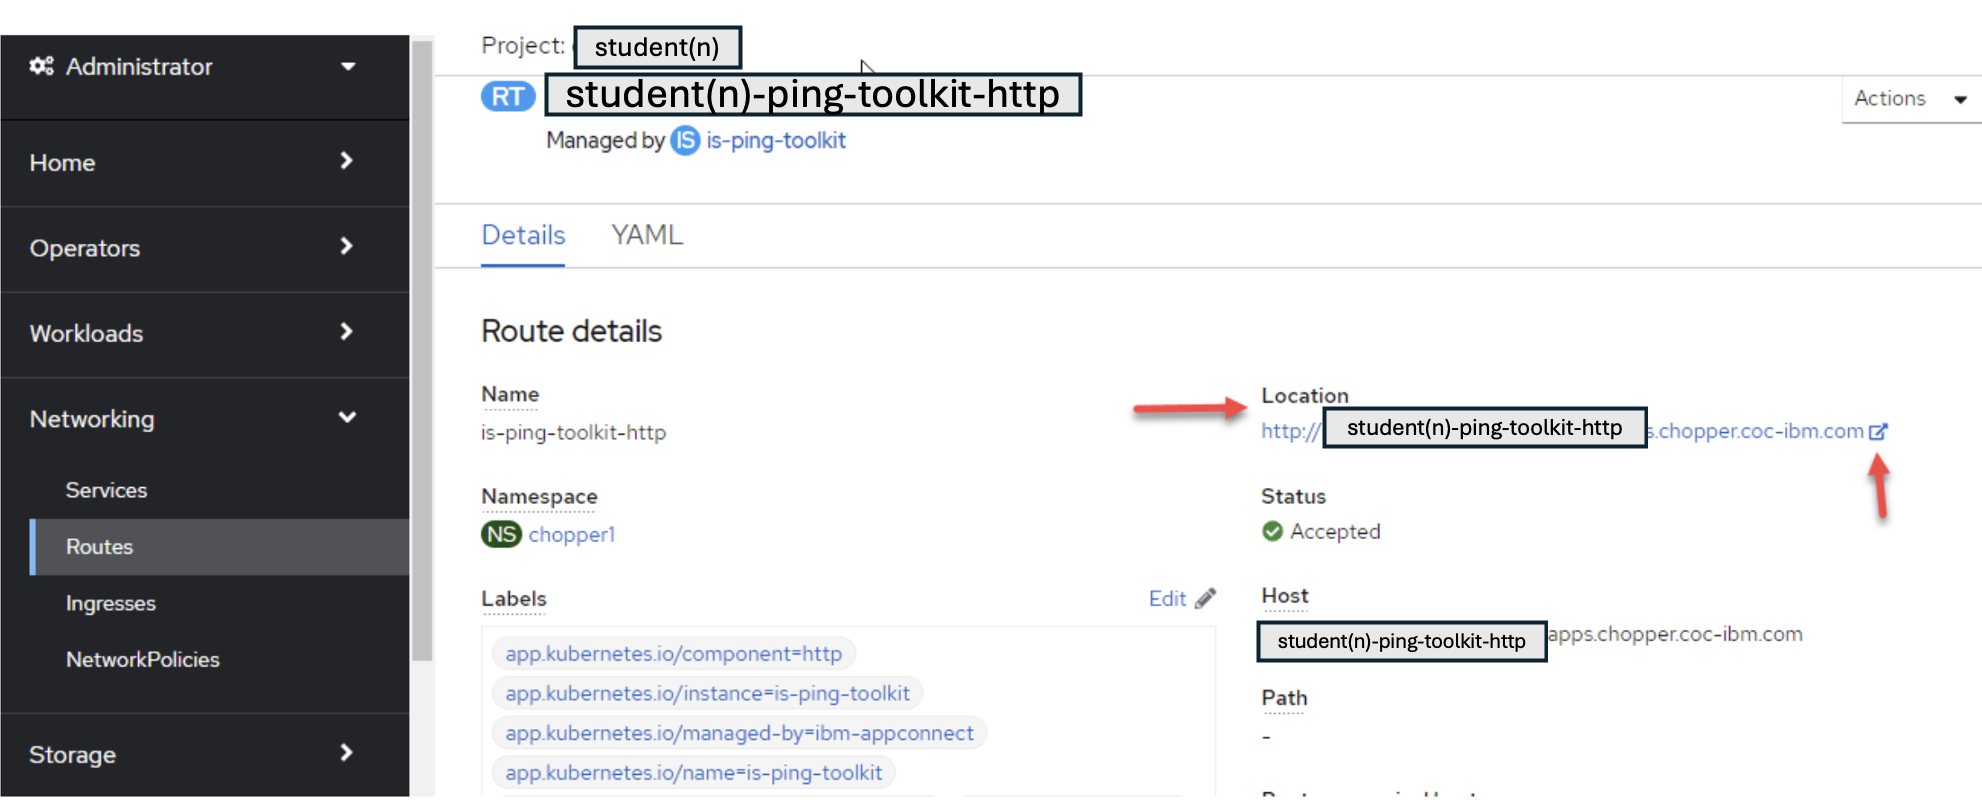
3. Now you will be in the OCP console for your userid. On the left side menu click on the Networking drop down and select routes. Make sure you userid (Project) is correct in the top. In this example it is student(n). Scroll down to find your new server you created is-toolkit-http and click on that.
4. Now once you are in the Route page you will see the Location which is what you will use to call the service. Click on the copy next to the Location address to save it.
5. You can go back to the App Connect Dashboard and check that the service is up and running.
6. Now open a new firefox browser window and enter the the route address for you for your service you saved and append PING_Basic to it and enter.
Note in the example we are using techzone OpenShift cluster.

7. You should see something simialr to the following: