IBM Integration PoT Labs Home page
IBM API Connect
API lifecycle which includes creating, running, managing, and securing APIs
Table of Contents
- 1. IBM API Connect
- 2. The Steps of the API Lifecycle Include Creating, Running, Managing, and Securing APIs
- 3. Configure API
- 4. Test API
- 5. Publishing
- 6. Developer Portal
1. IBM API Connect
IBM API Connect is an integrated API management offering, where all of the steps in the API lifecycle, and the actions that surround it, are performed within the offering.
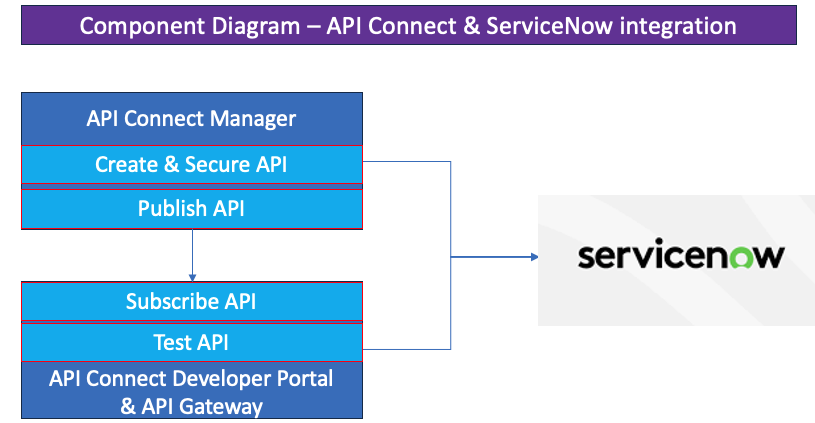
2. The Steps of the API Lifecycle Include Creating, Running, Managing, and Securing APIs
- Create, develop, and write the API definition and implementation, and test the API.
- Run, package, and deploy the API. Ensure that the API is hosted securely on a stable platform.
- Create and manage self-service portals that expose the API to API consumers. Monitor the set of rules and conditions that govern the API to ensure it is fulfilling its intended purpose, and make adjustments if necessary. Retire and archive the API when appropriate.
- Secure, incorporate access control, monitoring, and logging to properly secure the API.
2.1 Let’s Start
First make sure you are logged into the CP4I Platform Navigator using the account the instructor provided to you. If you are already logged in, you can skip these steps.
4. Click on the API Connect link to take you to the API Manager Home page.
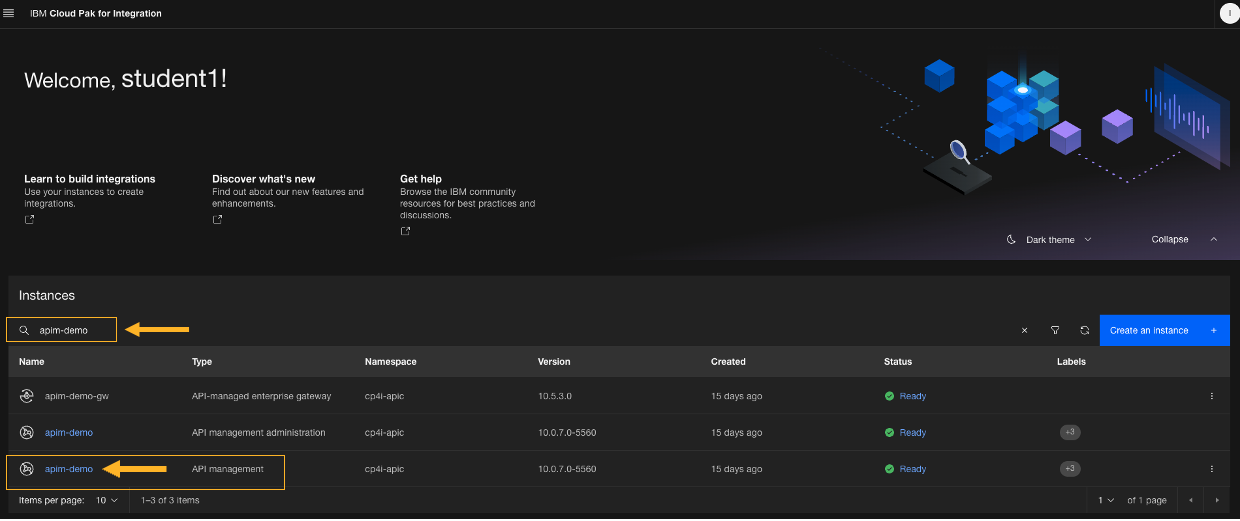
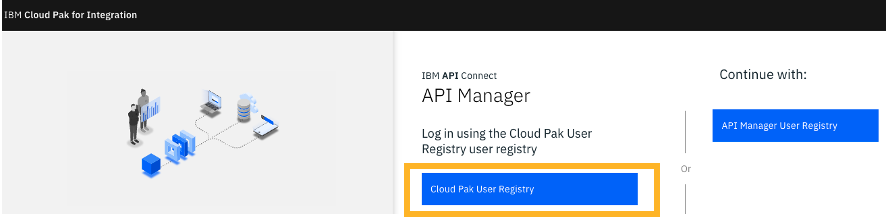
5. You will now be on the APIC log in page. Select the Common Services User Registry This will log you into the Provider Org you will be using.
6. Once you are on the main page make sure you are in the correct POrg. It should contain your userid.

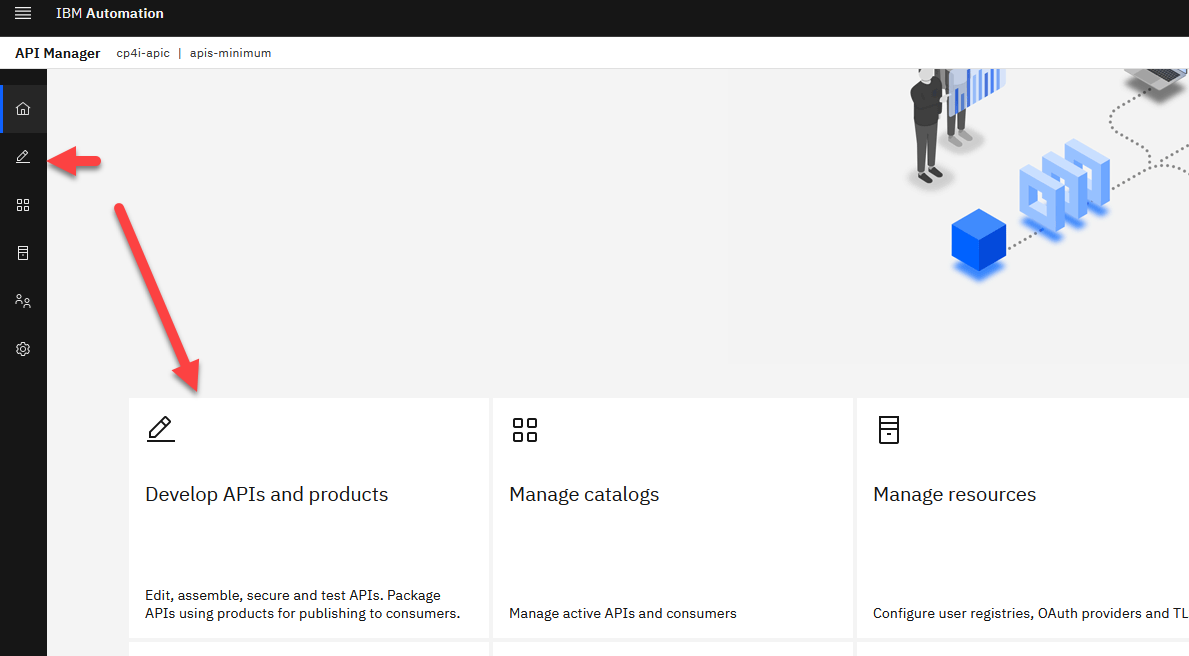
7. When logged in and connected to the APIC Home Dashboard, you will see a few tiles and a tab on the left-hand side of the page. You can use the left-hand menu or the Develop APIs and Products tile.
2.2 Import API
There are a few ways to pull existing API flows or manually expose an API on this page. Whether it’s starting from scratch or pulling from an asset from a connected asset repo they all achieve the same thing.
For this Lab, we will use the Open API Document (ServiceNowRetrieve-0.0.1.yaml) we downloaded from our ACE integration server earlier in order to import the API.
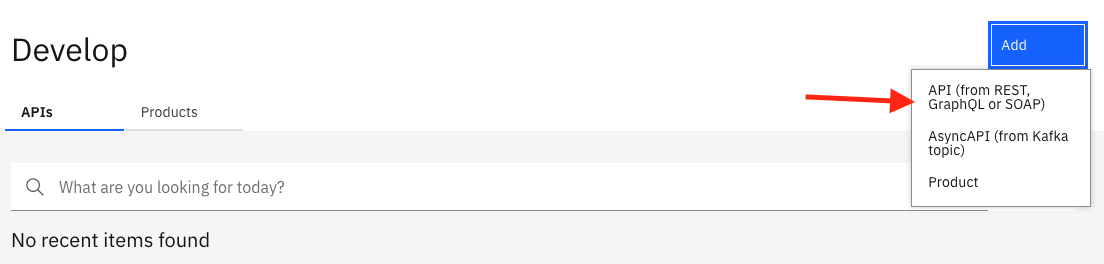
1. For now, we will click Add and select API from the dropdown.
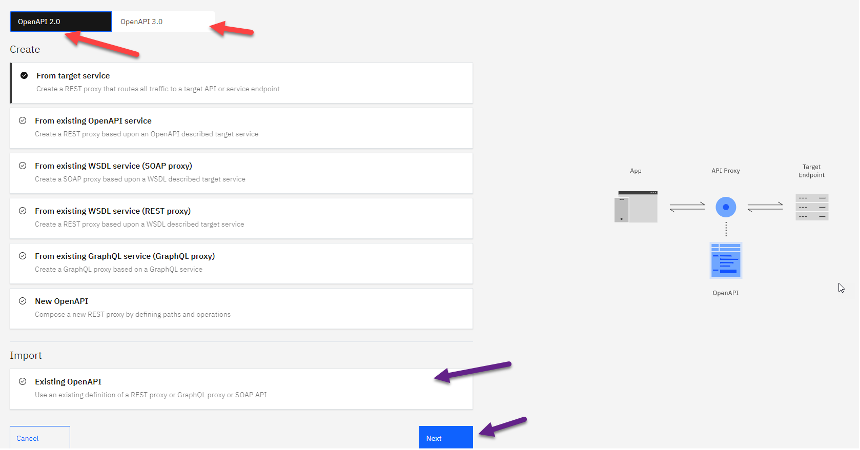
2. On the create page, you will be greeted with choices of how you would like to add an API. And on the top you will see option for OpenAPI 2.0 or Open API 3.0. For this lab, we will use the OpenAPI 2.0. Go ahead and click Import from existing API Import and click Next.
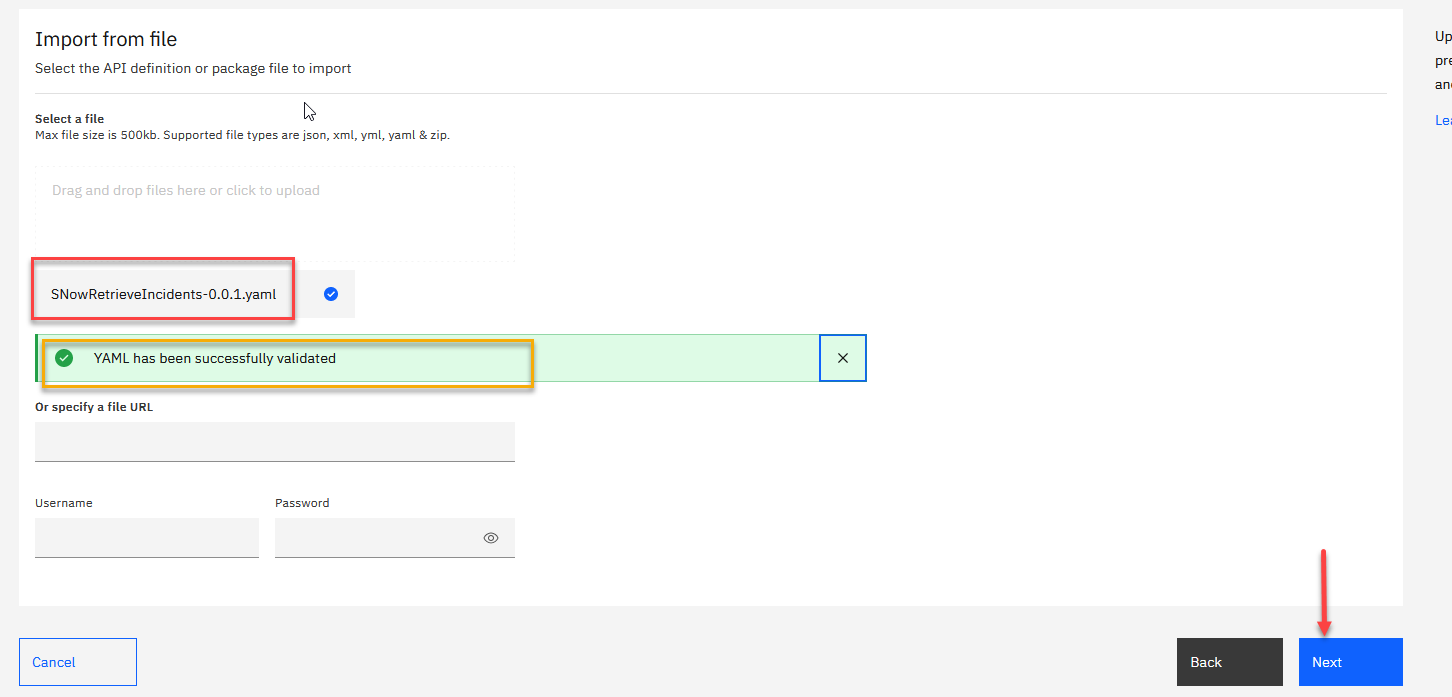
3. On the Import API page, either drag and drop the yaml file from the ServiceNow Designer lab or click to upload it. Click Next.
4. The next screen will ask if you want to activate the API. This will automatically create and expose your API. However for this lab, we will NOT check that box and click Next.
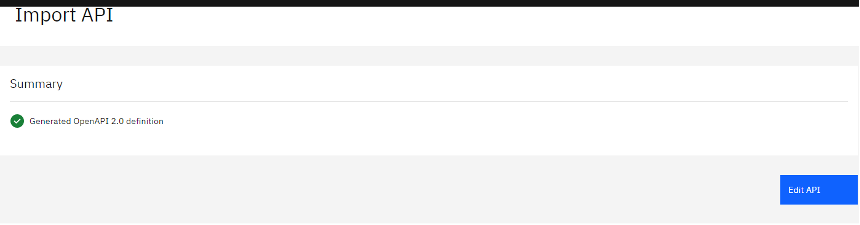
5. You will see the following summary page that shows the definition was successful generated. Click on Edit API. This will take you to the designer page and will populate the fields inside APIC with what was able to be pulled from the document we imported.
3. Configure API
After importing the existing API, the first step is to configure basic security before exposing it to other developers. By creating a client key and secret security, you are able to identify the app using the services. Next, we will define the backend endpoints where the API is actually running. API Connect supports pointing to multiple backend endpoints to match your multiple build stage environments. Finally, we will configure the proxy call to invoke the endpoint.
3.1 Configure API Key Security
The API Designer is a graphical user interface within the developer toolkit and provides functions for the creation and configuration of API definitions, running offline.
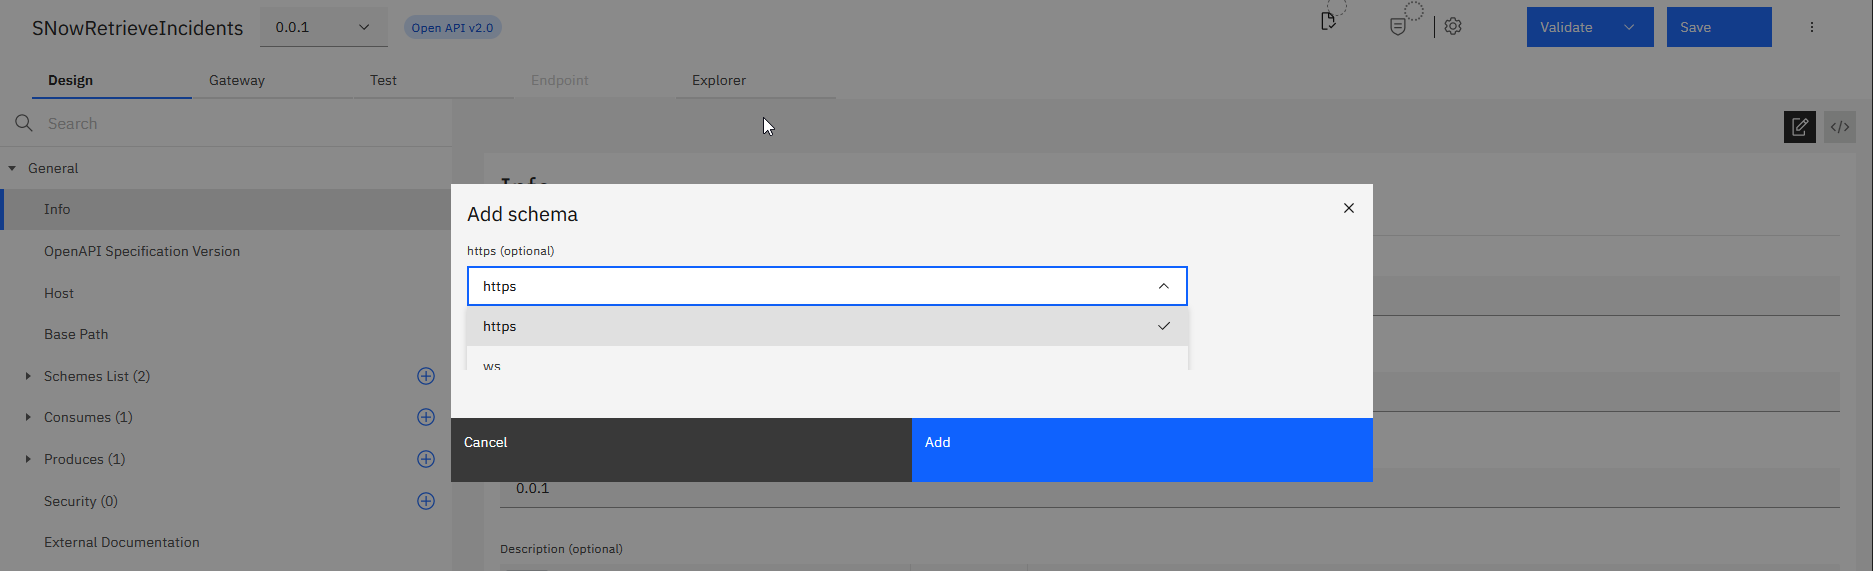
1. On the Design page, you will notice the small red dot indicating an error. This is related to not having https in our schemes. Click on the + next to the Schemes List.

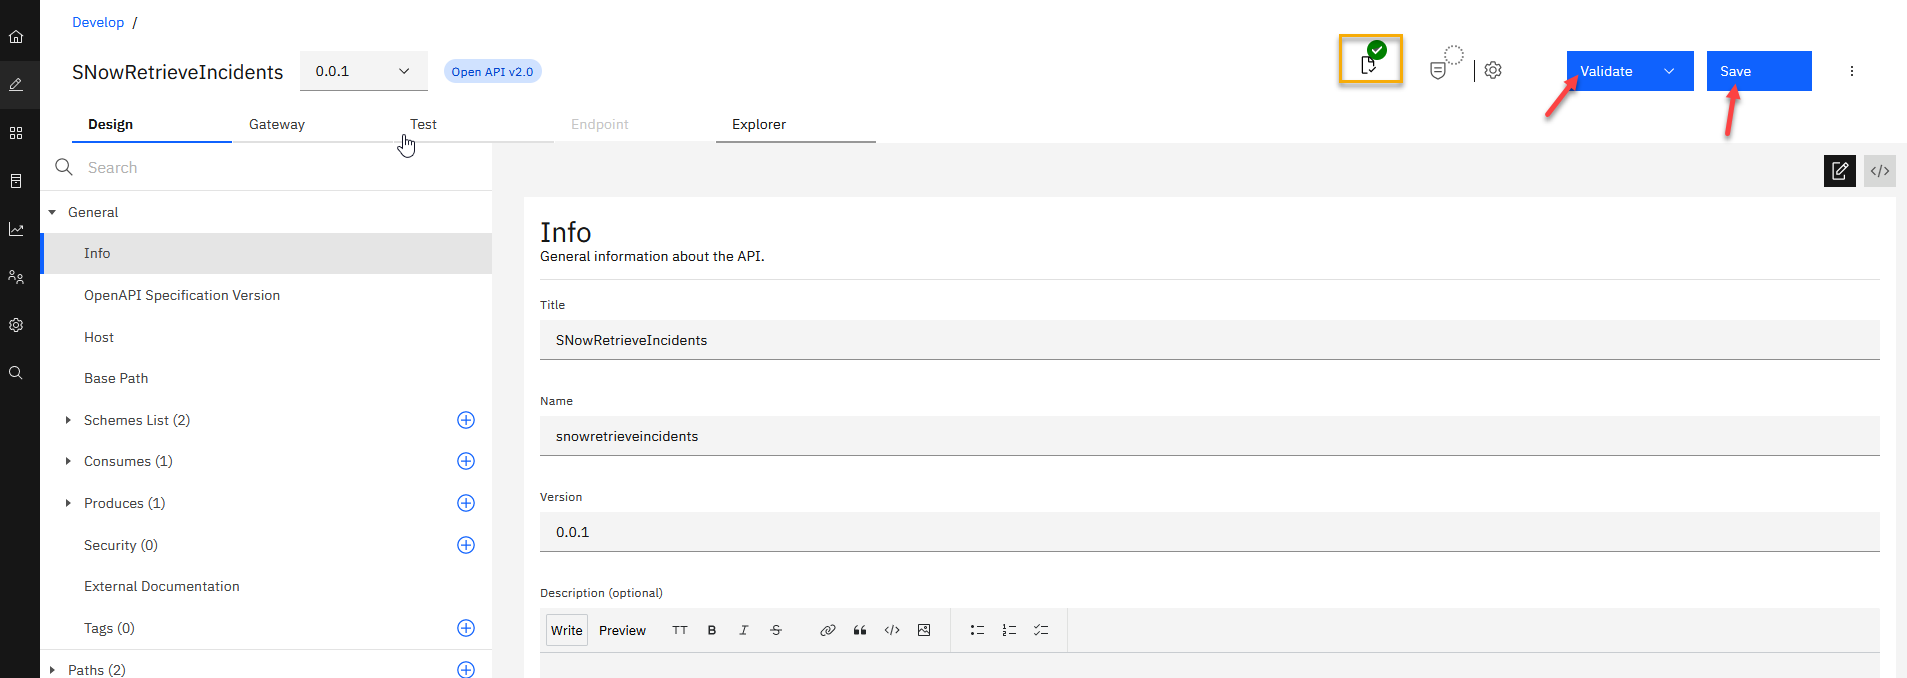
2. Add the https and then click Save. You will now be showing Schemes List(2)
Note Whenever you do a Save the following pop-up will show up. Go ahead and click the x to close it.
3.2 Security Definition
After importing the existing API, the first step is to configure basic security before exposing it to other developers. By creating a client key and secret security, you are able to identify the app using the services. Next, we will define the backend endpoints where the API is actually running. API Connect supports pointing to multiple backend endpoints to match your multiple build stage environments. Finally, we will configure the proxy call to invoke the endpoint.
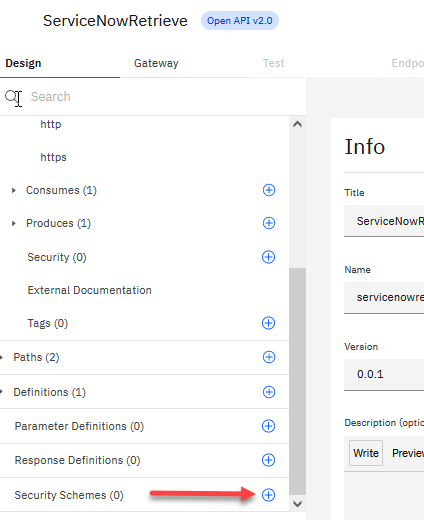
1. We will now secure the API. On the left-hand side, let’s click on Security Schemes.
Click on the + and we will start adding the Client ID.
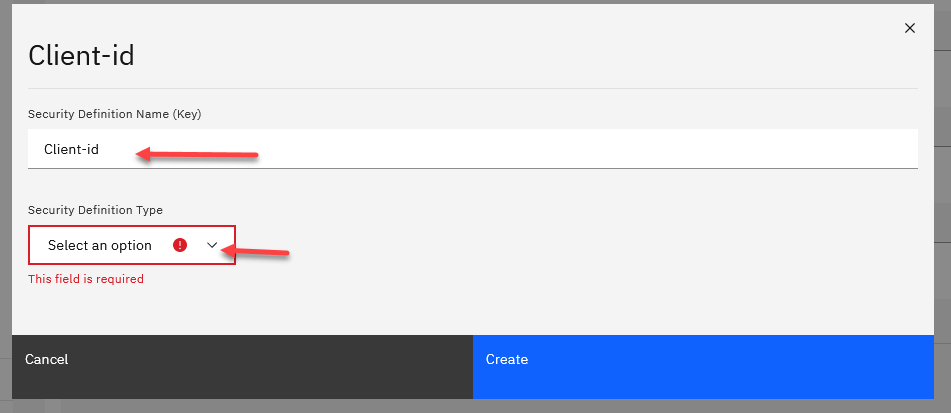
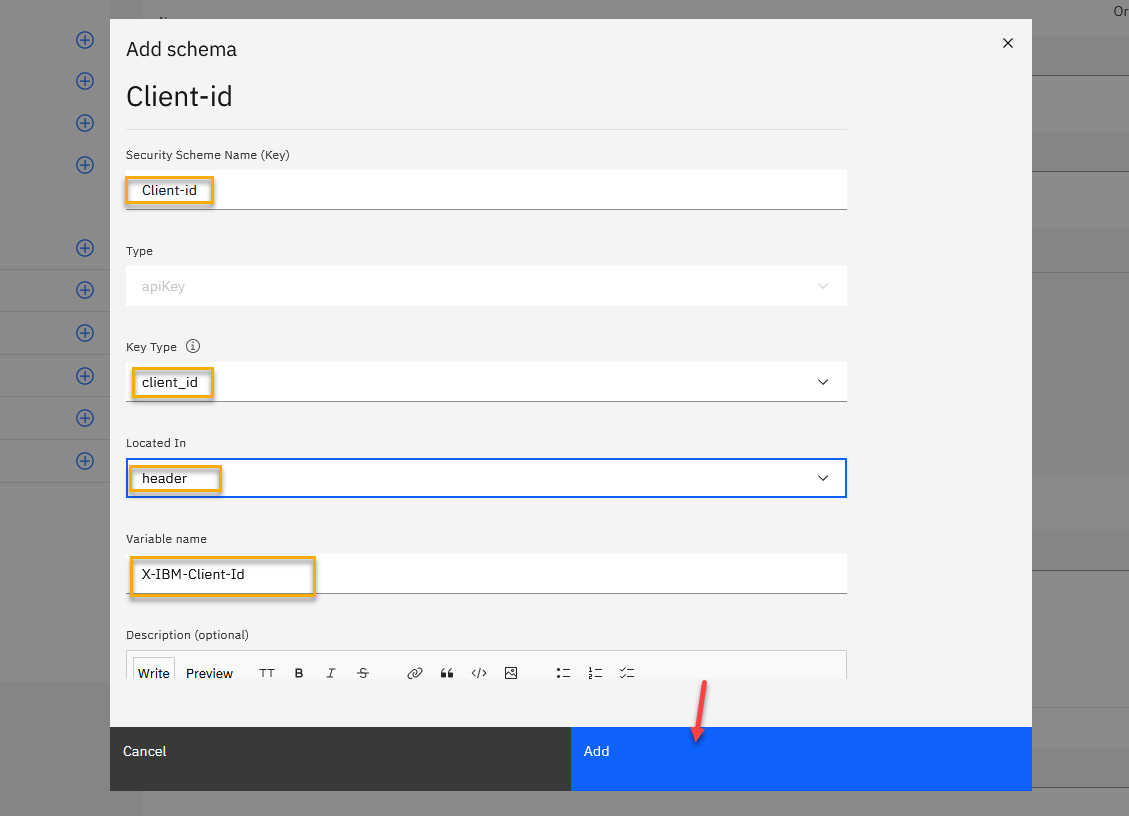
2. We will first create a client-id filling in the page with the following info.
- Enter “Client-id” for the Name of the key.
- For the Security Definition Type click on the drop down and select apiKey.
3. After you select apiKey, the following window will open. Finish filling it in with the rest of the info and click Create.
Key type = client_id
Located In = header (from dropdown)
Varible name = x-client-id
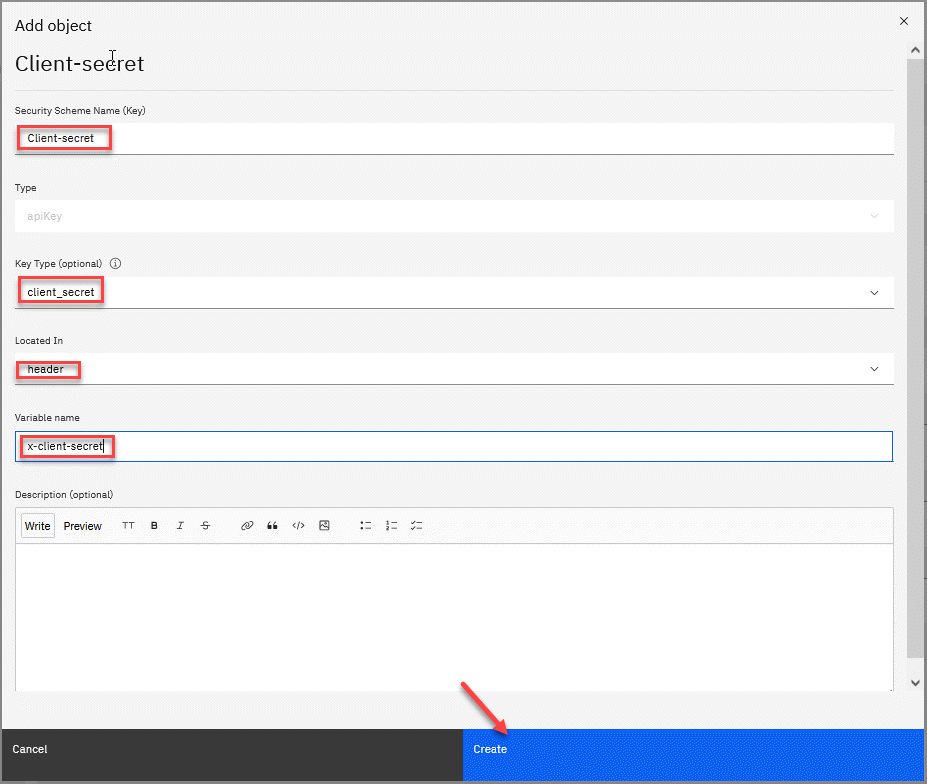
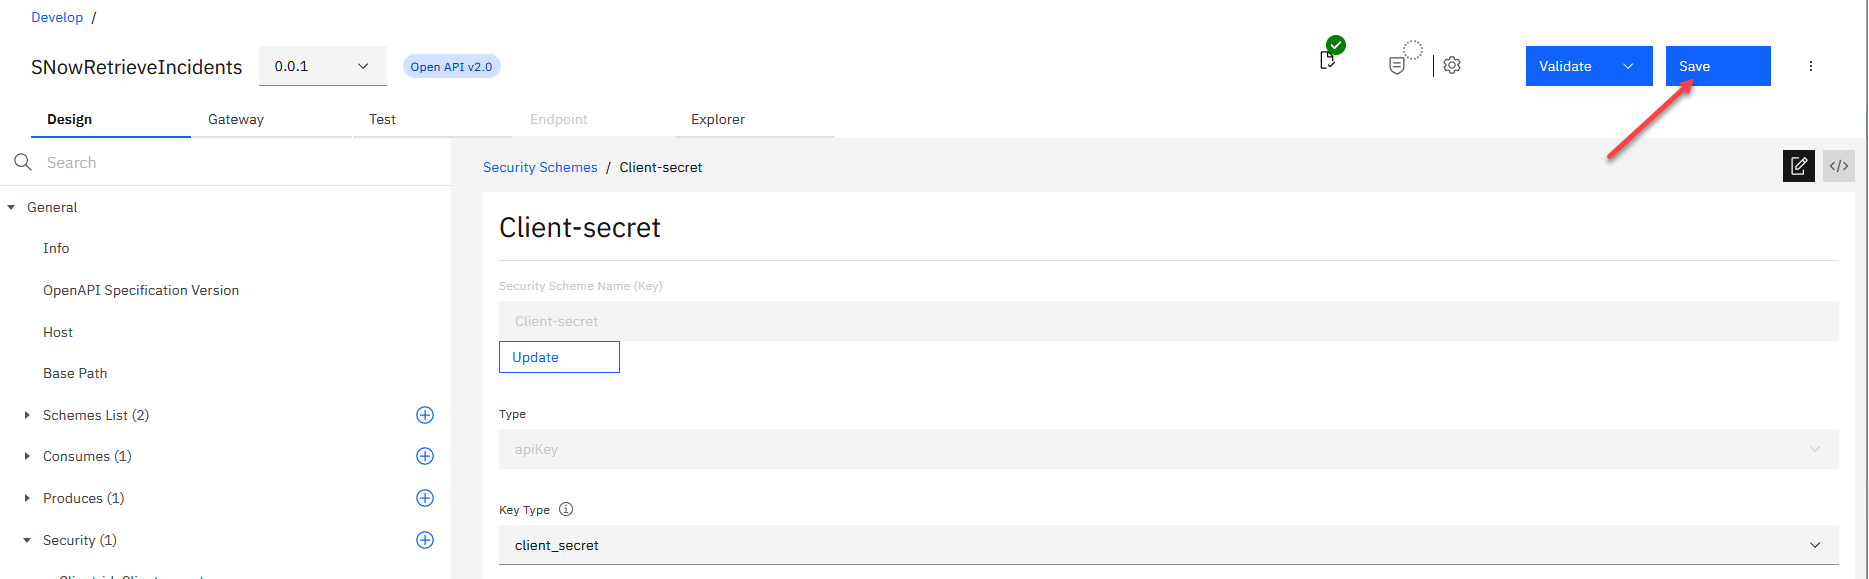
4. Repeat steps 1 to 3 to create the Client-secret as a Type client_secret. It should look like the following screen:
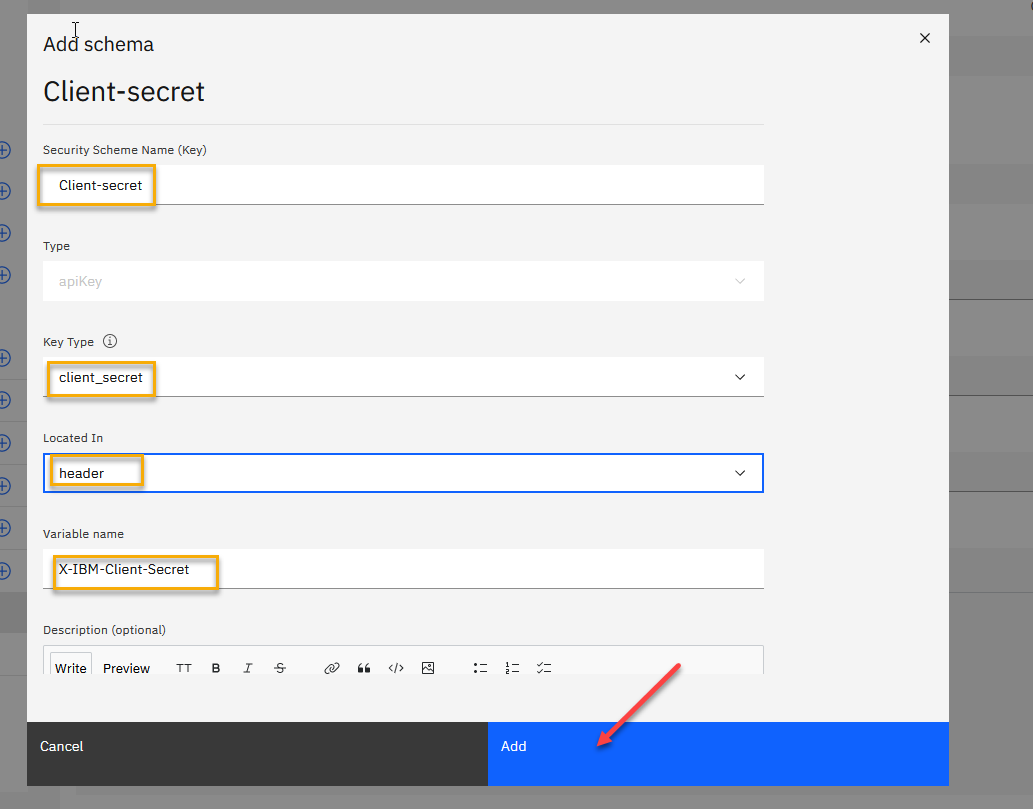
5. You should now have a Client-id and Client-secret for your Security Schemes (2).
6. Go to the Security under Produces and click the + to add our security.
- Click the Client-id and the Client-secret and then click Create.
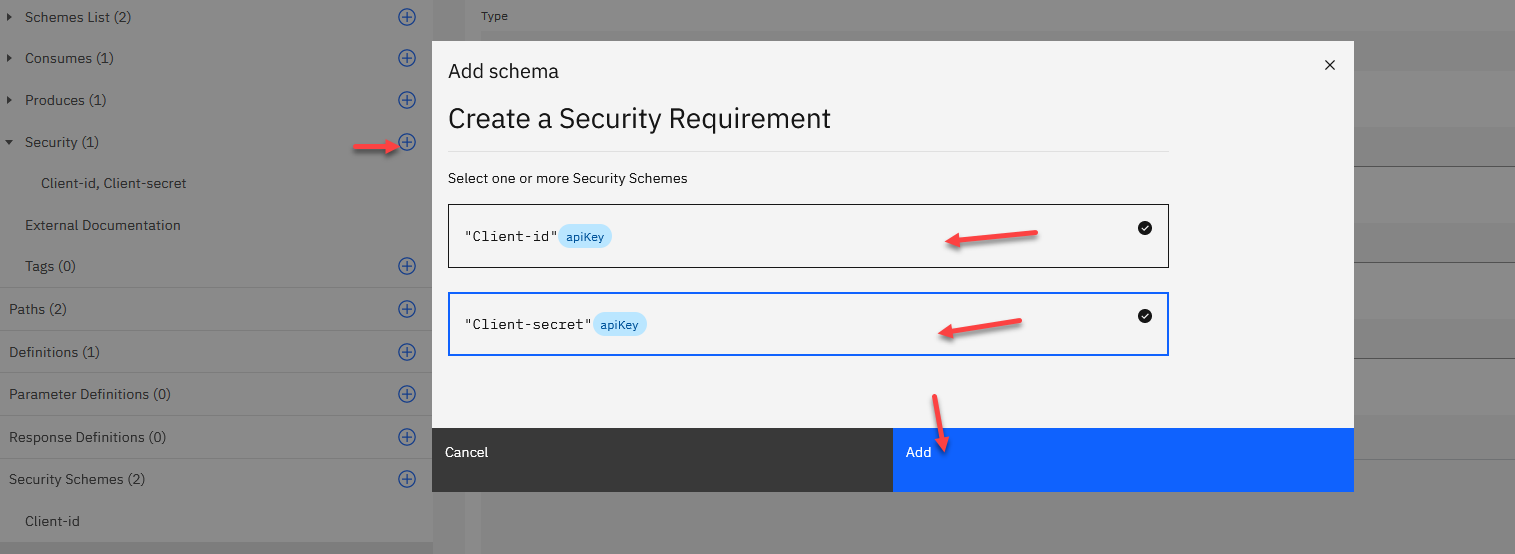
7. Once you have selected both, click on Submit. Also go to the upper right and click on Save to save all your updates.
8. One last thing to do on the Design tab. Click on Host and then save the host name to a notepad and leave this blank. We will use this in the next section when we setup our apigw proxy. * Also go to the upper right and click on Save to save all your updates.
Note: You will want to make sure that the host name field is empty.

3.3 Define Target-URL for Sandbox Environment
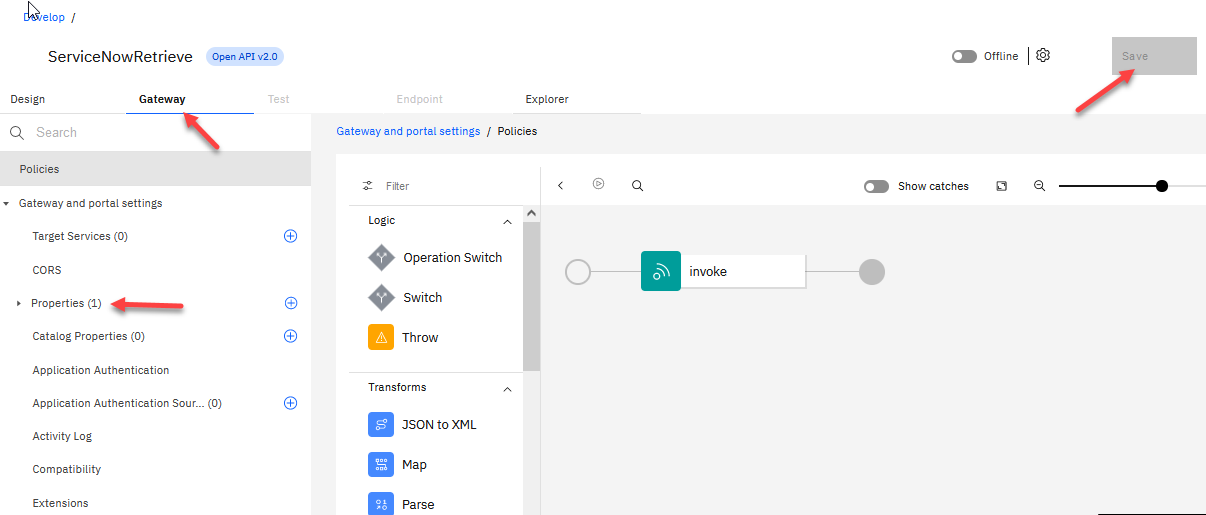
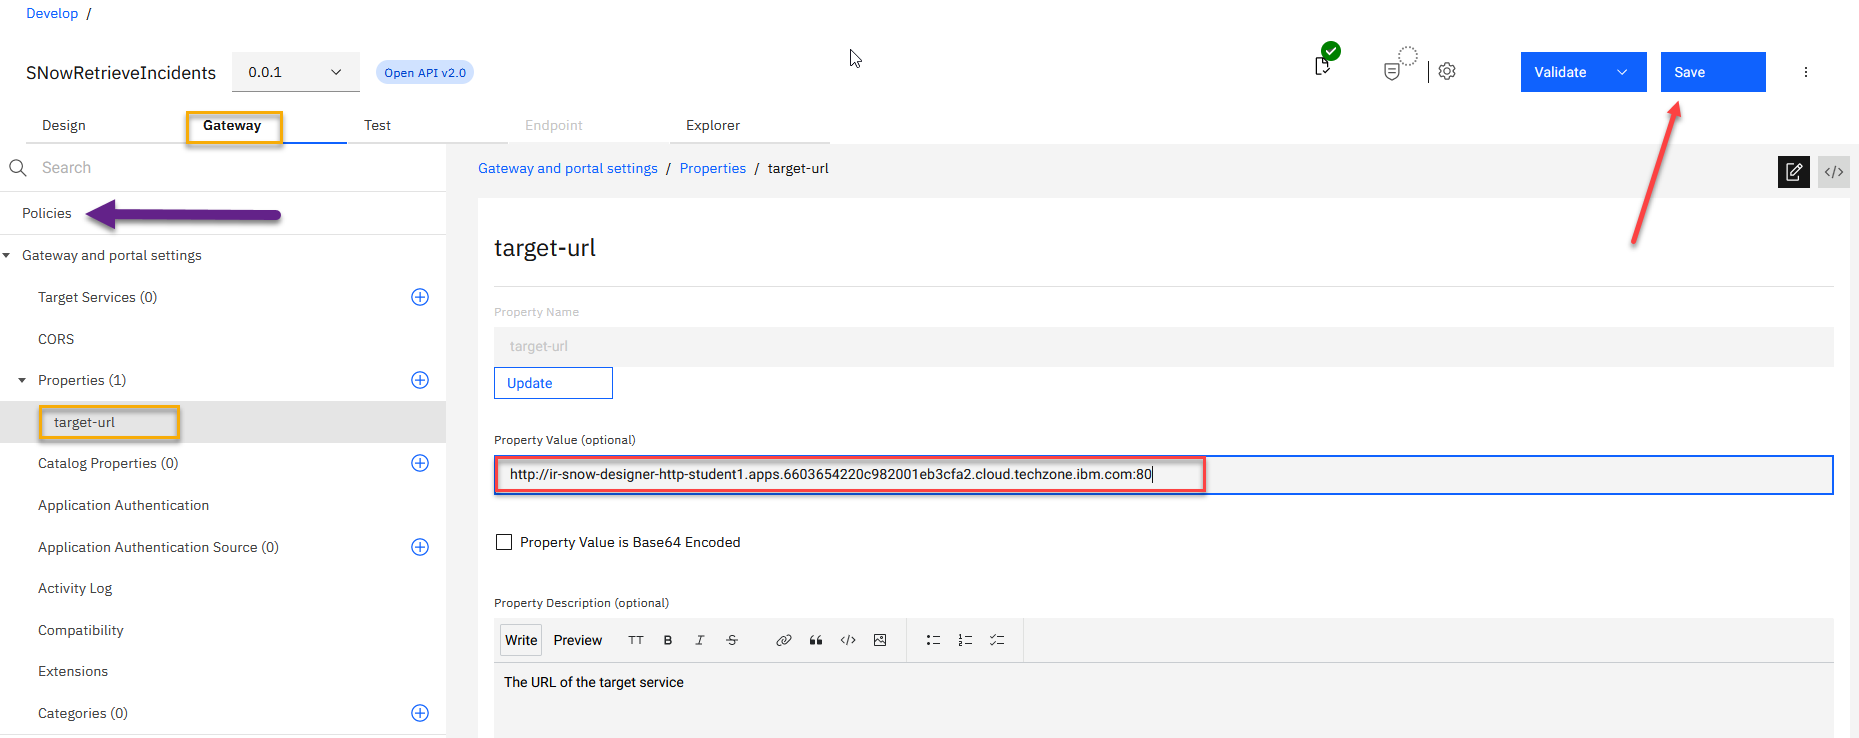
1. Click on the Gateway tab. This is where we will setup our Gateway and Portal setting for our API. Make sure that all your updates are saved by checking the upper right corner. Click on the Properties on the left menu.
2. Now click on the target-url and use the host name that we saved from step 7 above. Make sure to add http:// in front it and save it. Once done click on the Policies in the left menu.
3. You will now see the assemble view. With assemblies, you can readily tailor your APIs to include components such as activity logging and redaction of specific fields. This view includes a palette, which lists available components, a property sheet, which is used to configure a component, and a canvas, which is used to arrange and visualize the assembly’s components.
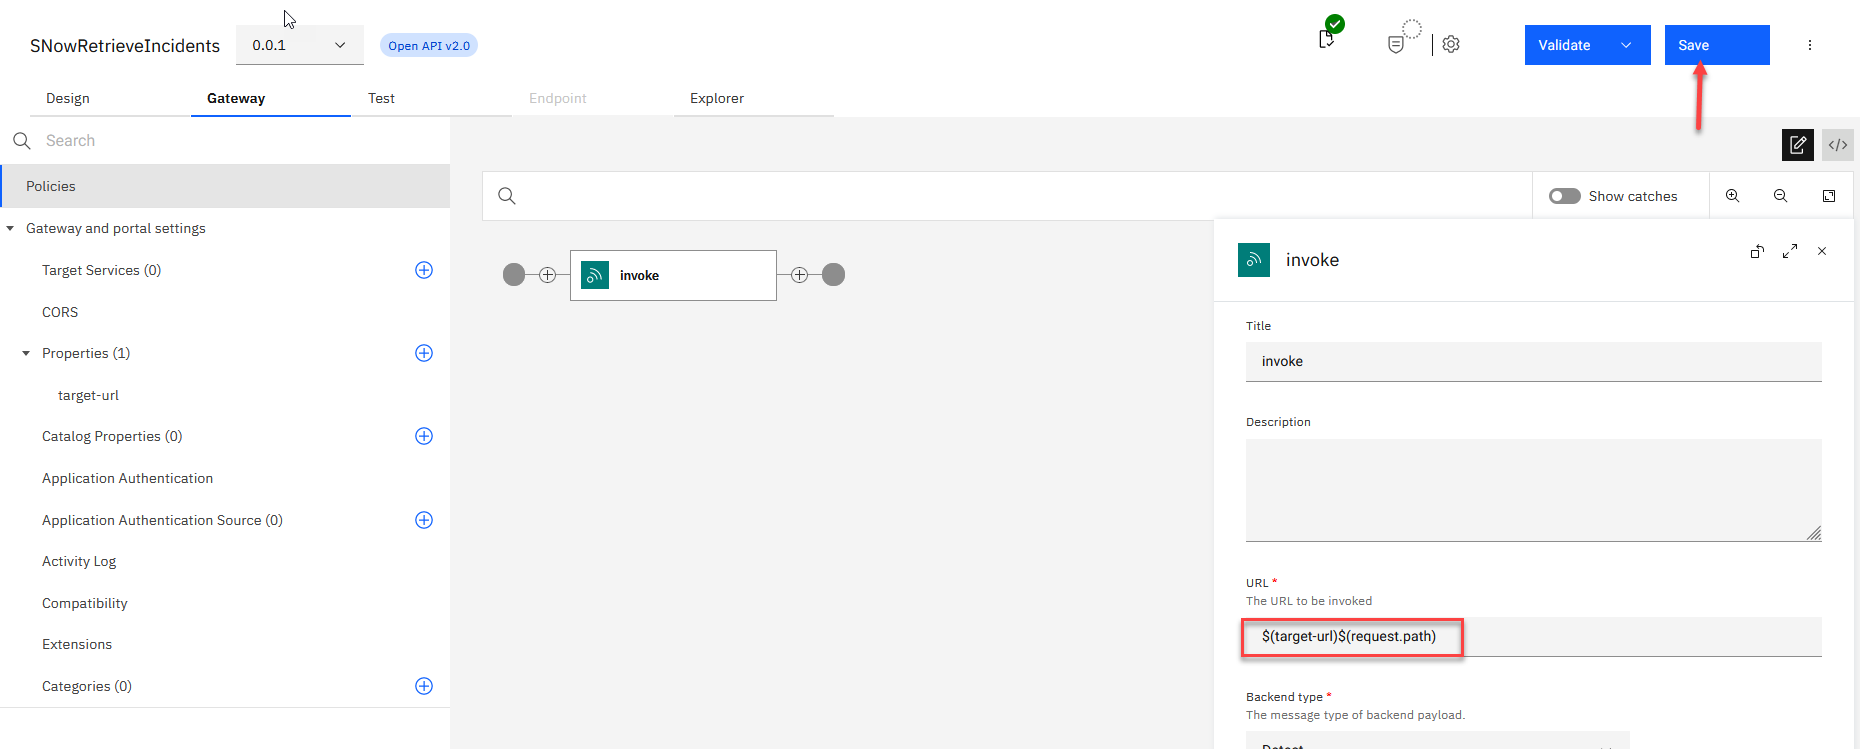
- Now we will click on the invoke to open that so we can update the URL configuration.
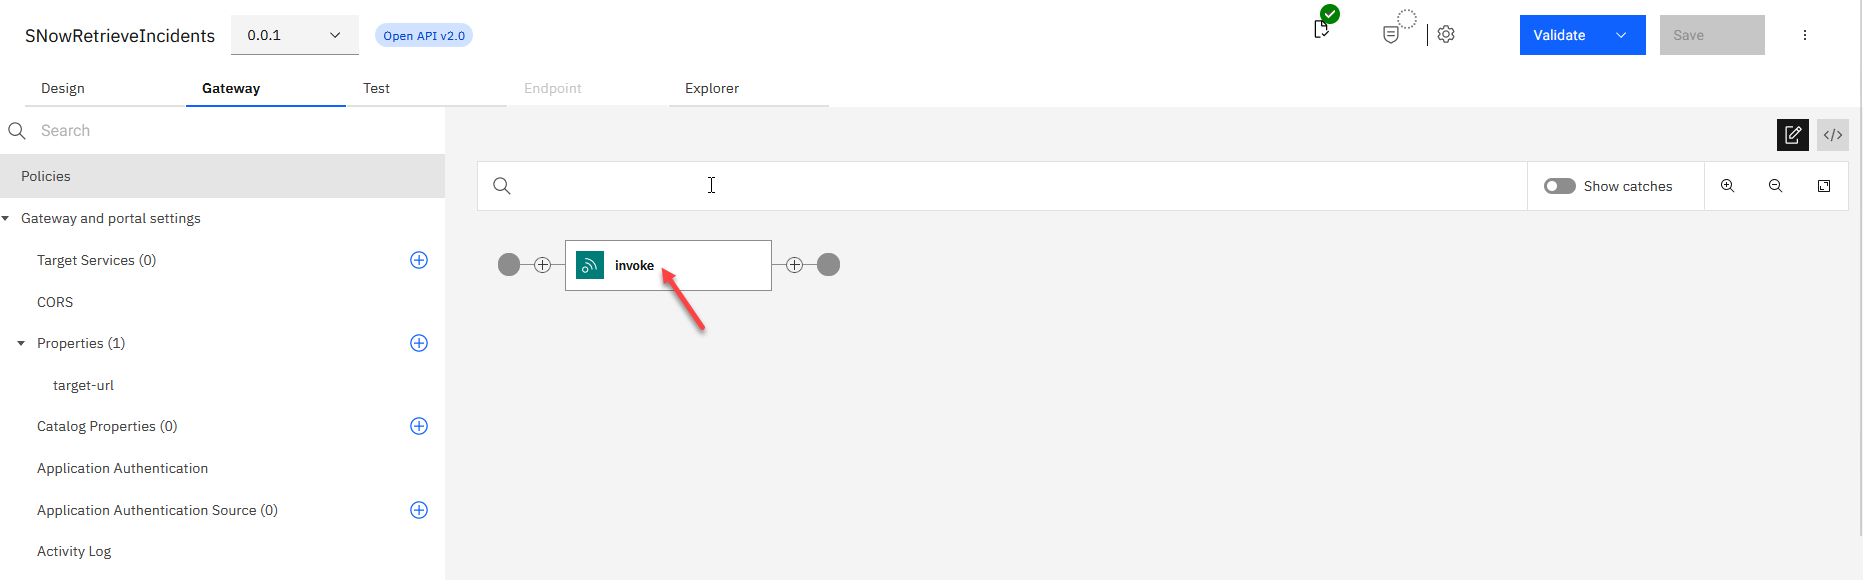
4. Below the canvas is the details for the invoke. Scroll down to the URL and you will see $(target-url) please type $(request.path) after it. This will append the path we created earlier to our invoke components URL. Click Save in the upper right corner.
4. Test the API
In the API designer, you have the ability to test the API immediately after creation in the Assemble view!
1.Toggle Offline to activate API and to publish the API itself to the gateway for testing.
- Make sure that the Save is gray out if not click it to Save all updates.
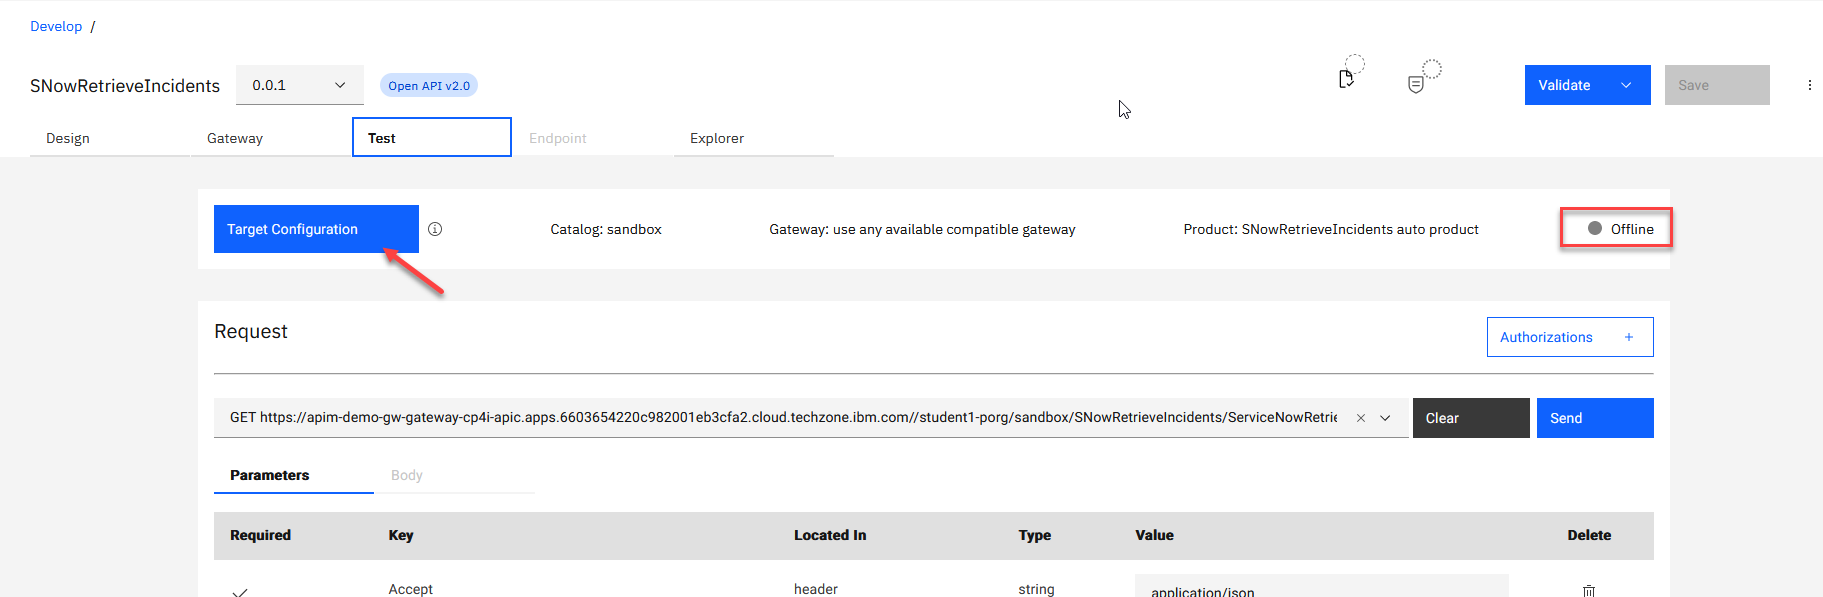
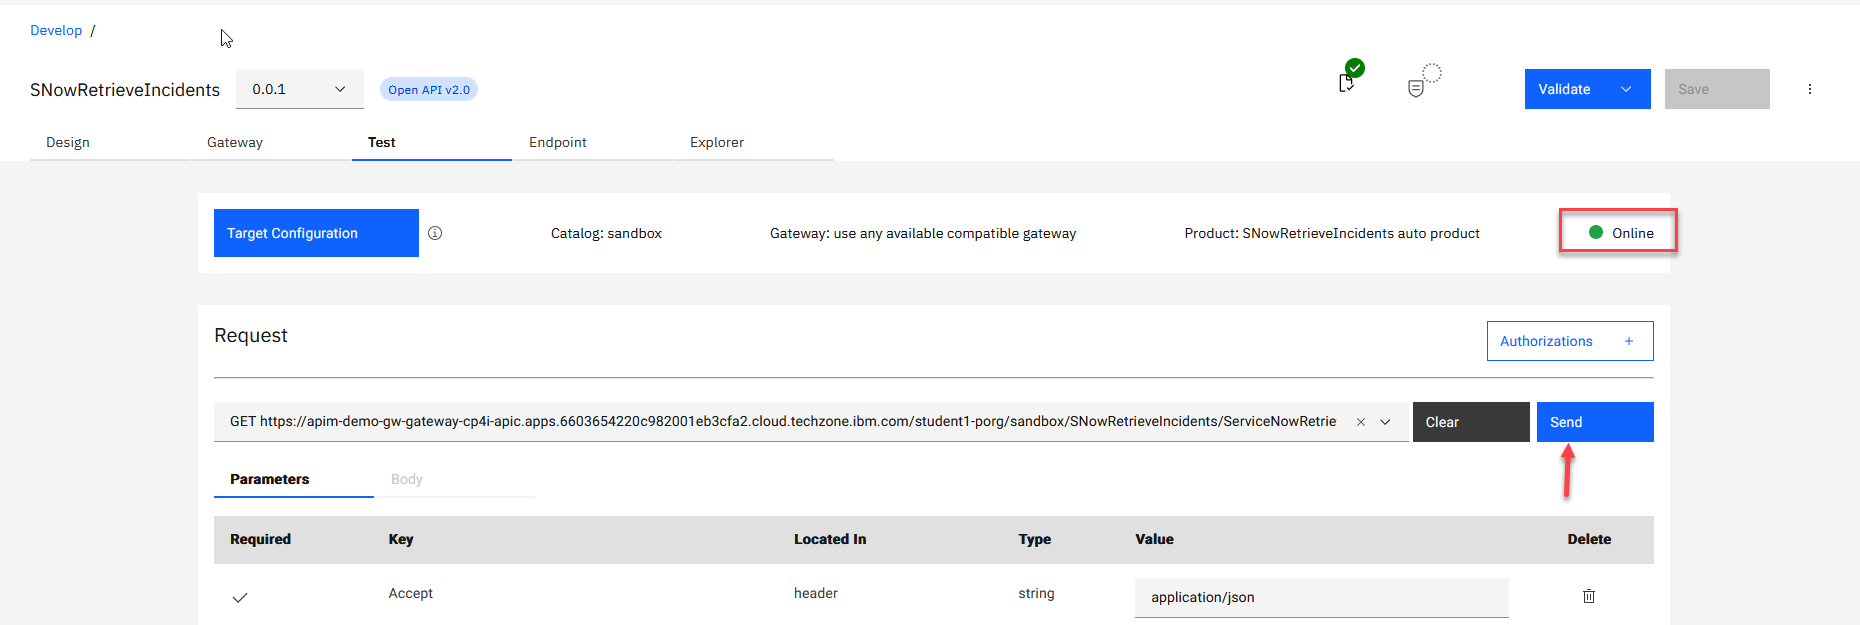
2. You will see that the API is now online. Close the API updated pop-up in the right.
- You will now see that you can click on the Test tab in the menu. Click on that to go to the Test section.

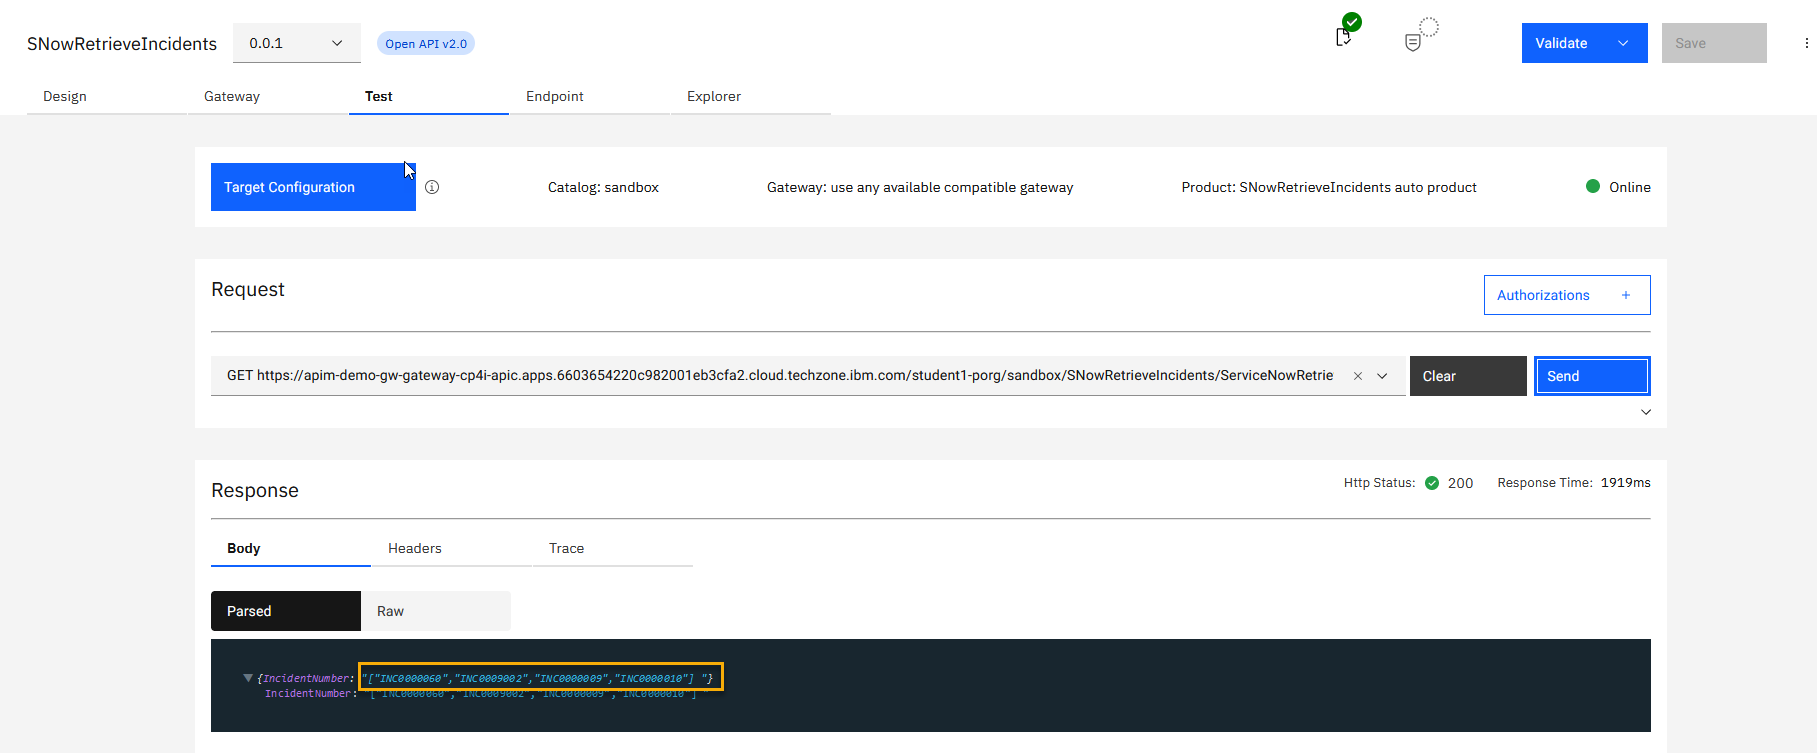
3. You will see you have both operations available for your API. Select the one that will return the first 2 users and click Send.
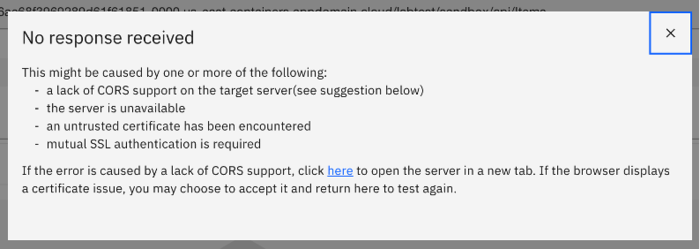
4. In the first time of running the API after publishing the API, the security warning dialog box may show. Please click on the here link and accept the certificate to see the 401 message.
- Go back to the test view and click Send again.
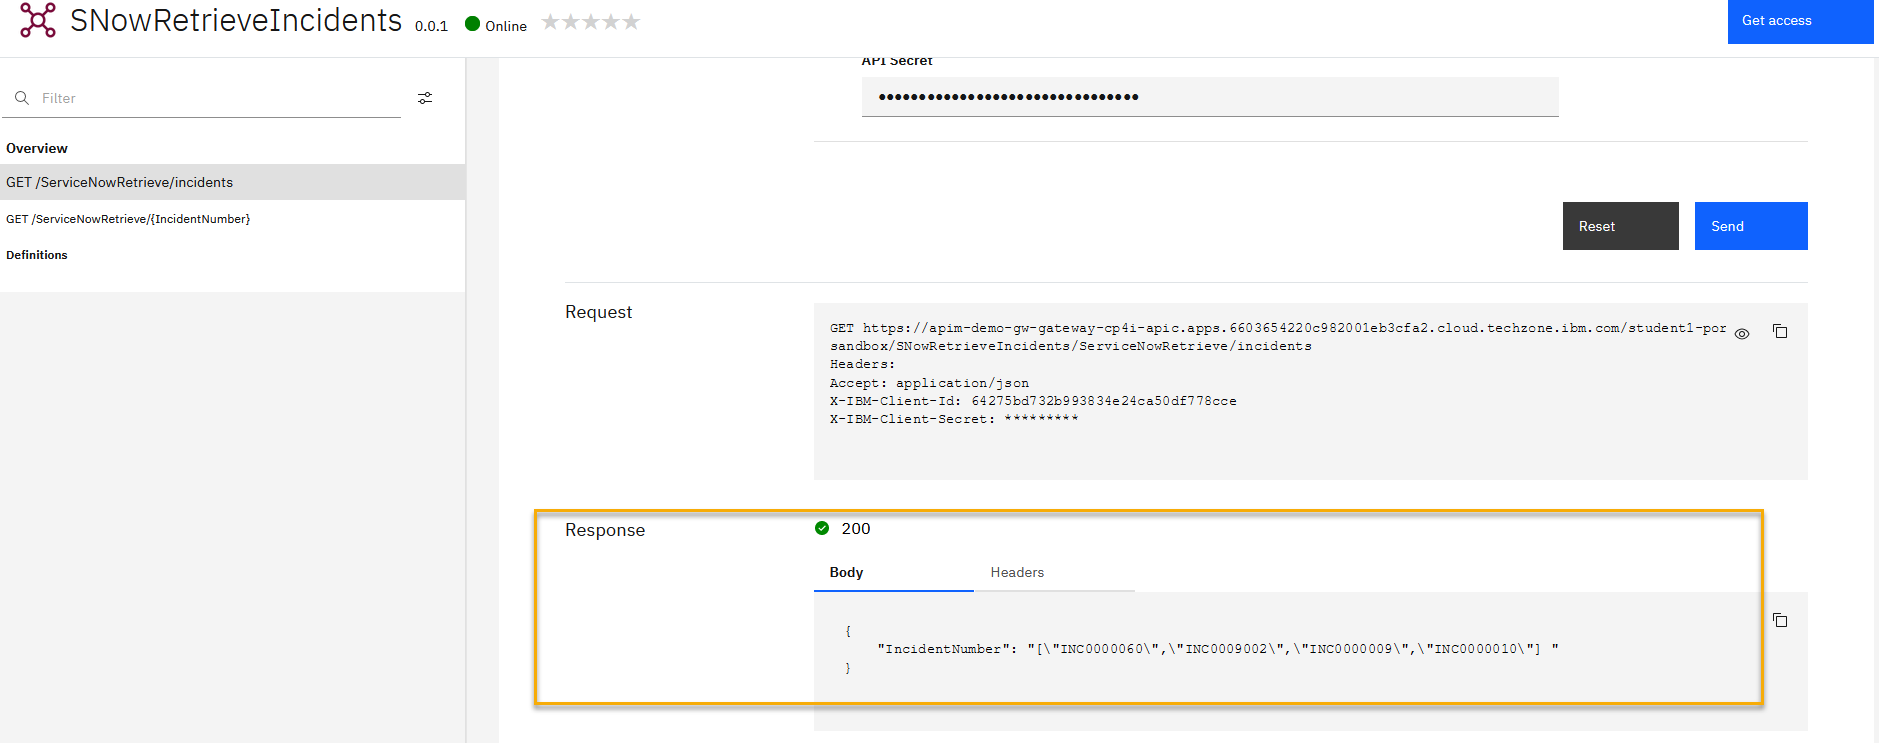
5. In the Response section, you should see the results of your API call. Review this and save one of the Incident Numbers to test the other operation.
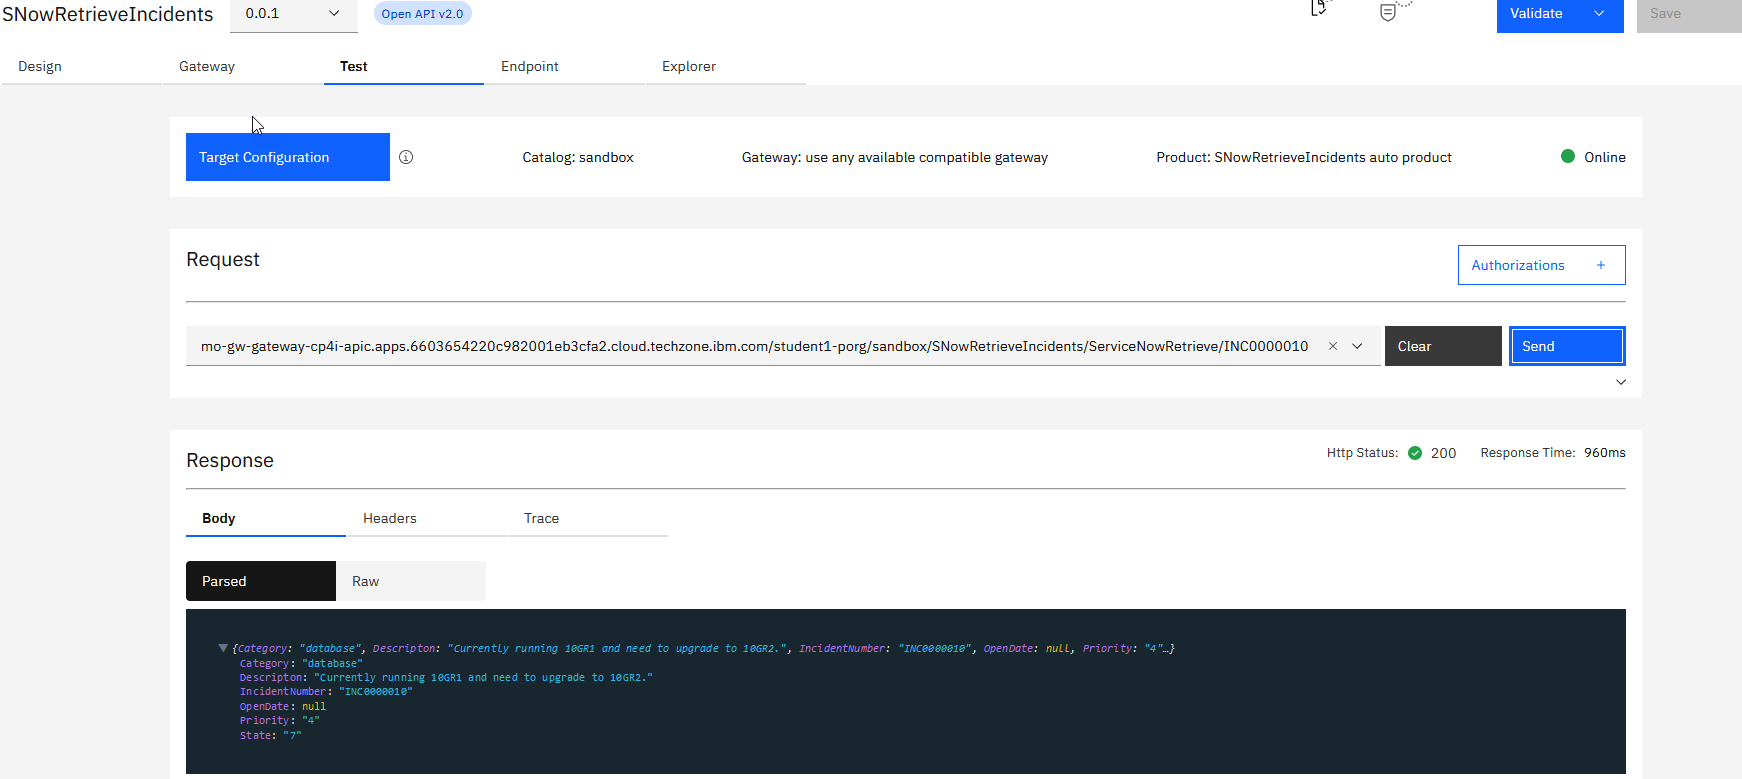
6. Now select the operation to retrieve one AccountID. Replace {Incident Numbers} with one of the user IDs from the first test and click Send.
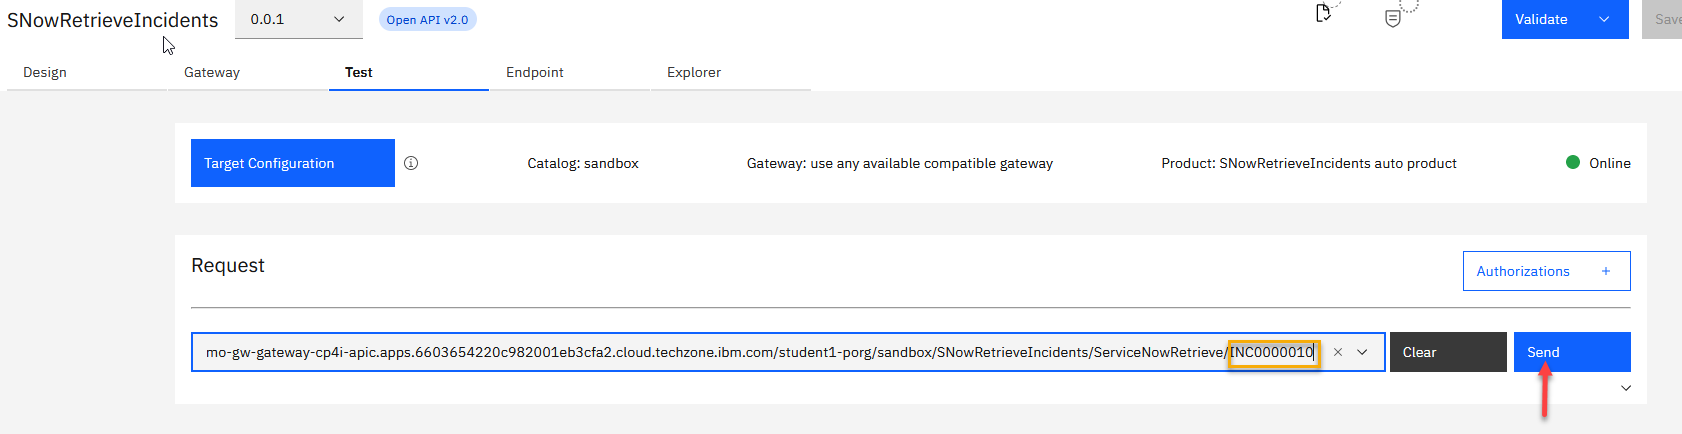
7. In the Response section, you should see the results of your API call for just the one user ID.
5. Publishing
Now that your API has been activated and tested to work, you may want to publish it to a product that can make use of it, or if you’re just starting like us we can create a product for this API to live within.
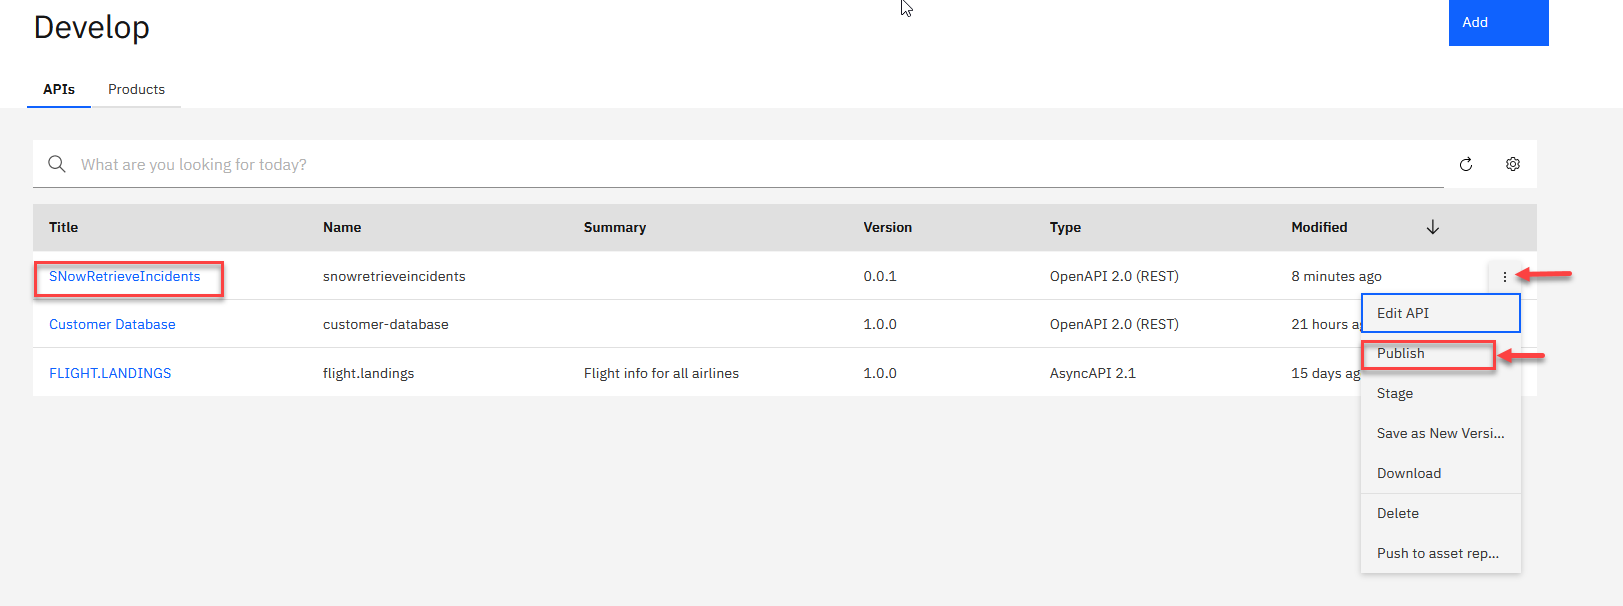
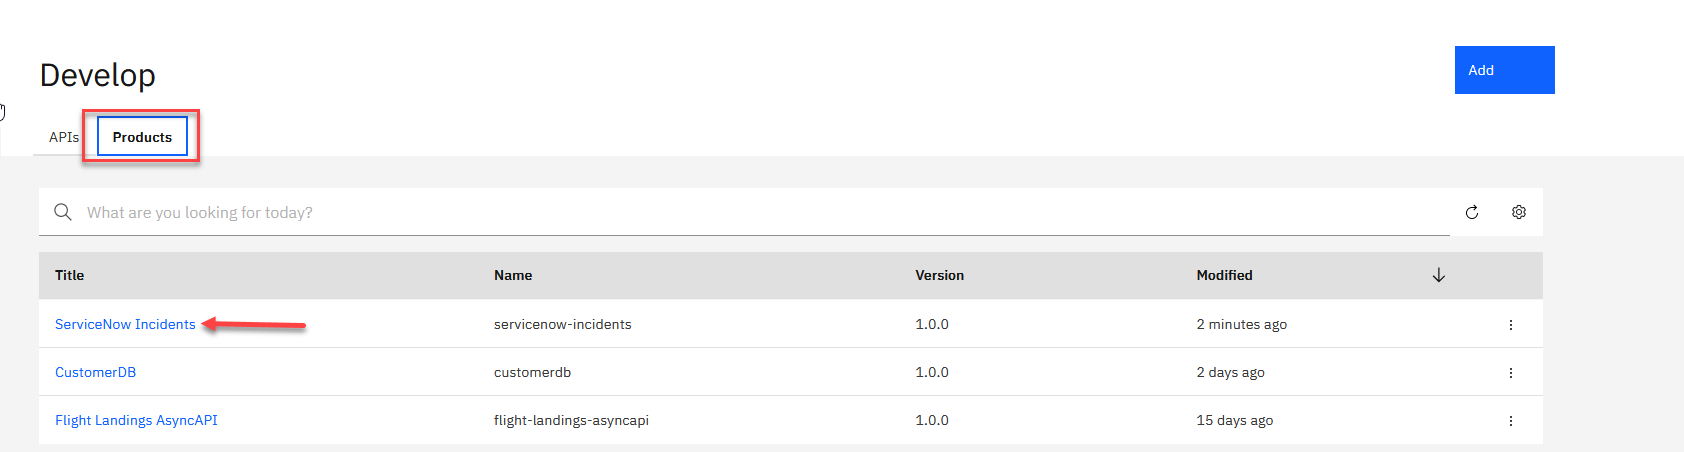
1. There are a few ways to go about this but for this lab let’s go back to the development tab that we first saw when we attempting to create an API.
2. Once here you will see the title, version, type, and time last modified of your API. Click the three dots at the end of your API and choose Publish.
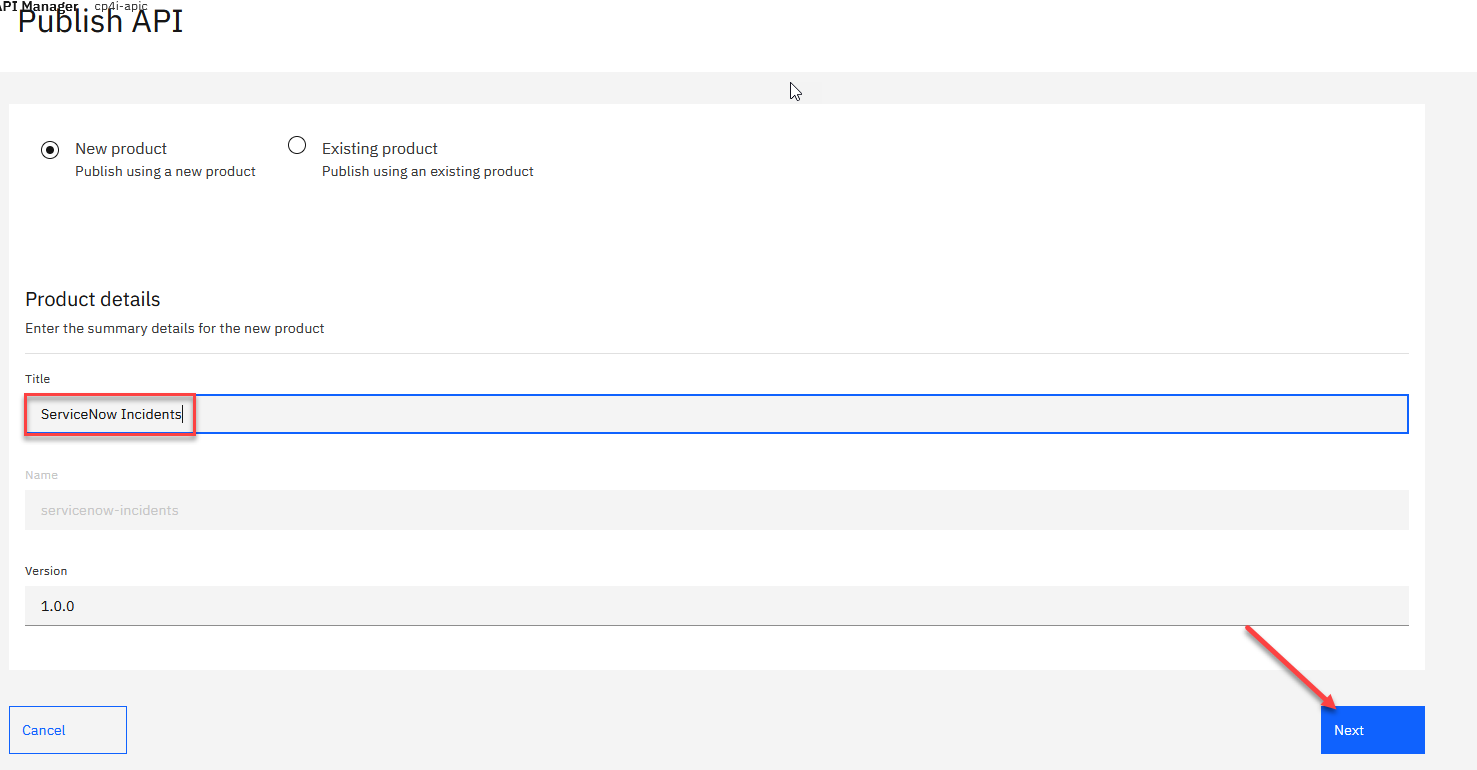
3. Since this is our first product, let’s go ahead and give it a title and click Next.
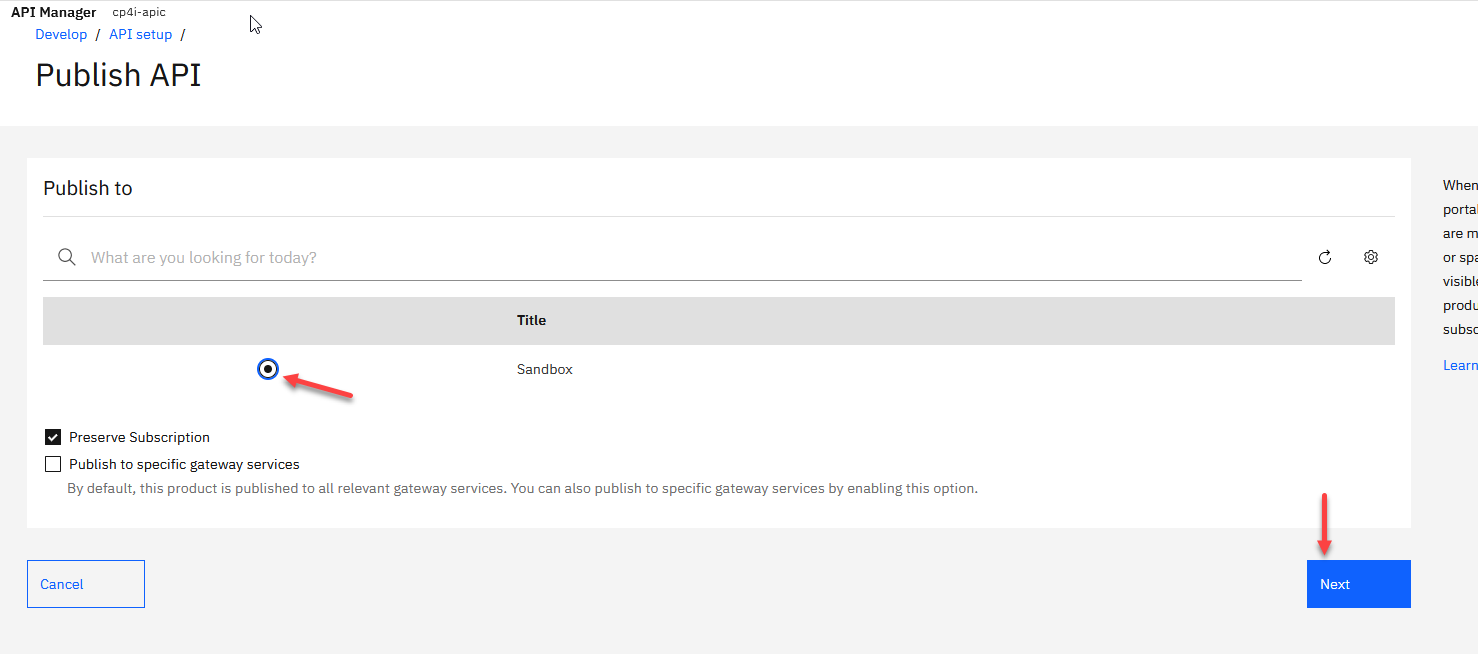
4. Each organization can create and manage several catalogs containing different combinations of API and products and its own Developer Portal. For this lab, let’s stick with the Sandbox catalog and click Publish.
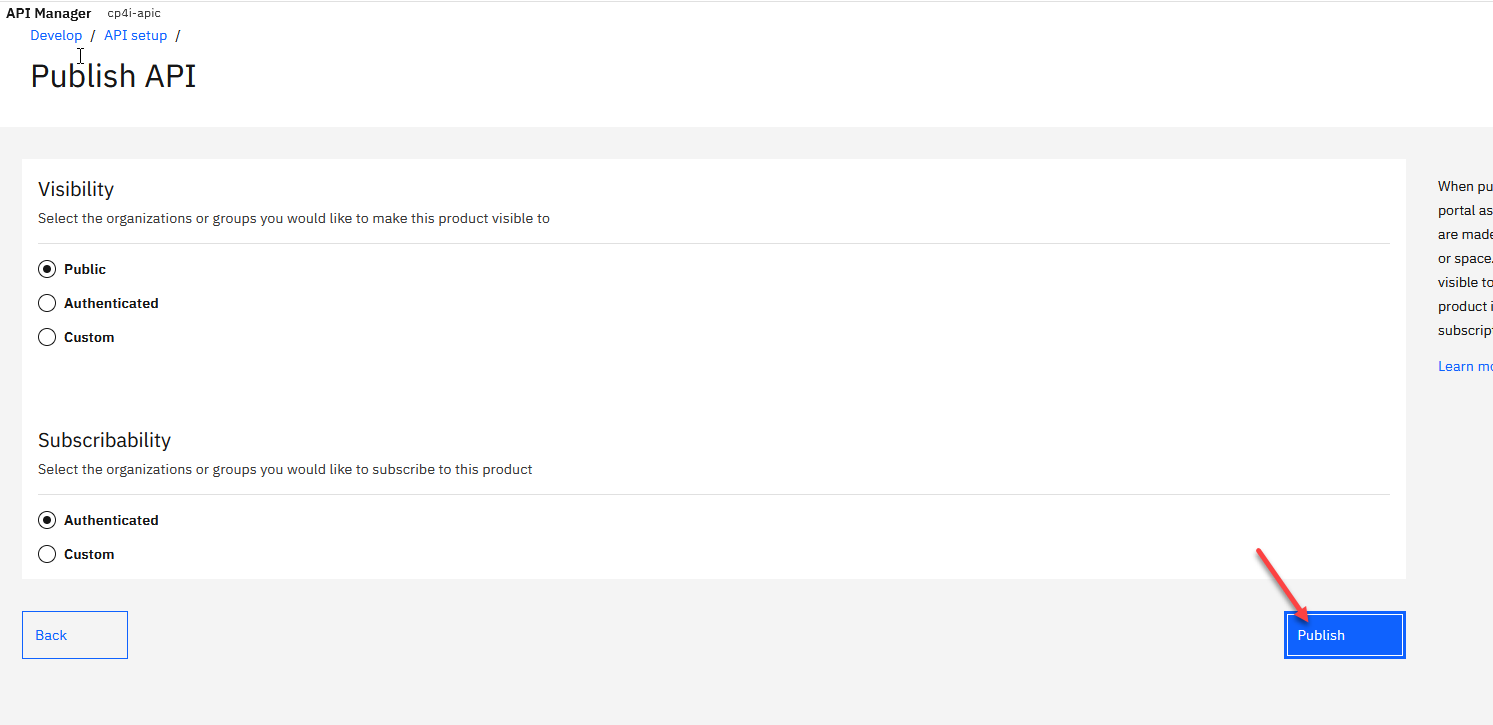
5. We have now created a consumable product that we can find in our Developer Portal.
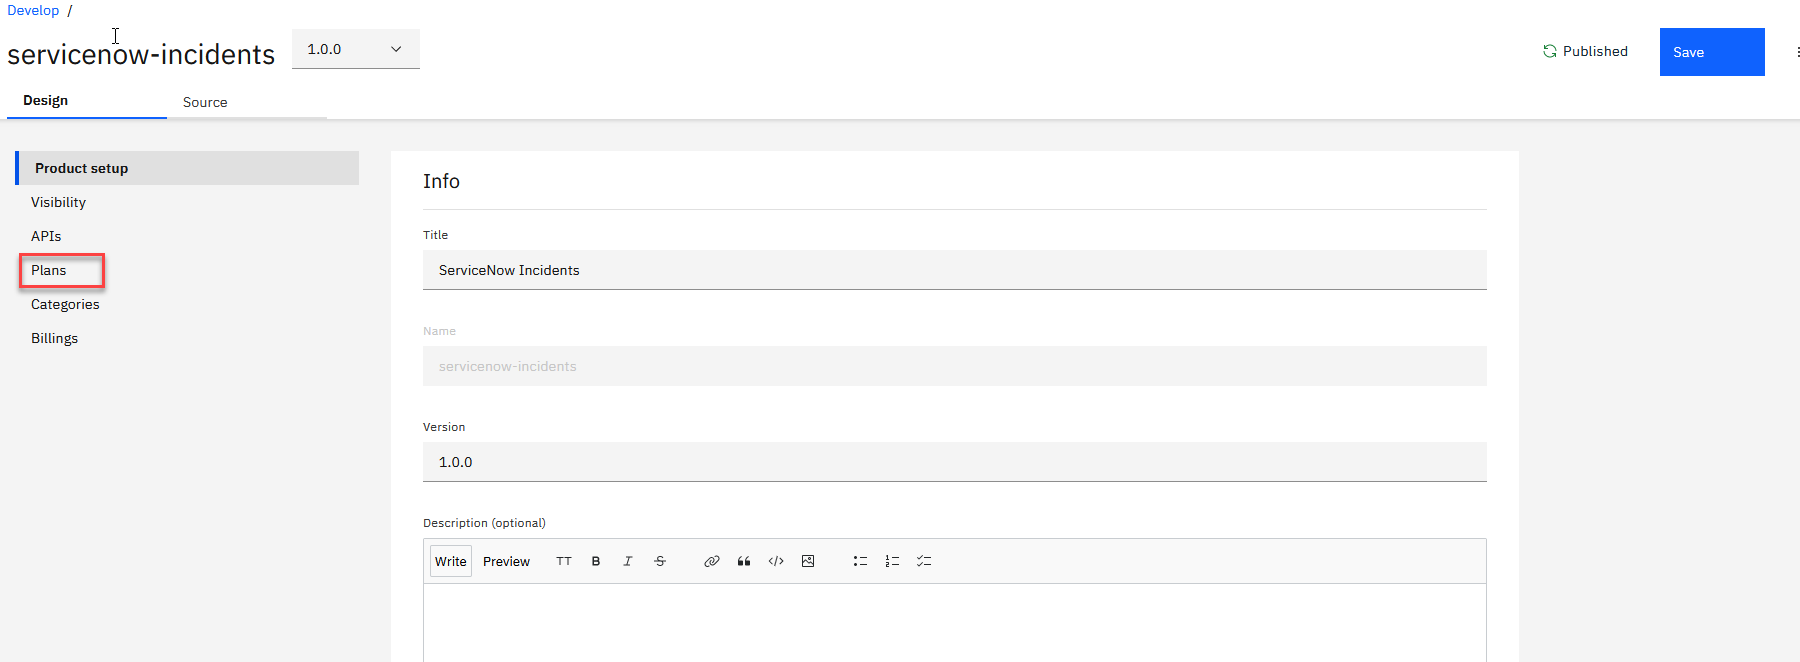
Something to note is we completely skipped the stage portion of the product. Normally you would want to stage the product, make changes to visibility, subscribability, APIs, categories to include, and lastly subscription plans and rate limits. An example of what I’ve mentioned can be seen below.
6. Developer Portal
Application developers discover and use APIs by using the Developer Portal. You can customize the Developer Portal for your application developers. In addition to allowing application developers to find and use both free and paid APIs, the Developer Portal provides additional features including forums, blogs, comments, and ratings, together with an administrative interface for customizing the Developer Portal.
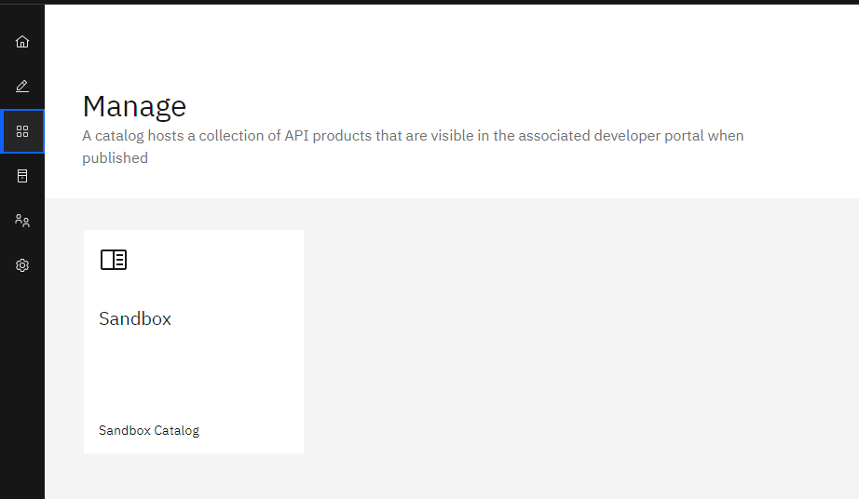
Now that your product is published, let’s view it in the Developer Portal. This can be found under the Manage section of APIC.
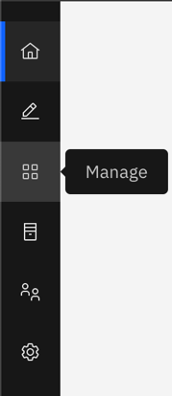
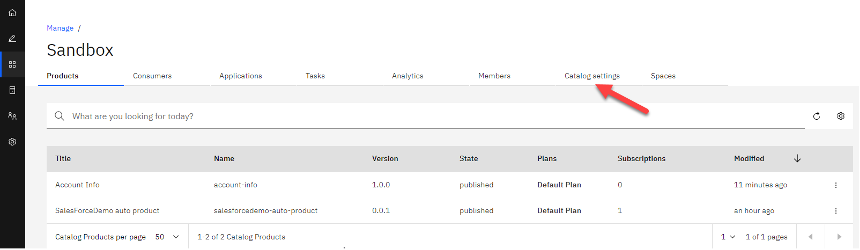
1. Click on the Manage tab on the left side bar.
2. Click the catalog in which you published the API (Sandbox).
3. Click on Catalog settings.
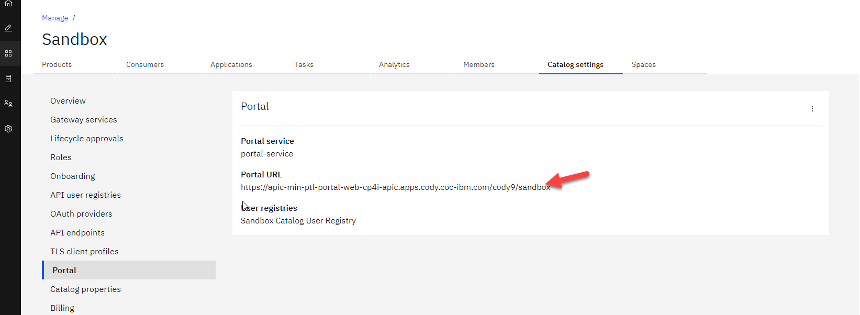
4. Click on Portal in the left menu and copy and paste the Portal URL into your browser in a new tab.
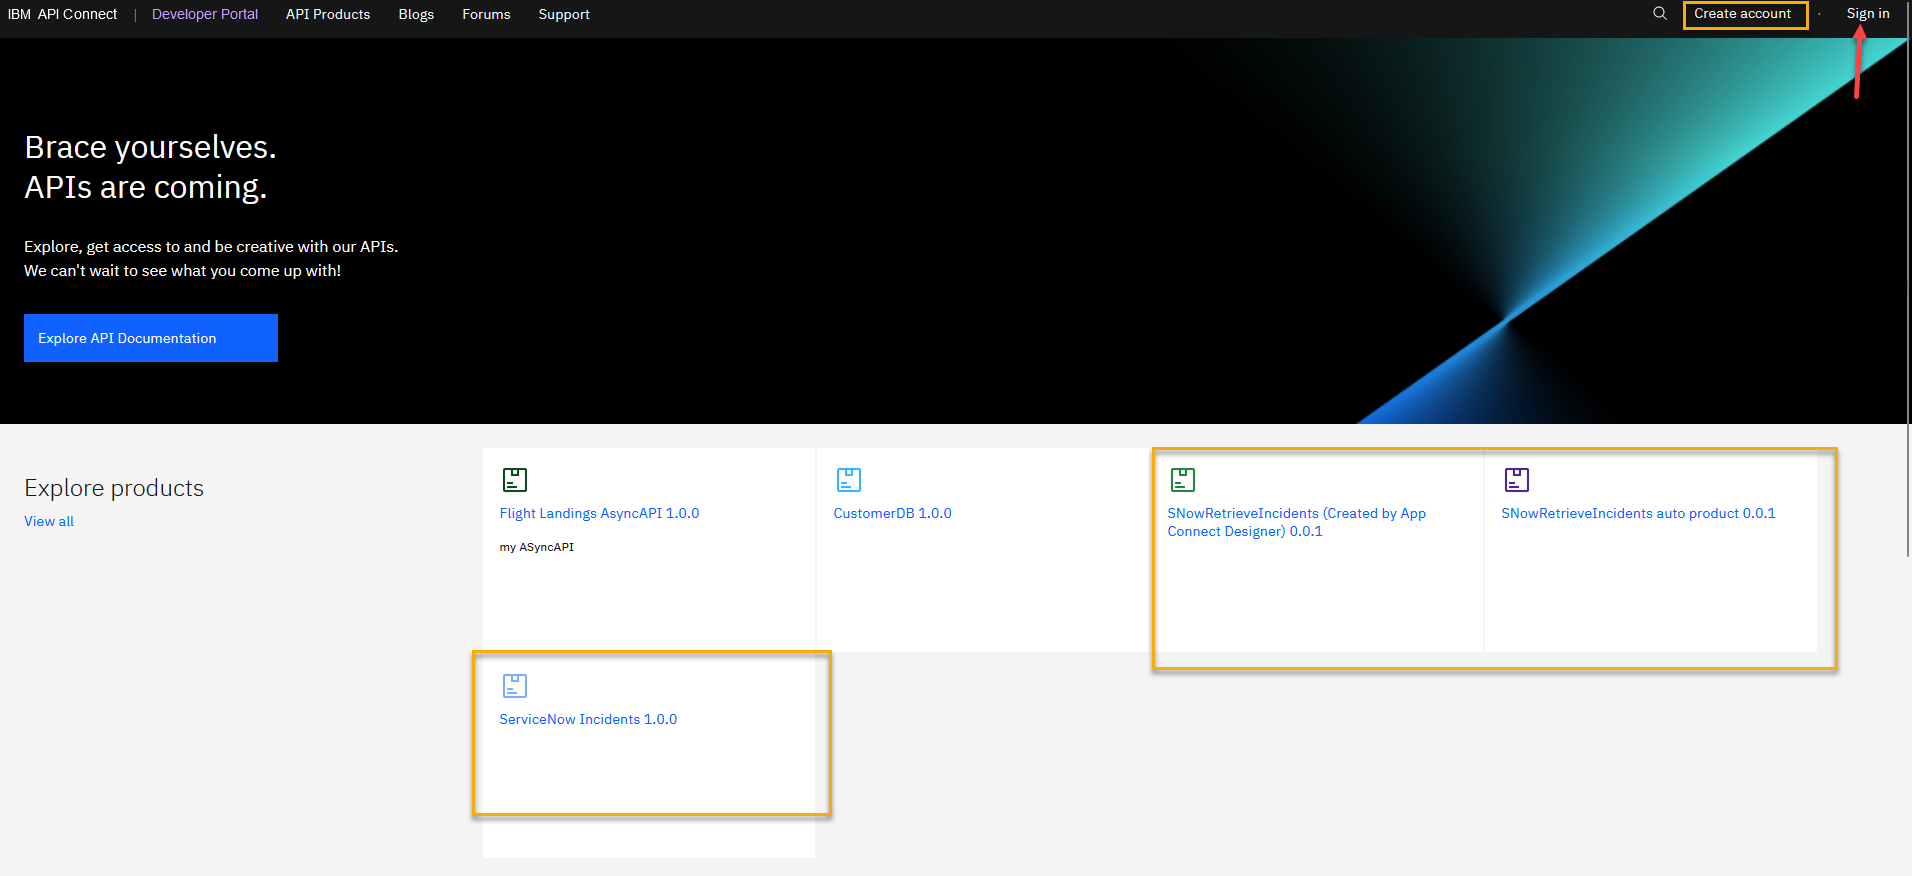
5. The portal is setup for self service so you can create a new account as a developer. You would fill in the form and make sure to use a valid email address since that is where the activation email is sent.
For now we have already created Consumer Org for you to use.
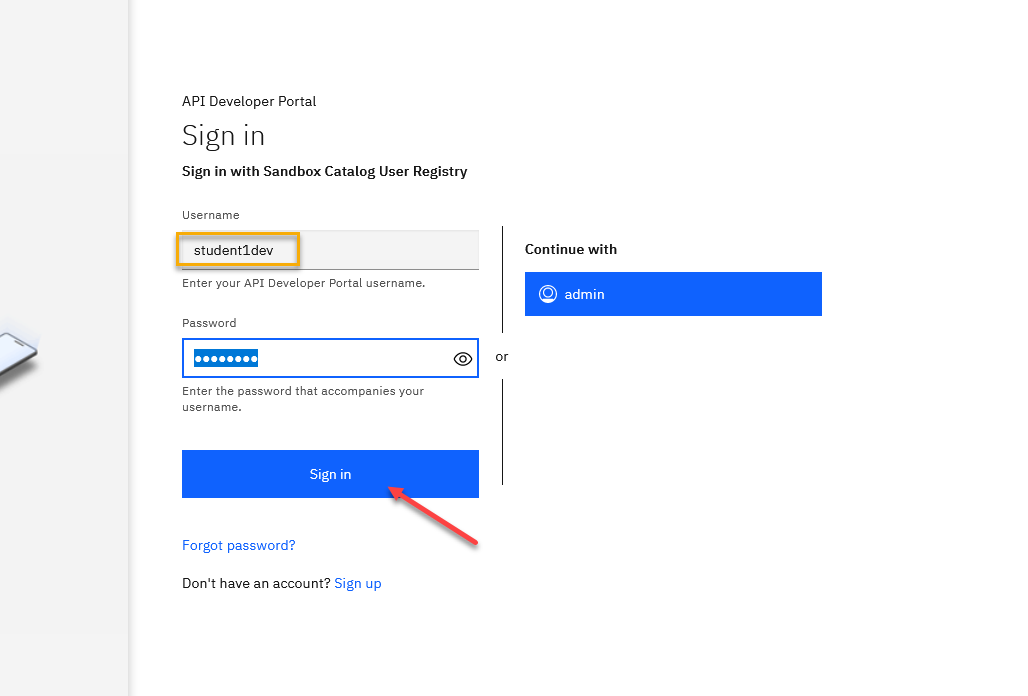
Go to Sign in and enter your Username and Password that was provided to you by the instructors.
9. Once you are logged in, you can explorer varies sections in the Developer Portal. For now, let’s go to the Incident Product we created and Published to.
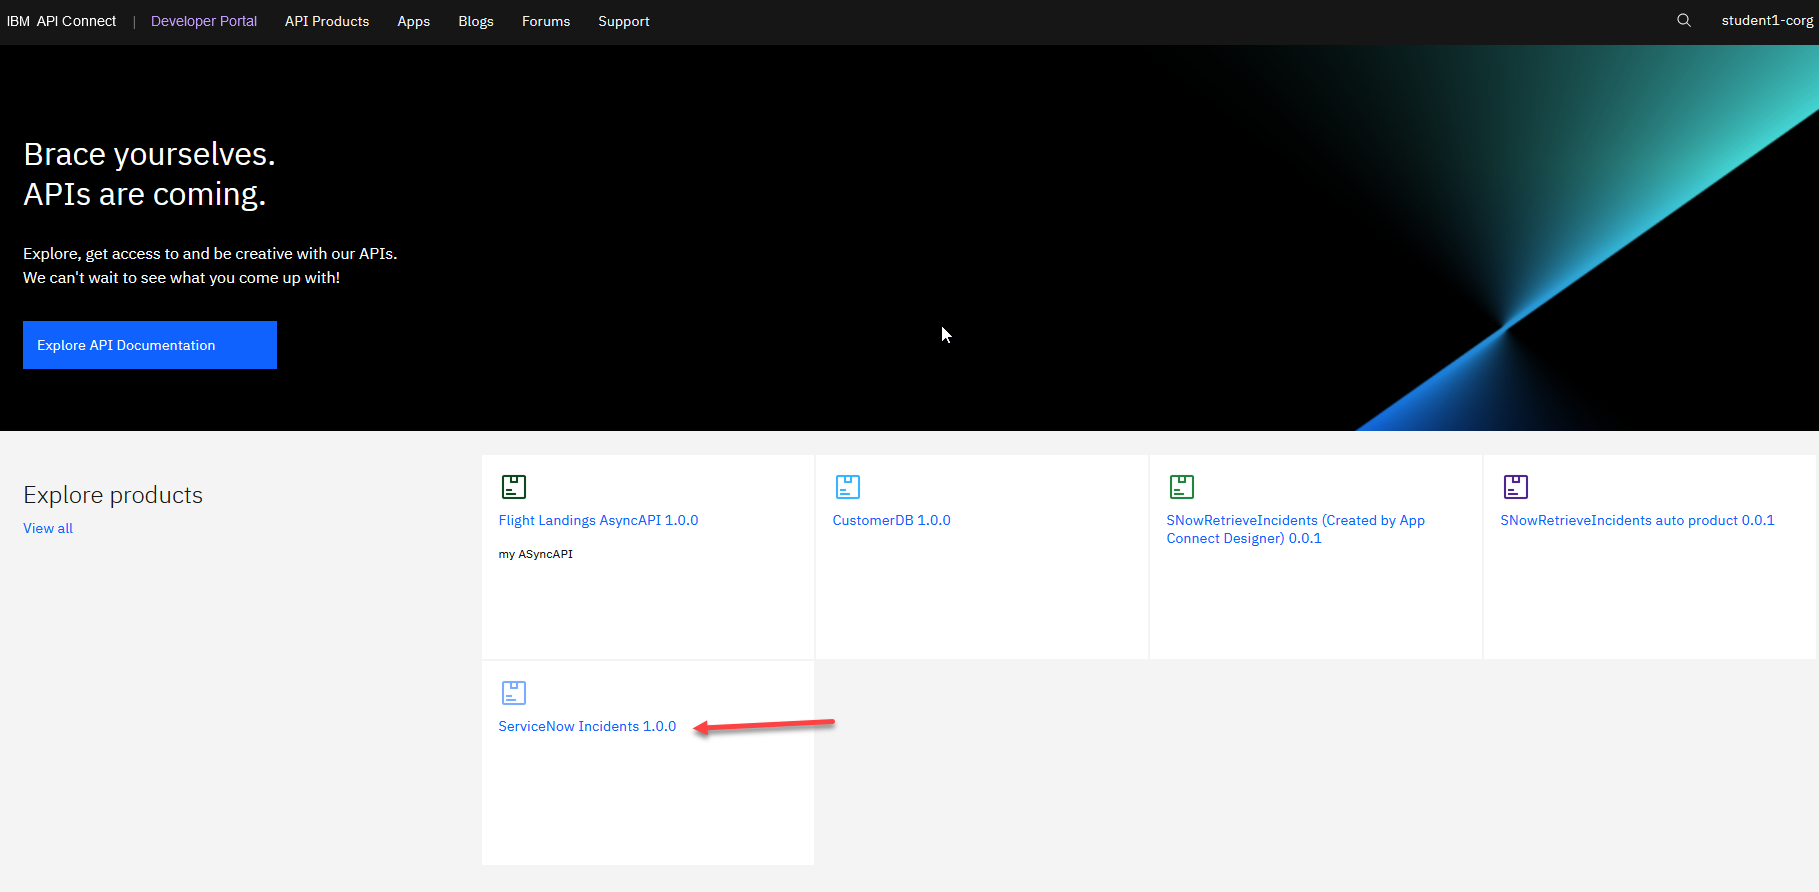
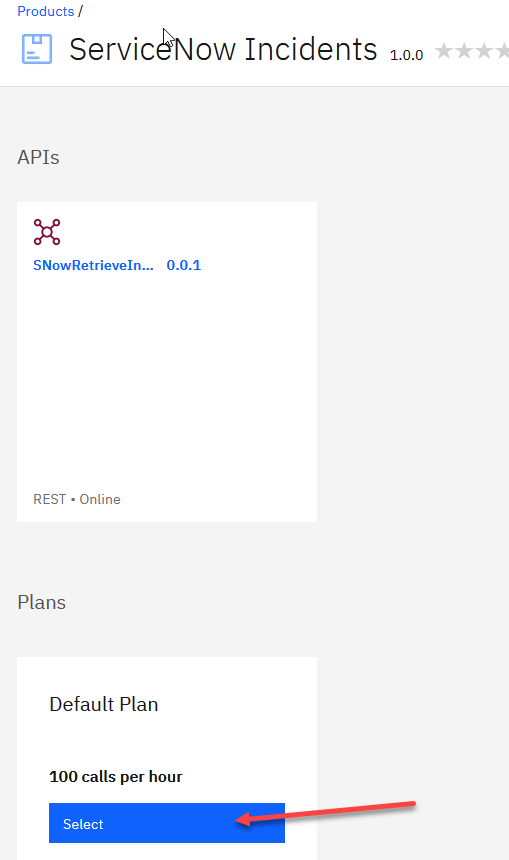
10. Now from the Products page, we see our API for ServiceNow Users and below that you see Plans. This can be configured back in the Products section where you may add plans for Silver and Gold plans. We just have the default for this one. Click on the API tile.
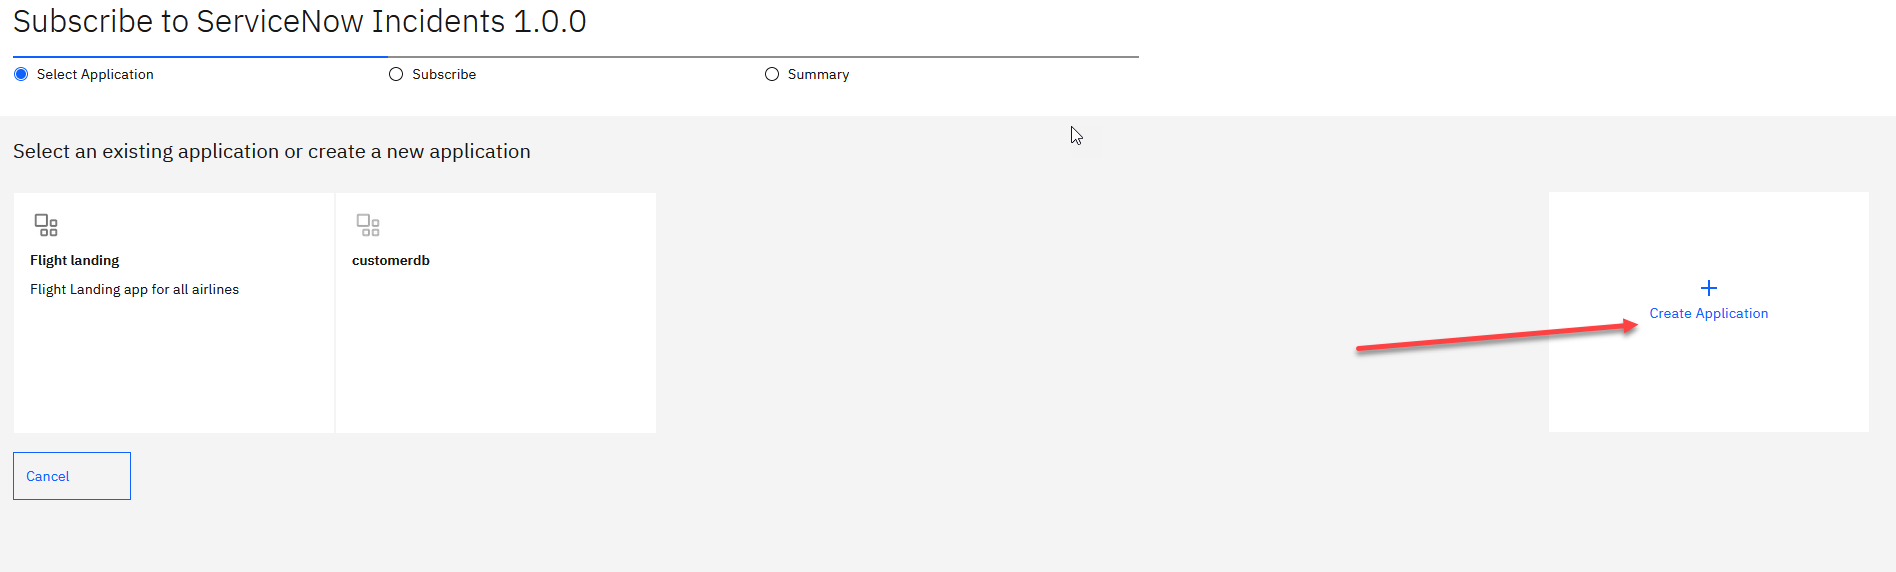
11. We will now need to Subscribe to the API to use it. You may have other applications already created from other labs. We will create a new one for this one.
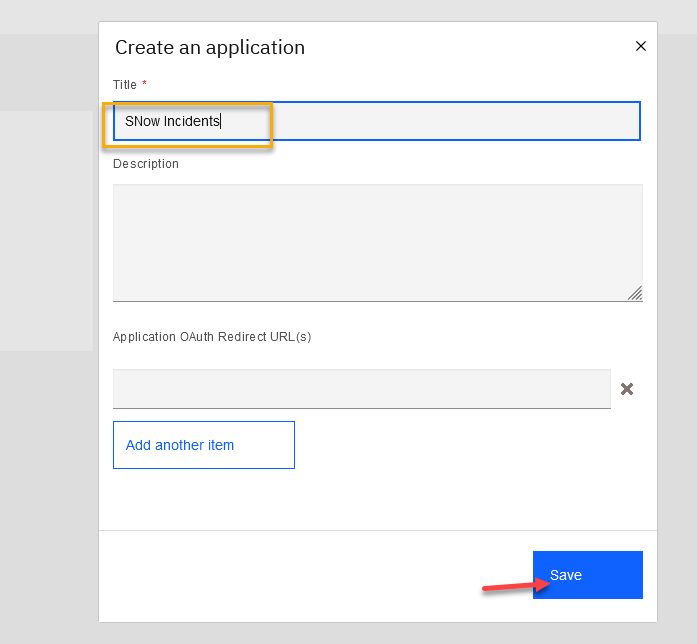
12. Enter a name for this application and click Save.
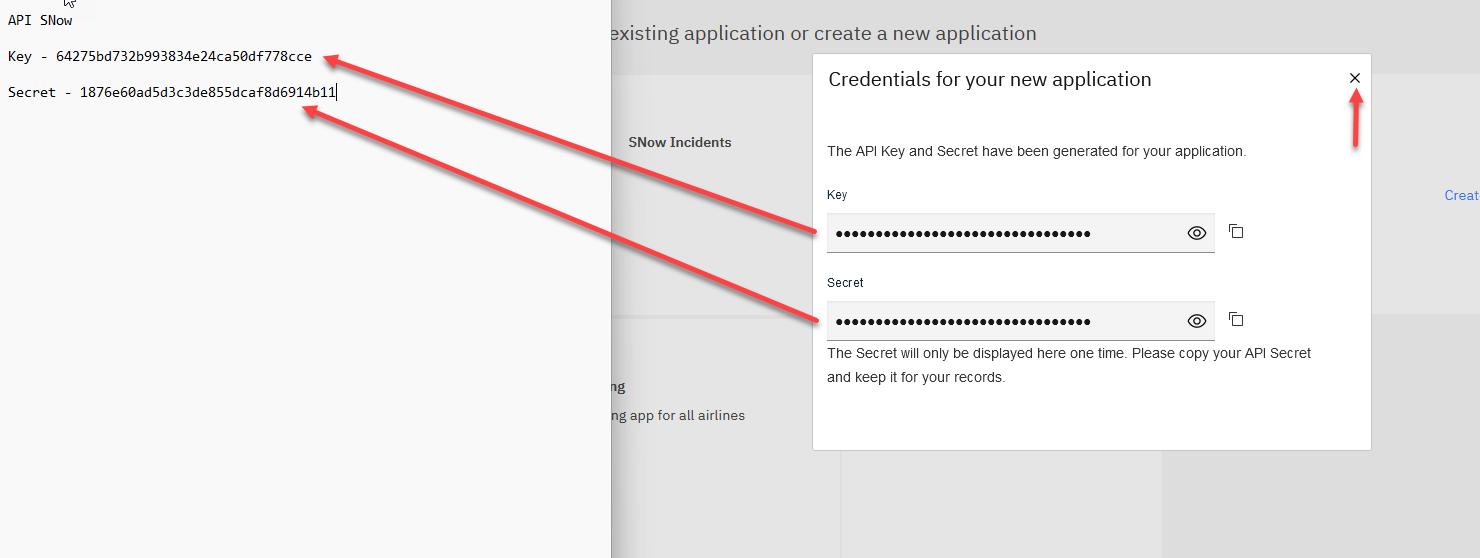
13. You will get the following page. Save the Key and Secret into notepad and then click X to close window.
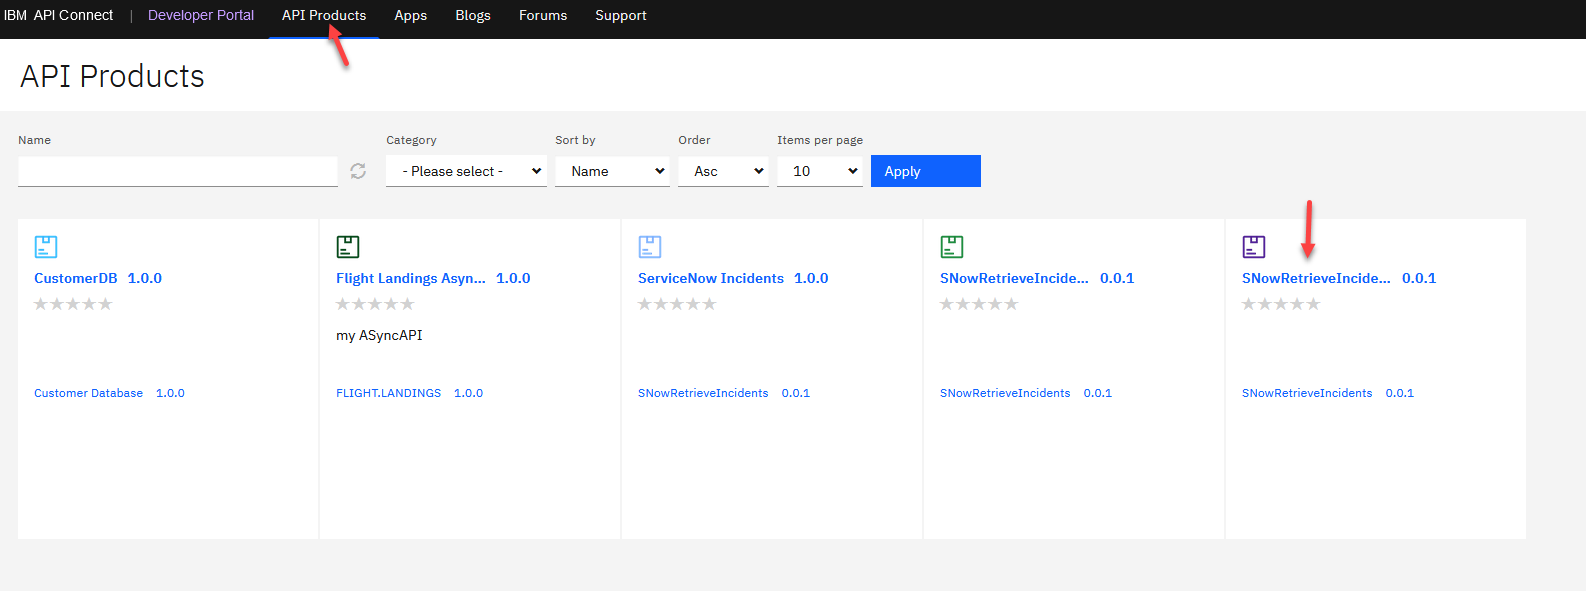
15. With an app now created, let’s travel back to the API Products page of the Developer Portal (upper left) and click on the product shown that we created and published to.
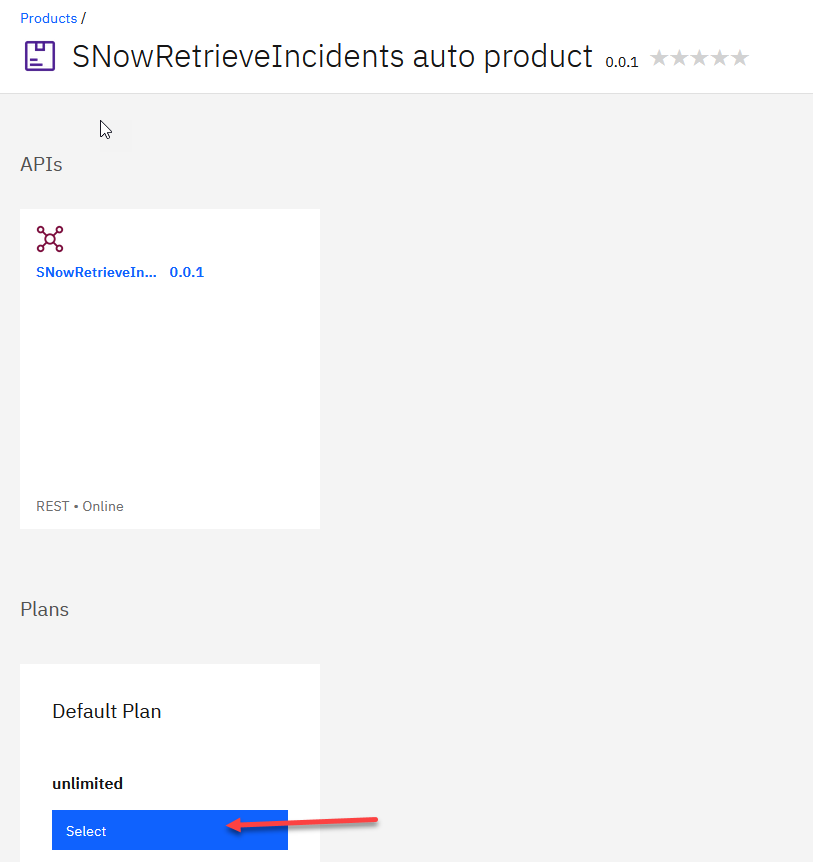
16. We will also need to subscribe to a plan for this Product. Since we only have the Default plan we will use that.
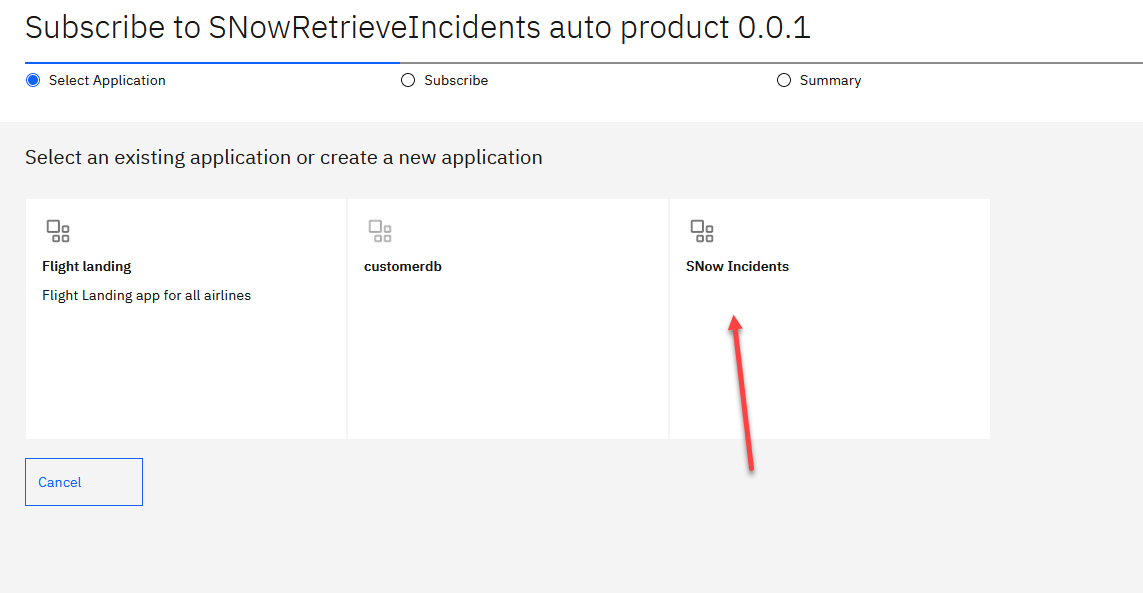
17. Select the existing application.
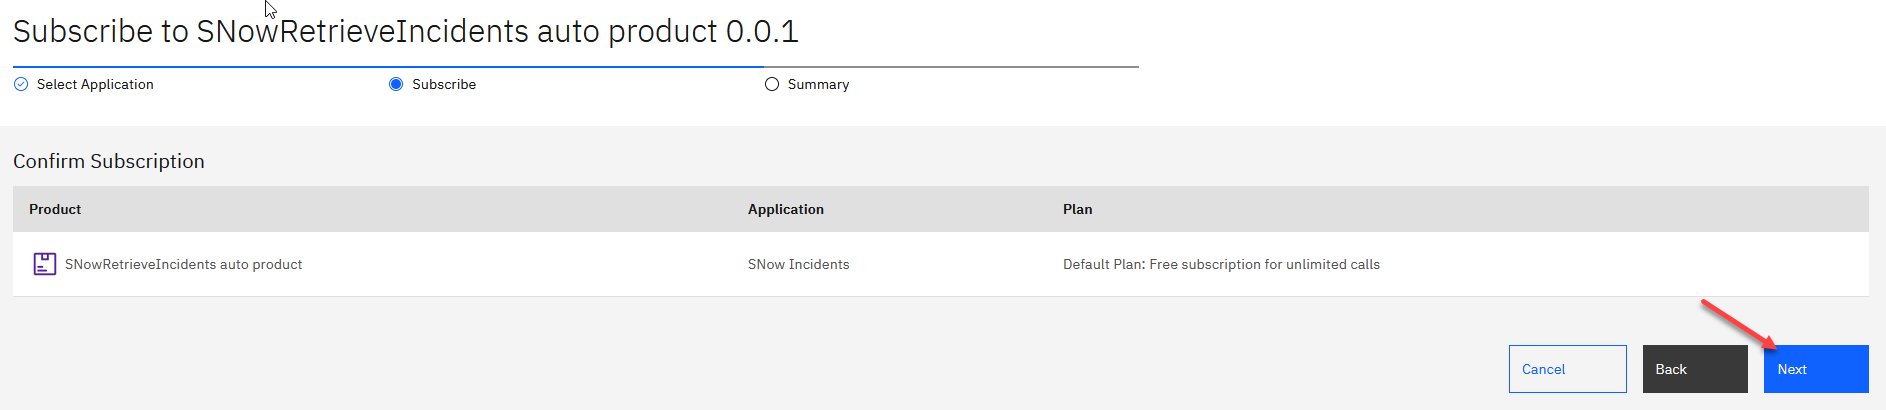
18. Confirm subscription and click Next.
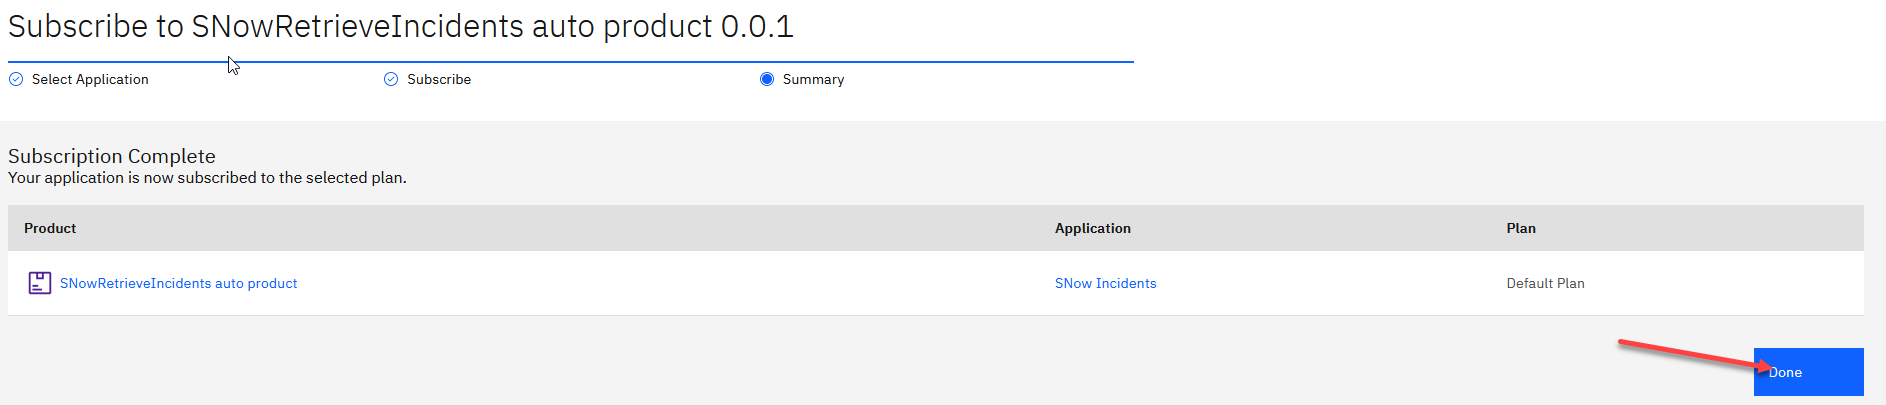
19. This will complete the Subscription. Click Done.
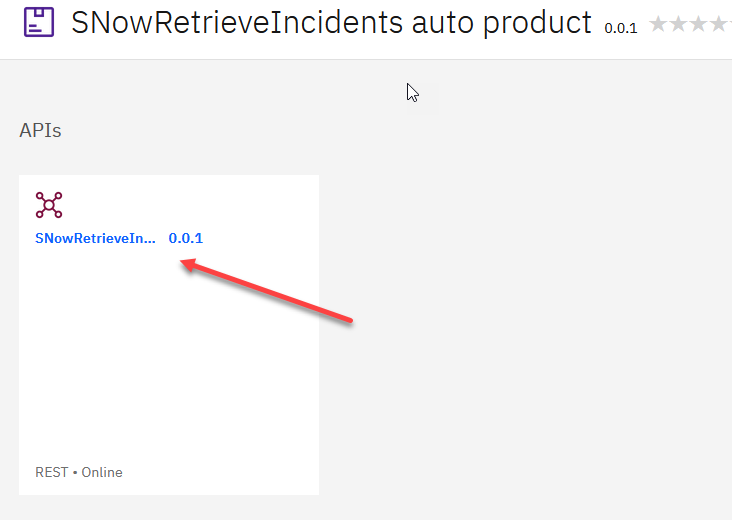
20. Click on the API that we will now test.
21. Here we will select the GET account operation on the left and then select Try it. The Client ID will have the App name we created earlier. You will need to copy the secret that we saved and paste it in the Client secret. Click Send.
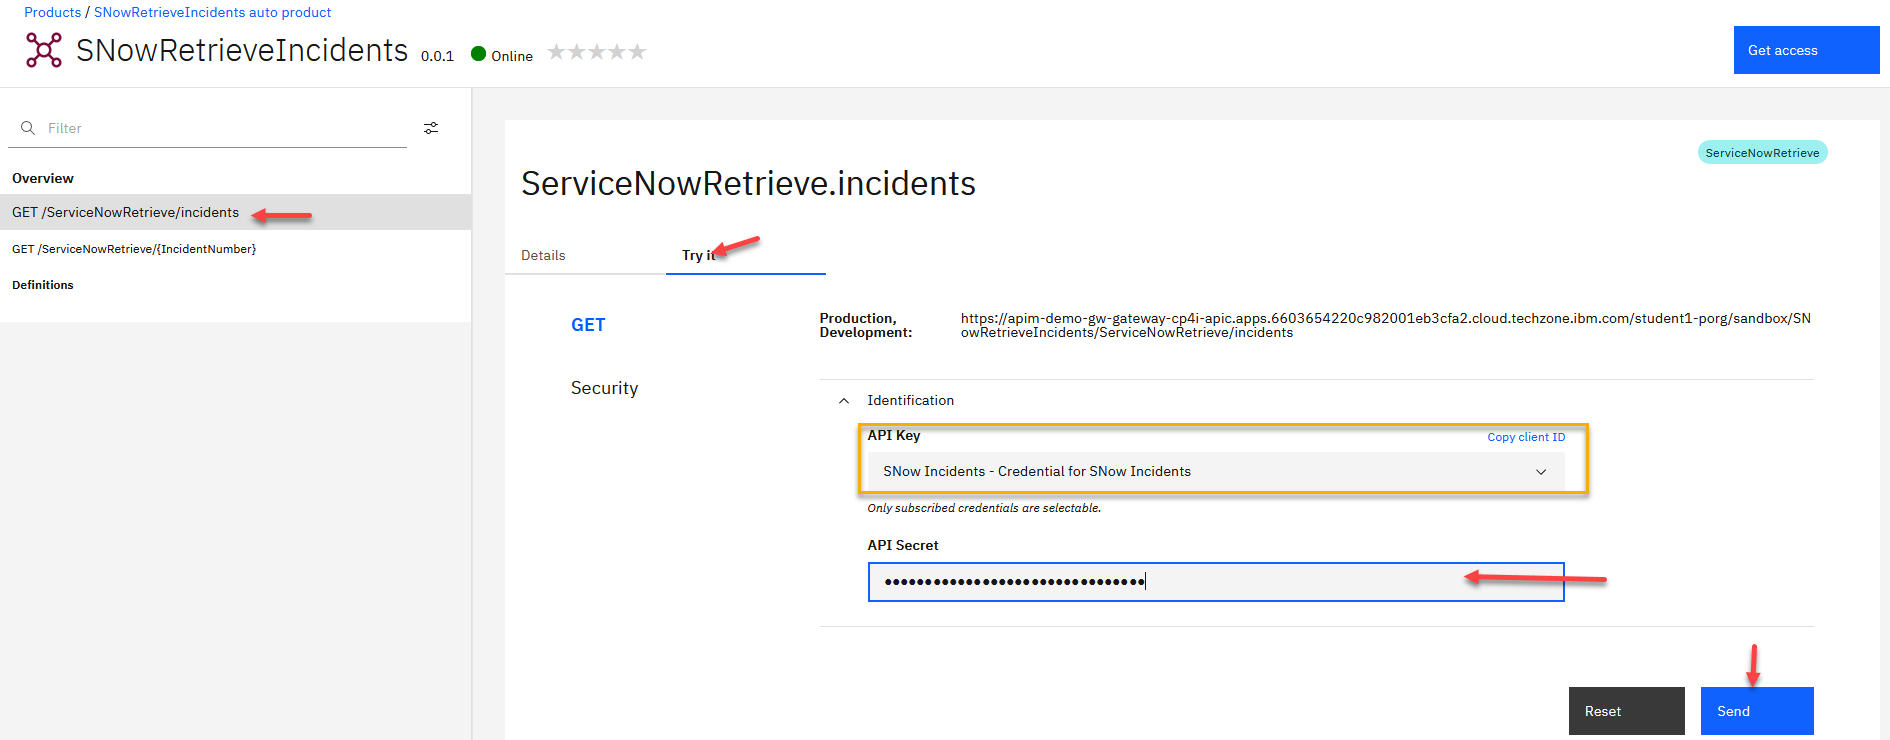
22. You will see the response on the bottom of the page. Note: Hit the Send button a few more times to exercise the API.
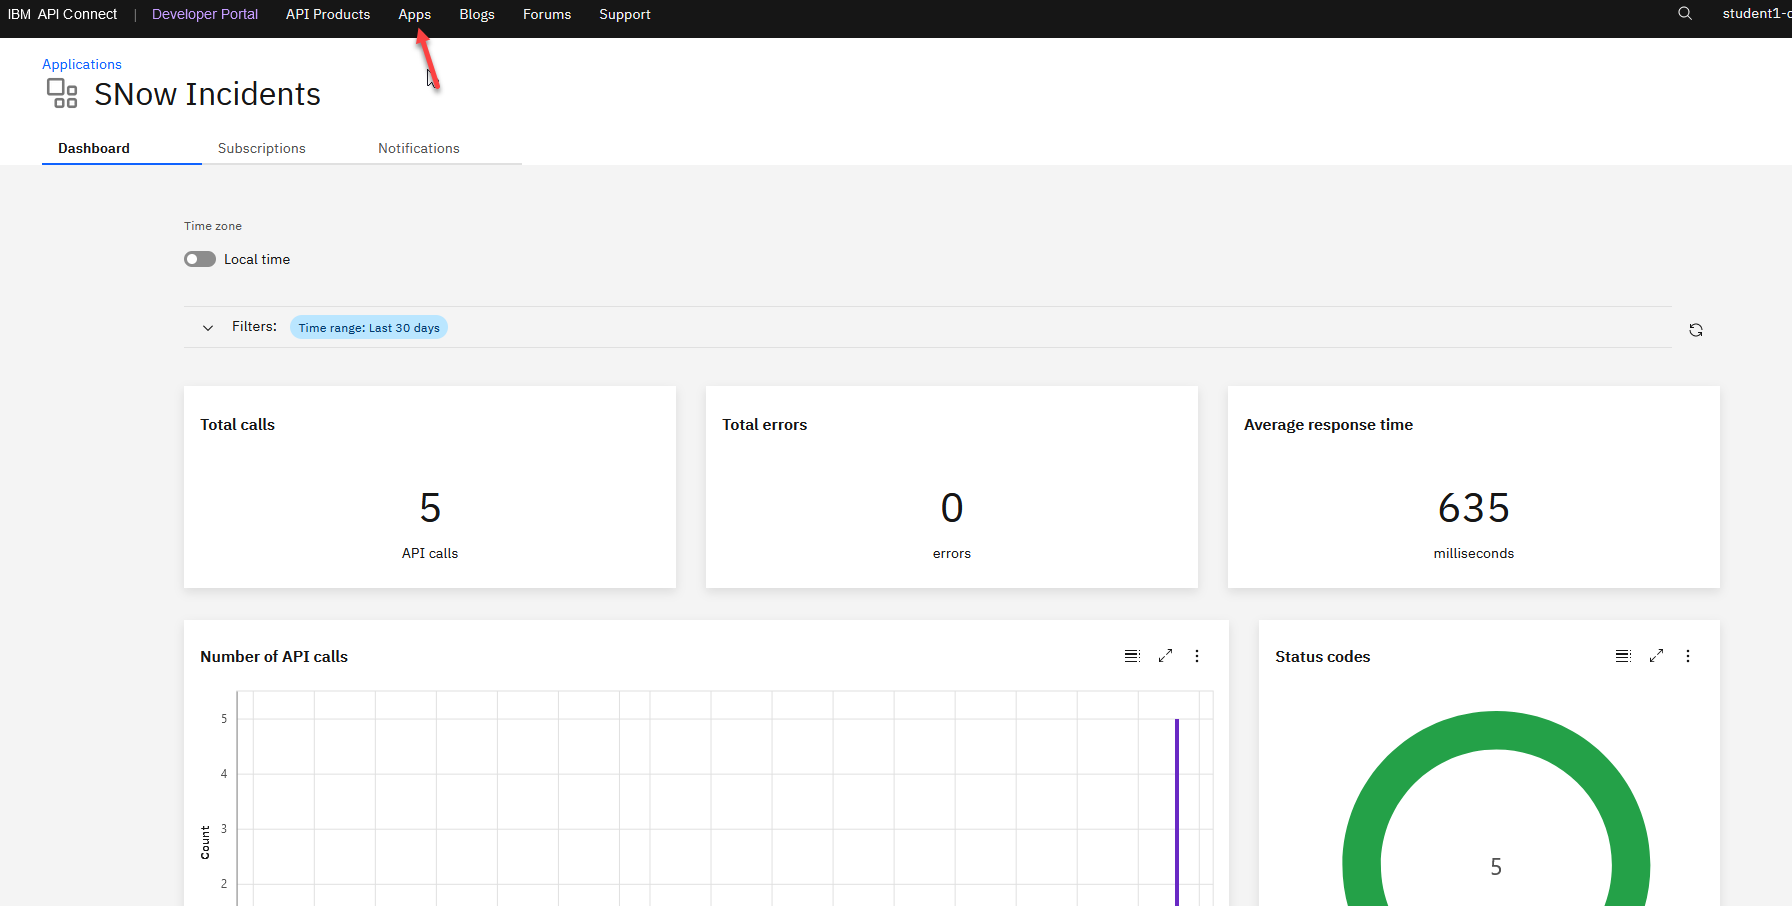
23. Now that we have run the API several times, click on Apps on the top menu and select the Active app that we are using.
This will give you info on the APIs that you are running.
The End.