IBM Integration PoT Labs Home page
IBM App Connect Enterprise
App Connect Designer Salesforce
—v
Table of Contents
- 1. Introduction
- 2. Setup connection to Smart connectors for this lab
- 3. Create a Designer Event Flow in CP4I for Salesforce
- 4. Testing the Event flow
- 5. Deploying Your Designer Flow to App Connect Dashboard
1. Introduction
In an event-driven flow you identify an event that can occur in your source application and actions that can be performed in one or more target applications. The flow is triggered when the event occurs.
- The purpose of this LAB is to show how to create an event-driven flow to identify when new Salesforce Account Records are created.
2. Setup connection to Smart connectors for this lab.
In this section we use App Connect Designer to create a flow that is triggered when an event occurs on Salesforce records.
First make sure you are logged into the CP4I Platform Navigator using the account the instructor provided to you.
7. For this lab we will be using MQ to receive the events from App Connect so we will go and create a new Queue in are QMgr. Right click your qmgr and open in a new tab.
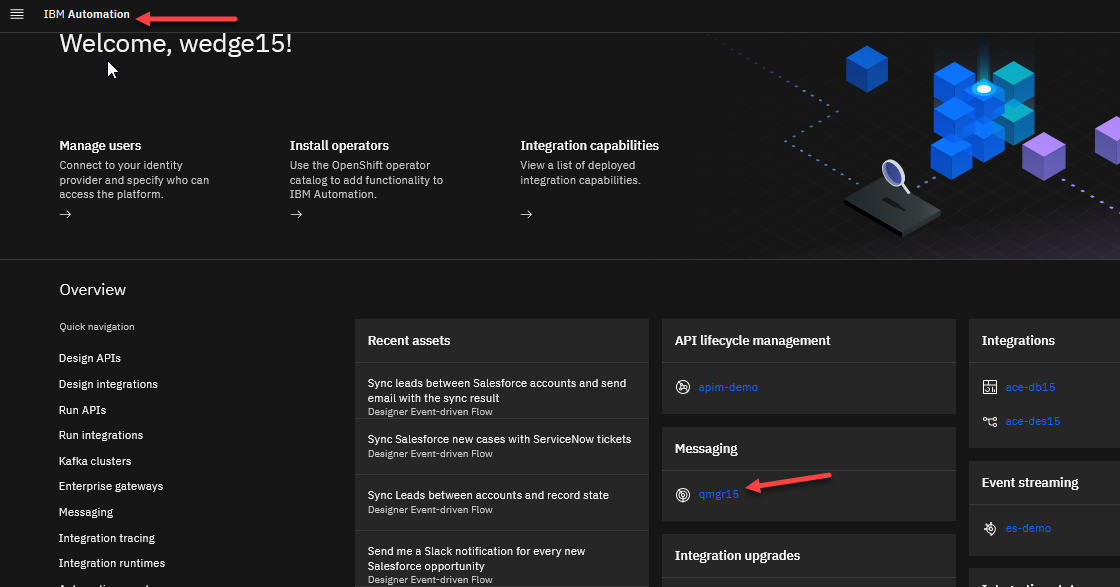
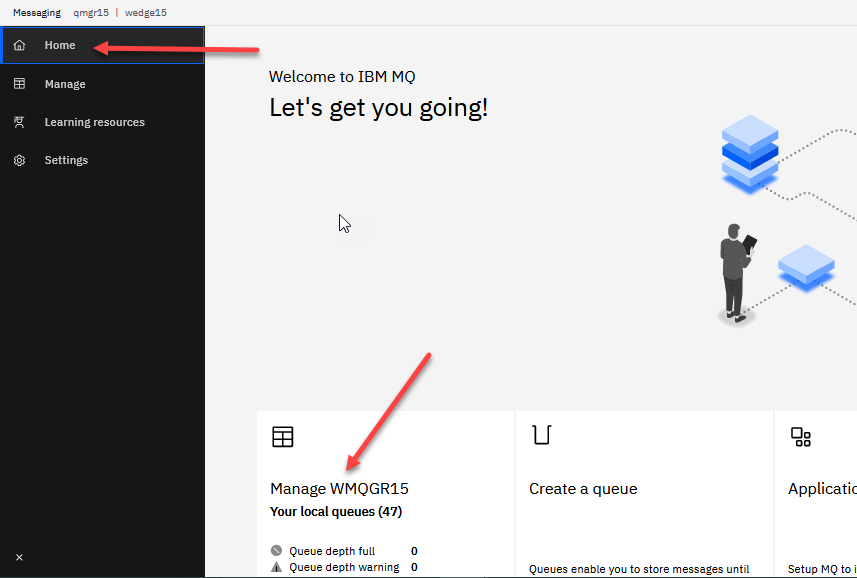
8. Now save the name of your QMgr and click on the tile to open that Qmgr dashboard.
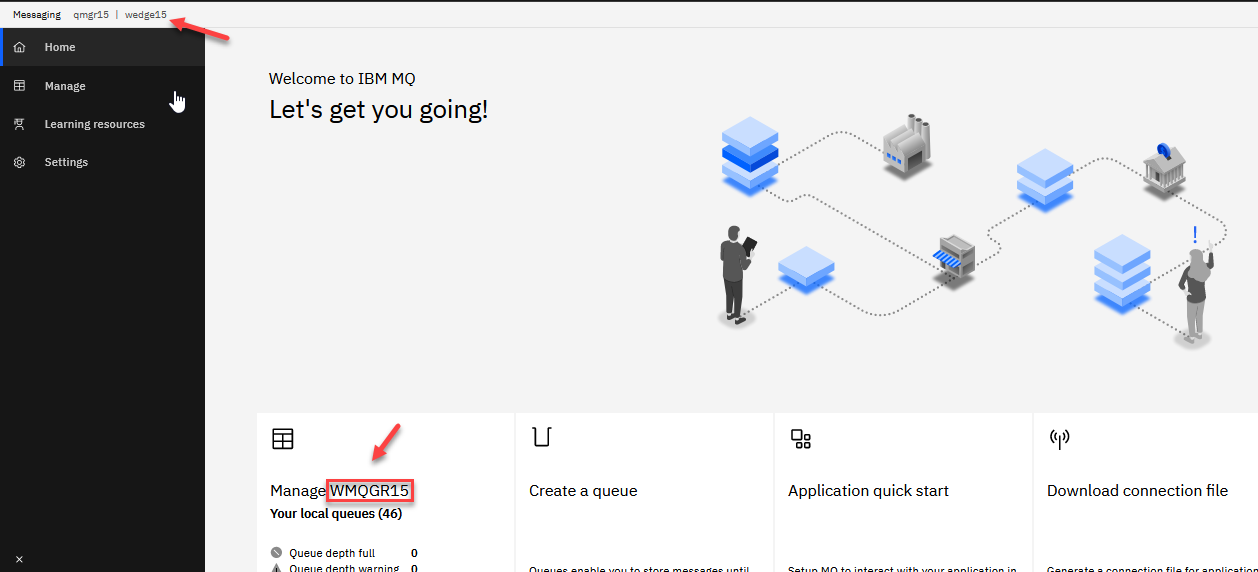
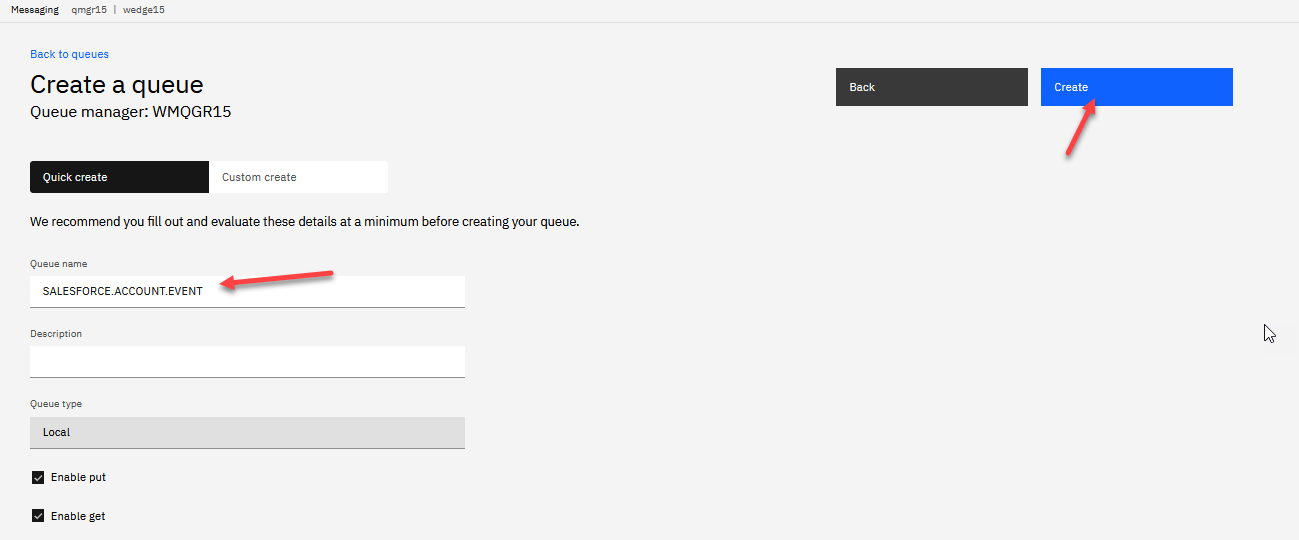
9. Now we will create a new Queue to use in our new flow
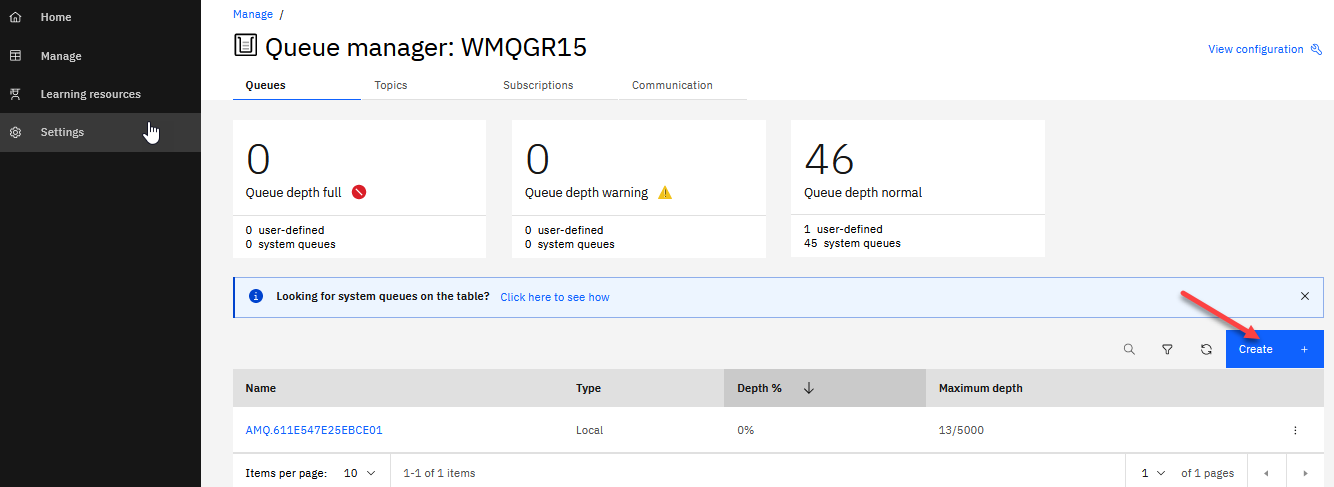
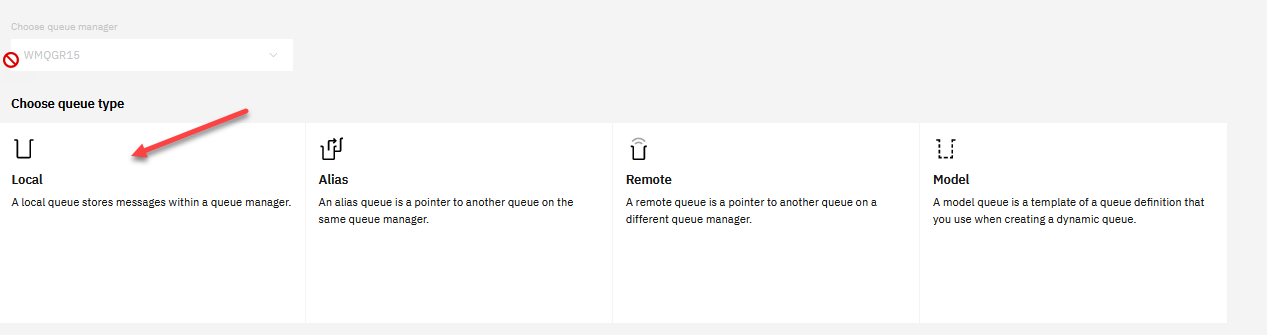
10. We will be creating a new Local queue.
11. Enter the name for the Queue. In the example we used “SALESFORCE.ACCOUNT.EVENT” then click Create.
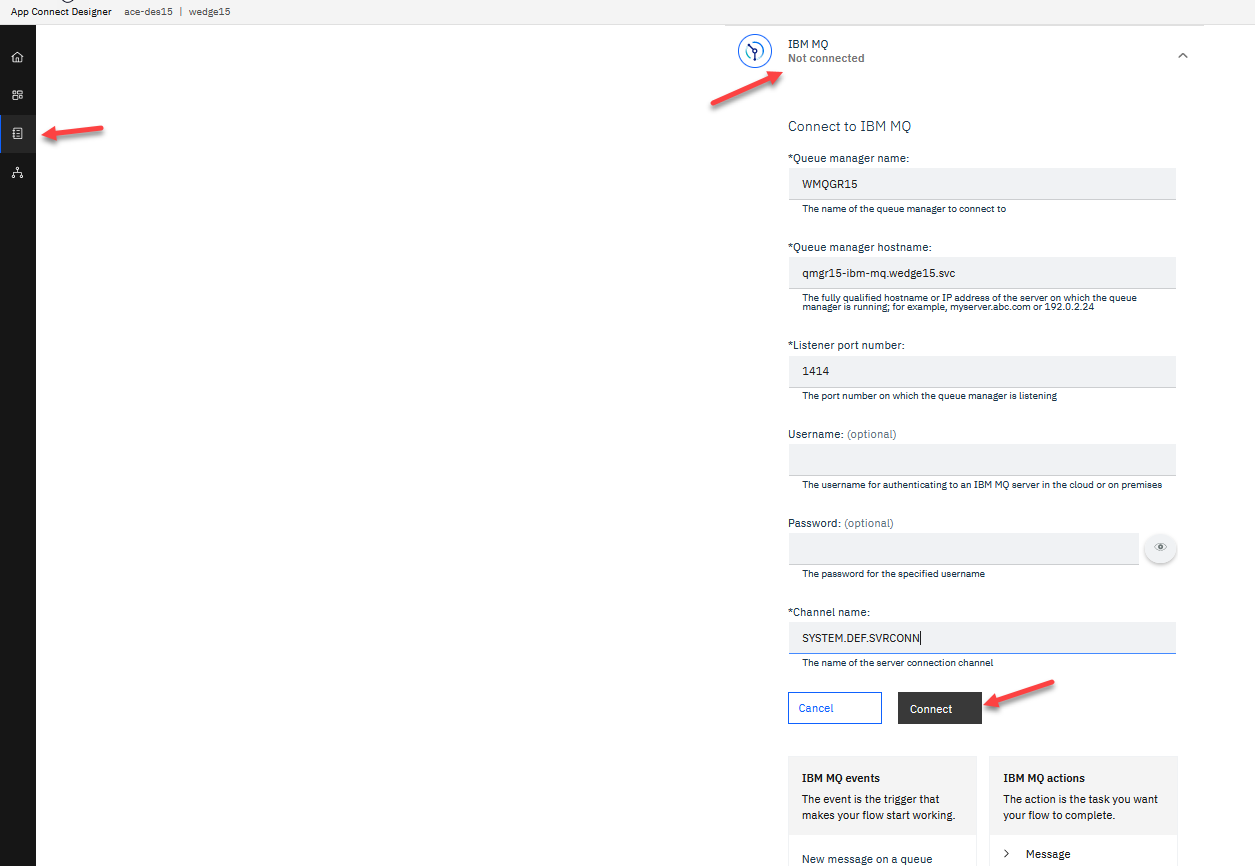
12. Now go back to the tab with the App Connect Designer and select the catalog on the left menu. Scroll down to IBM MQ and fill in the connection info.
- Enter your QMgr name
- For the QMgr host we will use the service name qmgrX-ibm-mq where the X equals the number from your cluster id ( ex: palpatine2 )
- Port is 1414
- Channel SYSTEM.DEF.SVRCONN
3. Create a Designer Event Flow in CP4I for Salesforce
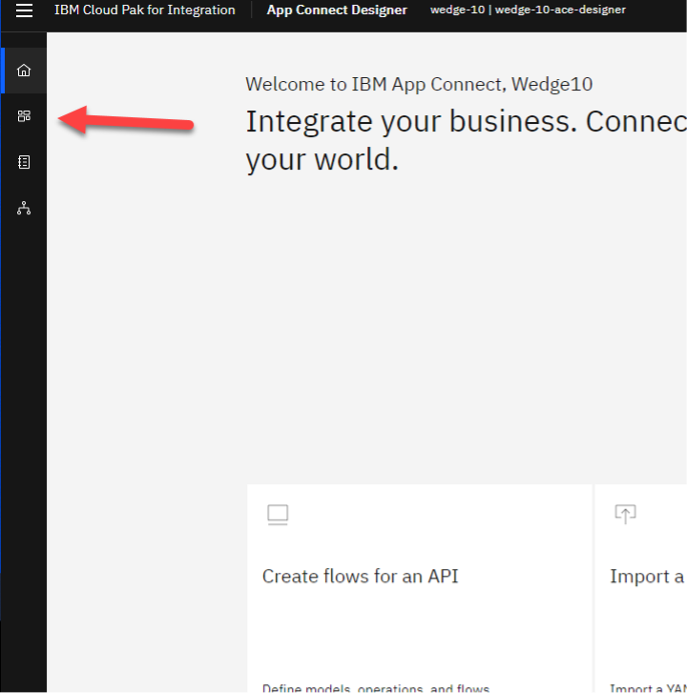
1. Click on the App Connect Designer dashboard icon:
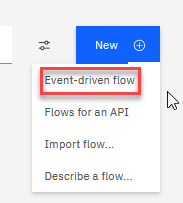
2. Select from the New drop down to create a new Event-driven flow:
3. First thing enter a name that identifies the purpose of your flow, for example: Salesforce New Account Events.
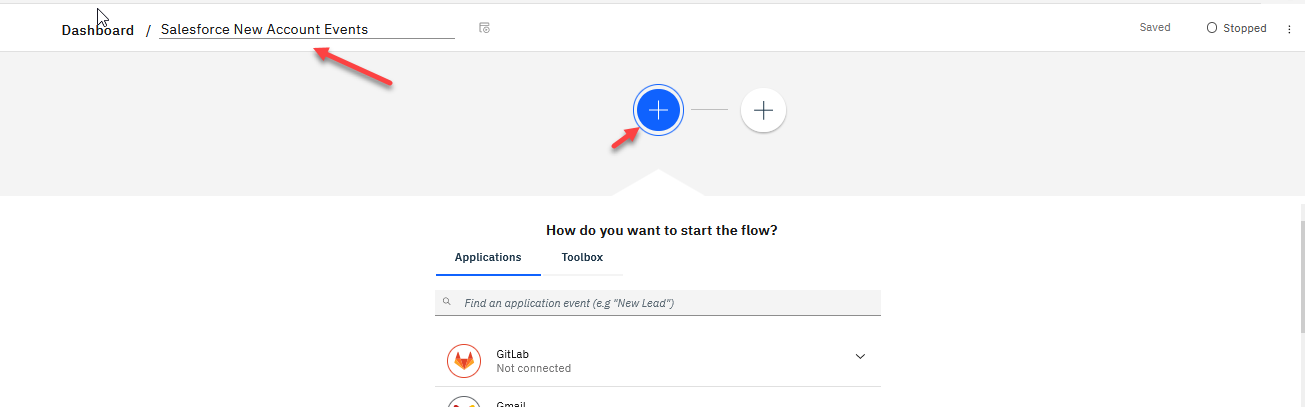
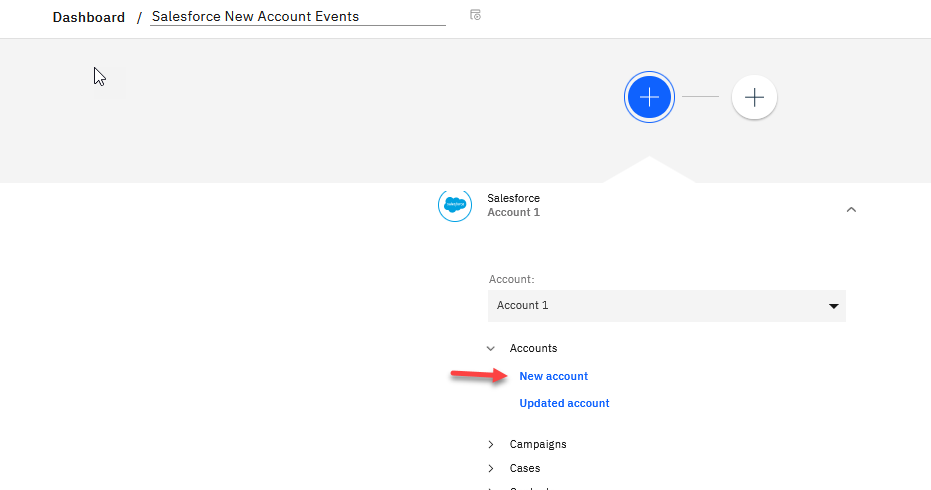
4. Click on the first Blue + and scroll down to Salesforce connector. Select New account under Accounts.
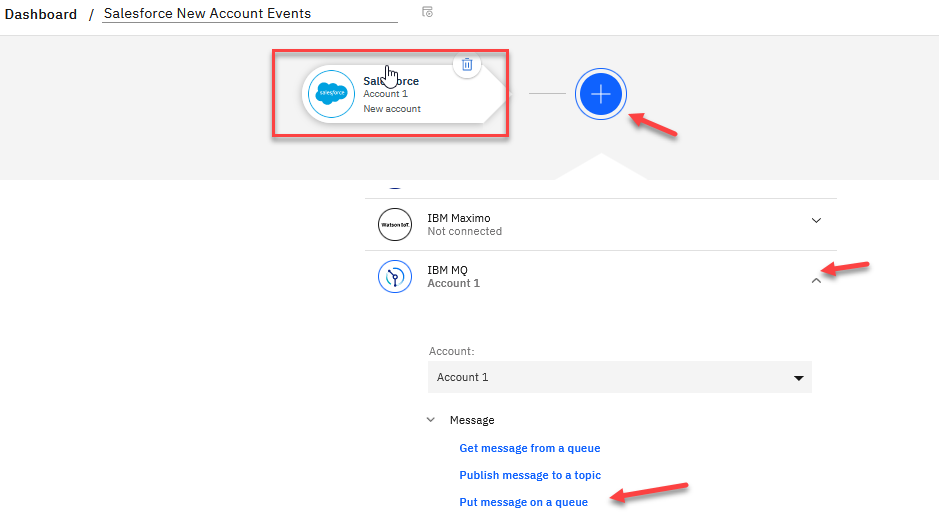
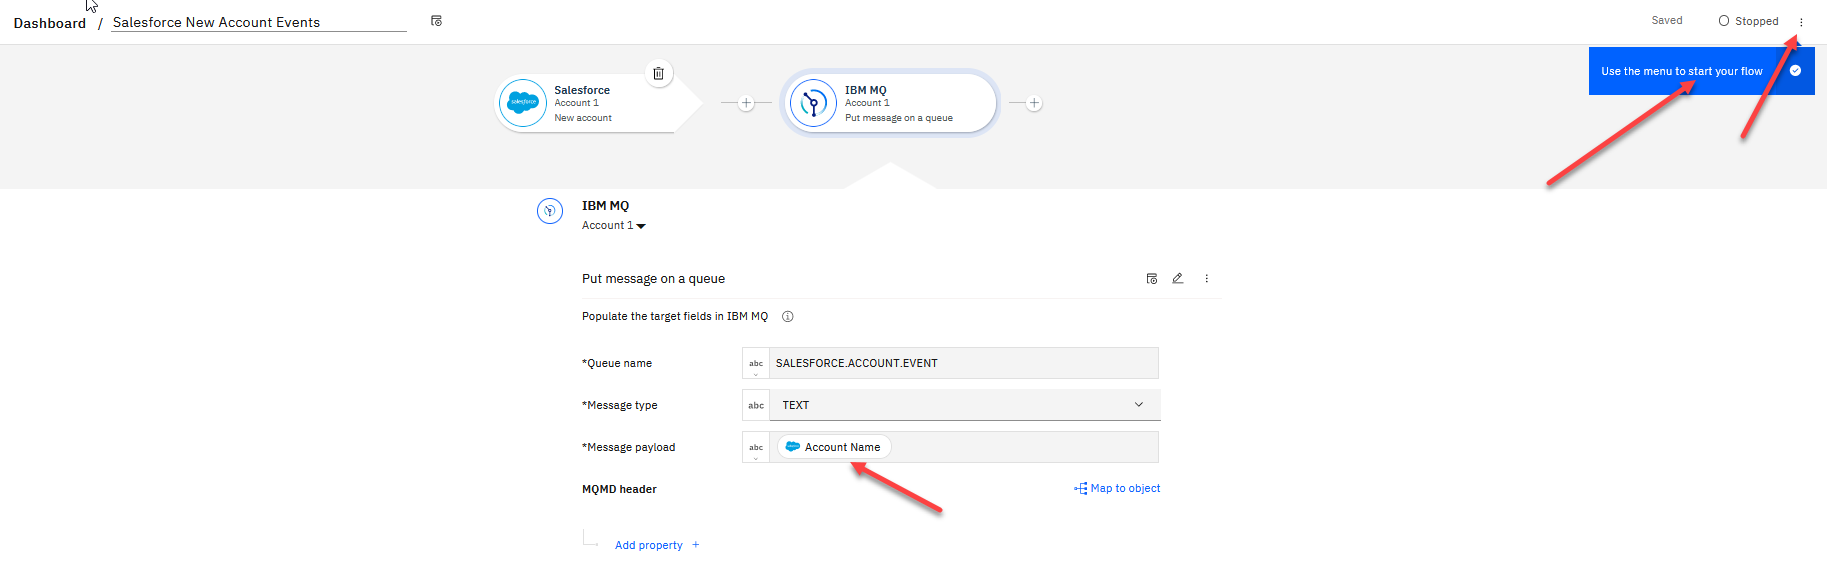
5. Now we show the Salesforce connector. Click on the next Blue + and scroll down to IBM MQ. Select the Put message action.
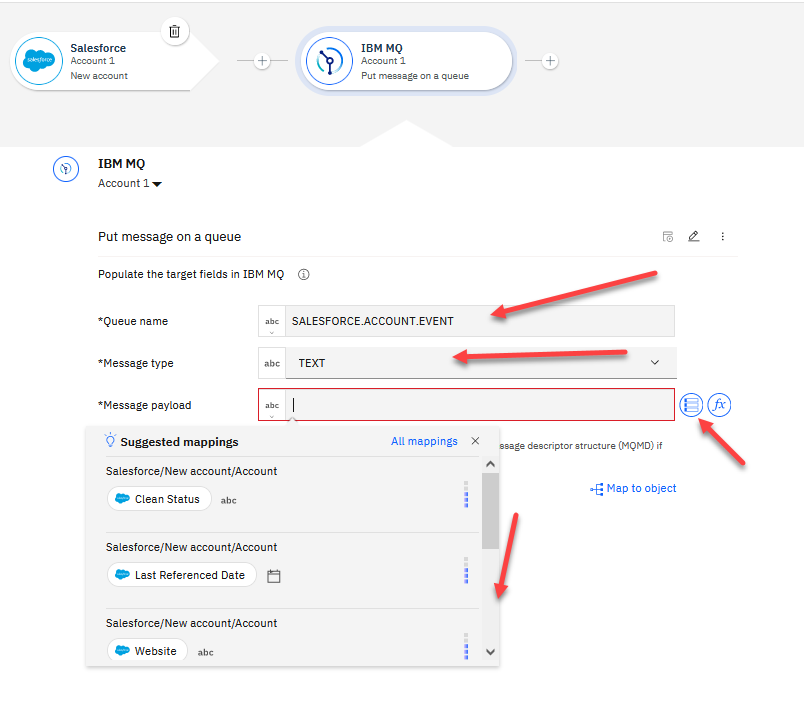
6. Now enter the Queue Name you created for MQ. We used SALESFORCE.ACCOUNT.EVENT
- For Message type select Text
- For the Message payload click on the insert mapping and you will have a list of Suggested mappings. Scroll down and select the Account Name.
7. Now we are ready to start the flow. In the upper right corner click on the 3-dots and start the flow.
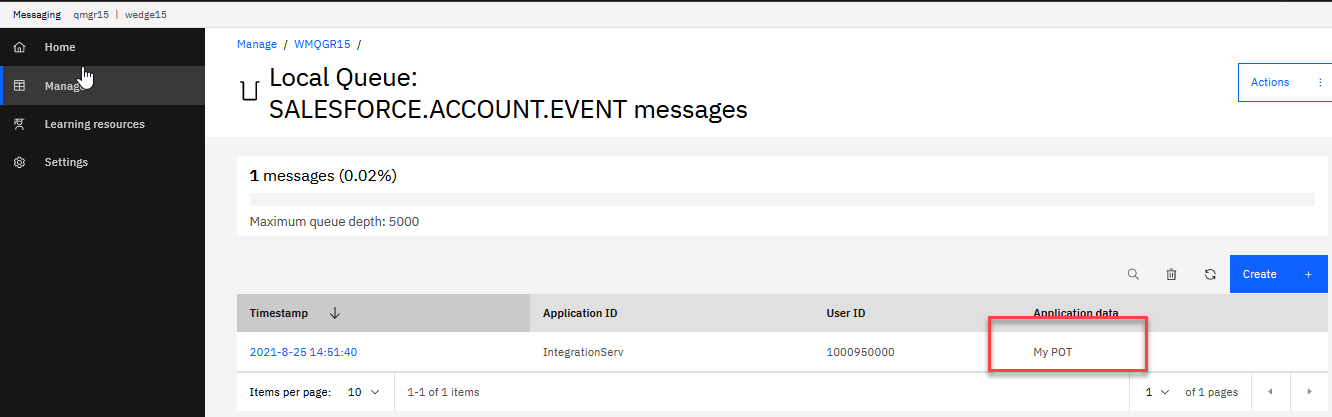
8. Now return to the tab where you have the MQ console opened. Click on manged and you should see your new Queue. It should be showing 0/5000 which means it has no messages and can handle 5000 messages.
- This is where we will check when we test this flow.
![alt text][pic14aa]
4 Testing the Event flow
We will now test the new Event flow. We will log into our Salesfoce account and create a new Account.
1. Open a new tab and go to https://www.salesforce.com/ login with your Salesforce login.
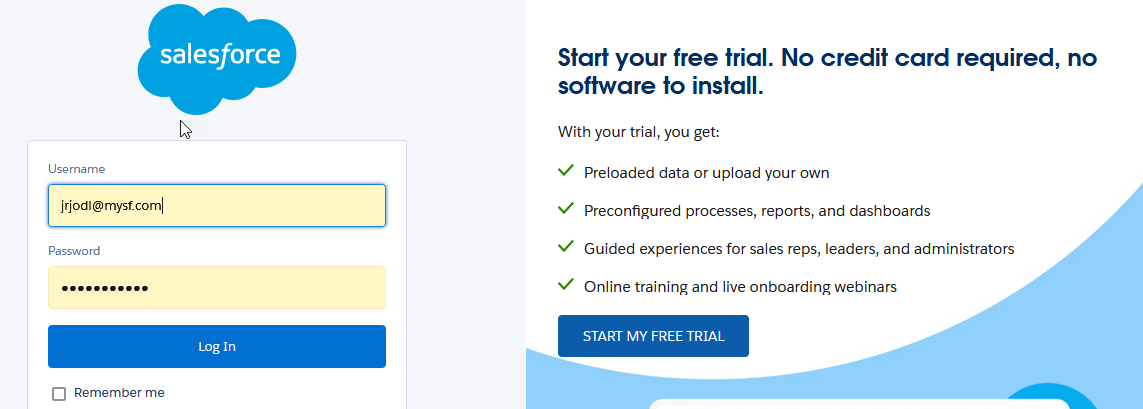
Note: This is a shared login so others will be using this as well so try and use names that are unique to you or the Account you were assigned.
You will use the Userid and Password provide for this lab.
    username: potSF@gmail.com
    password: SF-Aug-2024
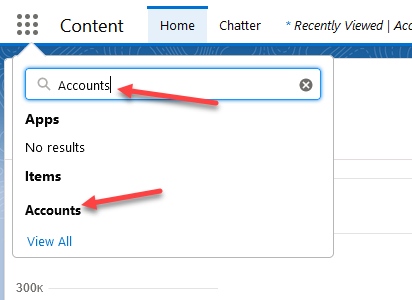
2. In the left menu seach for Accounts and select that.
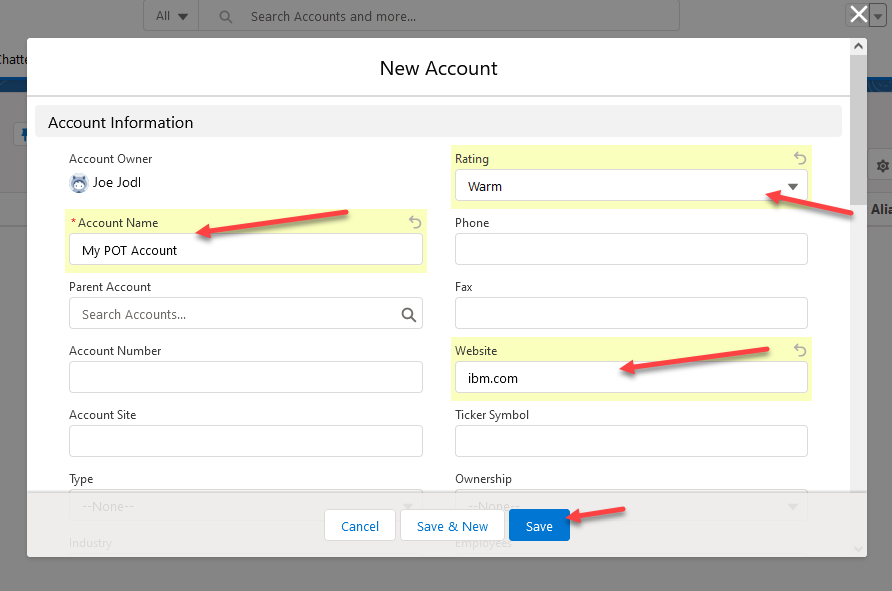
3. There are two methods for creating a new Account. Select one to get the New Account screen

4. Fill-in the new Account info. You will need a Account Name and website and then click Save
5. Now we will go back to the MQ console to check for messages on our Queue from this event.
5. You will now see that it shows 1/5000 which means we have a new message. Click on the Queue to see the message. Remeber in the mapping of the flow we put the Account Name in the Message body so you should see that here.
5. Deploying Your Designer Flow to App Connect Dashboard
As in other labs we can export our Designer flow as a bar file and deploy to App Connect Dashboard on Cloud Pak for Integration. We will not do that in this lab.