IBM Integration PoT Labs Home page
IBM App Connect Enterprise
App Connect Designer Salesforce
Table of Contents
- 1. Introduction
- 2. Create a Designer Flow in CP4I to Call Salesforce
- 3. Deploying Your Designer Flow to App Connect Dashboard
1. Introduction
The purpose of this LAB is to show how to retrieve Salesforce Account Records using IBM App Connect Designer on IBM Cloud Pak for Integration. When prompted to log in to CP4I use the username and password provided to you for this lab.
If you need to review logging in to the Platform Navigator review the steps in the Return to main lab page
Gathering your own SalesForce Credentials
- For this lab, you will be provided with shared credentials. If you would like to use your own account you can follow these steps to collect your SalesForce account details: Username, Password, Client Secret, and Client ID. You can learn how to obtain these values here
2. Create a Designer Flow in CP4I to Call Salesforce
In this section we use App Connect Designer to create a flow that will be exposed as an API to connect and call Salesforce records.
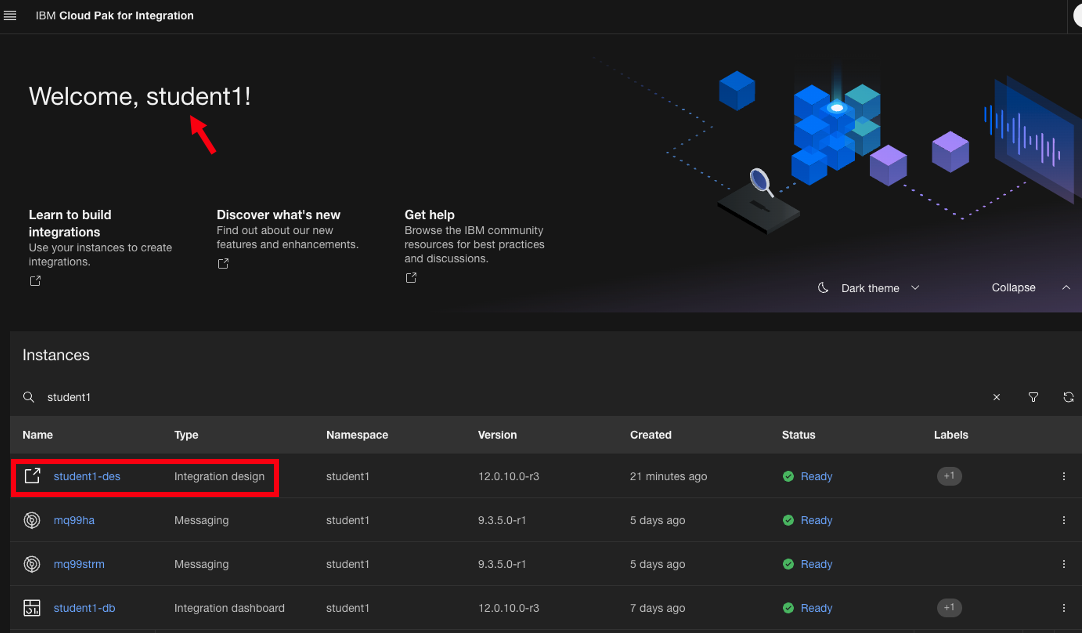
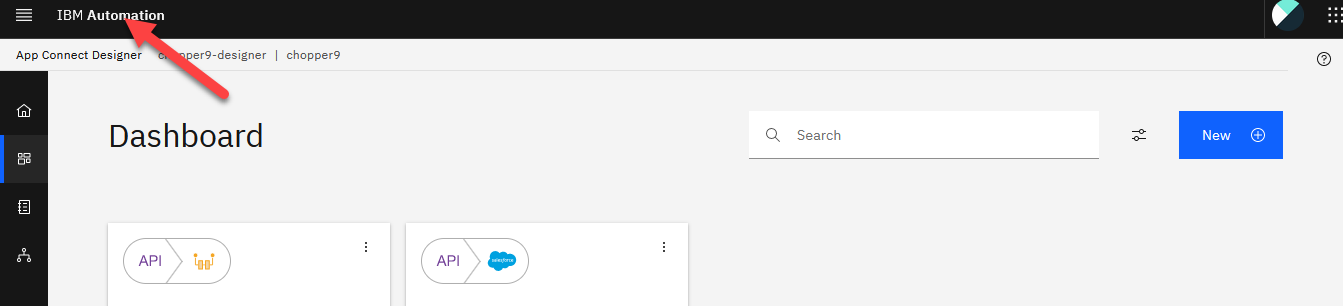
2. You will now be on your home page and in the upper left it will show your login name. Under Integrations click on the App Connect Designer link to take you to the designer dashboard.
3. In the upper left always make sure you are in the correct namespace. Select the tab on the left to open the Catalog screen. The App Connect catalog provides a list of applications and APIs that are available.
4. Now scroll down to the Salesforce connector and click on the Connect button. We are setting up our Salesforce connector here first but this also can be done with in the flow as you are building it.
- Note: If you already have the Salasforce smart connect account setup skip to step 8.
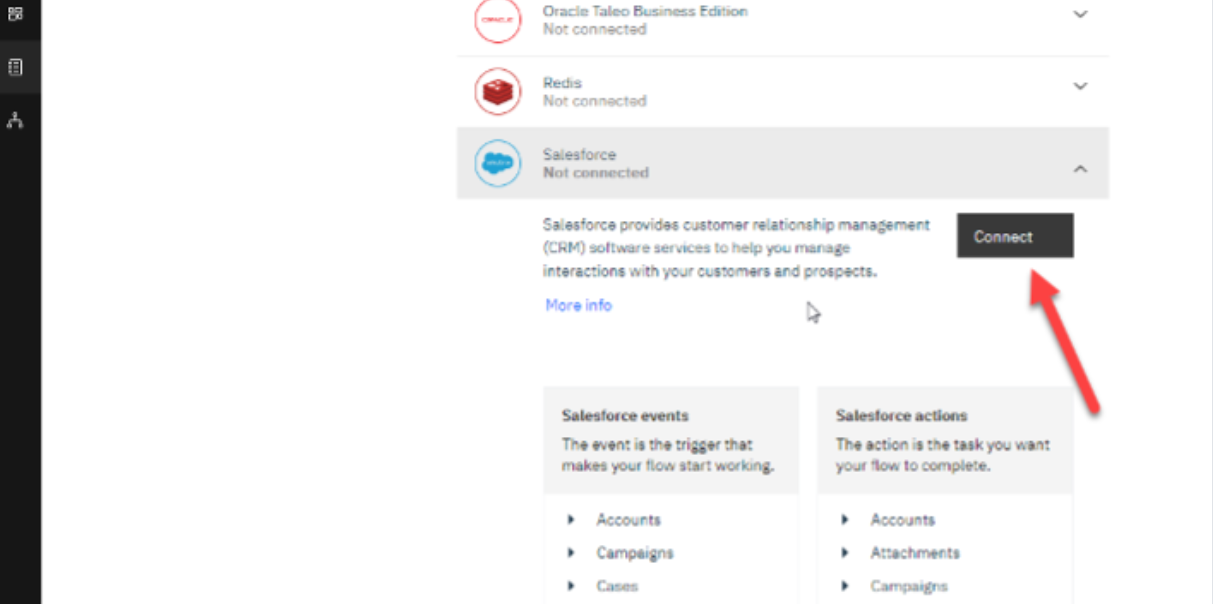
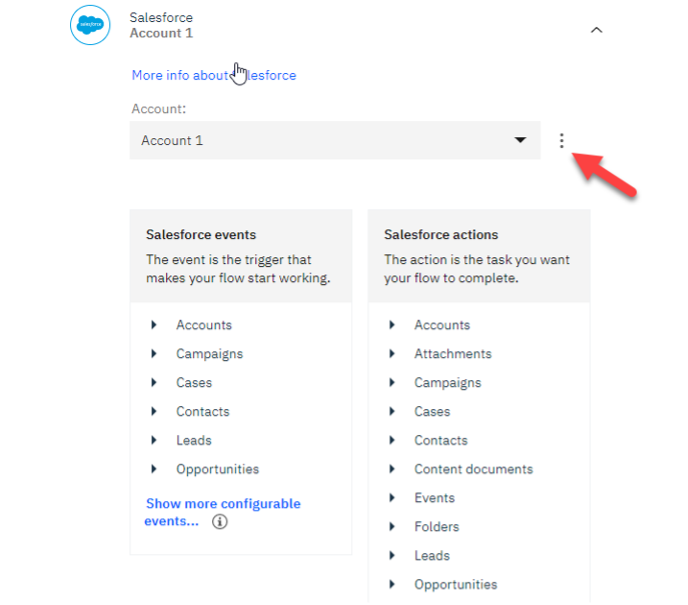
5. You will see the events and actions available with this connector. Also you can change the Account Name to something more meaningful to you by clicking on the 3 dots next to the Account name.
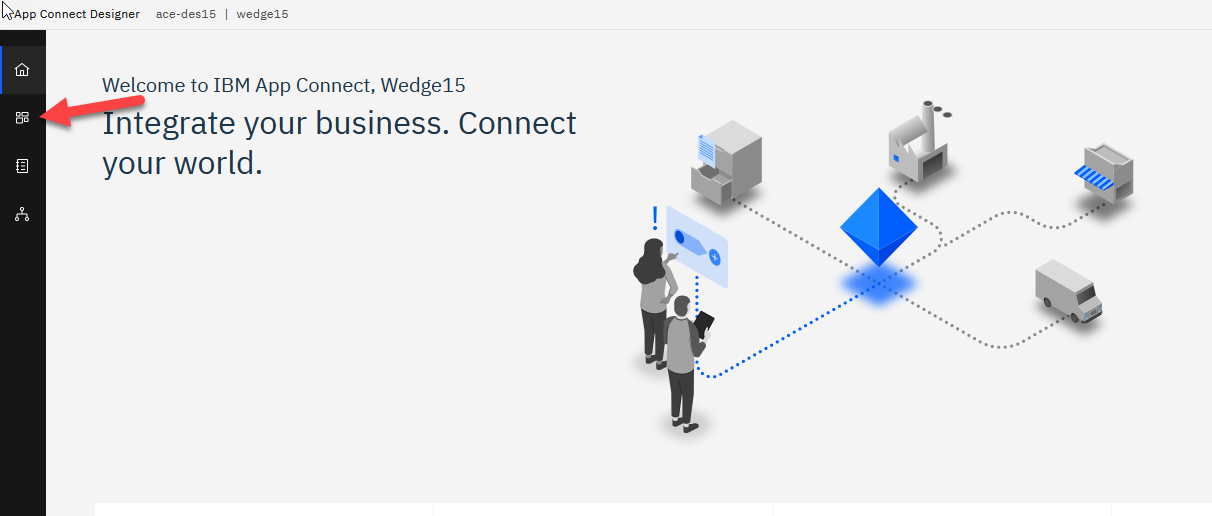
6. Click on the App Connect Designer dashboard icon:
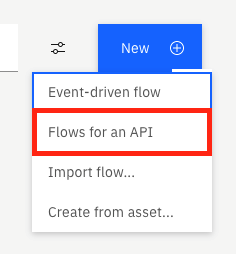
7. Select from the New drop down to create a new API flow:
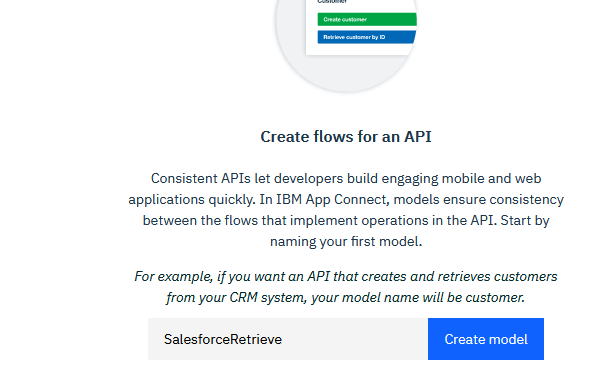
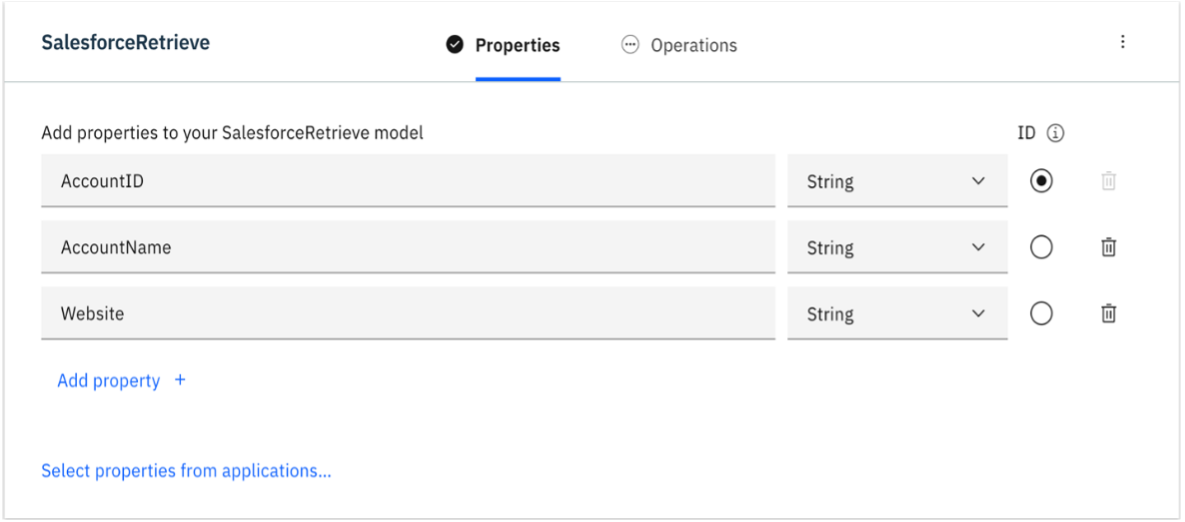
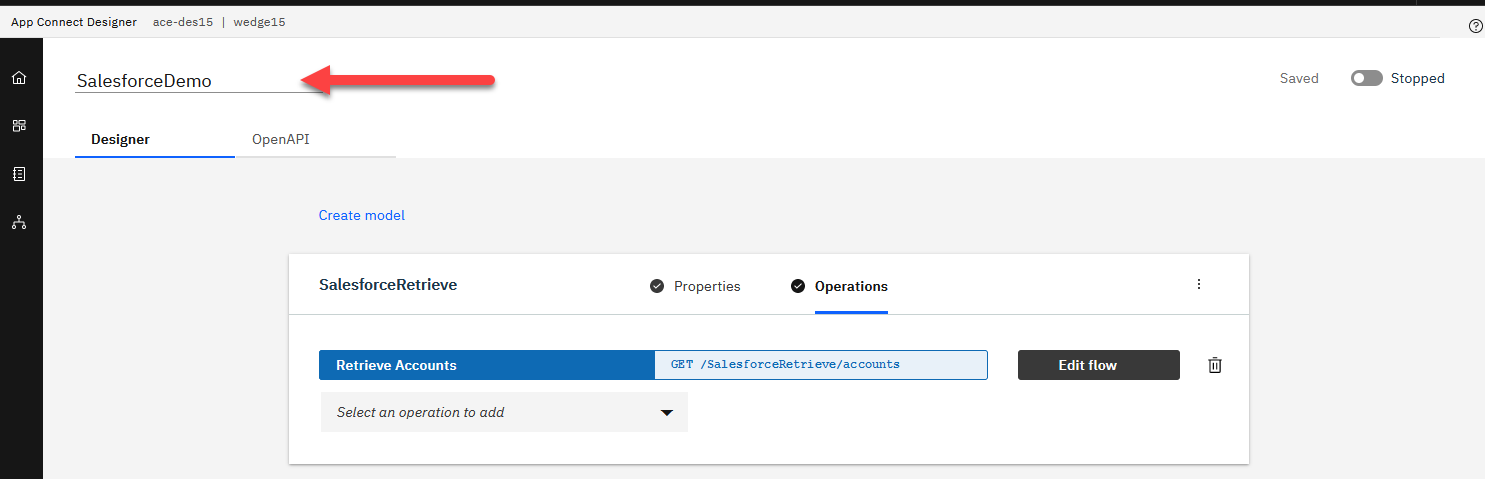
8. First thing we will do is create the model for this. We will call the model SalesforceRetrieve
9. For this example, we will map the following properties which are all data type String. You can also set the data type to Number for properties containing numerical integer values.
- AccountID
- AccountName
- Website
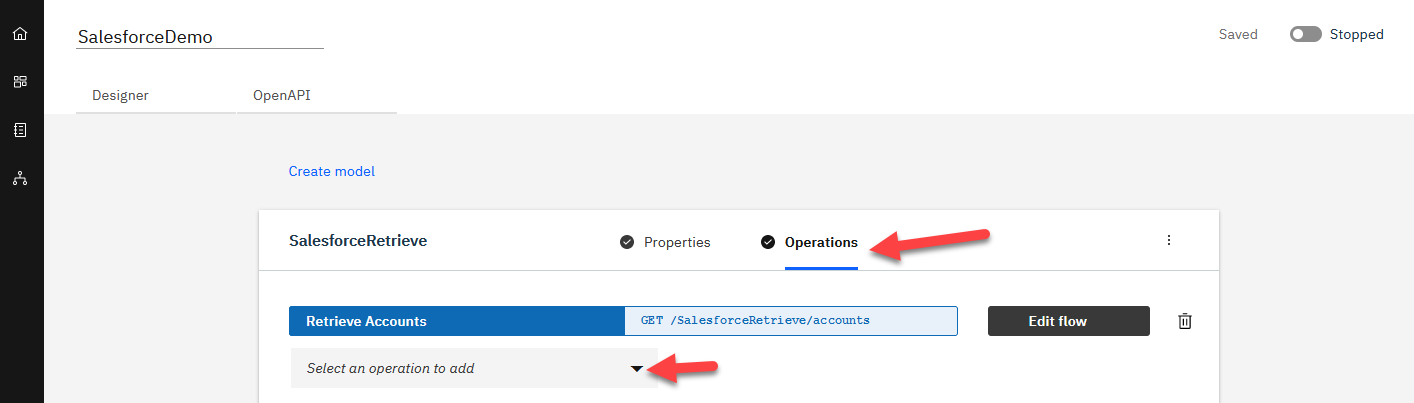
10. Now that we have defined the properties in our API model definition, we can implement a flow by clicking on the Operations tab. The Operations tab is located next to the Properties tab. From the Operations drop-down menu, select Add a Custom Operation. Here we will customize the operation that we want our API to perform.
11. Customize the details of your API operation.
- Note: You can optionally set a description for your individual API operation.
- Display Name: Retrieve Accounts
- HTTP Verb: GET
- Operation Name: accounts
- Note: The operation name will be a part of your API Endpoint URL and is therefore consumer-facing.
- Response body: SalesforceRetrieve
12. After customizing your API operation, the details should match the image below.
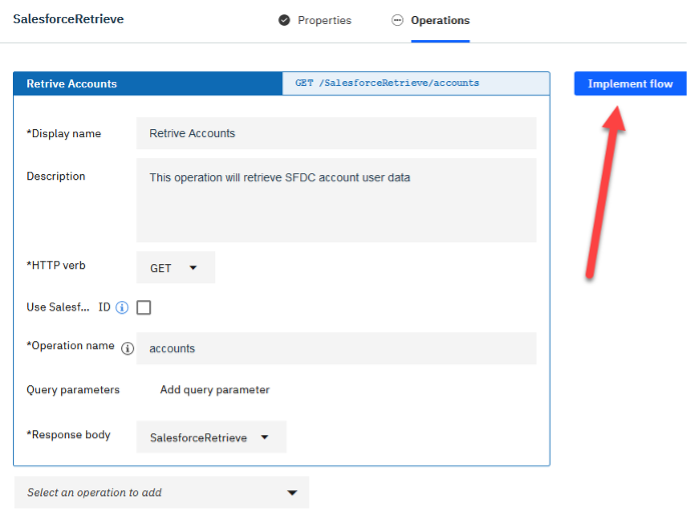
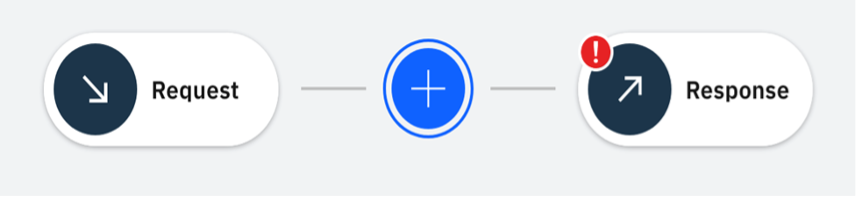
Now click the “Get /SalesforceRetrieve/accounts” tab can click the Implement Flow button next to our API operation definition. This will take us to the App Connect Designer flow. This is where we can insert Smart Connectors to communicate with a variety of external applications as well as implement conditional logic and callable flows.
13. After clicking the blue plus icon on our flow designer interface, we will be able to see the variety of Smart Connectors offered by IBM App Connect Designer. You will also see an option for callable flows which allows you to integrate more complex logic into your Designer flows by building them in App Connect Enterprise Toolkit and calling them via REST API protocols.
14.For our lab, we will be using the Salesforce smart connector, so let us scroll down to the Salesforce connector and select it.
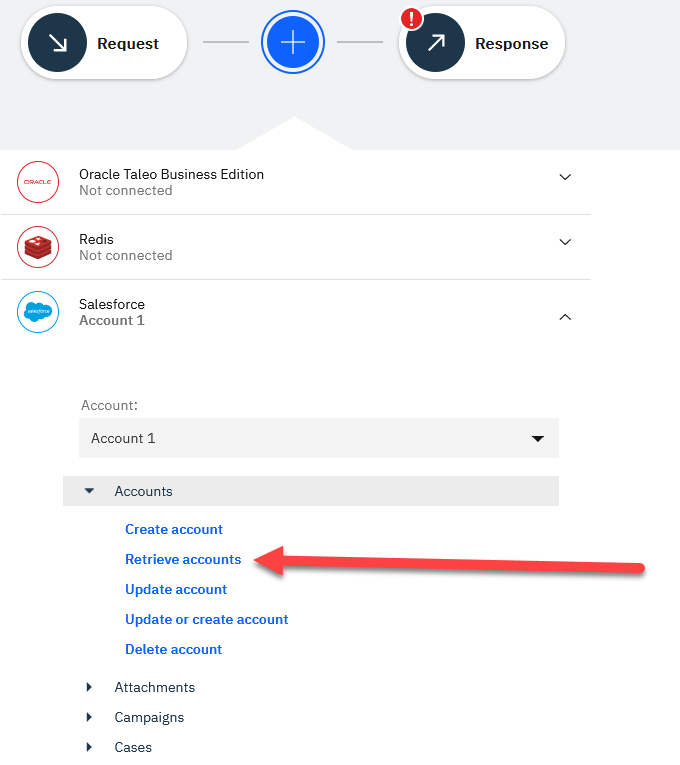
15. There is a vast catalog of different Salesforce objects you can interact with from App Connect Designer. In this lab we are retrieving Account information so go ahead and drop down the Accounts option and click Retrieve accounts.
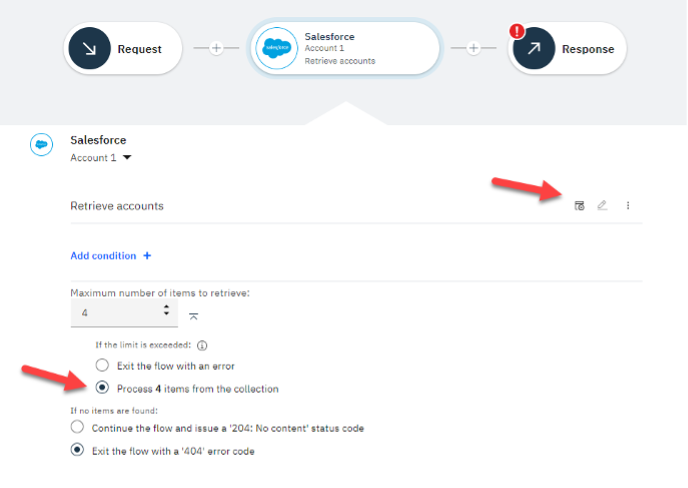
16. The next interface that populates under our Designer flow allows us to add conditionals to our integration flow. For example, if we want to retrieve all account records for a particular account, we can specify this condition by setting the AccountName key to the respective account.
In our example, we will retrieve the first 4 Salesforce account records. In order to do this, we can set the Maximum number of items to retrieve field to 4. And then select, Process 4 items from the collection in the radio button options. As you can see there is also some error handling options provided by App Connect Designer below.
A helpful feature offered by the Smart Connectors is the “Try this action” button on the right side of the canvas. Clicking this button will allow you to test your Salesforce connection. If your credentials and operations are configured correctly you should be able to pull records from Salesforce.
17. You can now click on the View details to see the results. This is done even before your API is complete and allows you to see info that is returned from Salesforce to be mapped.
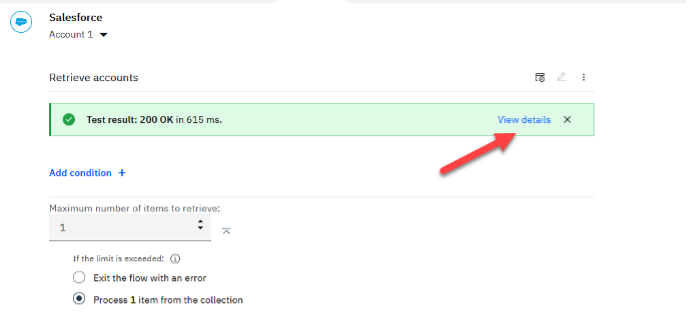
18. This shows the Test Results details.

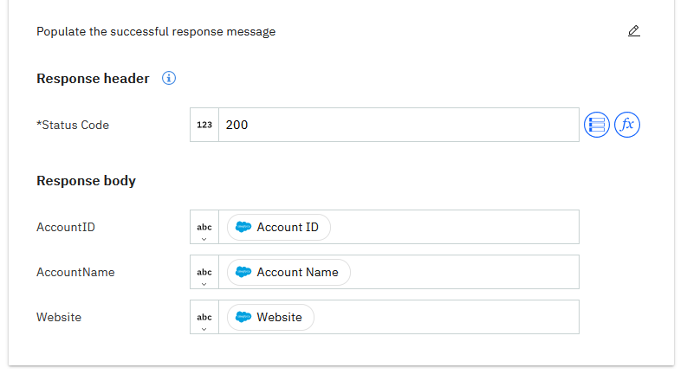
19. Now we can configurate our API Response body to populate a successful response message with the data fields we are interested in returning to our consumer. Go ahead and click the Response button on the integration flow (outlined in the blue box below).

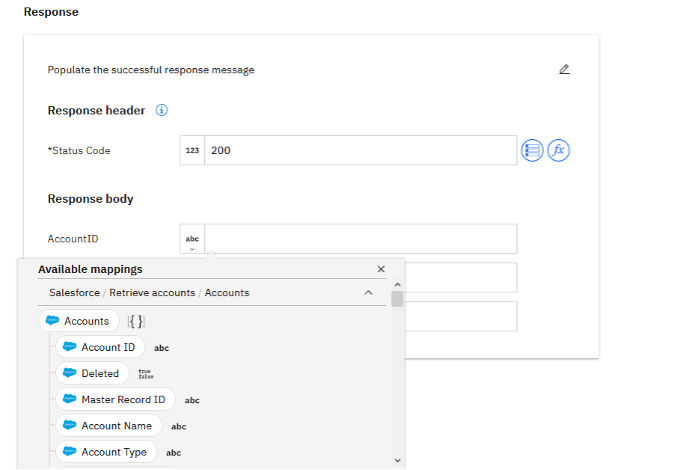
20. Now we will map our API Response keys to the respective values we want our consumer to obtain from Salesforce. Let us start with the AccountID field.
- Click on the hamburger icon next to AccountID field.

- Now you will see the list of Available mappings.
Click on the Salesforce / Retrieve accounts / Accounts mapping and select Account ID. Repeat the process for the other two data fields. After populating all the fields your mapping should match the image attached below.

21. After populating all the fields your mapping should match the image attached below.
22. We are now ready to start and Test the API but first need to give it a meaningful name. This will automatically be saved. Click the Done button to close the flow
2A Testing the API flow
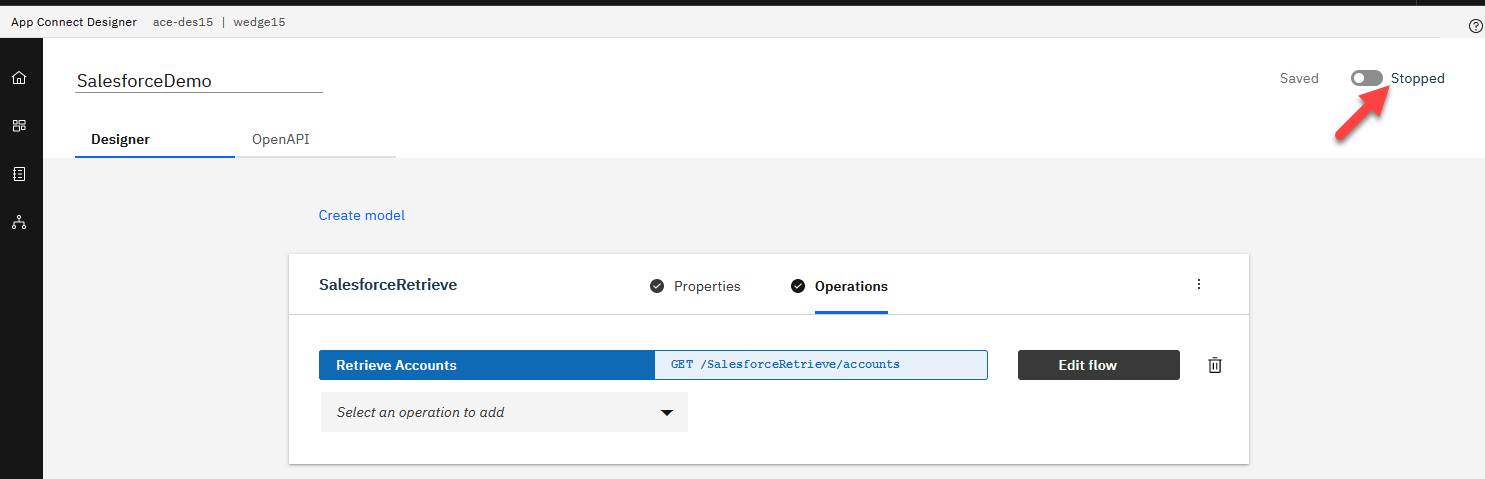
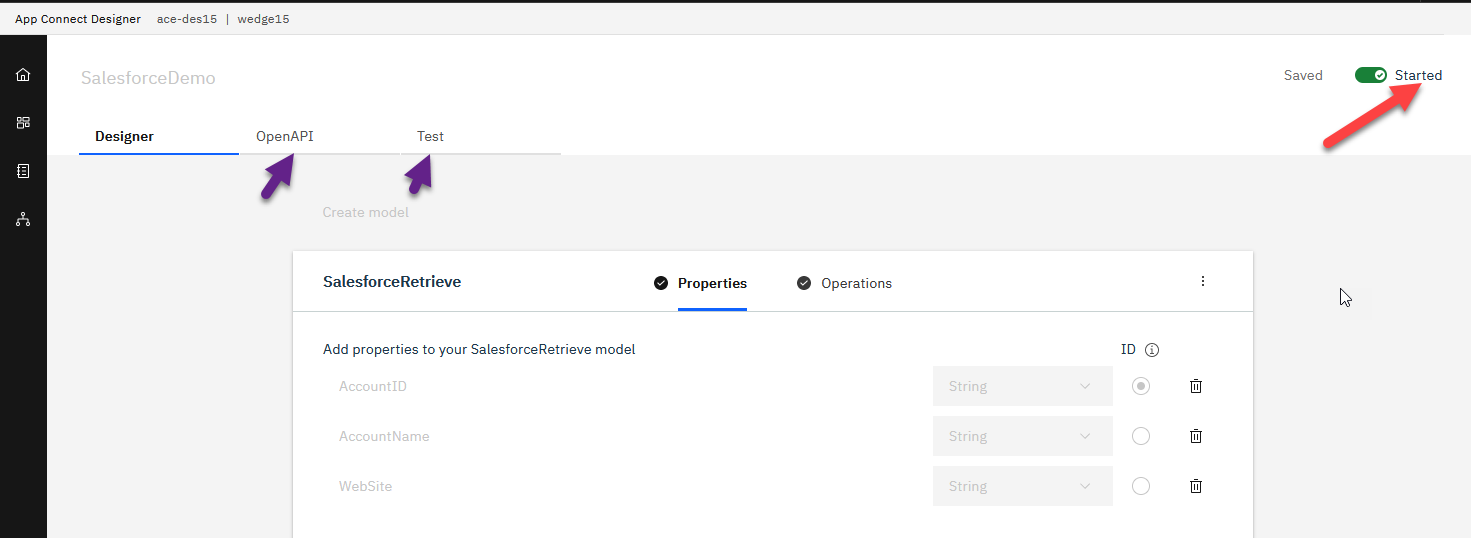
We will now start the API and this will make the Test button visible on the menu bar.
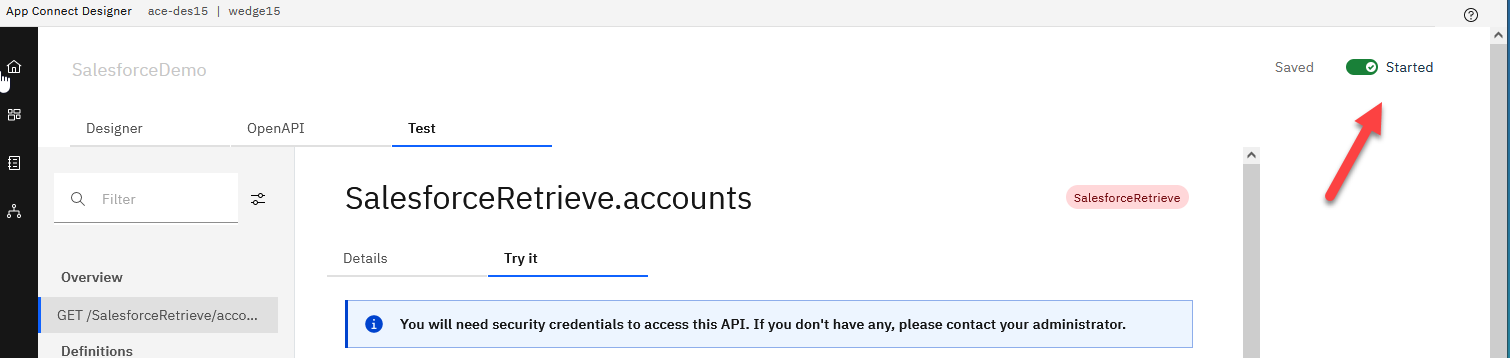
1. Click in the upper right cornor on the Stopped switch and it will turn green and show started.
2. We will not go into details on all the items on the menu bar. For now we will focus on the Test button. Click on the Test button.
3. Now click on the Get operation on the left side under Overview. This will take you to the Details page for this operation. Scroll down and review the info. When ready to Test the API click on the Try it

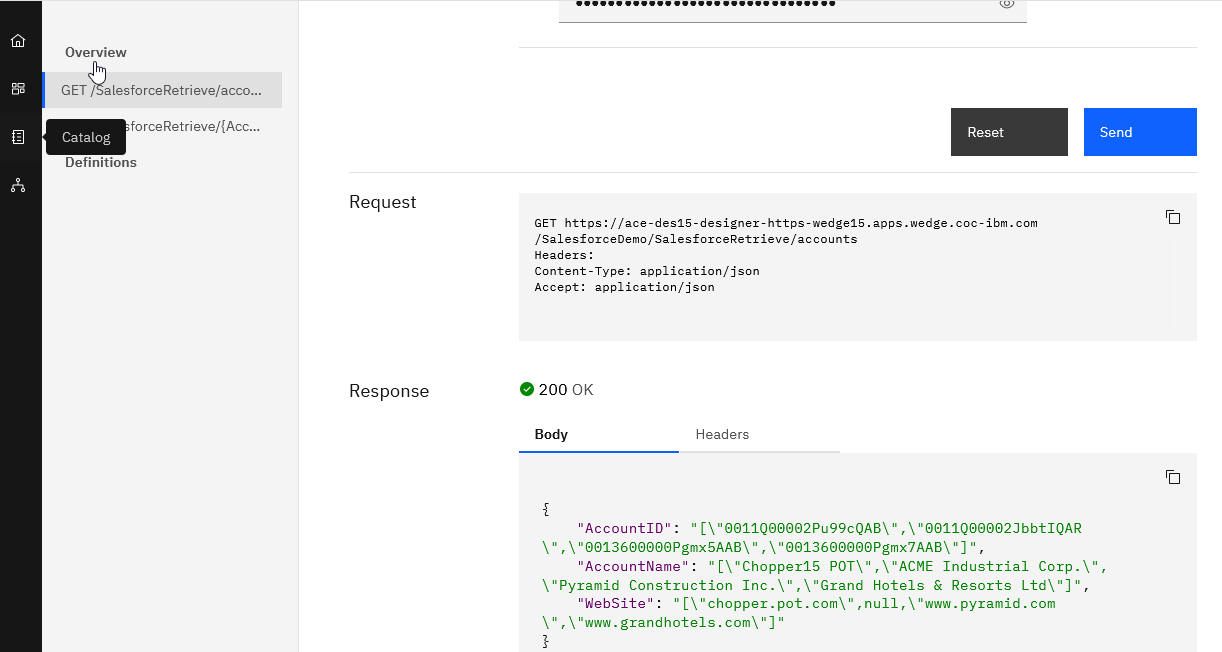
4. Now you will see the GET Url for our API and the Security key. Since we are not passing anything into the API we can just go ahead and Click on Send
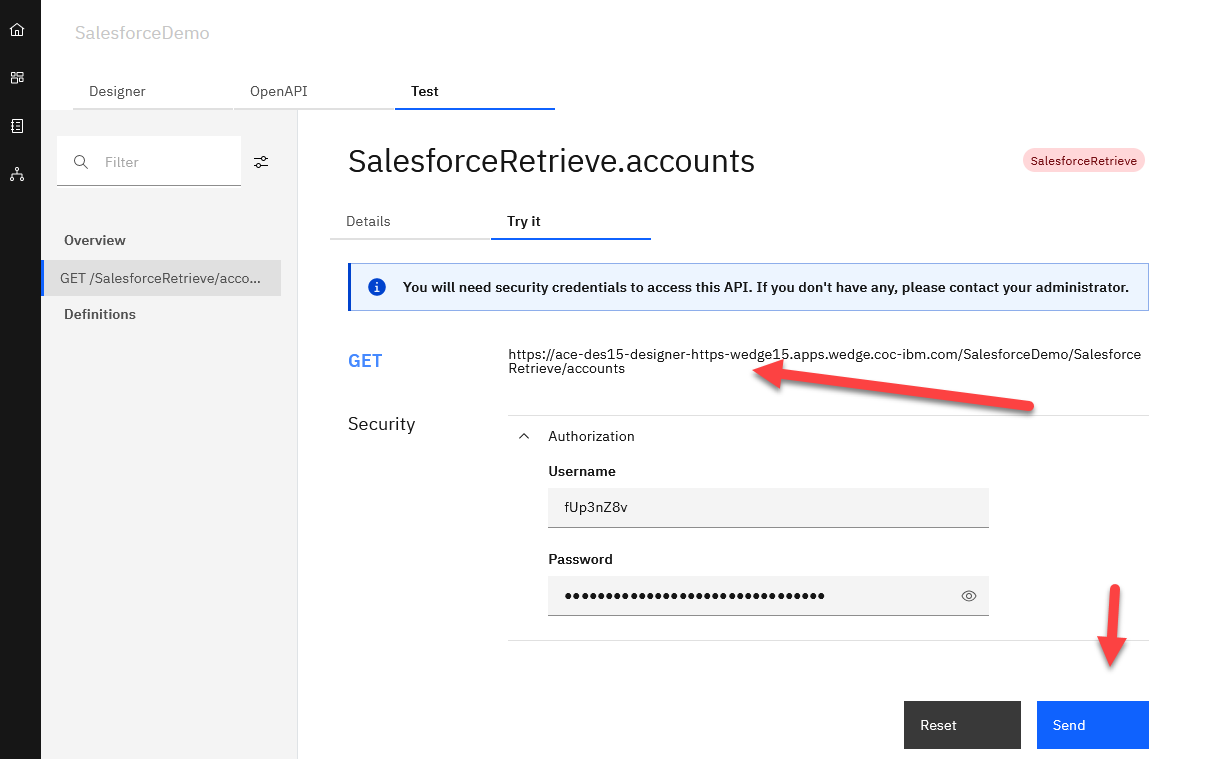
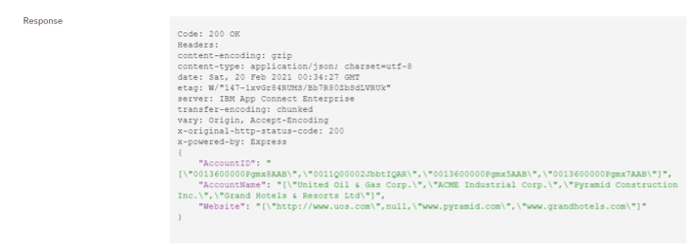
5. The API will run and you will see the Request details sent in as well as the Reponse from the API.

2B Add an Additional Operation for our Salesforce API
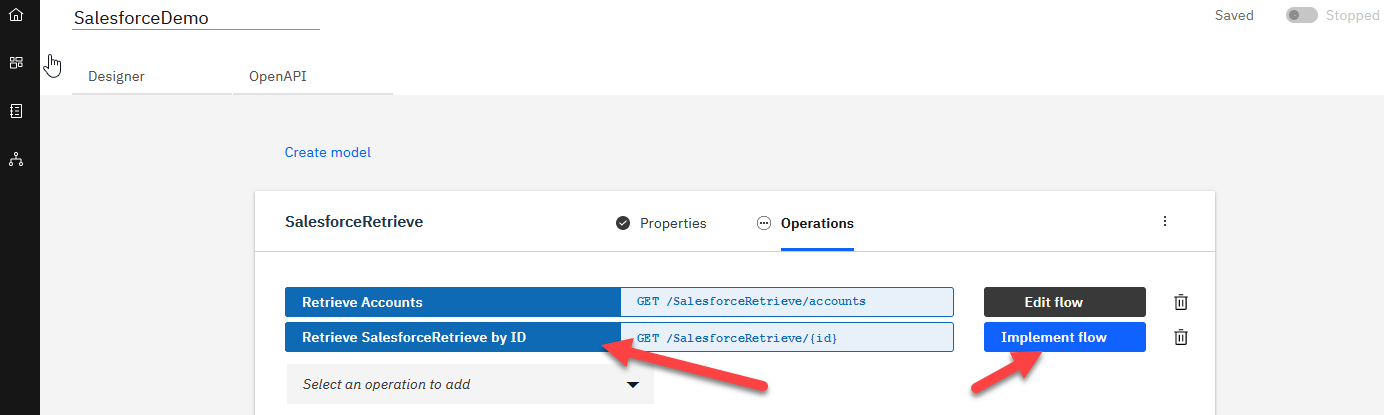
In this section we will add an additional operation to get Account by ID. First we will stop the API. Click on the green Started switch in the upper right corner. This will take you to the designer page. Click on the Operations item.
1. Now select to add another operation and select the Retrieve SalesforceRetrieve by ID.
2. Select “Implement flow” for the new operation and that will get us to the flow editor where we will select the “+” sign and scroll down to SaleForce connector and select Retrieve accounts.
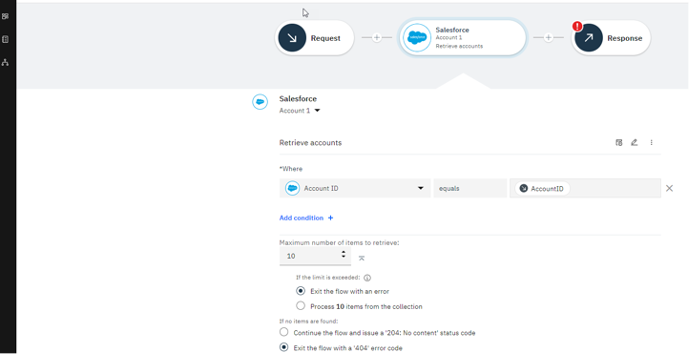
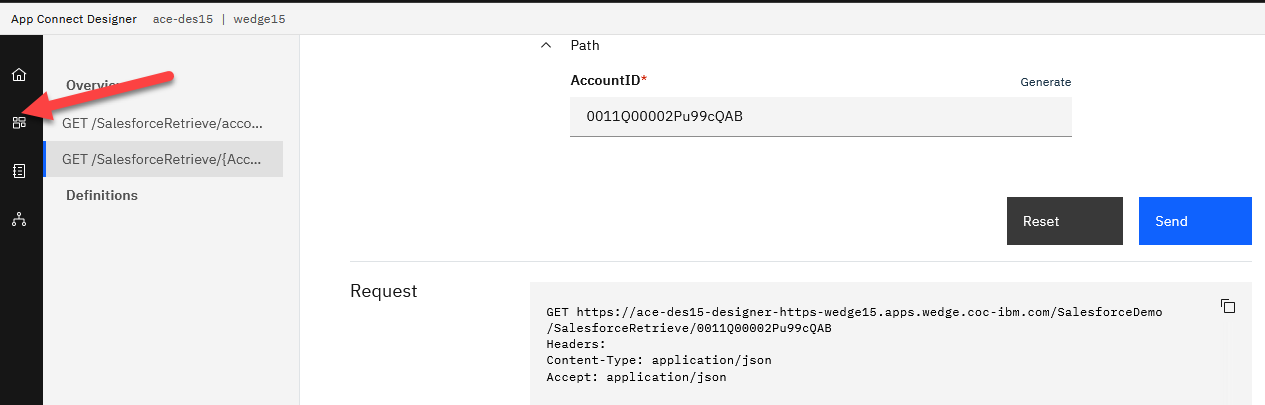
3. We will now add a condition to retrieve the Account for the Account ID that is passed to the API.
Click on the Add condition and you will see the Where clause for the equals condition click in the blank box and you will see the mapping option there where you can select the Account ID that is passed to the API.
When done should look like the following:
4. Now we will map our API Response keys to the respective values we want our consumer to obtain from Salesforce. Let us start with the AccountID field
- Click on the hamburger icon next to AccountID field.

- Now you will see the list of Available mappings.
Click on the Salesforce / Retrieve accounts / Accounts mapping and select Account ID. Repeat the process for the other two data fields. After populating all the fields your mapping should match the image attached below.
5. We are now ready to start the API and test the new operation.
2c Testing the New API Operation
We will now start the API and this will make the Test button visible on the menu bar.
1. Click in the upper right cornor on the Stopped switch and it will turn green and show started.
2. As you can see we have two operations now one that will get us the first four accounts and the other will get account by id.
So let’s first run the accounts GET first to get a list of Account IDs.
Click the Send button and we will see the Response with list of AccountID
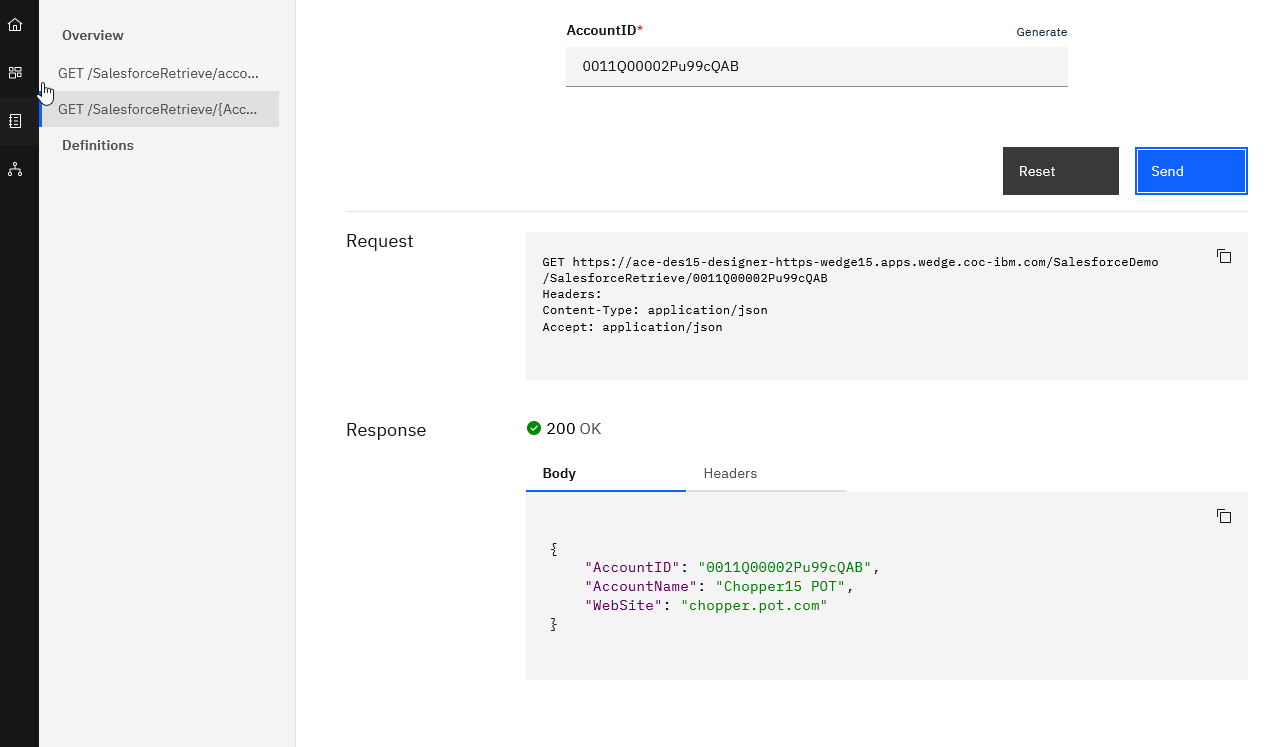
Pick one of the AccountID from the Response to use in the other Operation.
3. Now select the GET operation on the left menu and review the information on this new operation we just created.
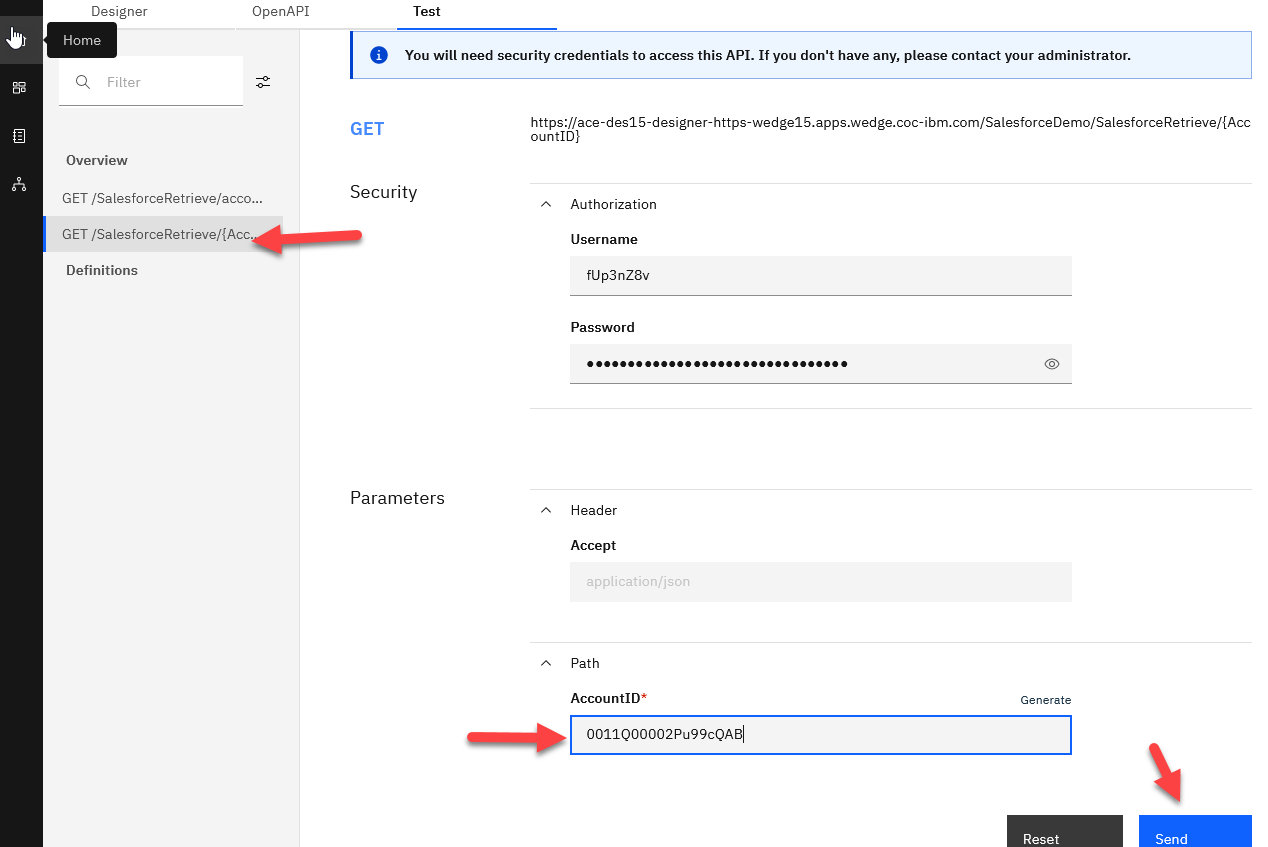
4. You will see the response for the AccountID that we entered to the API.
3. Deploying Your Designer Flow to App Connect Dashboard
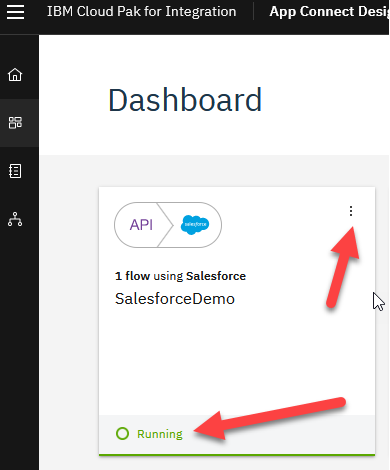
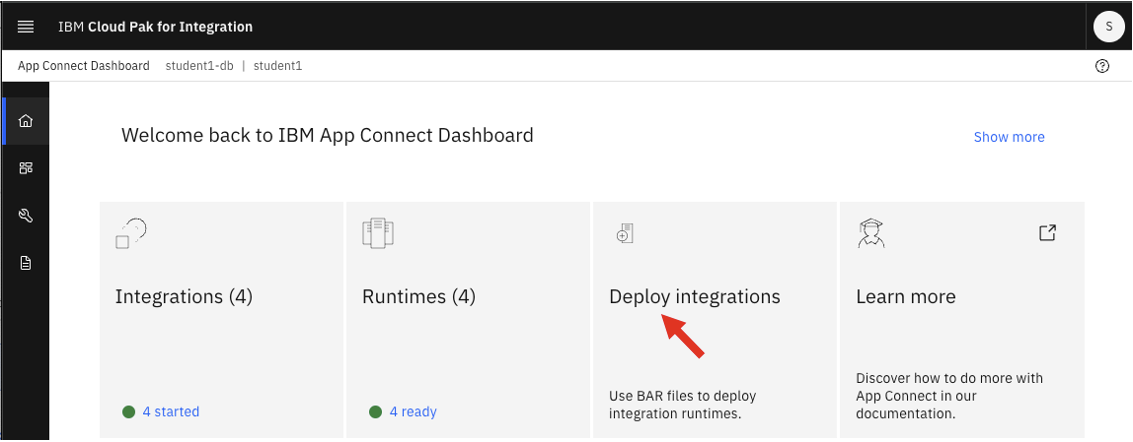
Now we can export our Designer flow as a bar file to be deployed in the App Connect Dashboard on Cloud Pak for Integration. Navigate to your App Connect Designer Dashboard so we can export our flow as a BAR file.
1. Click on Dashboard to get back to the main designer page where you will see your API running.
2. You will see that your API is running and you then will click on the triple-dot icon on your Designer flow. Select Export.
3. We will export this API as a runtime flow asset.
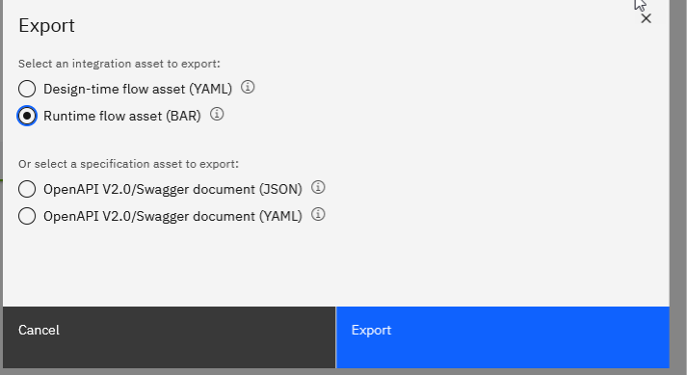
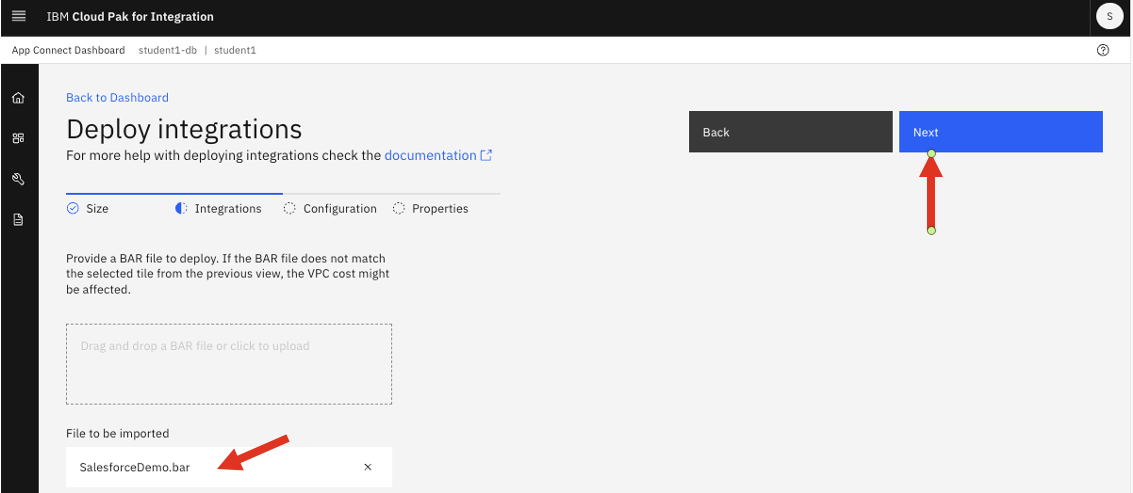
4. You will save the SalesforceDemo.bar file locally on your machine and will use that to deploy to the AppConnect runtime.
5. Now we will go back to the Integration home page. Click on the IBM Cloud Pak for Integration on the top menu
6. From the Platform Navigator, select your App Connect Dashboard instance.

7. Now select the Create a server option from your App Connect Dashboard capability
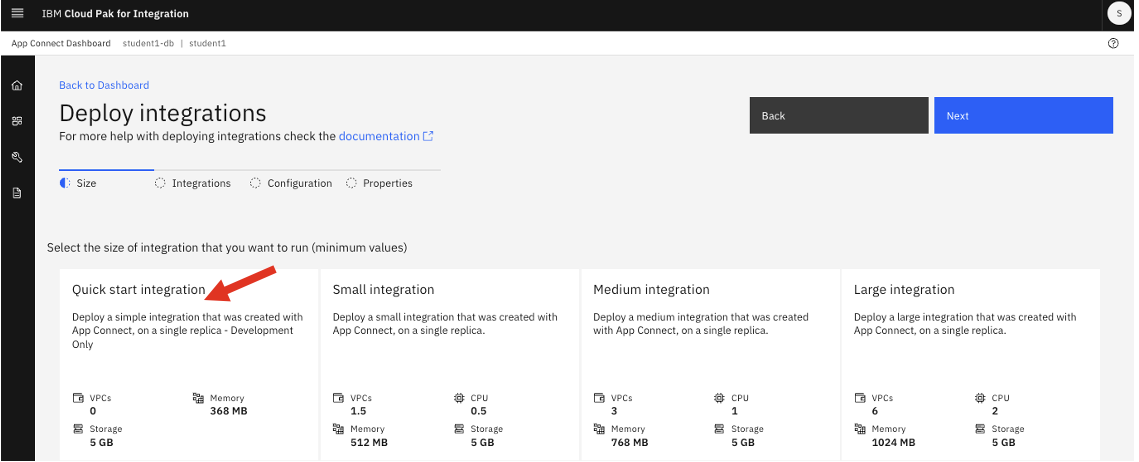
8. We will now select the Designer Integration that we will deploy then click next.
9. Now we will either drag and drop the BAR file we just exported or we can click to upload it. Then click next.
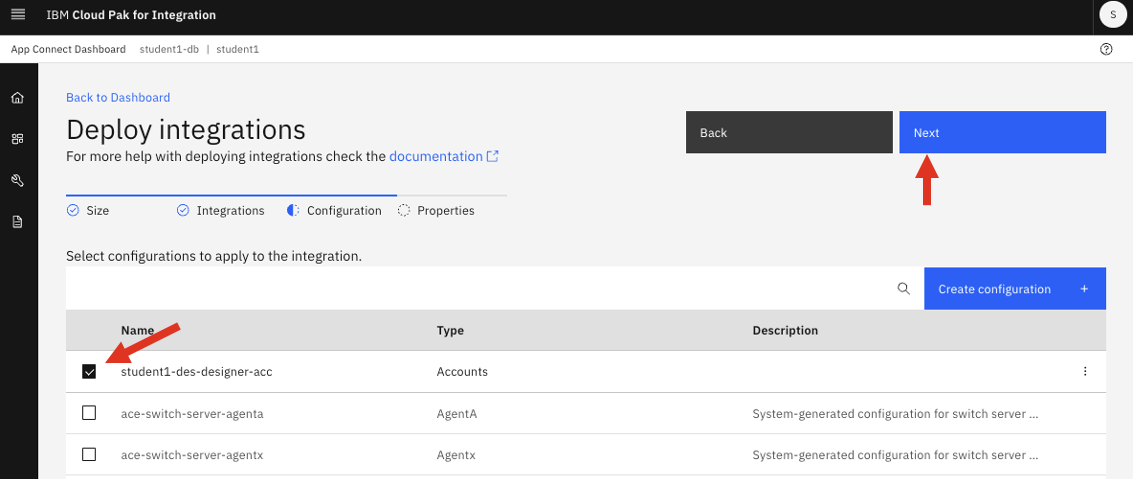
10. The next section is for configuration you can look at all the options that are available. We will just be using the Designer Accounts which will include your Salesforce credentials.
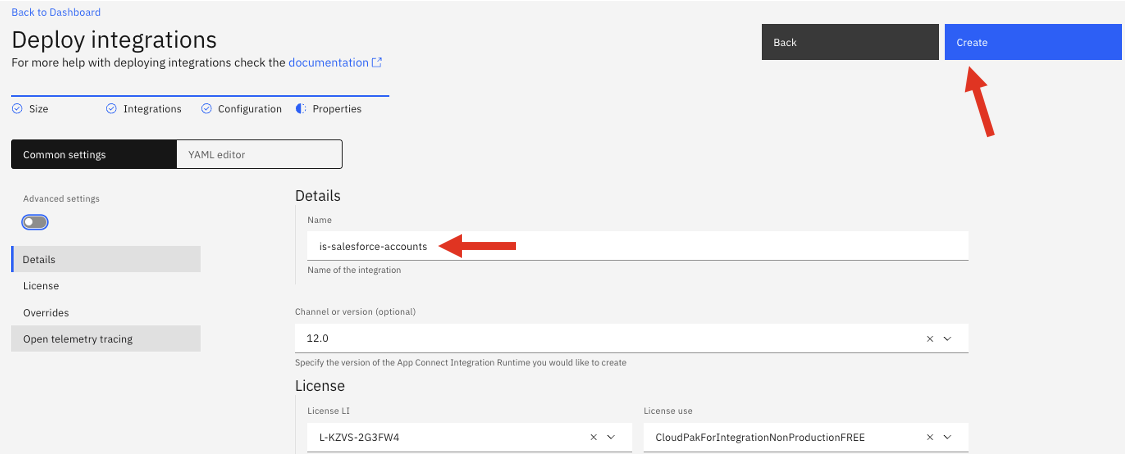
11. The final section is the server details. We will give it a name is-salesforce-accounts and change the Designer flows mode to local and Designer flows type to event-driven-or-api-flows. Go ahead and click Create.
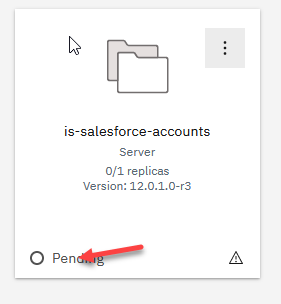
12. This will take you back to the Servers Dashboard where you will see your new server. To start with, it will be showing Unavailable while it is starting up the pods for it. Refresh the screen till it shows running.
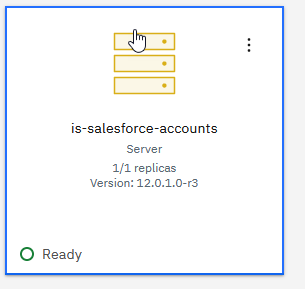
13. Once it is up and running it will show the following:
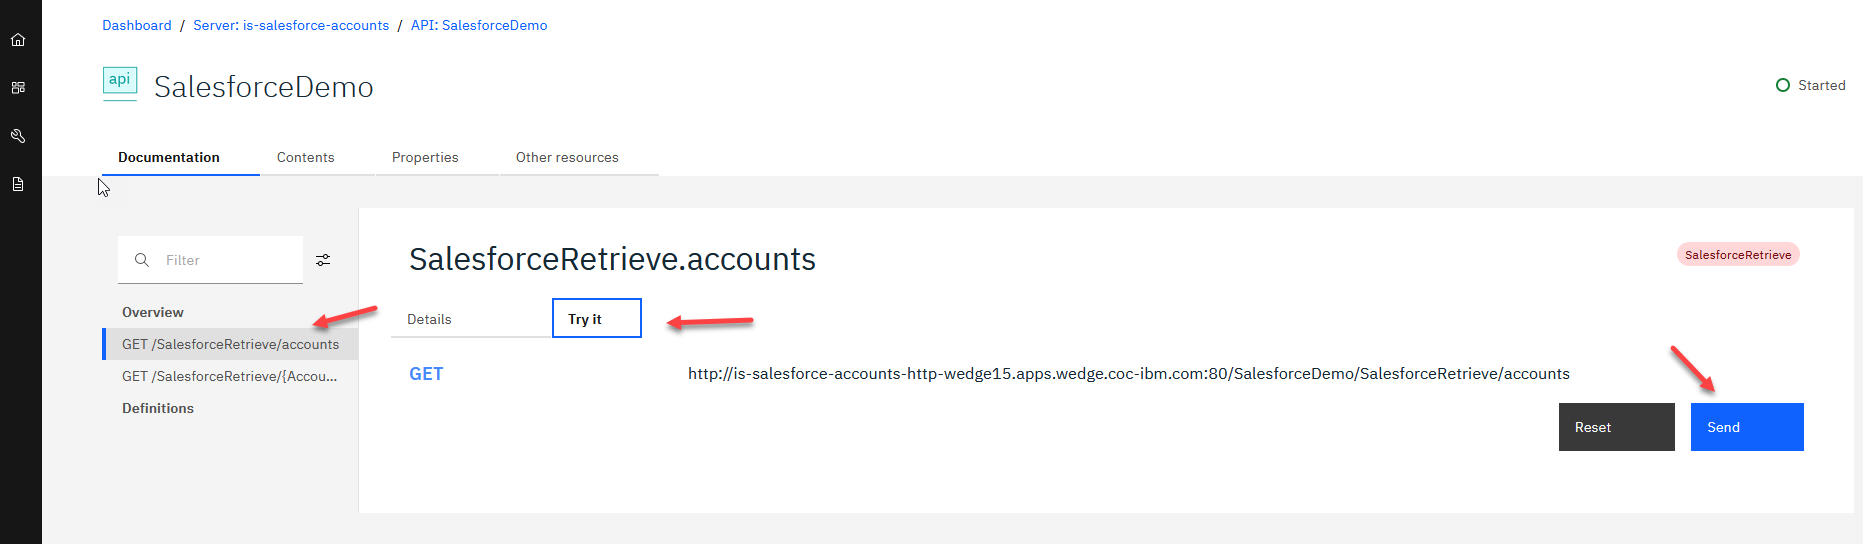
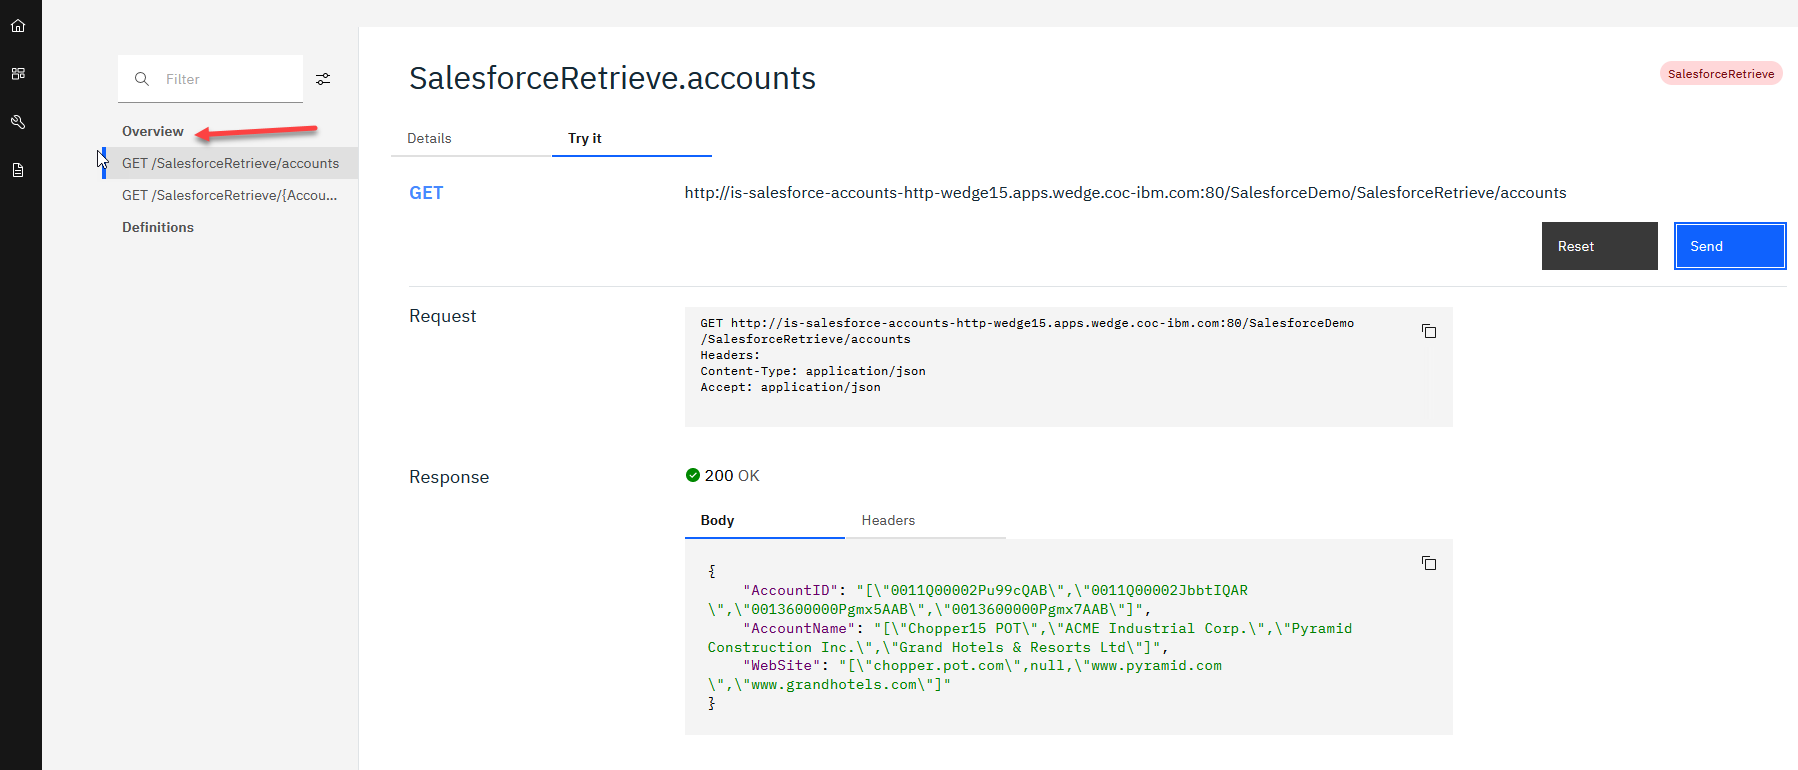
14. We can also quickly test the API call running in the Integration server. First click on the tile and it will show the API. Click once more and you will be at the SalesforceDemo API test page. Select the Get accounts and you will see the API details. Click on Try it and then click the Send button.
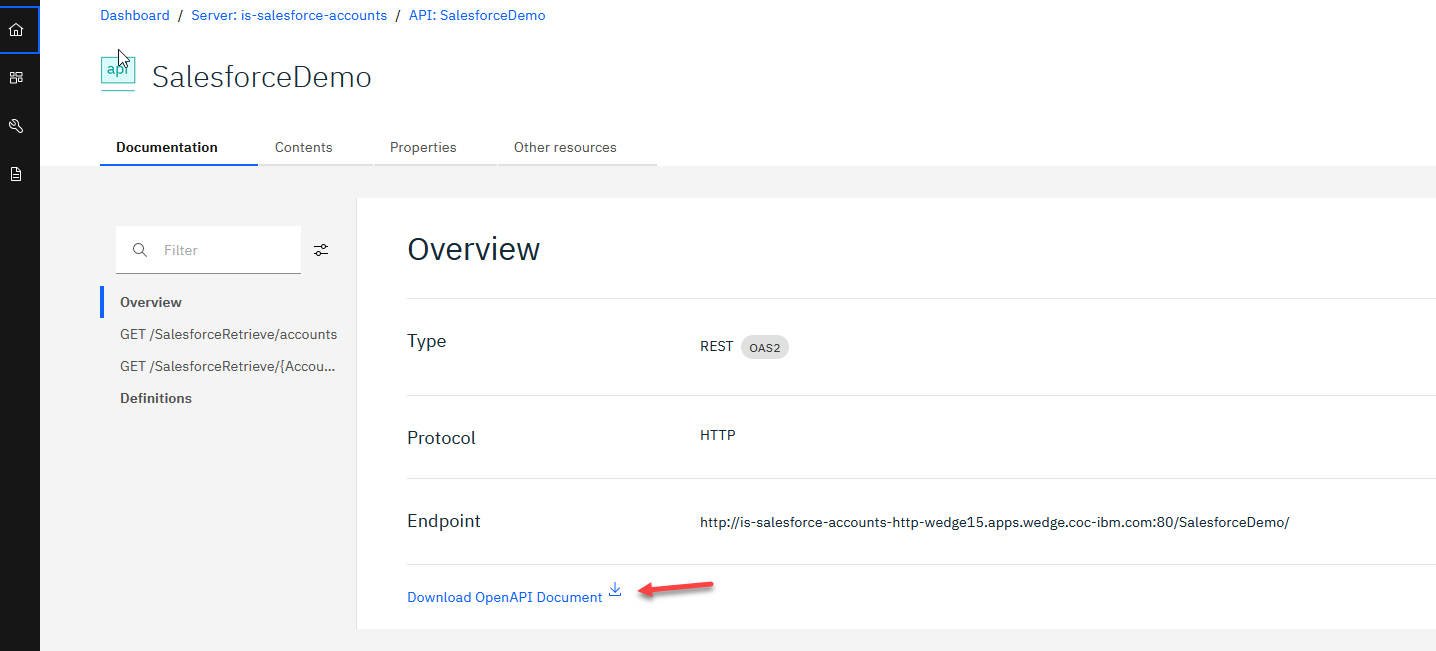
15.You will see the following results. After reviewing this click on the Overview on the left menu.
16. On the over view page near the bottom you can click on the Download OpenAPI Document . We will ue the OpenAPI Swagger document to import your API into IBM API Connect.