IBM Integration PoT Labs Home page
IBM API Connect
Create and Secure an API to Proxy an Existing REST Web Service
Table of Contents
1. Introduction
In this lab, you will get a chance to use the IBM API Connect (APIC) Designer and its intuitive interface to import and edit an API using the OpenAPI definition (YAML) of an existing Customer Database RESTful web service.
In this tutorial, you will explore the following key capabilities:
-
Creating an API by importing an OpenAPI definition for an existing REST service
-
Configuring ClientID/Secret Security, endpoints, and proxy to invoke an endpoint
-
Testing a REST API in the developer toolkit
-
Publish an API for developers
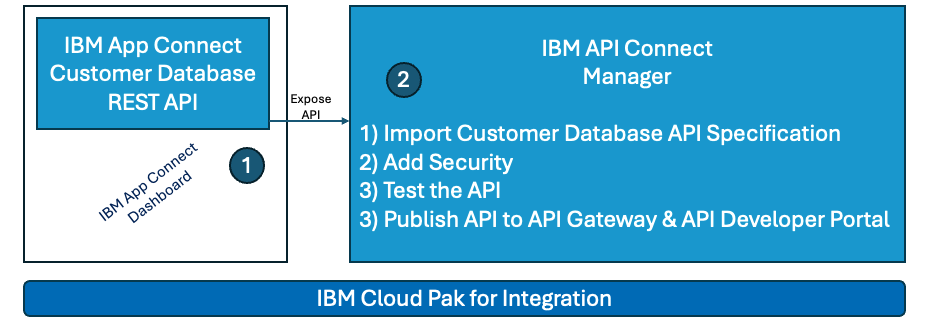
2. Deploying the REST Services
First, you will deploy a Customer Database REST service and then you will download the OpenAPI file for the Customer Database REST service that you deployed.
1. In a browser, enter the URL for the Platform Navigator URL that is provided by your instructor.
2. Filter instances by the student(number). You will see your instances.(br)
3. Navigate to the App Connect Dashboard.
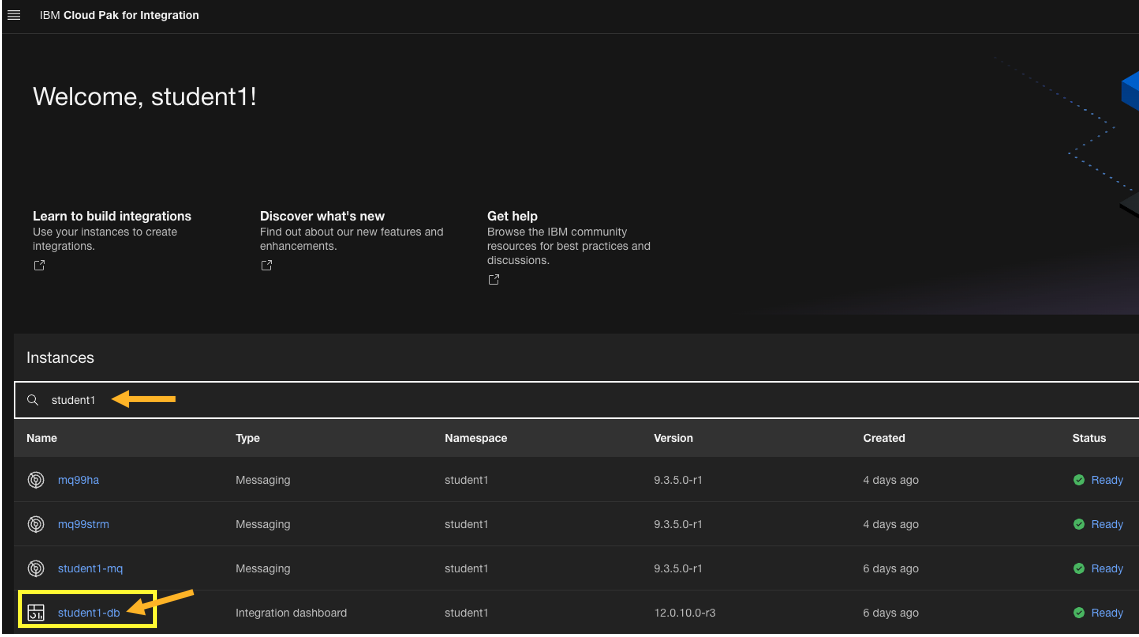
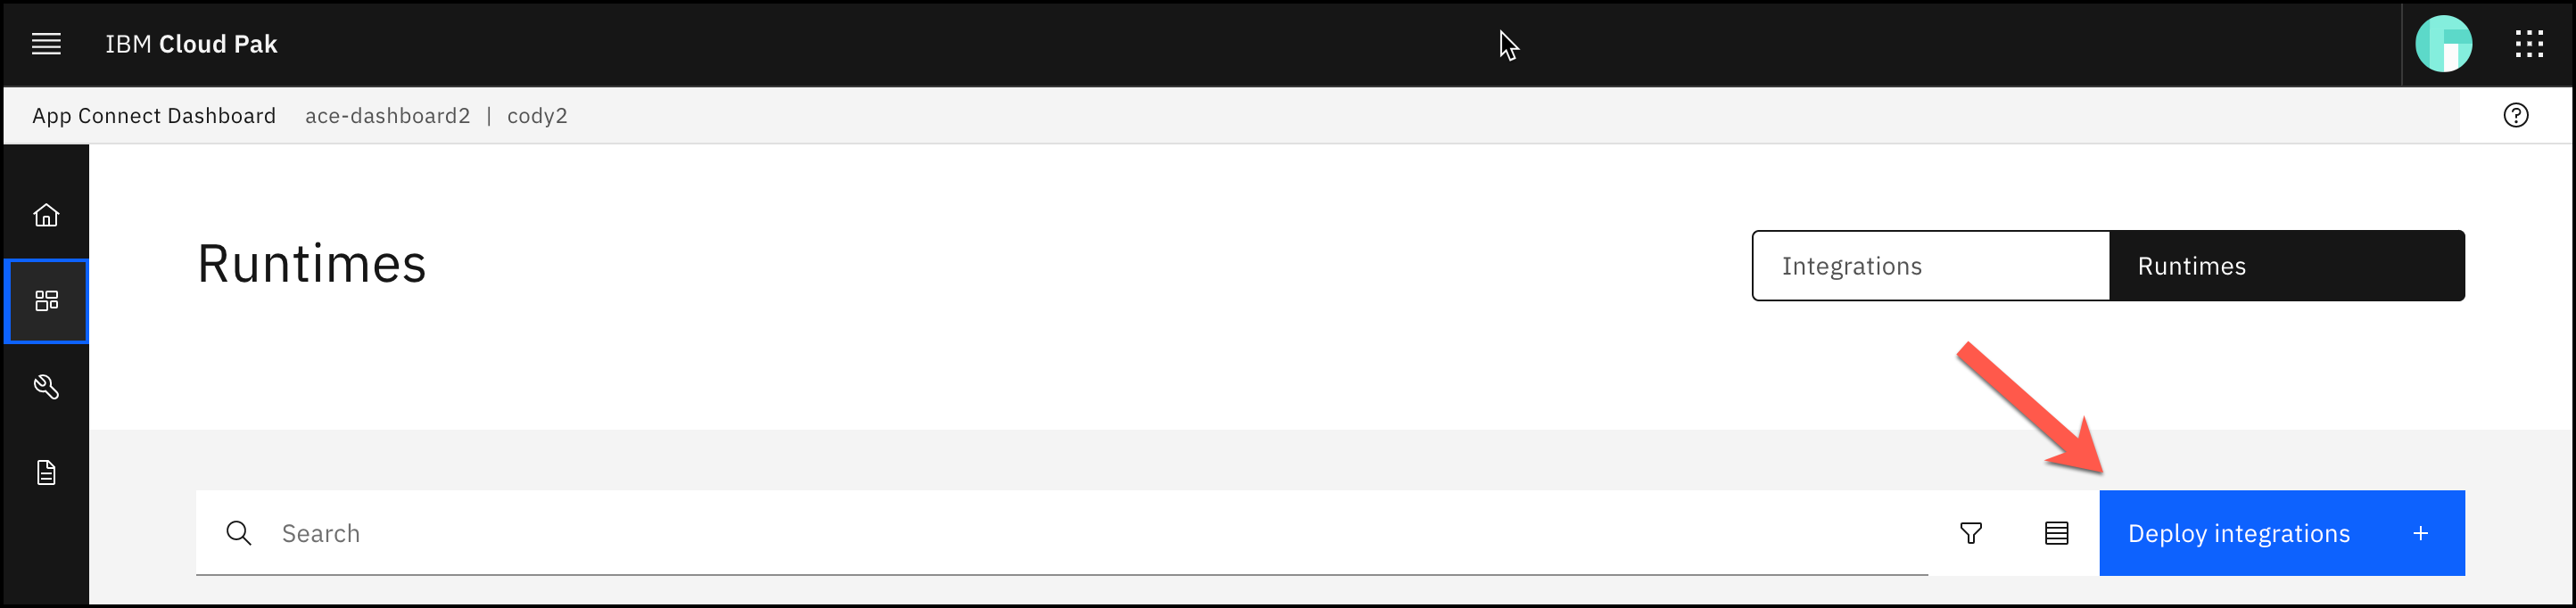
4. Click on the Dashboard icon in the left navigation.

5. For this lab, we already have the REST service built and available as a bar file. You can download the CustomerDatabaseV1.bar file for the service **here**.
6. Click on Deploy integrations.
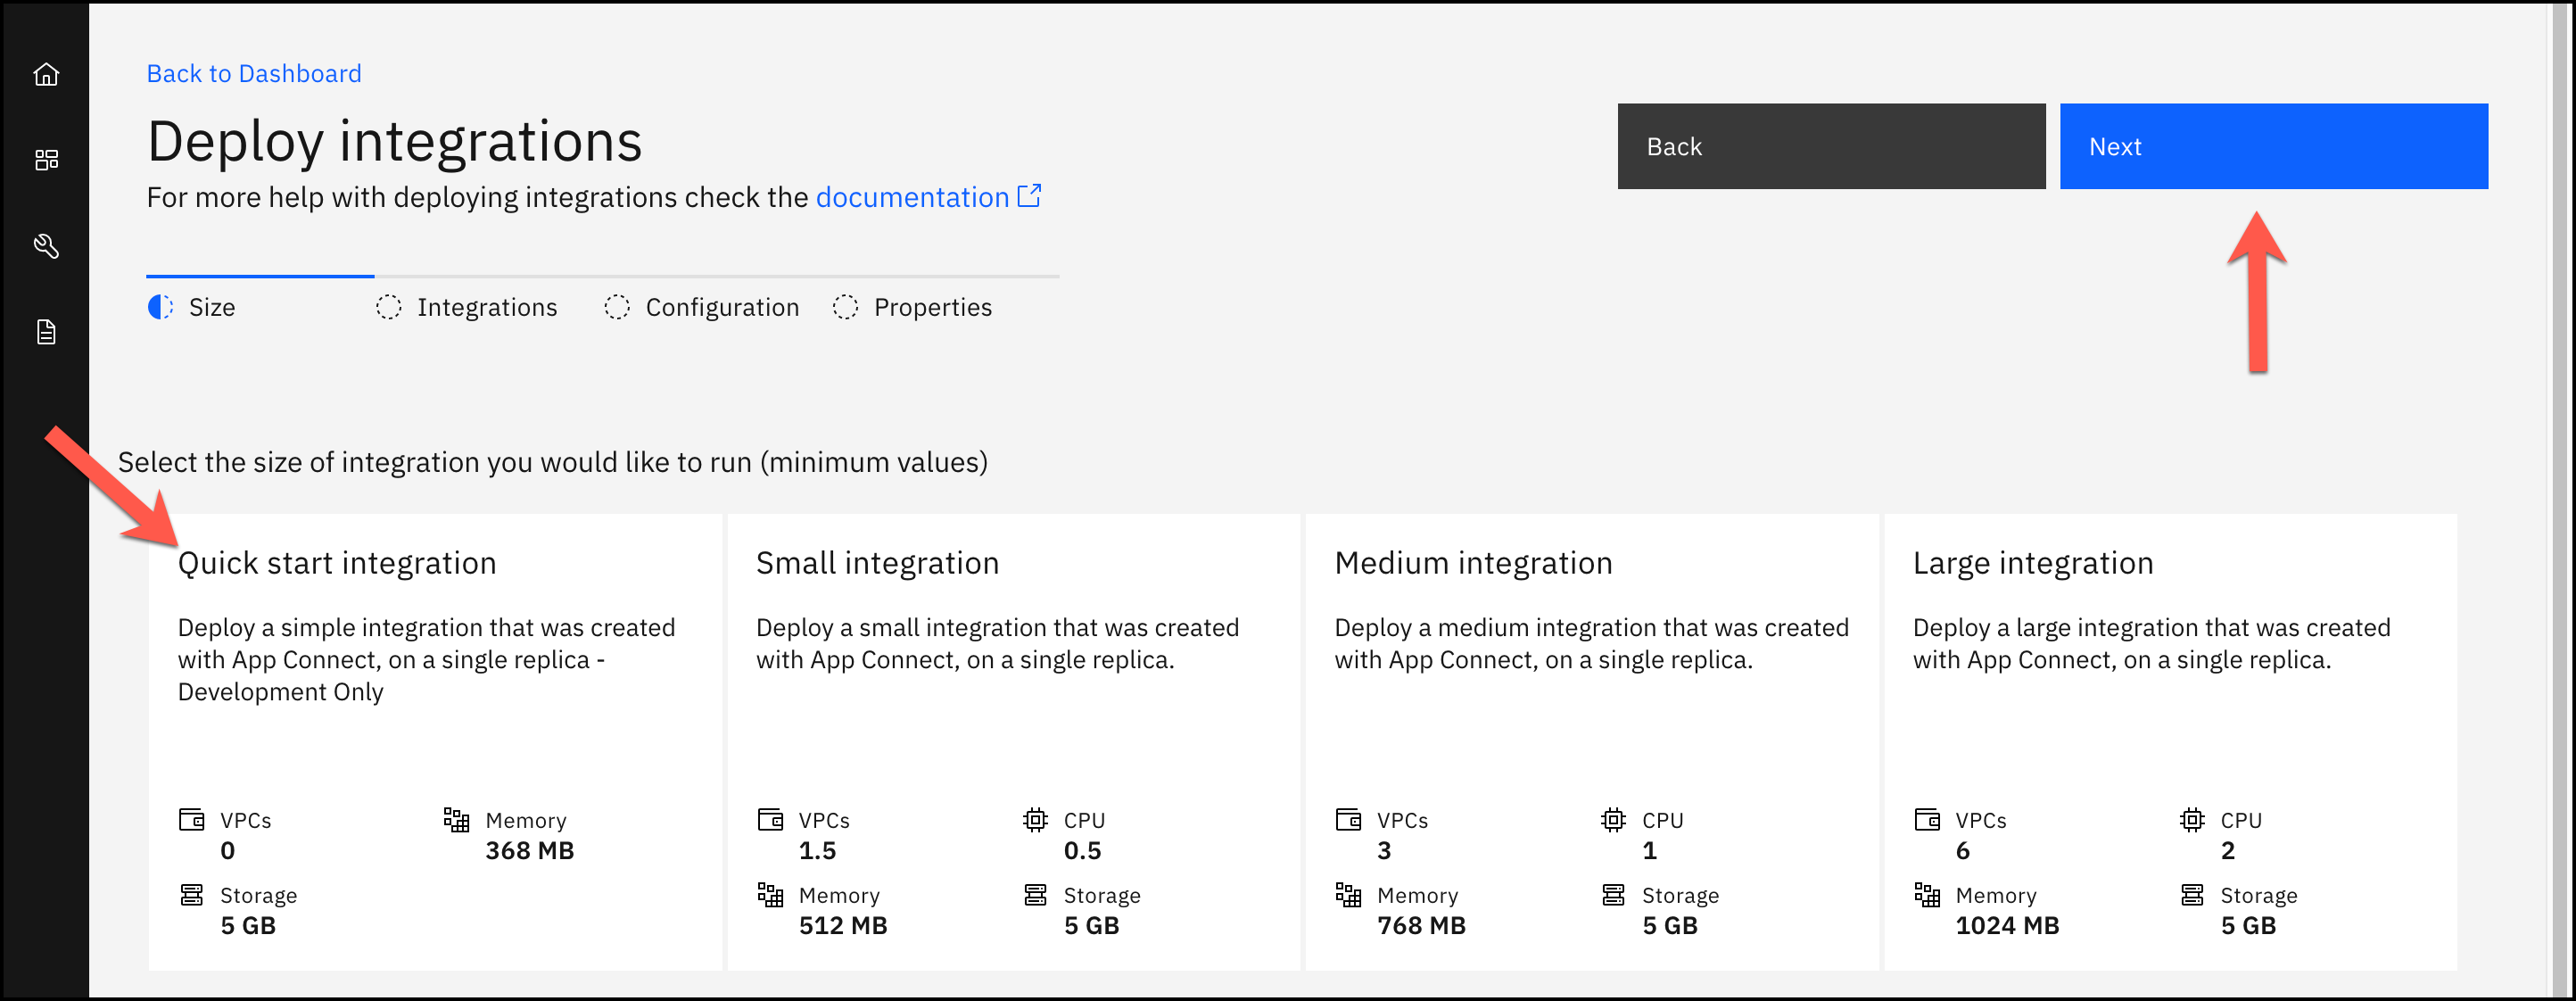
7. Click Quick start integration and click Next.
8. Drag and drop the BAR file that you just downloaded or click to upload. Once you have dragged and dropped or uploaded, you will see the bar file listed under to be imported. Click Next.
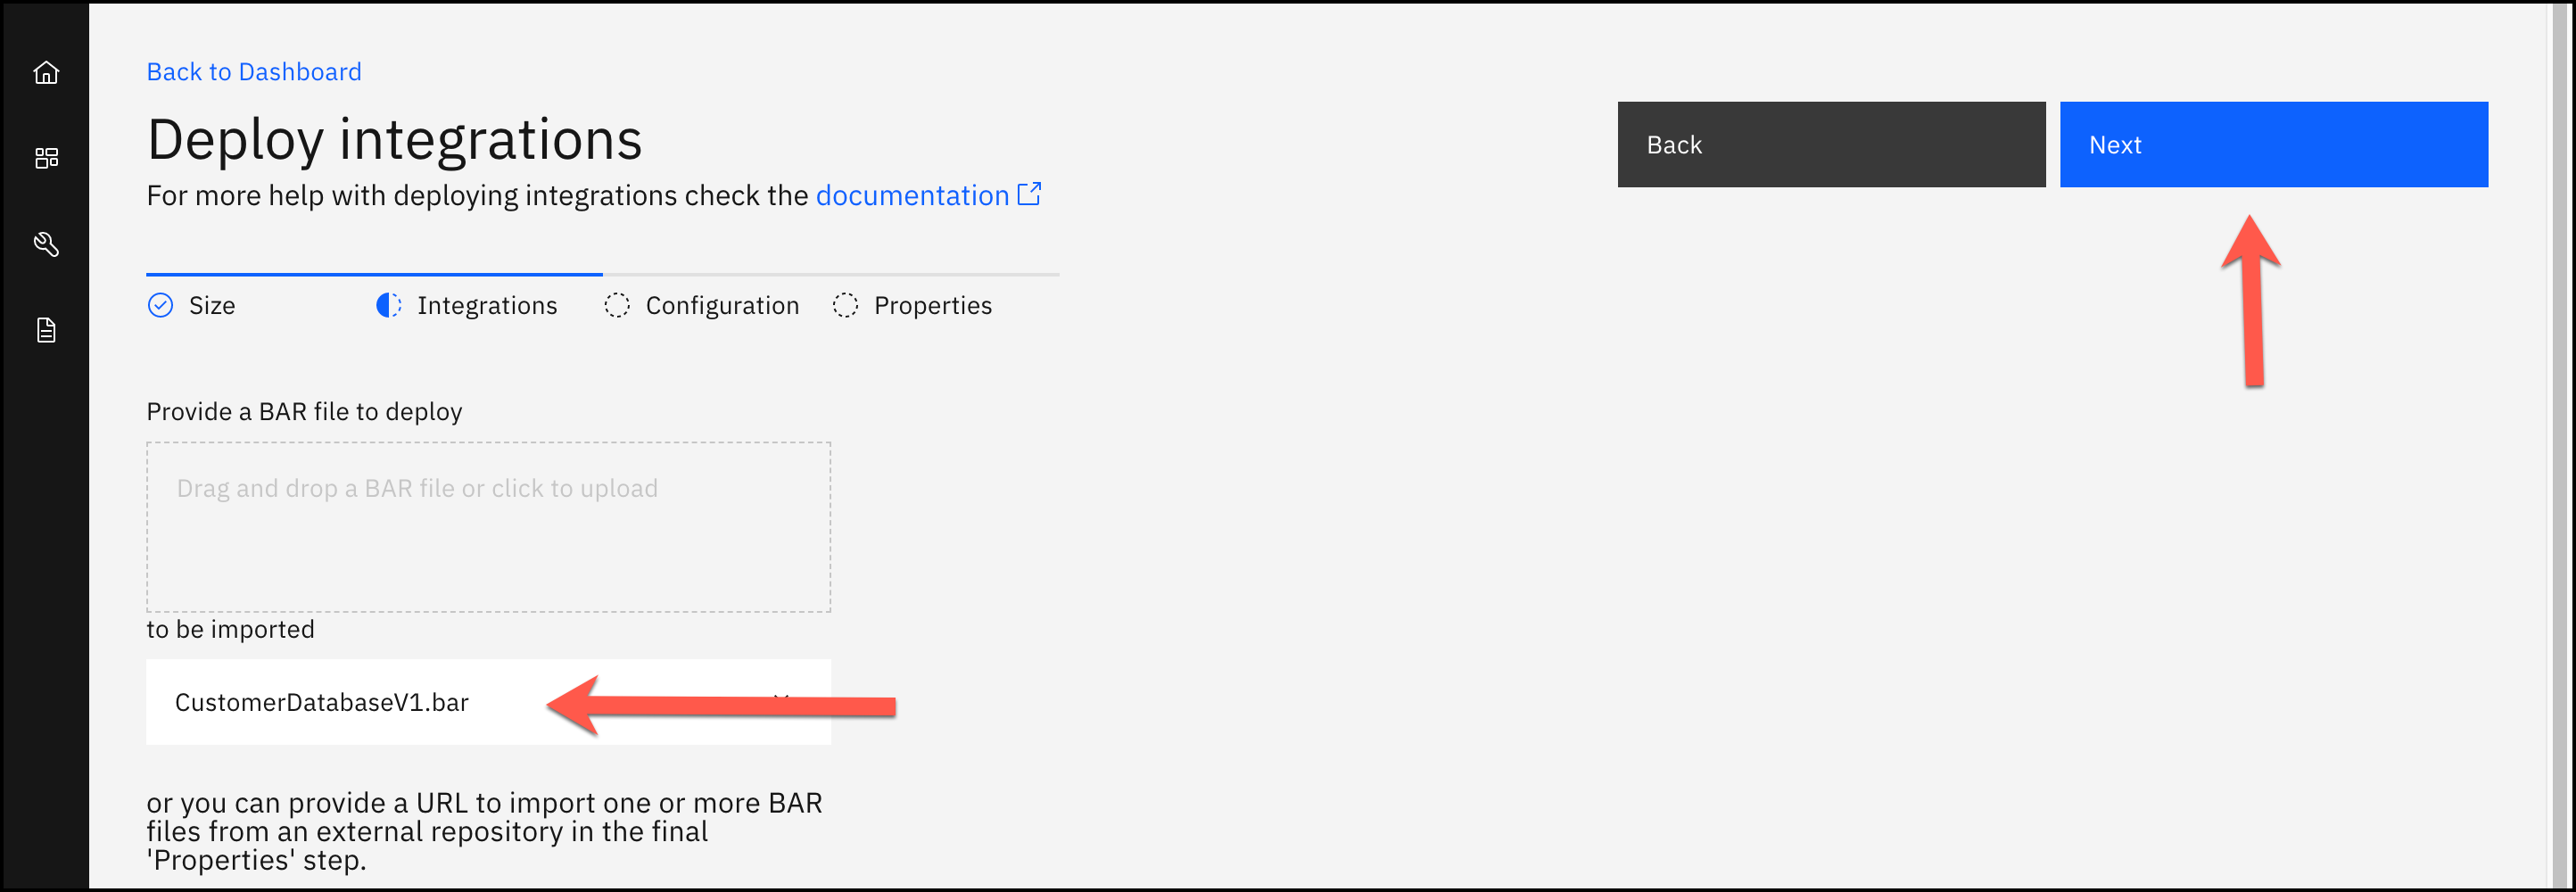
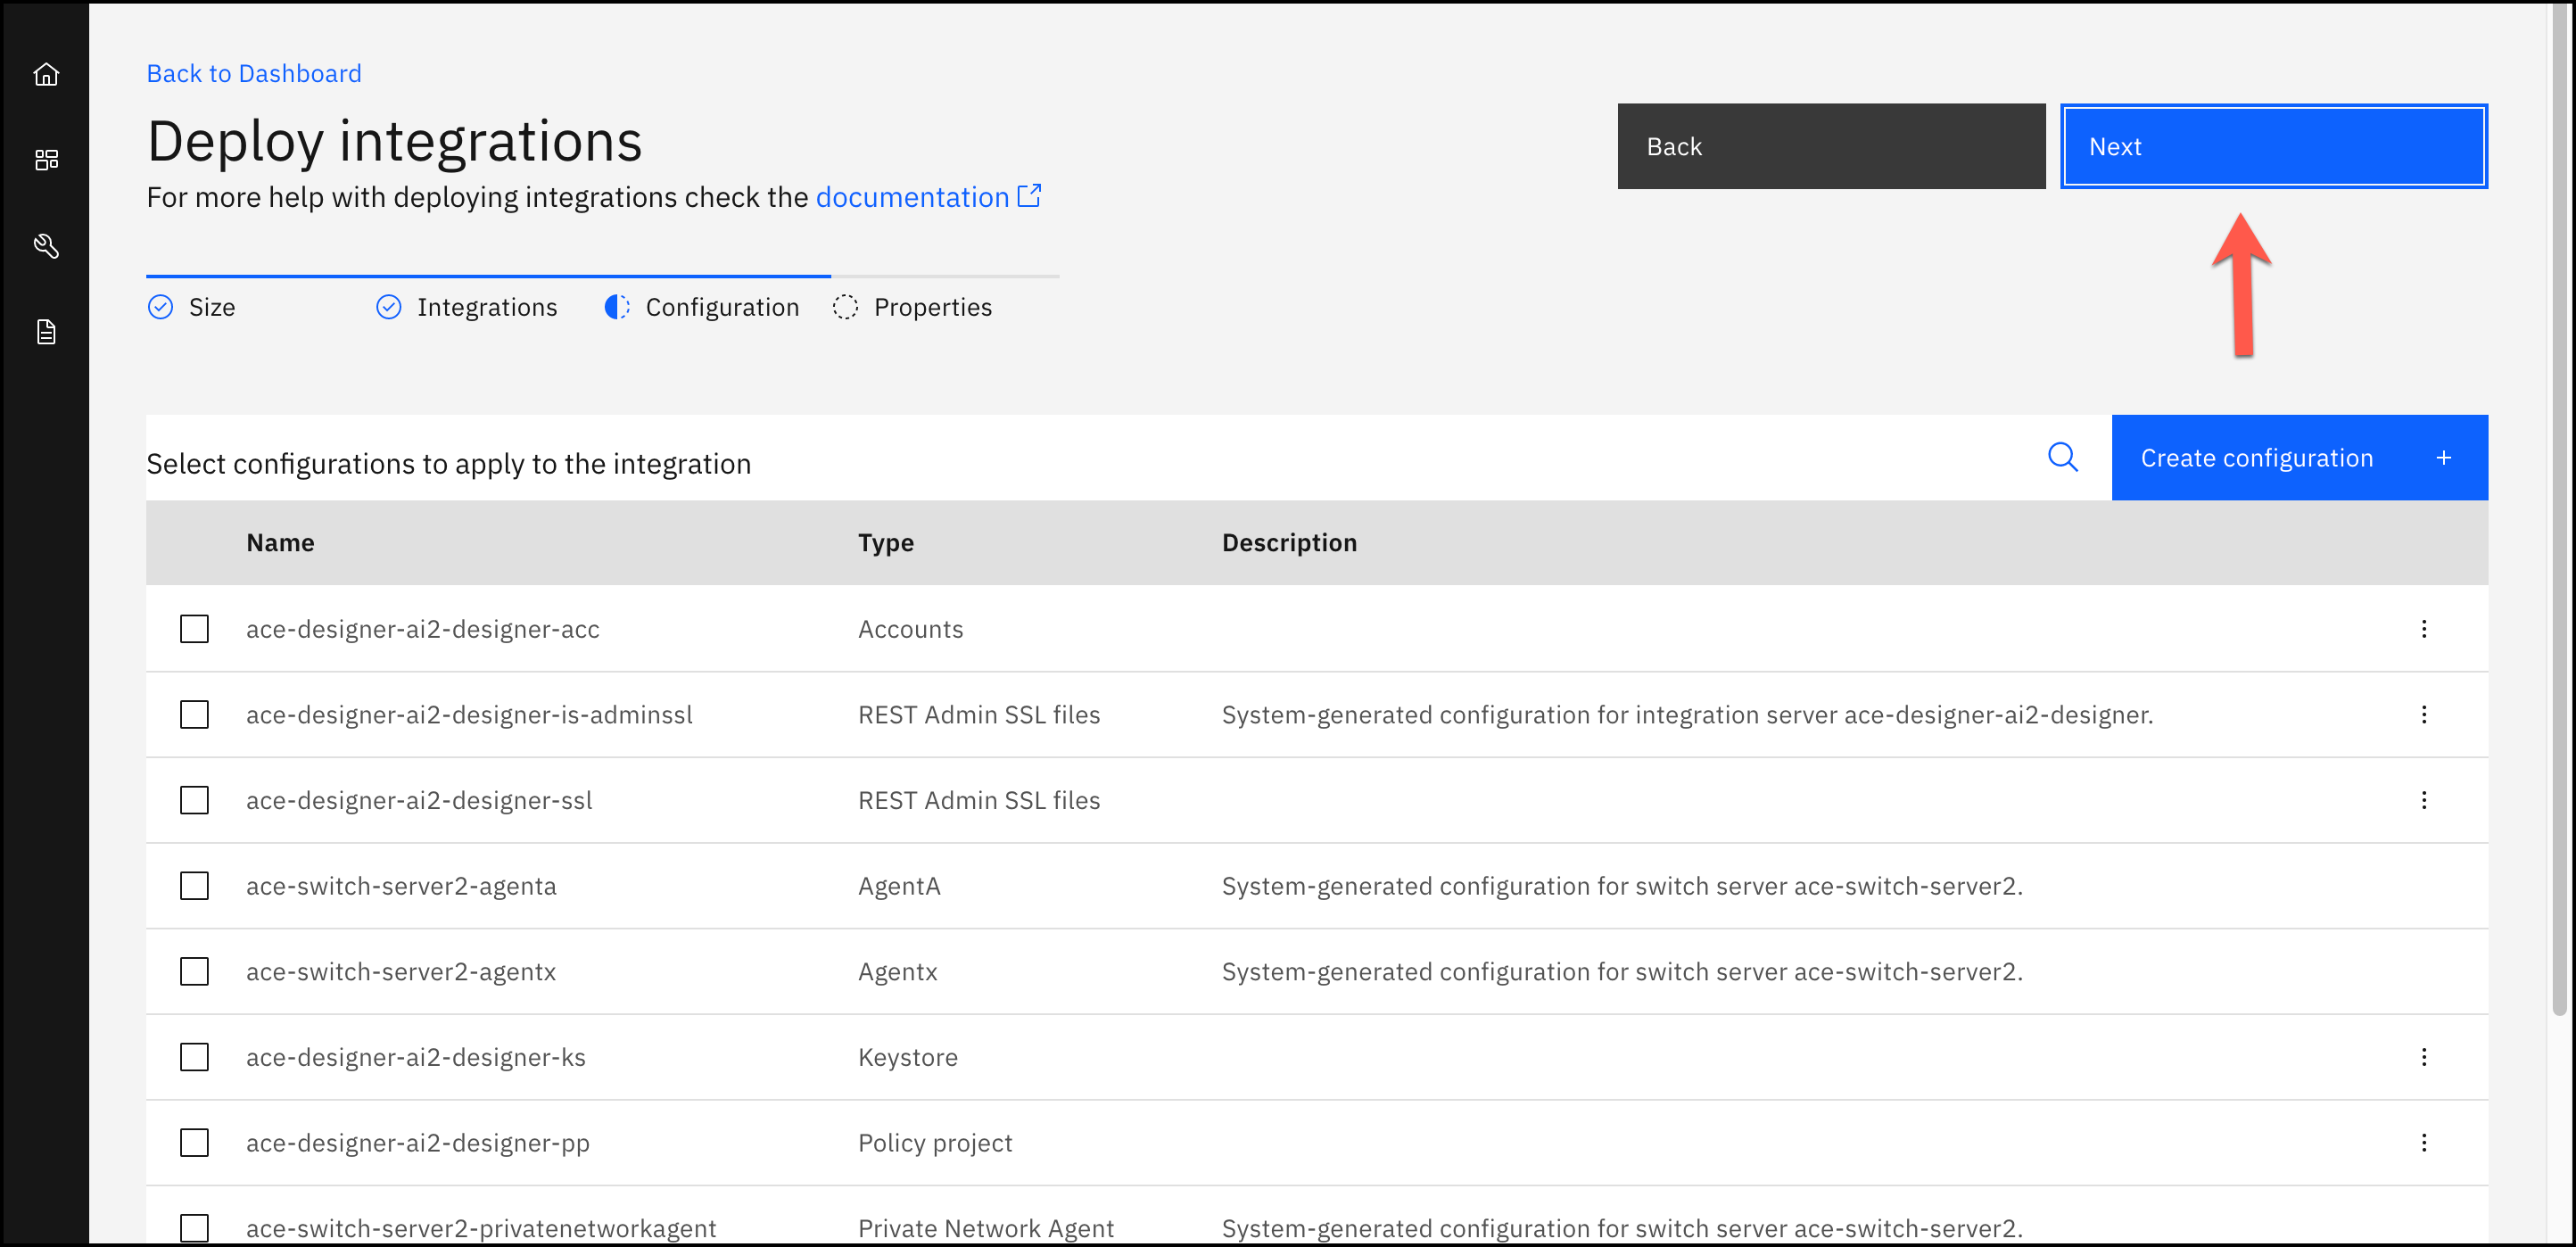
9. Click Next.
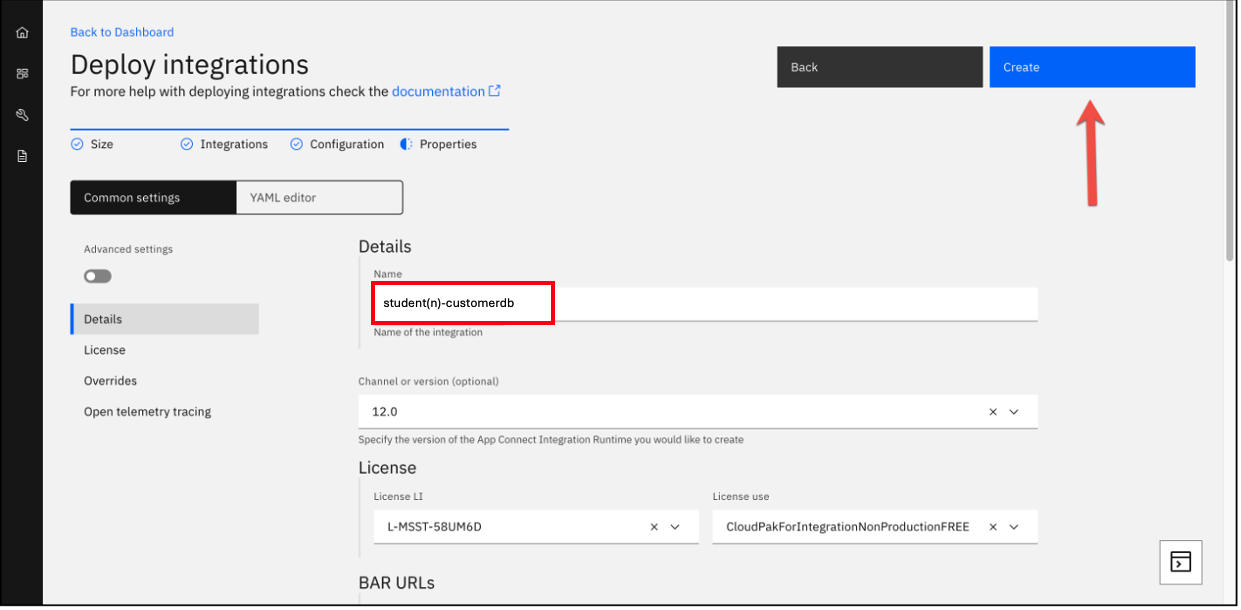
10. Give the Integration Server a Name (e.g., username-customerdb) and click Create.
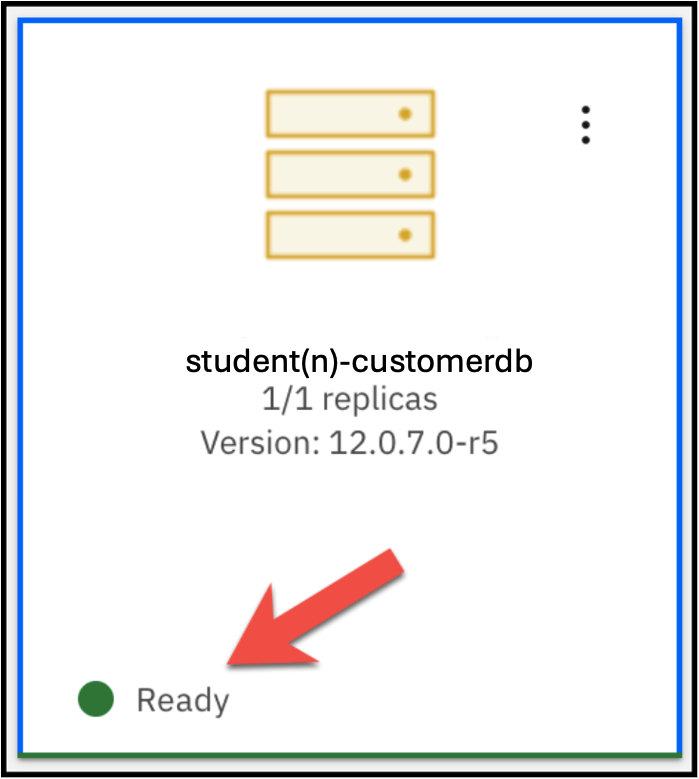
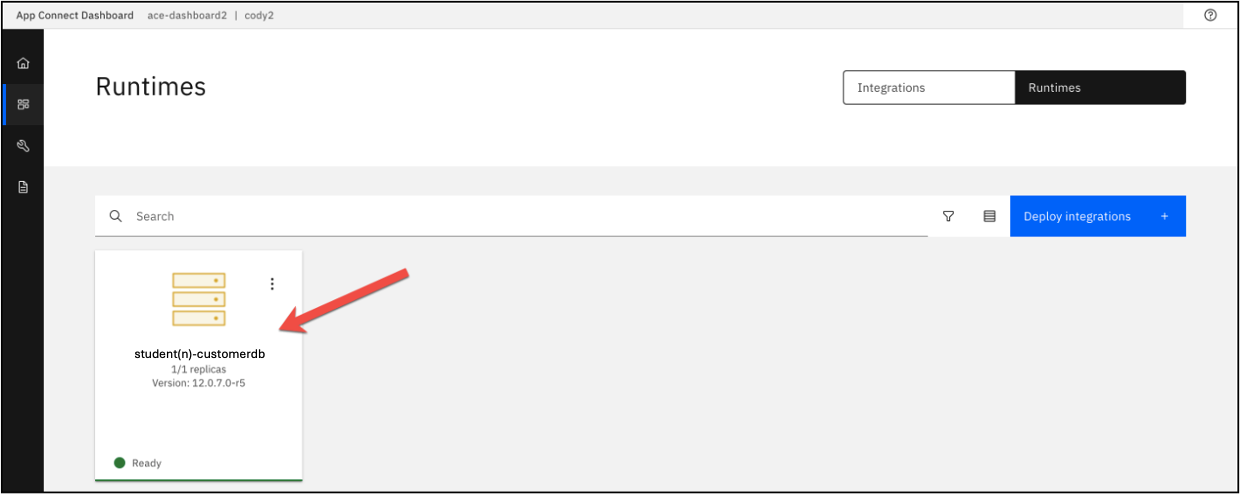
11. This will take you back to the Runtimes Dashboard where you will see your new server. It will likely be showing Pending while it is starting up the pod.
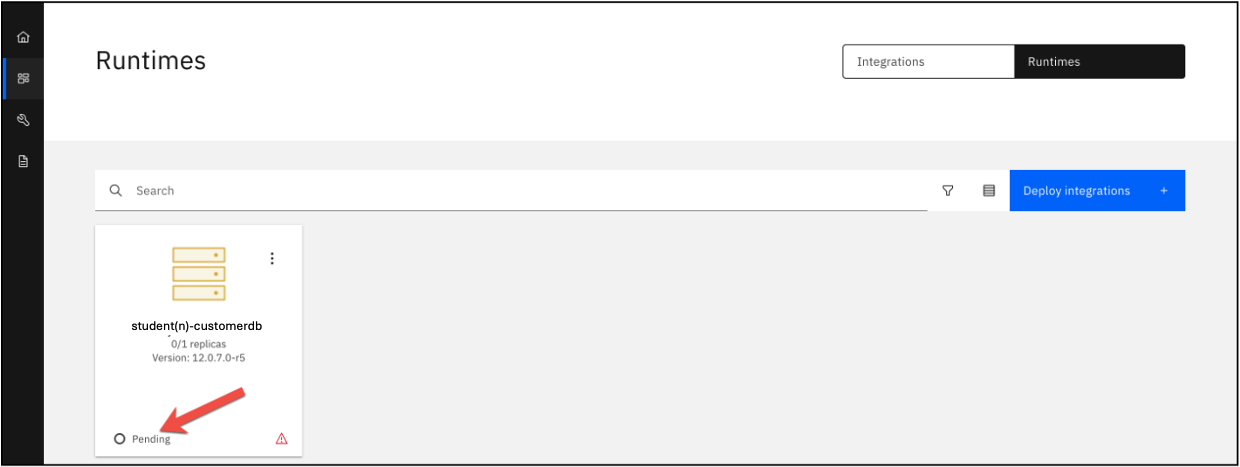
12. Note: It may take a several minutes to start up. You can refresh the page. Once it is up and running it will show the following:
13. Click on the newly created Runtime.
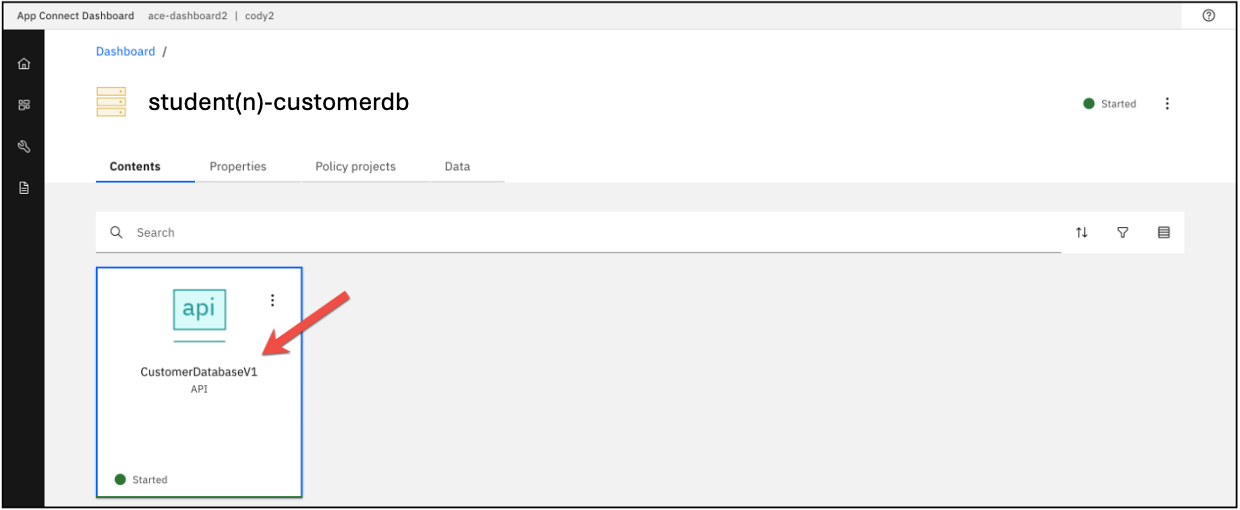
14. Click on the CustomerDatabaseV1 API.
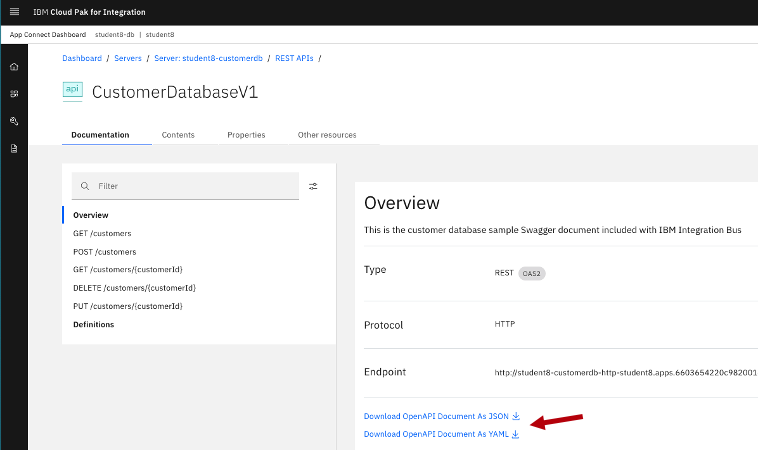
15. Confirm that the Overview tab is selected and click Download OpenAPI Document As JSON (or) Download OpenAPI Document As YAML. Either format can be used to import in API Connect.
3. Import an API into the Developer Workspace
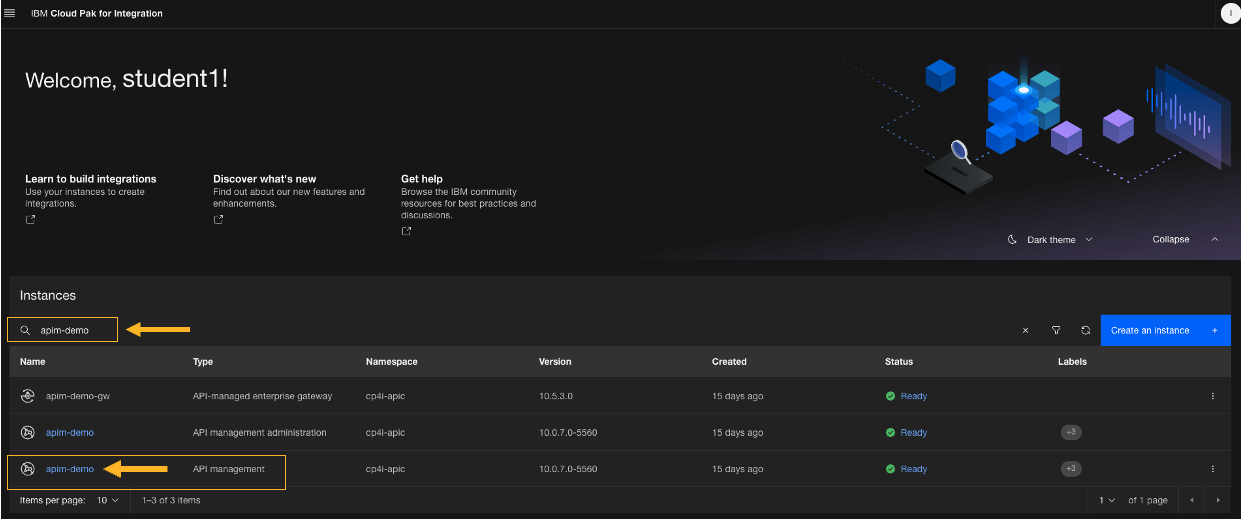
1. Click on IBM Cloud Pak in the upper left.

2. Navigate to the API Connect instance.
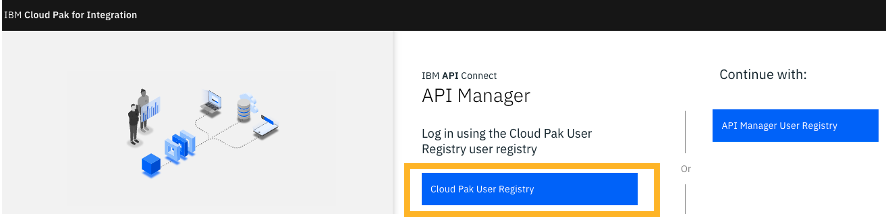
3. If this is your first time logging in, the login page is presented. Click Common Services User Registry.
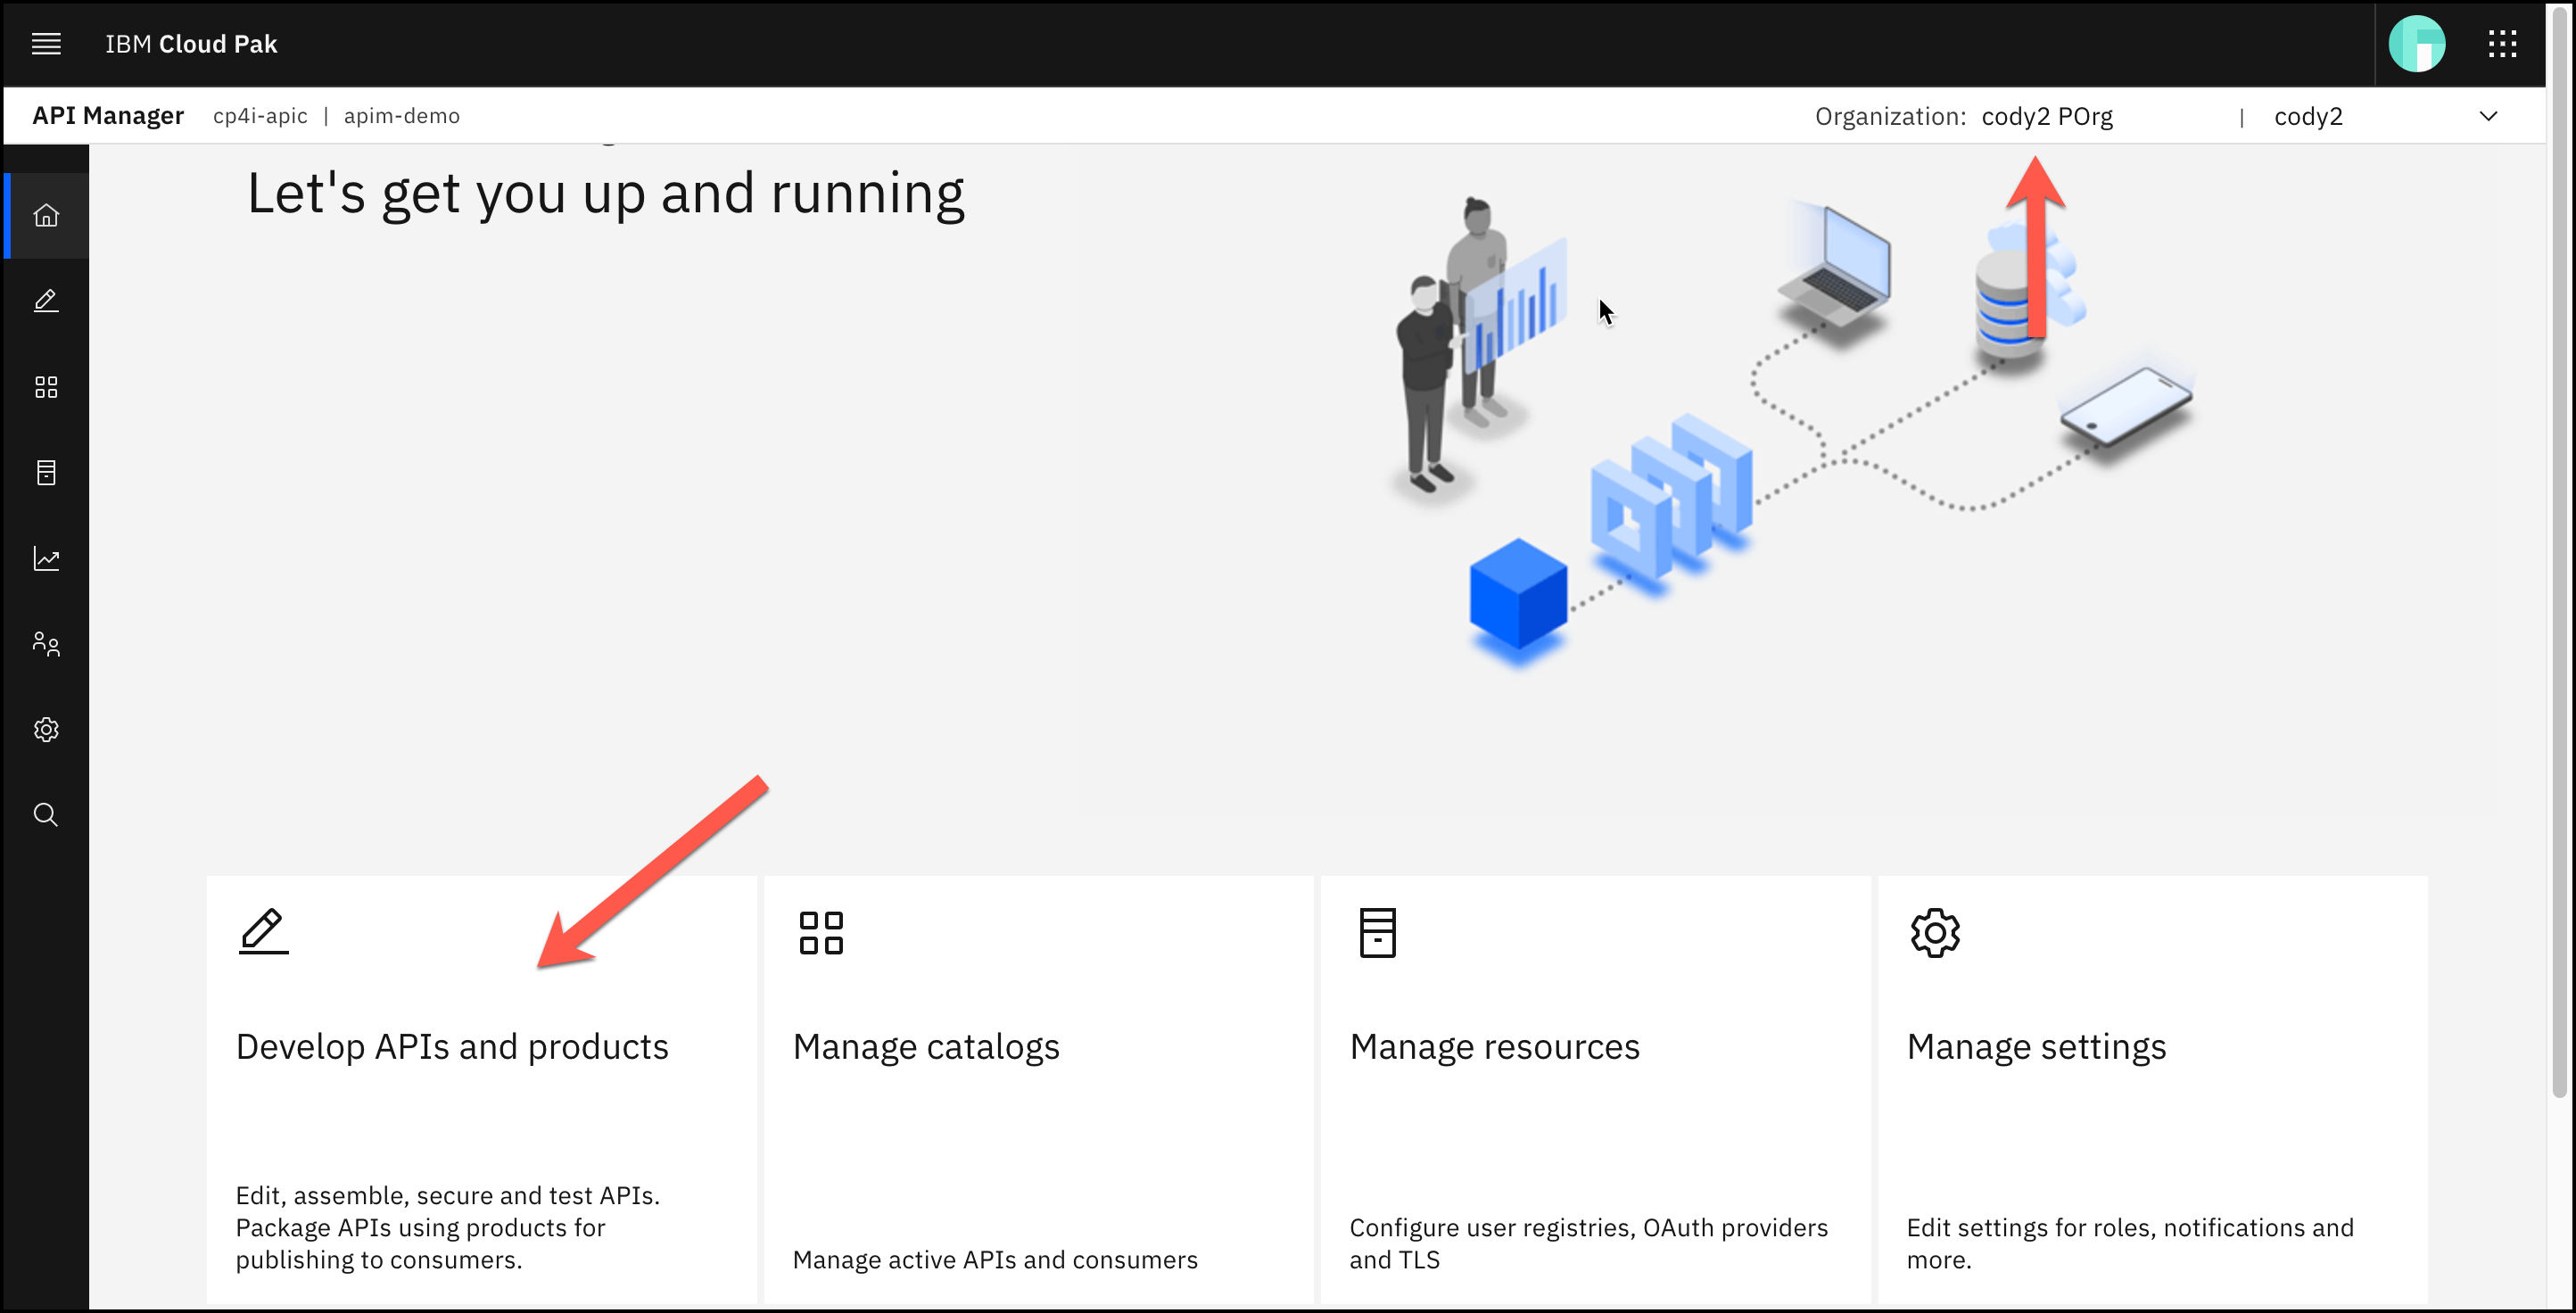
4. Confirm that you are in the provider organization for your username (upper right) and then click on Develop APIs and products.
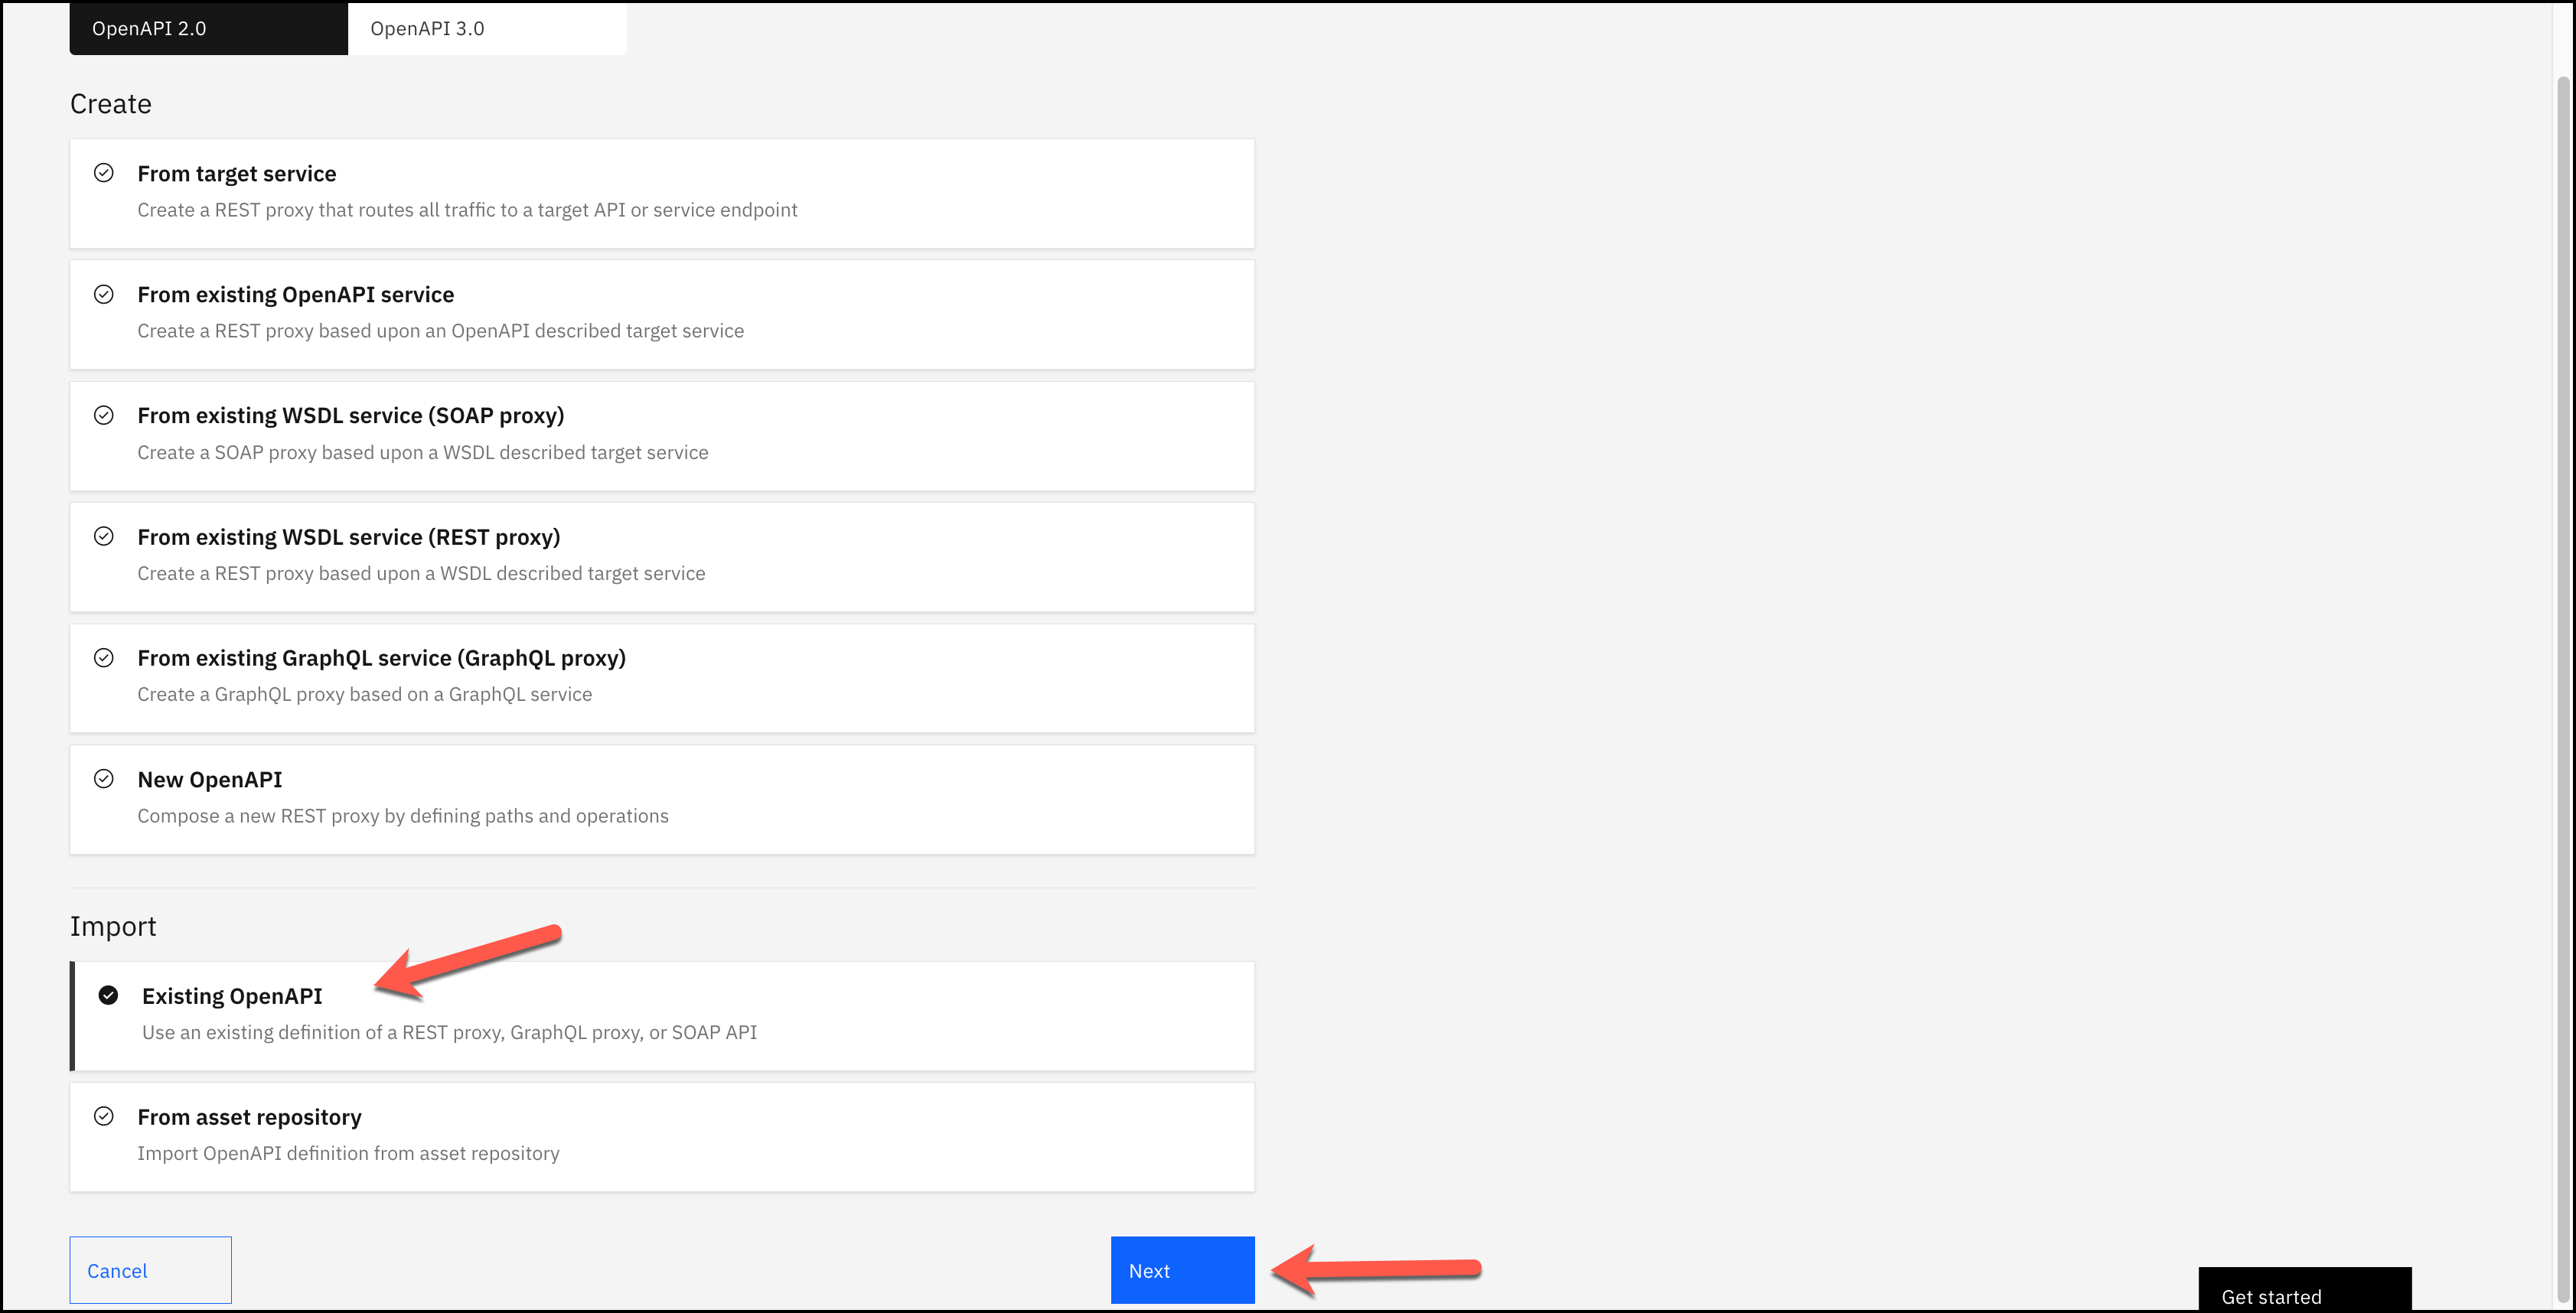
5. We are now able to begin to create APIs and Products. Click Add.

6. Click API (from REST, GraphQL or SOAP).

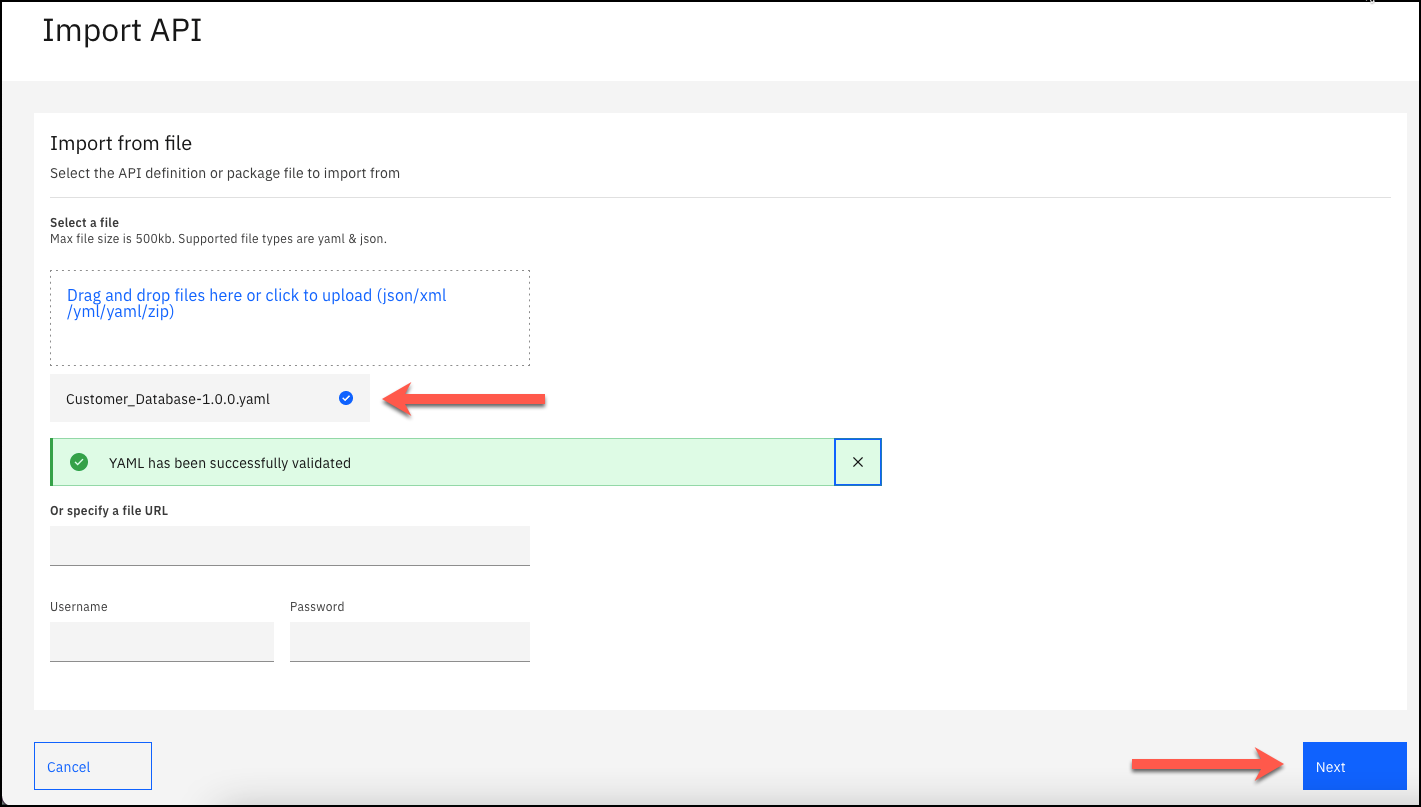
7. Click Existing OpenAPI under Import and click Next.
8. Drag and drop the yaml file that you just downloaded or click to upload. Once you have dragged and dropped or uploaded, you will see the yaml file listed under and should see a notification that the “YAML has been successfully validated”. Click Next.
9. The API should be imported successfully as shown in the image below. Click Edit API.

4. Configure the API
After importing the existing API, the first step is to configure basic security before exposing it to other developers. By creating a client key and secret security, we are able to identify the application using the API.
Next, we will define the backend endpoints where the API is actually running. IBM API Connect supports pointing to multiple backend endpoints to match your multiple build stage environments.
Finally, we will configure the proxy call to invoke the endpoint.
4a. Configure API Key Security
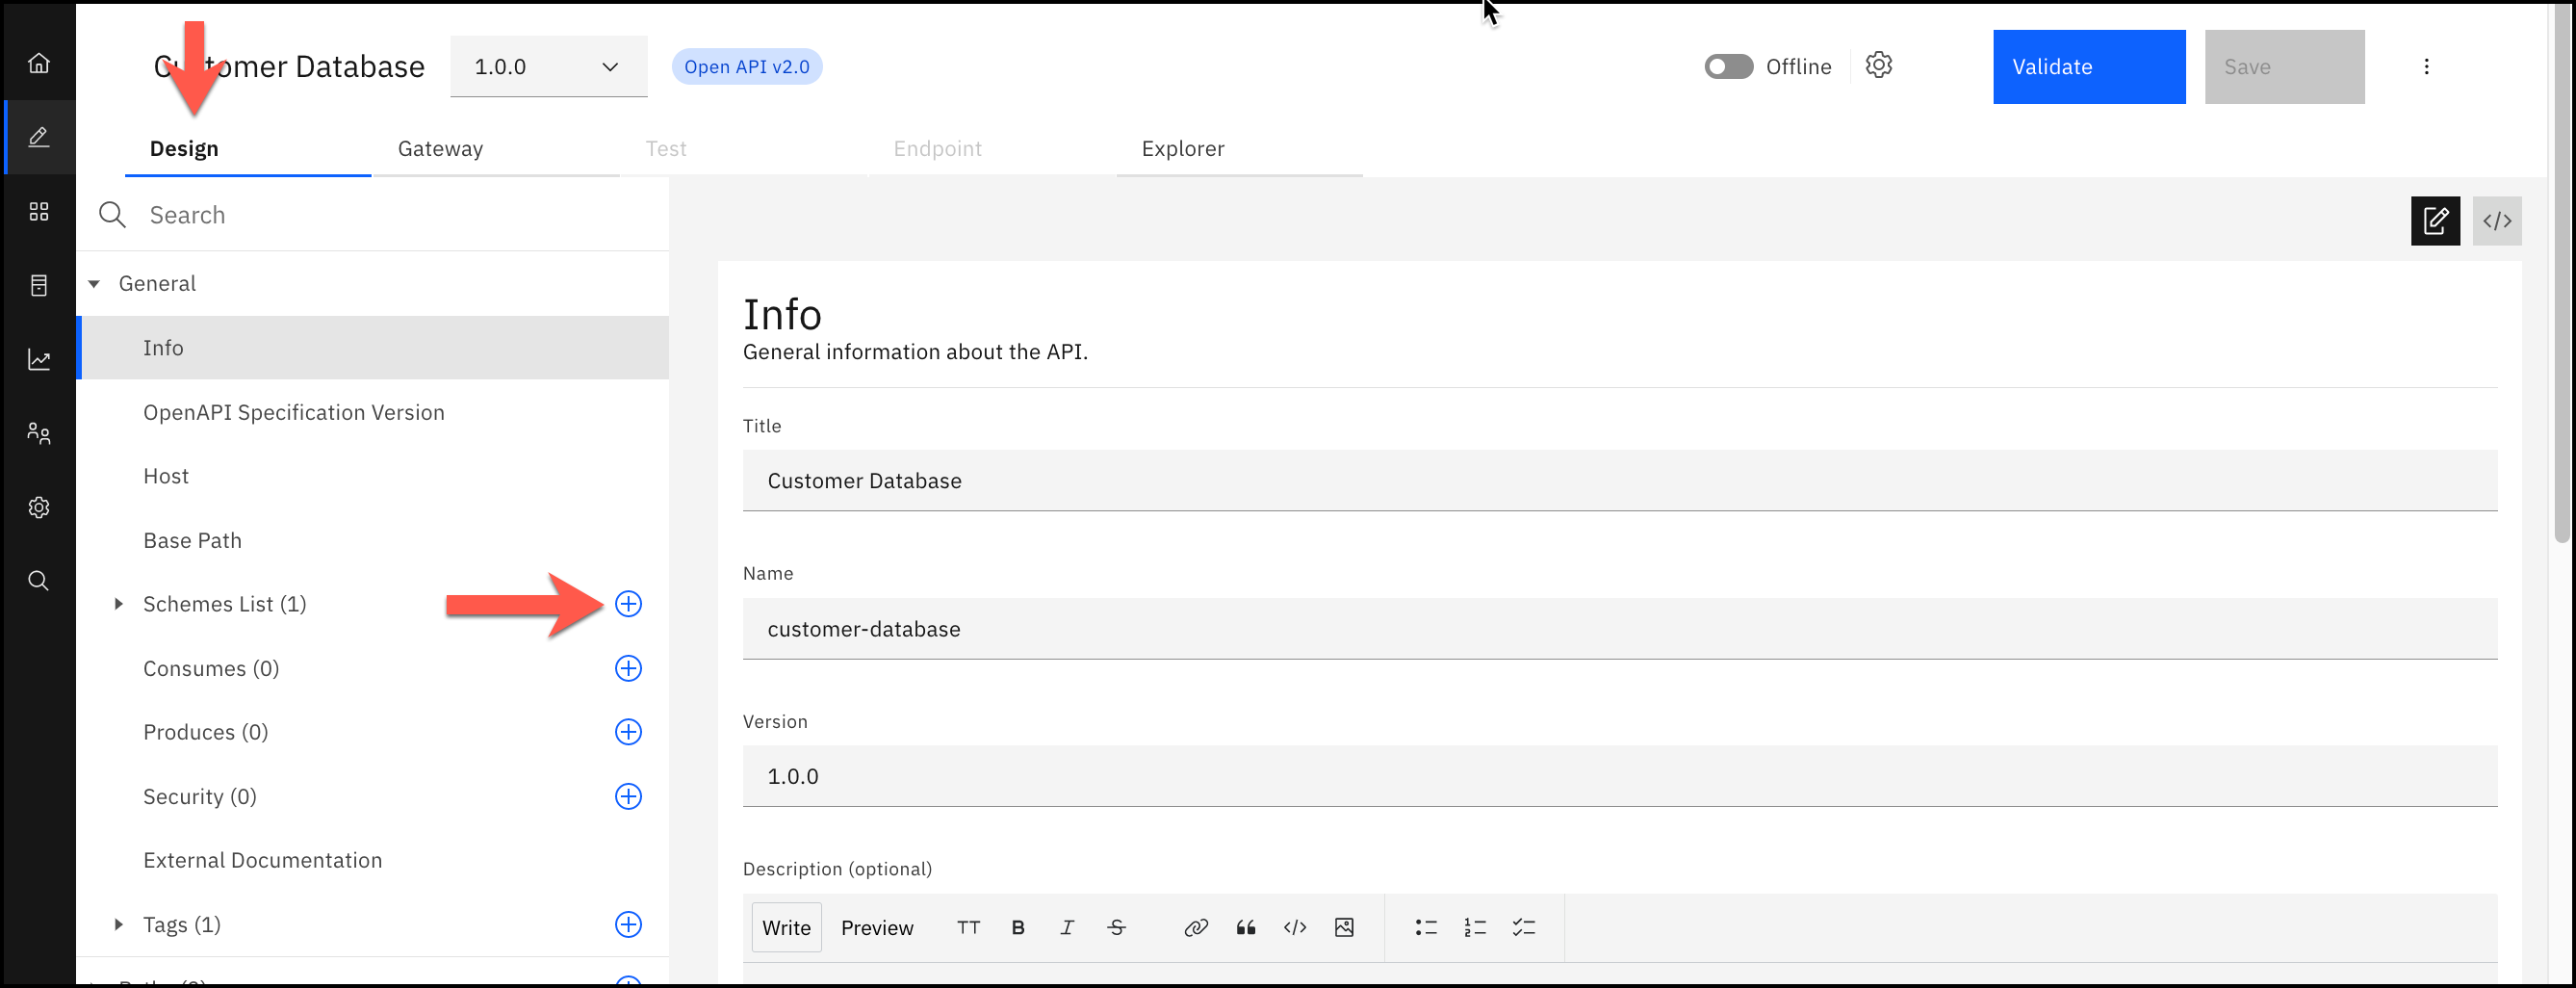
1. Schemes define which transfer protocols you want your API to use. Make sure that the Design tab is selected and click on the + next to Schemes List.
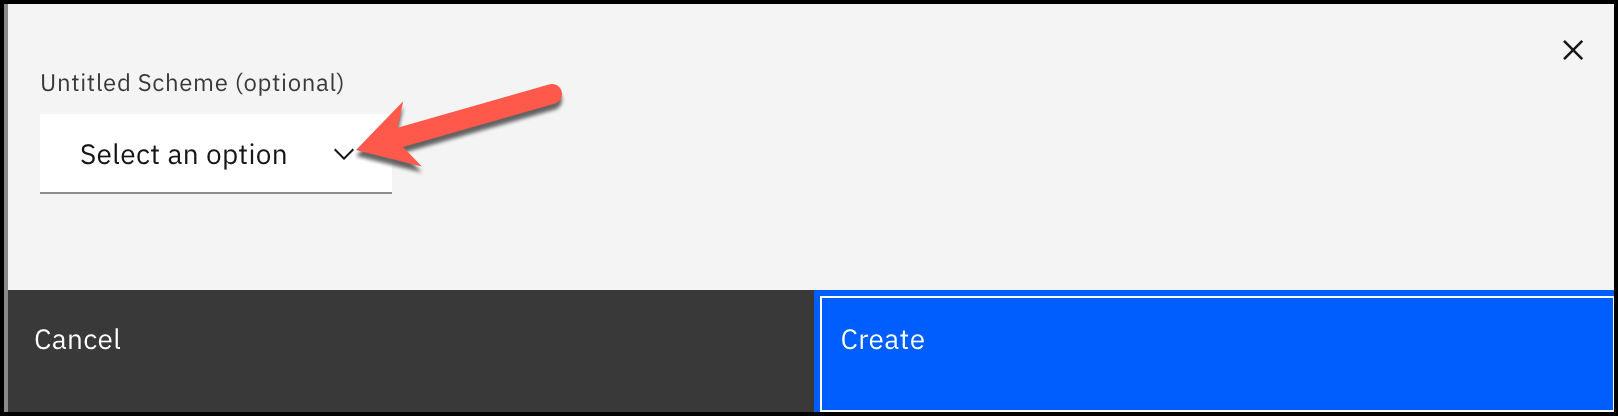
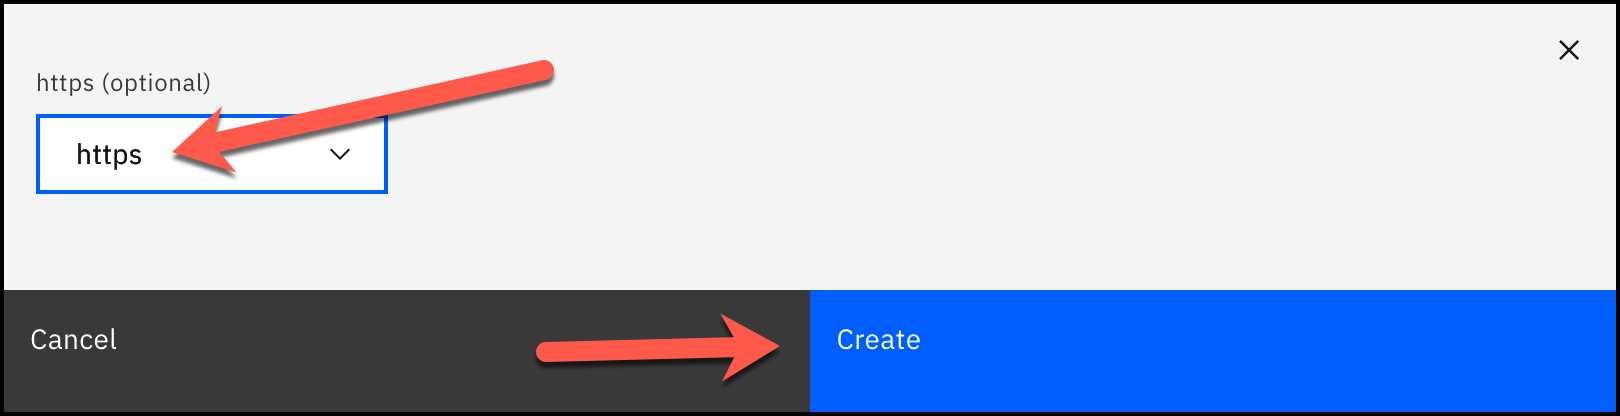
5. From the Select an option drop-down menu, select https. Click Create.
6. Expand the Schemes List section. Under the Schemes List, http and https are listed. Click Save.
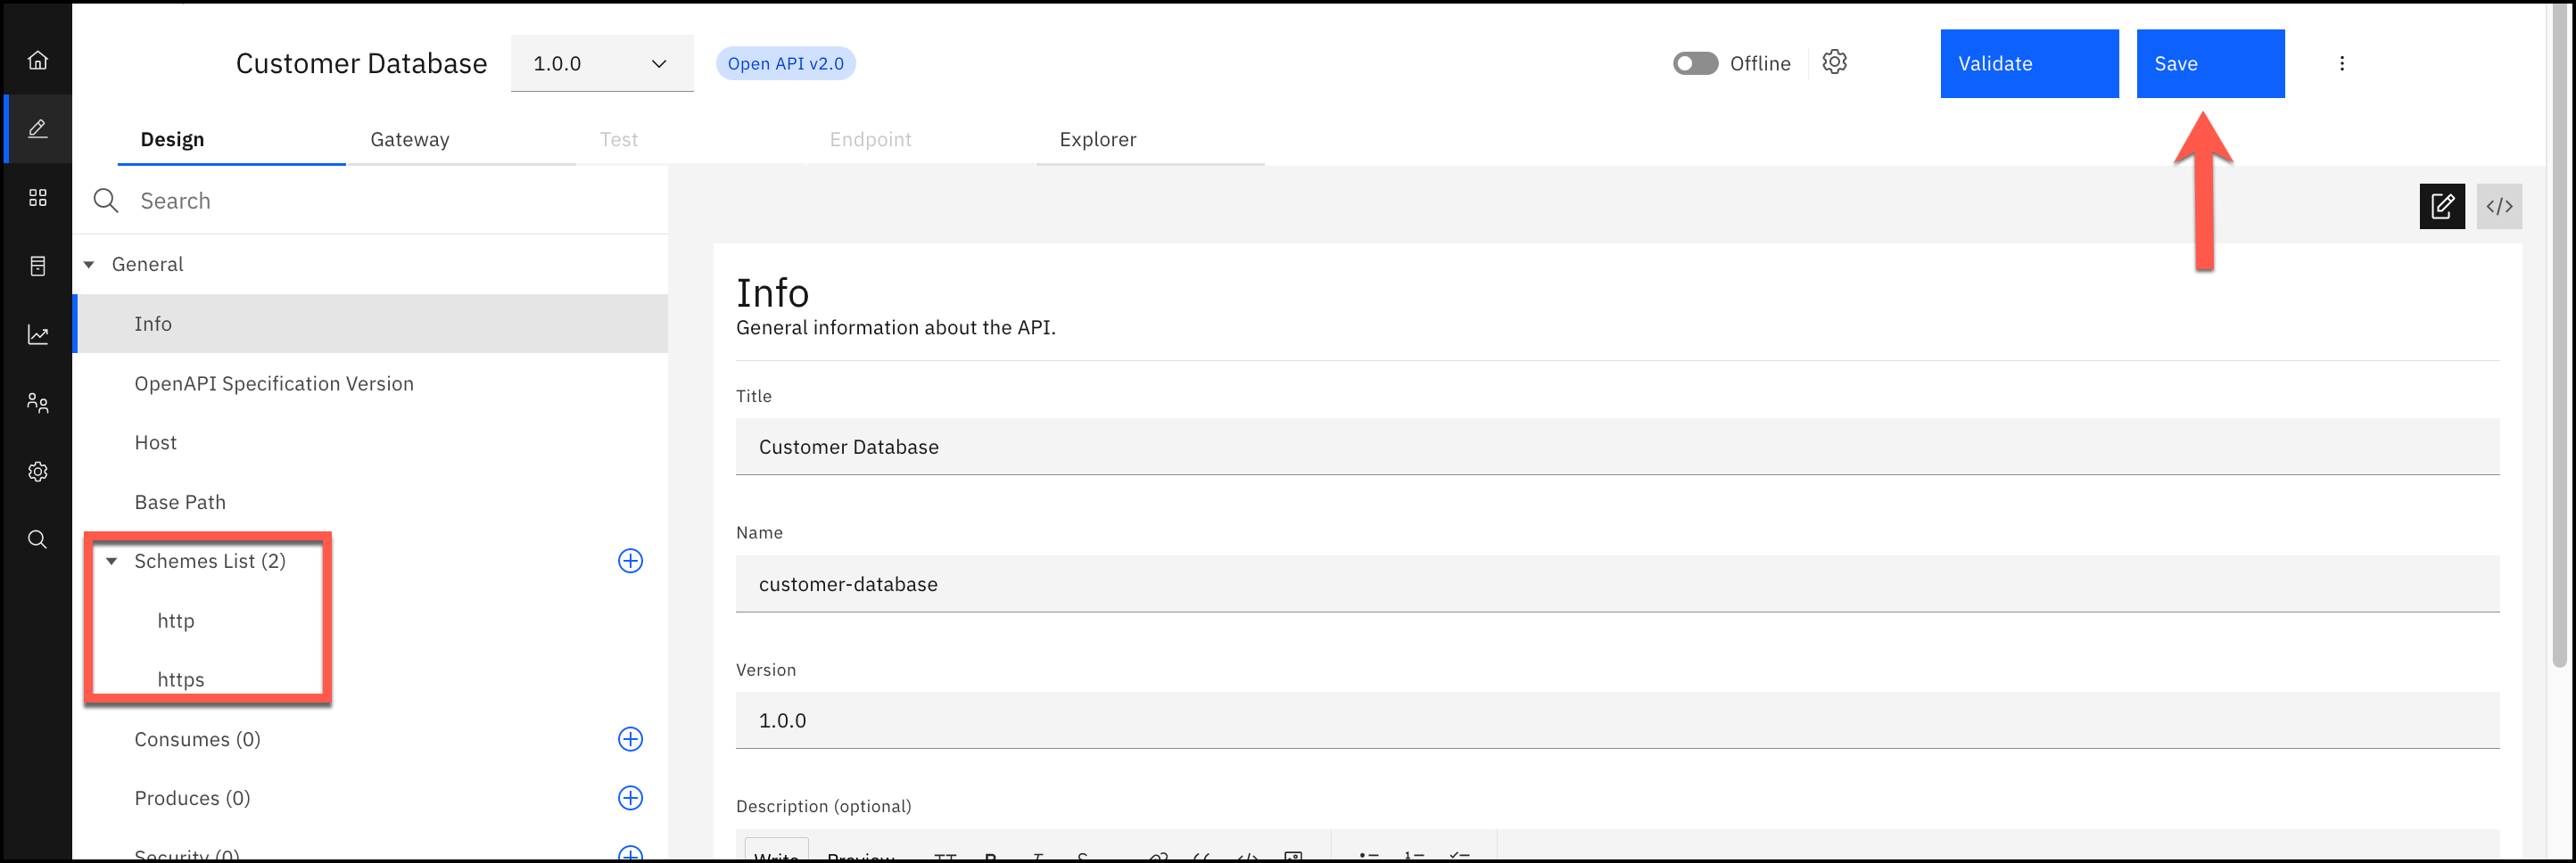
Once saved, you will see an indicator window appear that shows that Your API has been updated. Click on the X to close the window. You should no longer see the warning indicator.

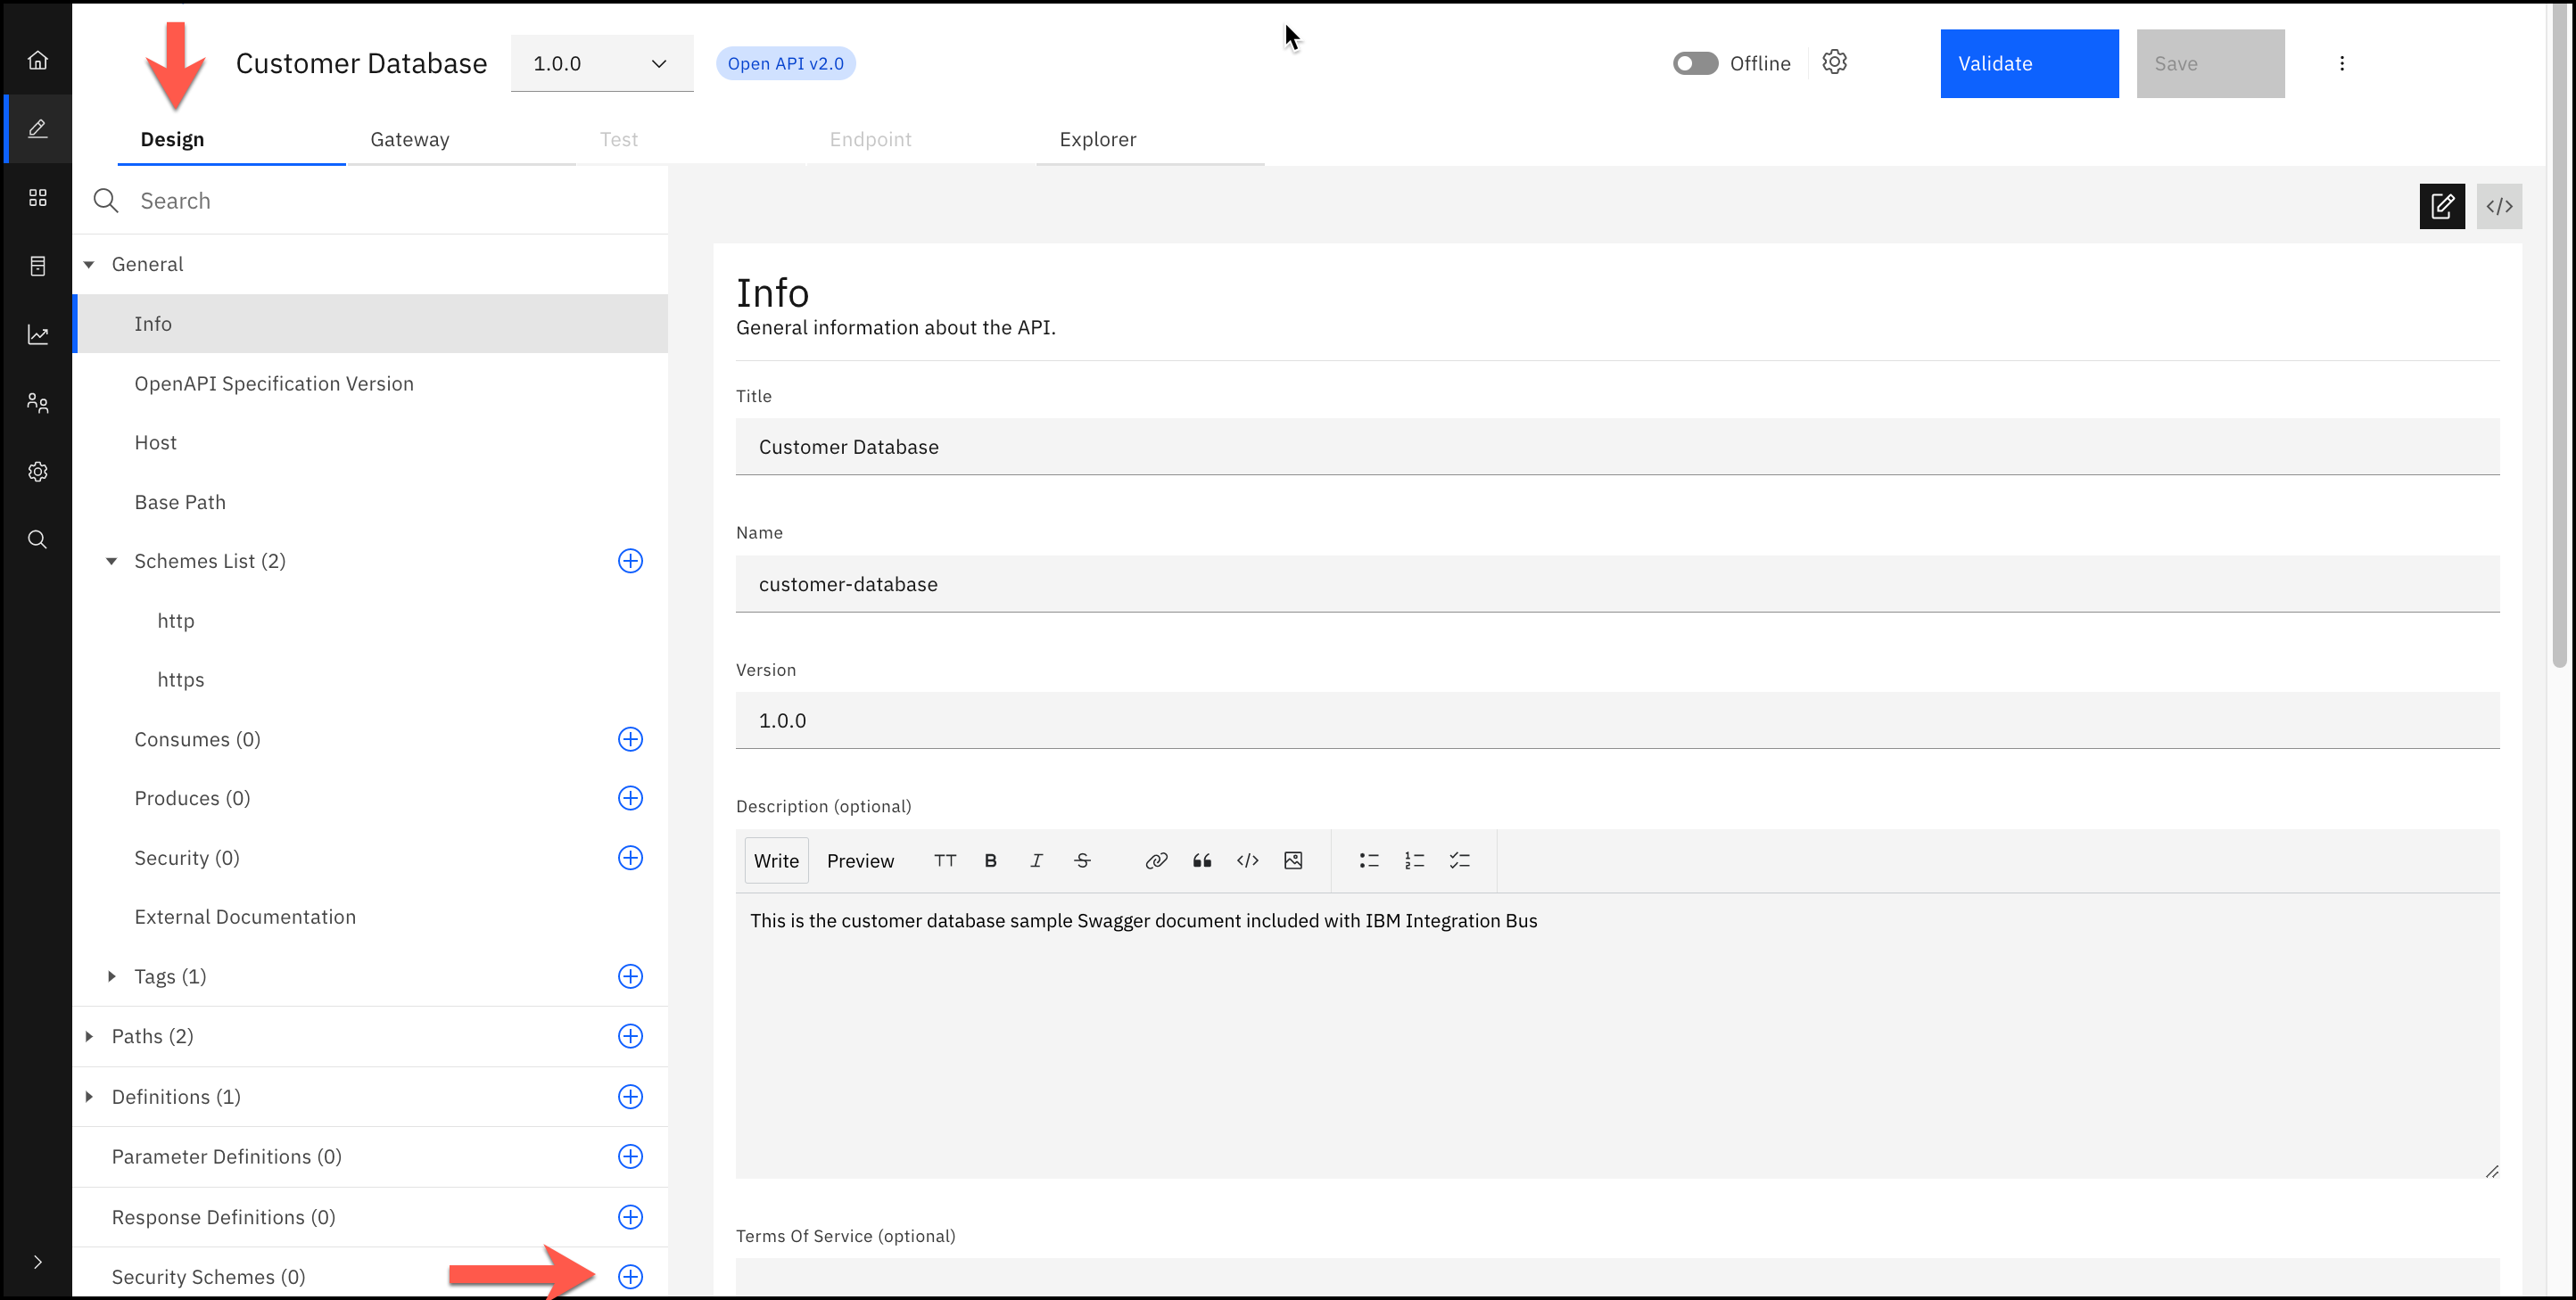
7. Make sure that the Design tab is selected and click on the + next to Security Schemes.
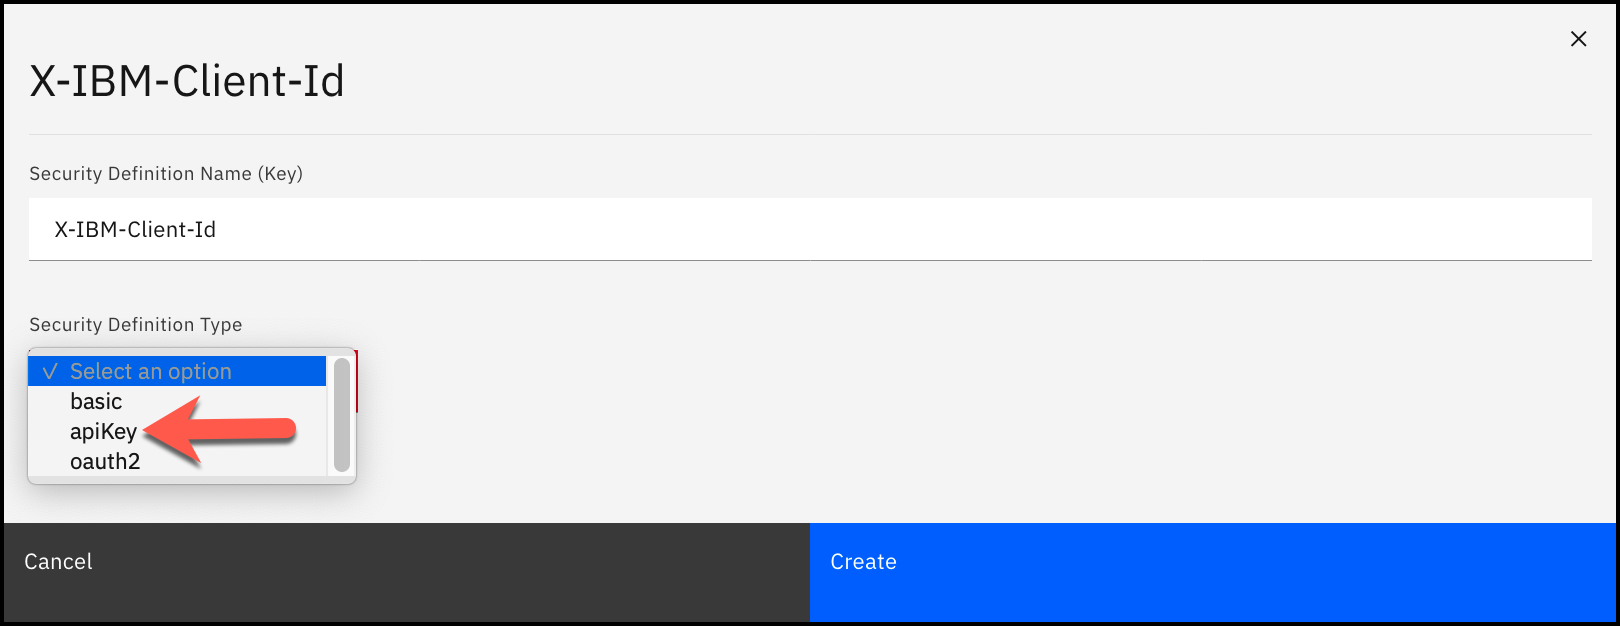
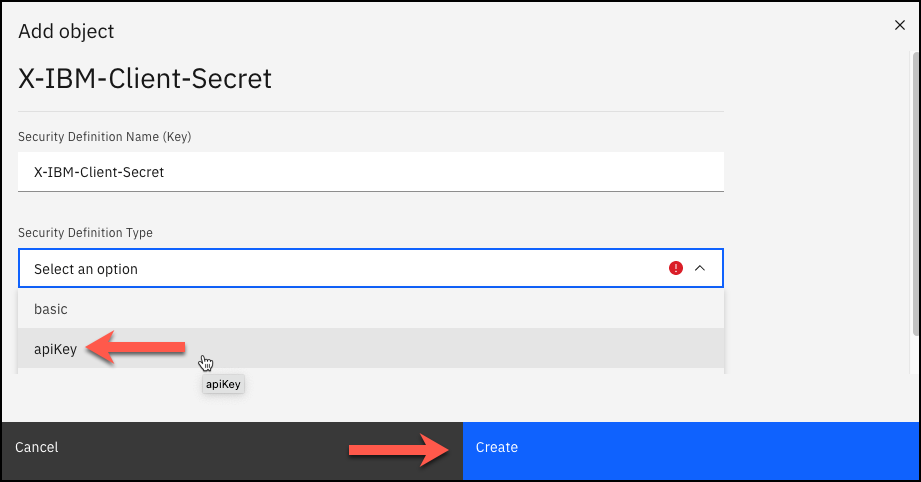
8. For the Security Definition Name (Key), enter a name (e.g., X-IBM-Client-Id) and select apiKey in the drop-down menu for Security Definition Type.
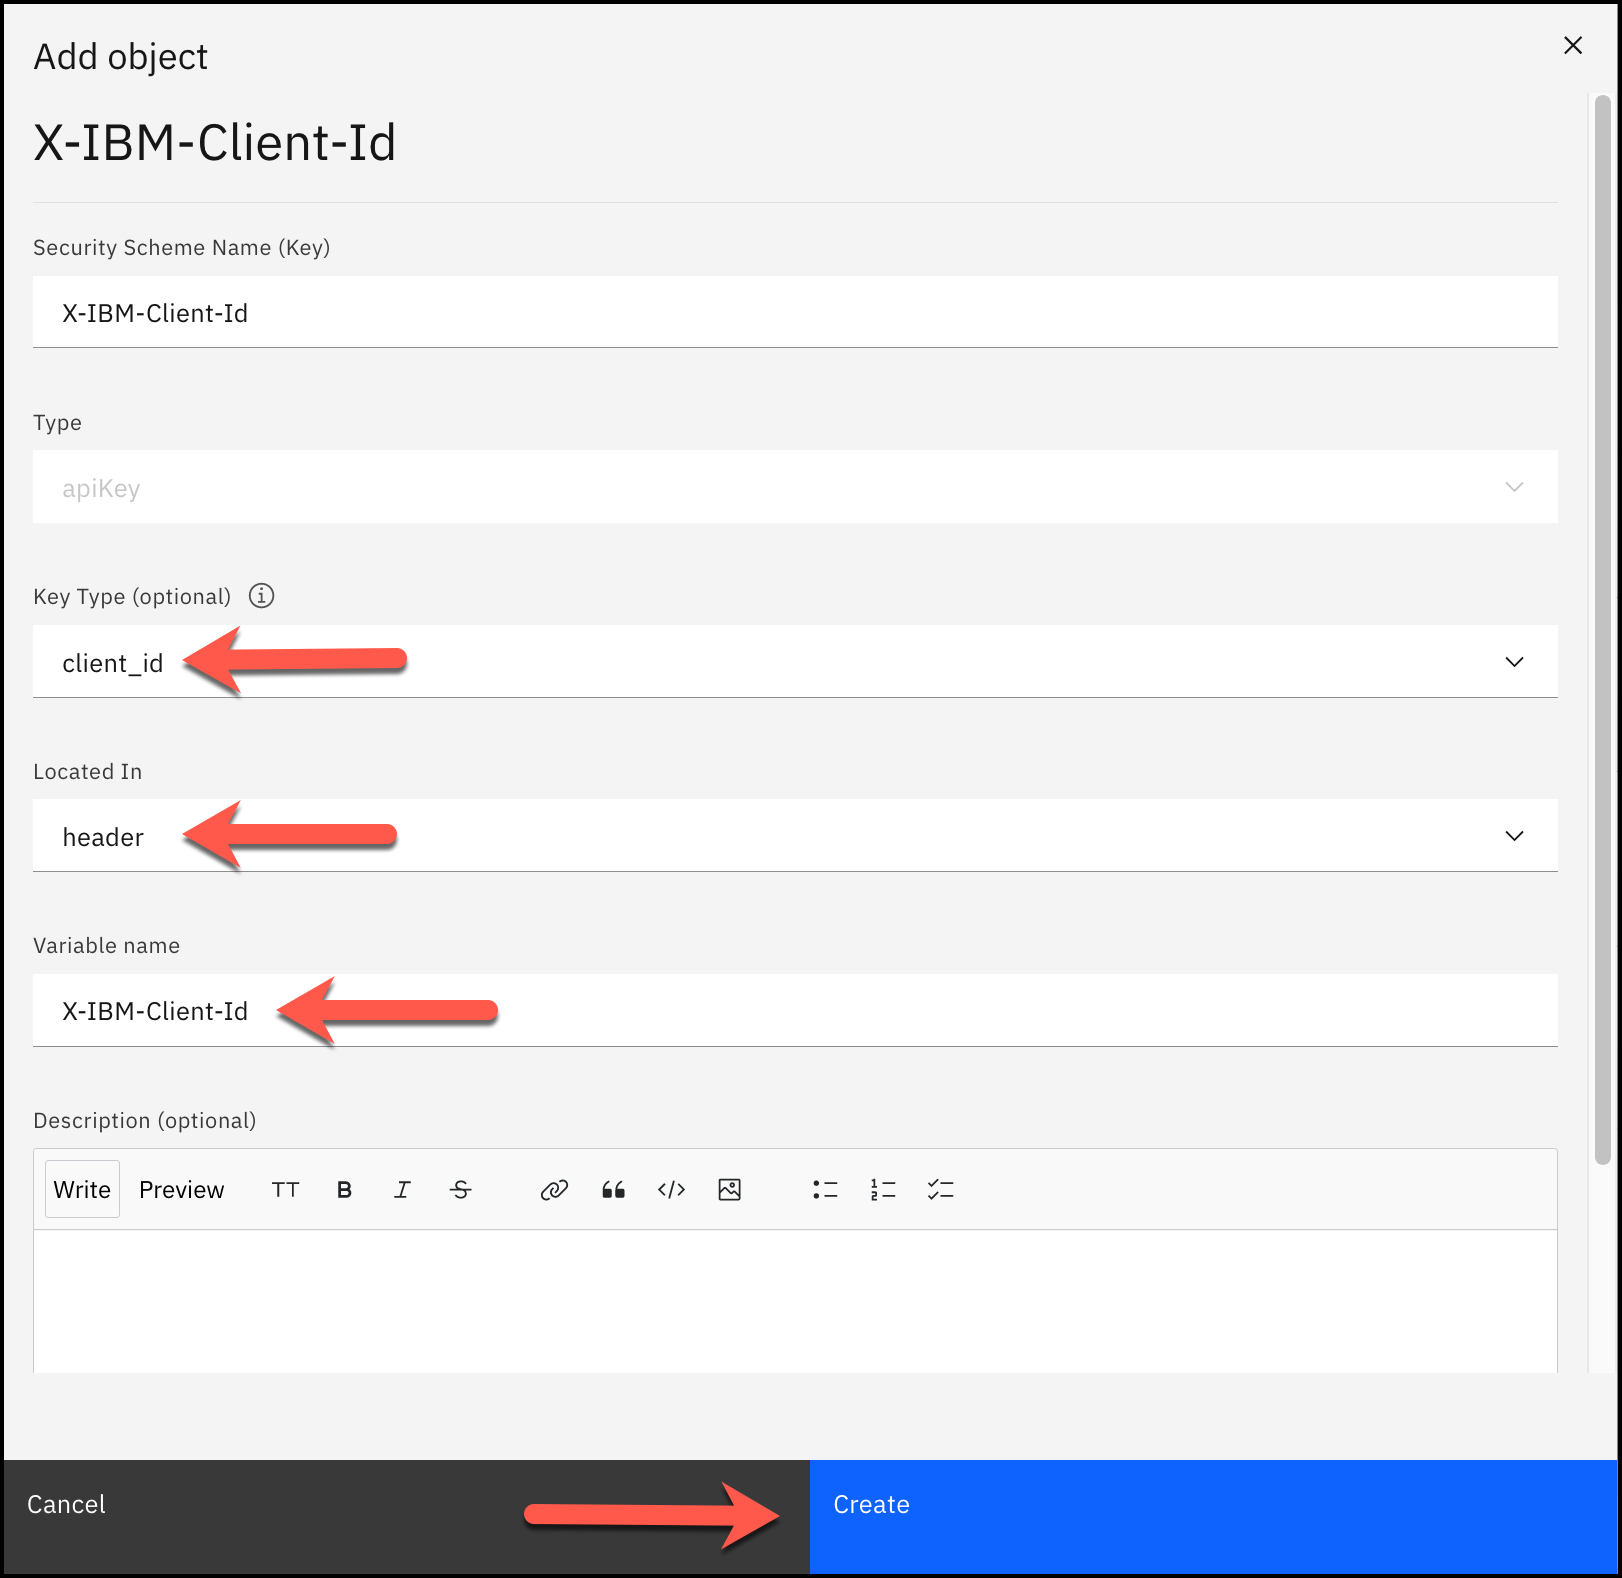
9. Select client_id from the drop-down menu for Key Type (optional), select header from the drop-down menu for Located In, and enter a name (e.g., X-IBM-Client-Id) for Variable name. Note: Before clicking Create, make sure that the This field is required indicator is no longer there. Click Create.
10. Click Save.

11. Once saved, you will see an indicator window appear that shows that Your API has been updated. Click on the X to close the window.
12. Make sure that the Design tab is selected and click on the + next to Security Schemes.

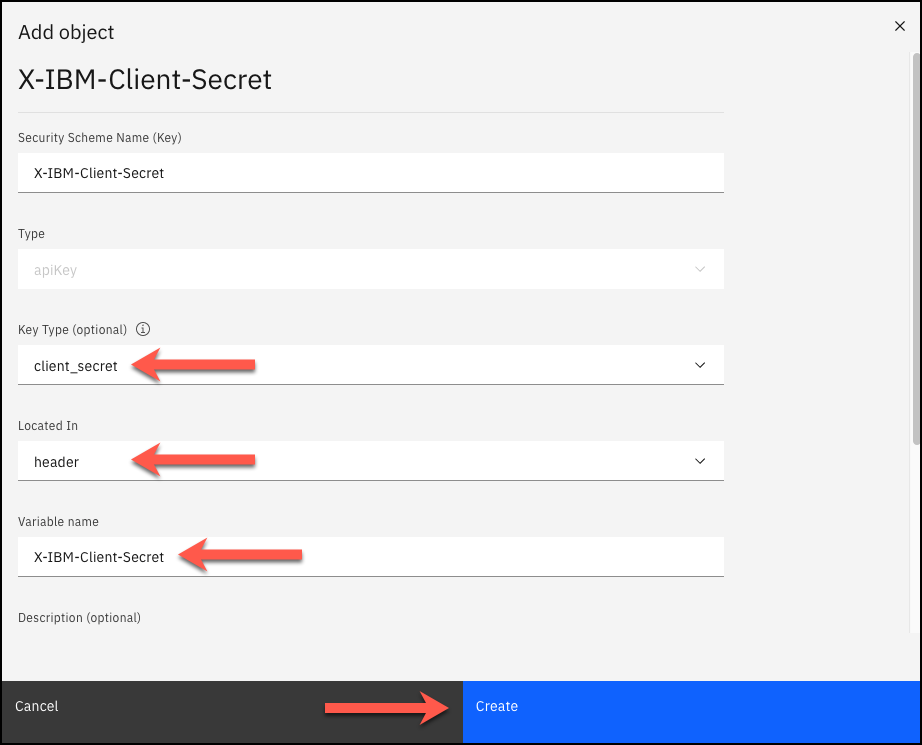
13. For the Security Definition Name (Key), enter a name (e.g., X-IBM-Client-Secret) and select apiKey in the drop-down menu for Security Definition Type.
14. Select client_secret from the drop-down menu for Key Type (optional), select header from the drop-down menu for Located In, and enter a name (e.g., X-IBM-Client-Secret) for Variable name. Before clicking Create, make sure that the This field is required indicator is no longer there. Click Create.
15. Click Save.
16. Once saved, you will see an indicator window appear that shows that Your API has been updated. Click on the X to close the window.
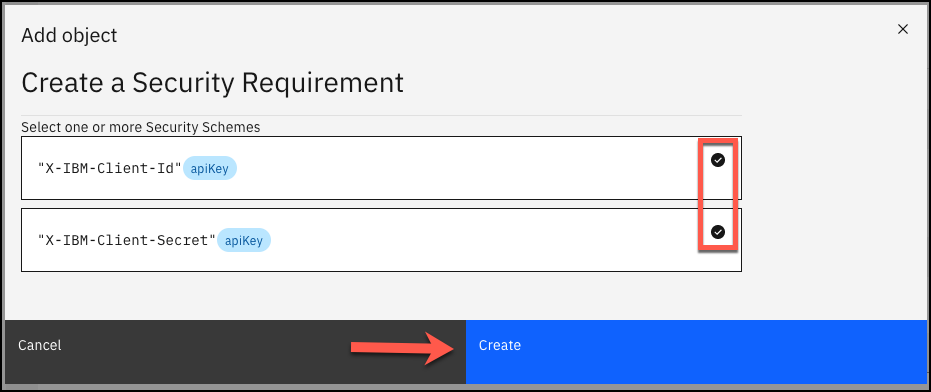
17. Make sure that the Design tab is selected and click on + next to Security.

18. Select “X-IBM-Client-Id” and “X-IBM-Client-Secret” and click Create.
19. Click Save.
20. Once saved, you will see an indicator window appear that shows that Your API has been updated. Click on the X to close the window.
4b. Define a Target-URL for Sandbox Environment
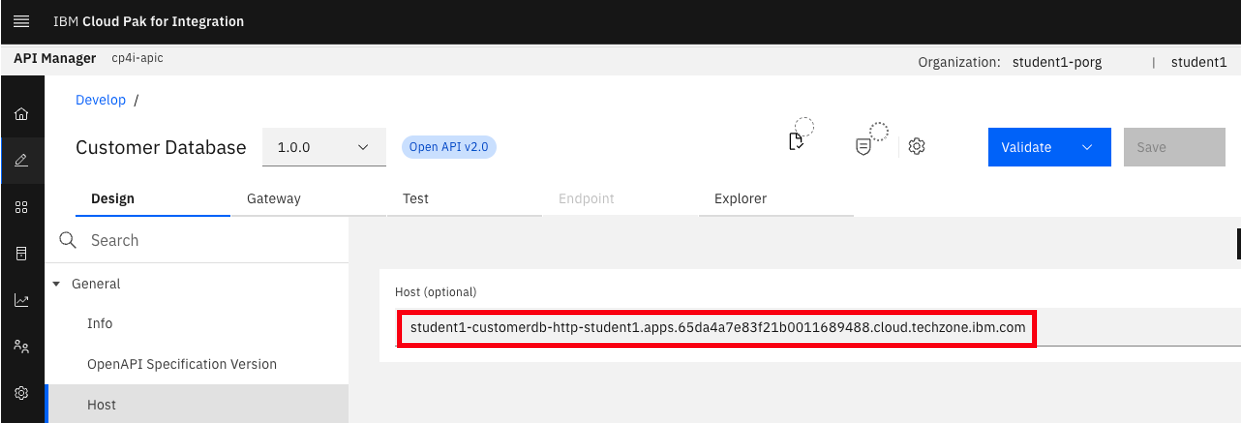
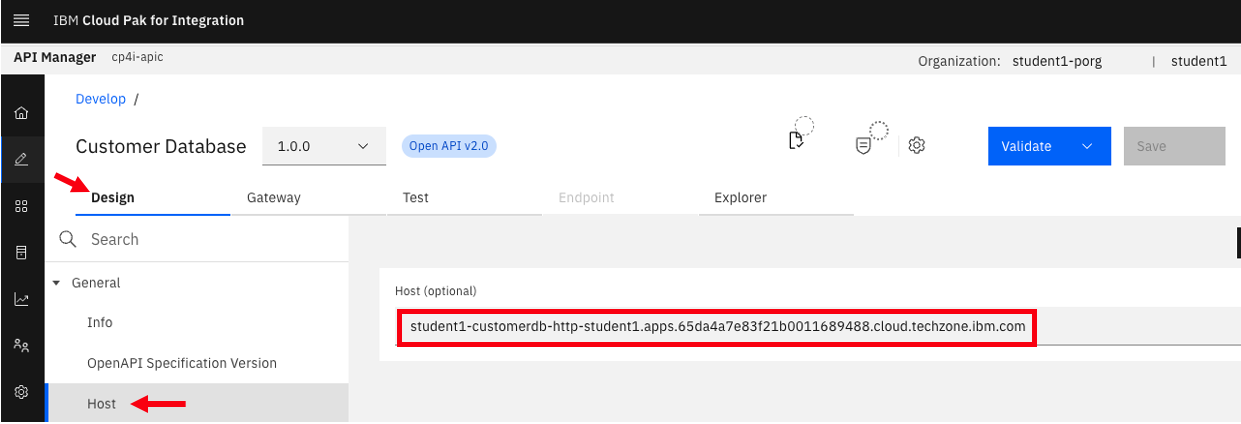
1. Make sure that the Design tab is selected and click on Host.
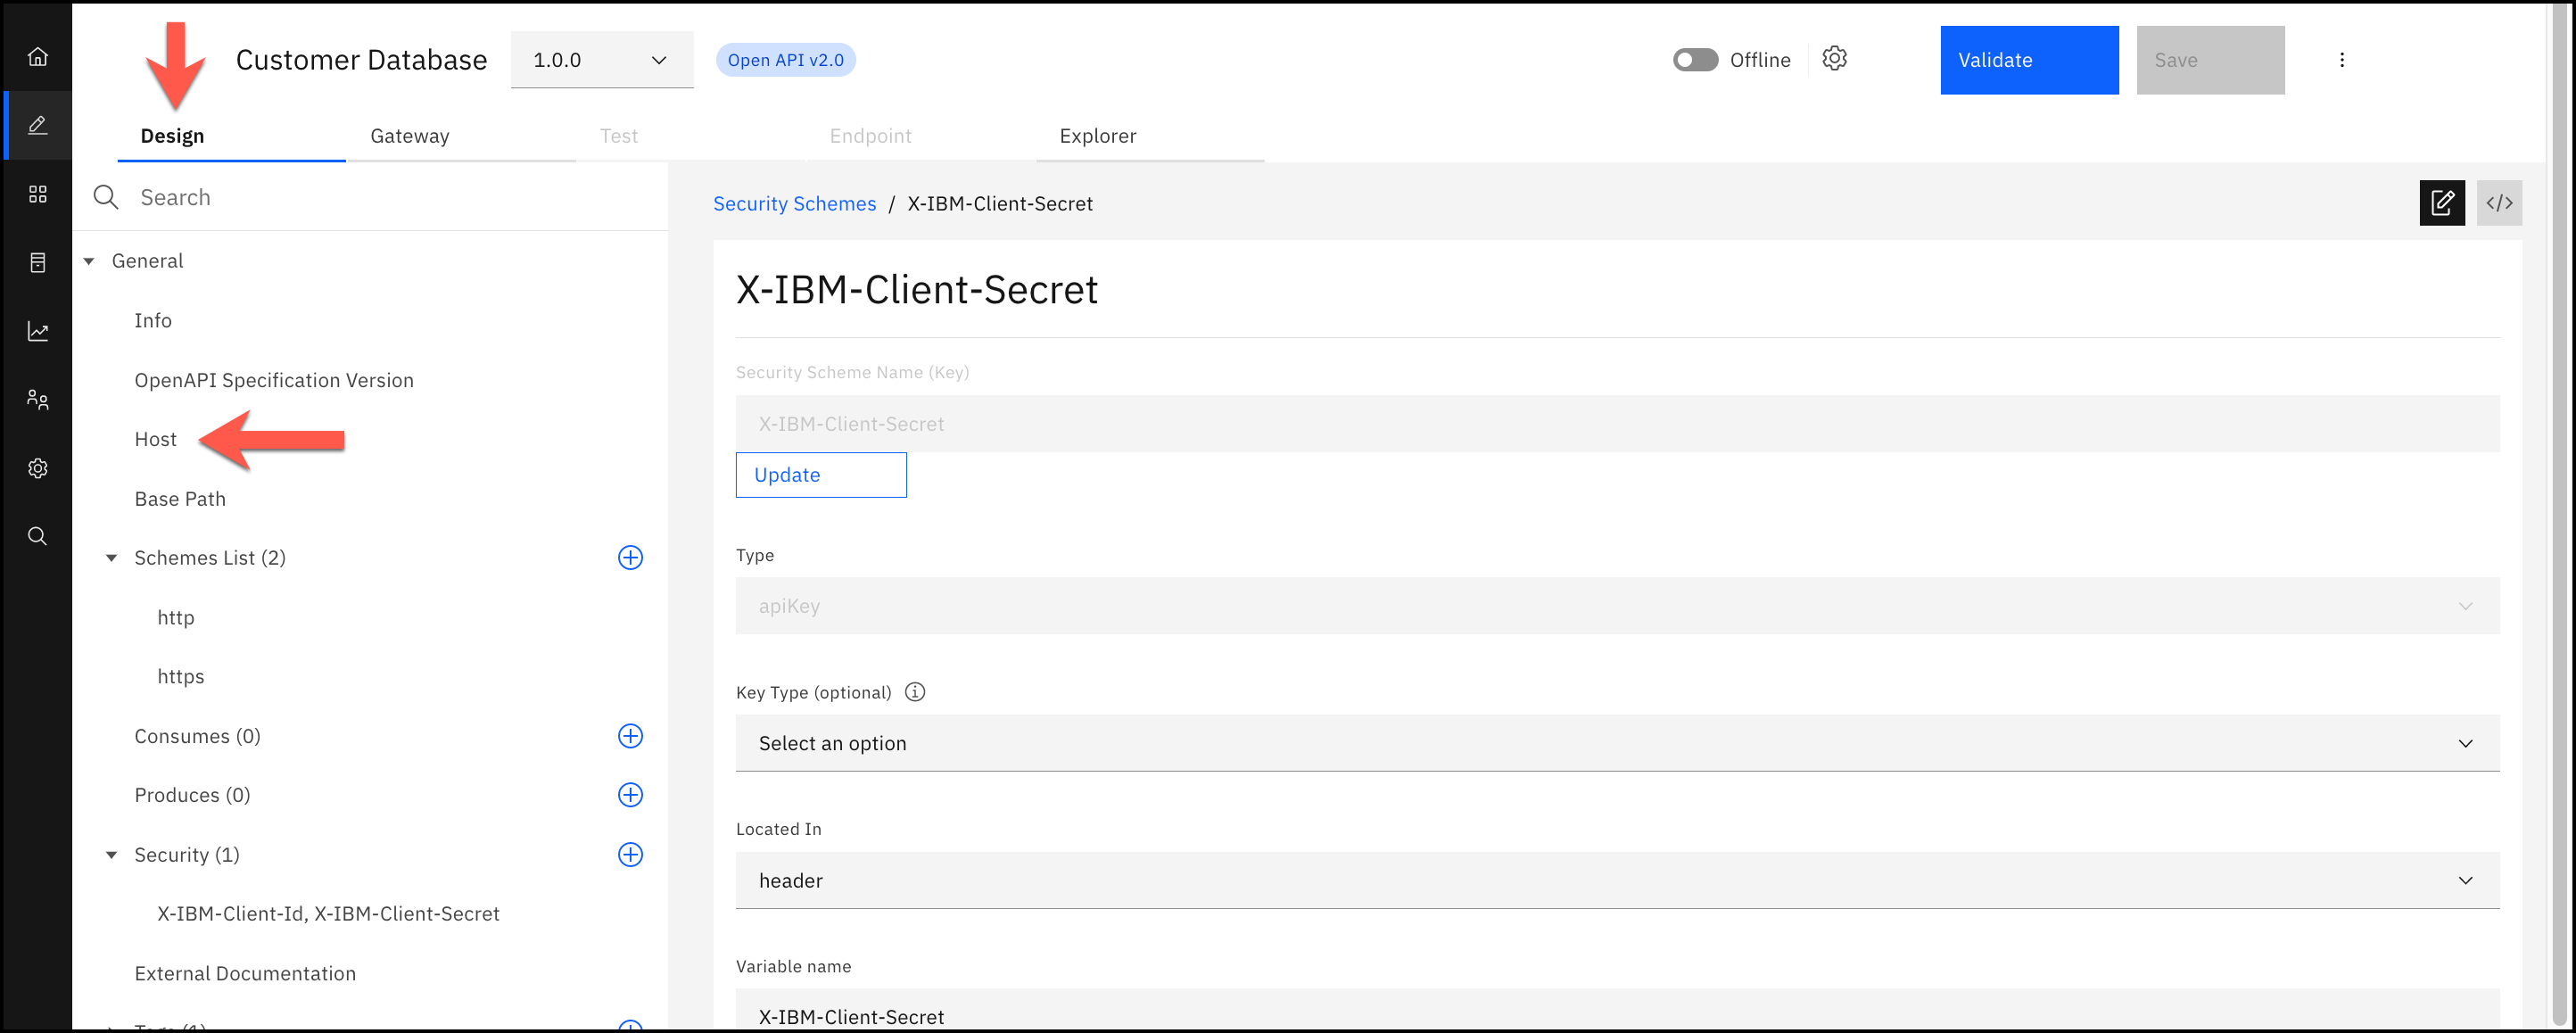
2. Copy the value in the Host (optional) field.
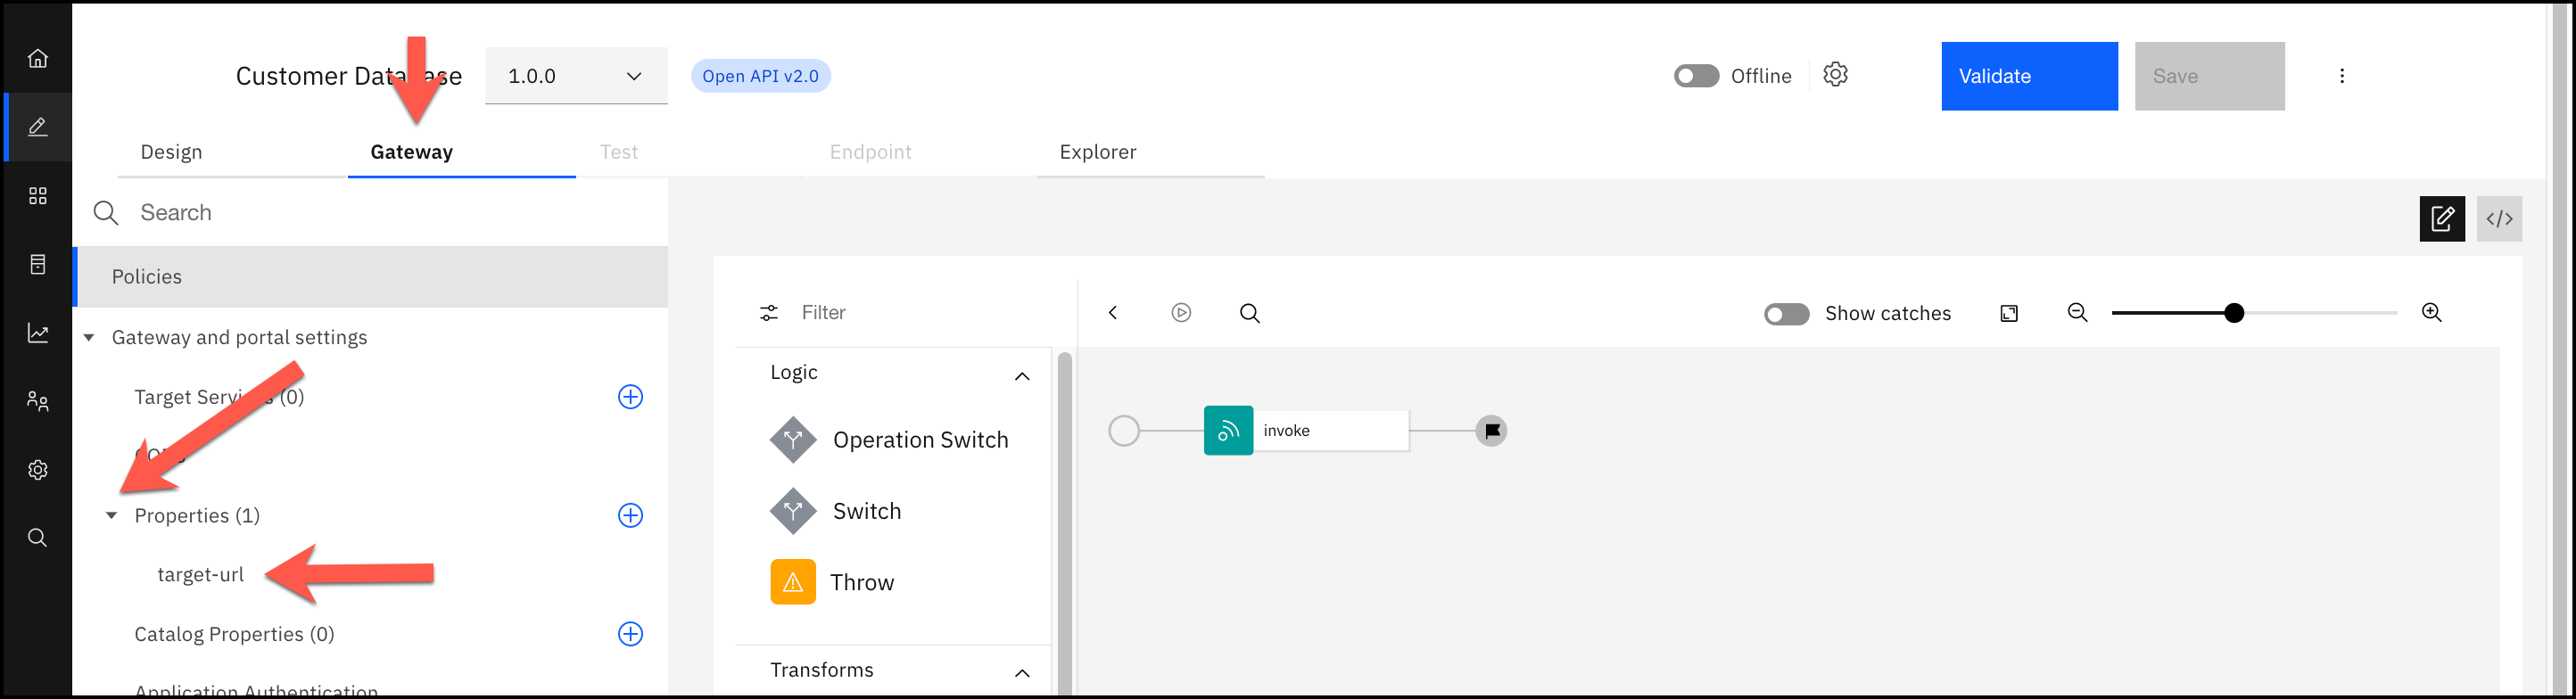
3. Navigate to the Gateway tab.

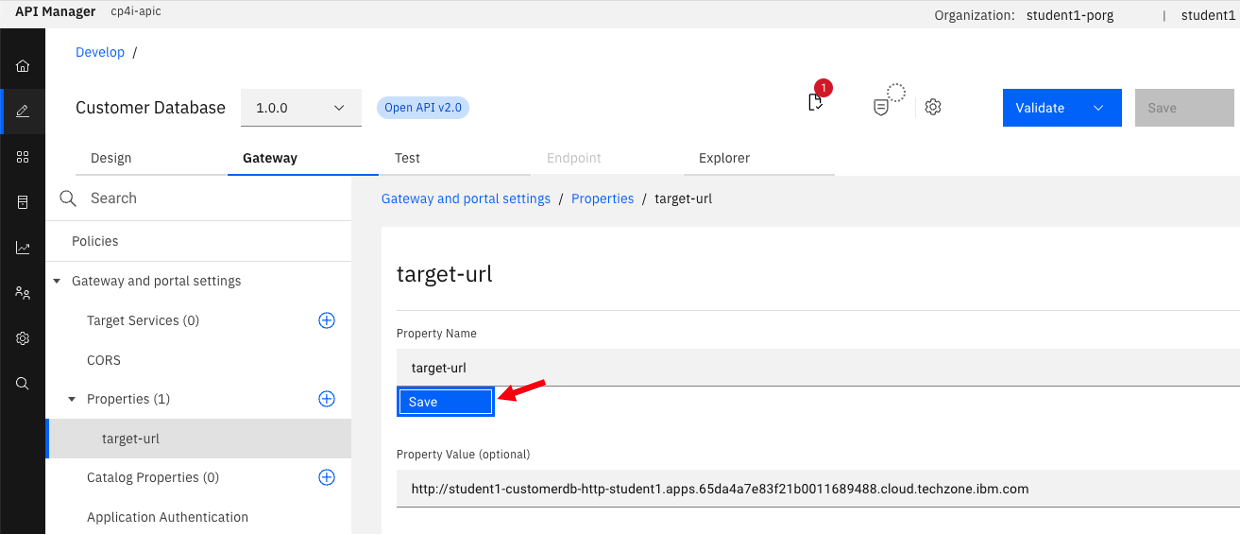
4. Make sure that the Gateway tab is selected and expand Properties. Click on target-url.
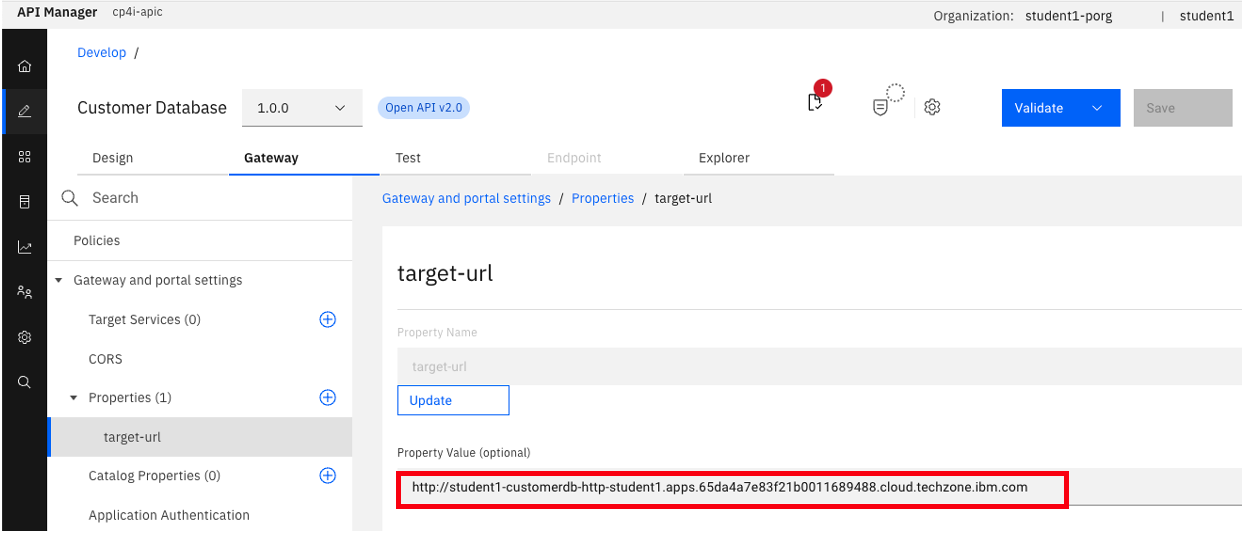
5. Replace the Property Value (optional) with the value that you copied in Step 2. Note: Make sure to include a http:// at the beginning and remove the : and port number (e.g. :80) if present from the end.
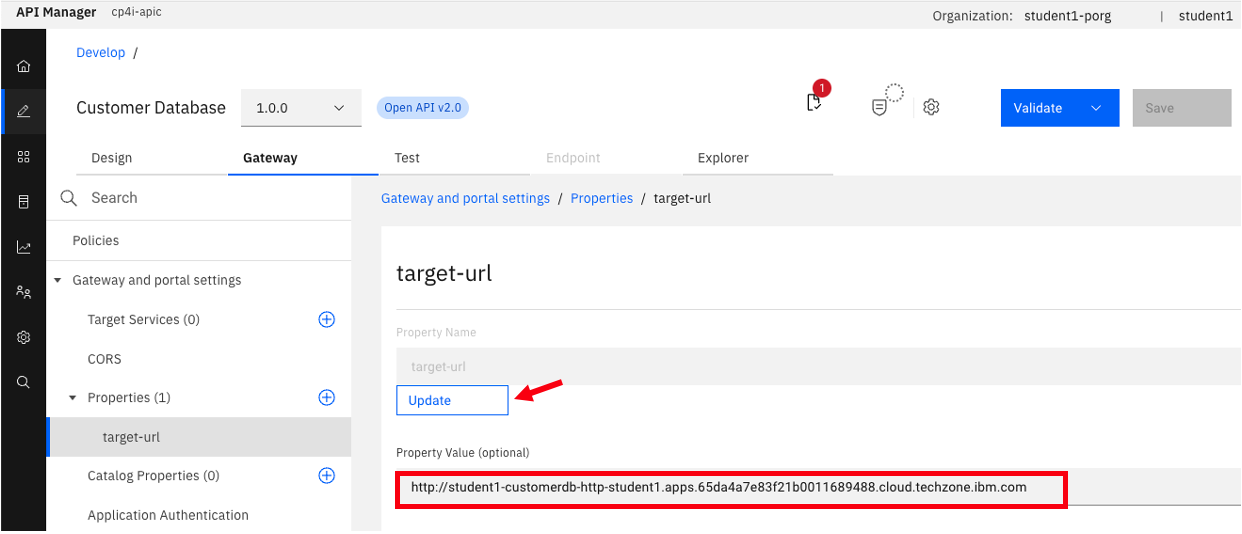
6. Click Update.
7. Click Save.
8. Navigate to the Design tab.

9. Click on Host.
10. Delete the value in the Host (optional) field.
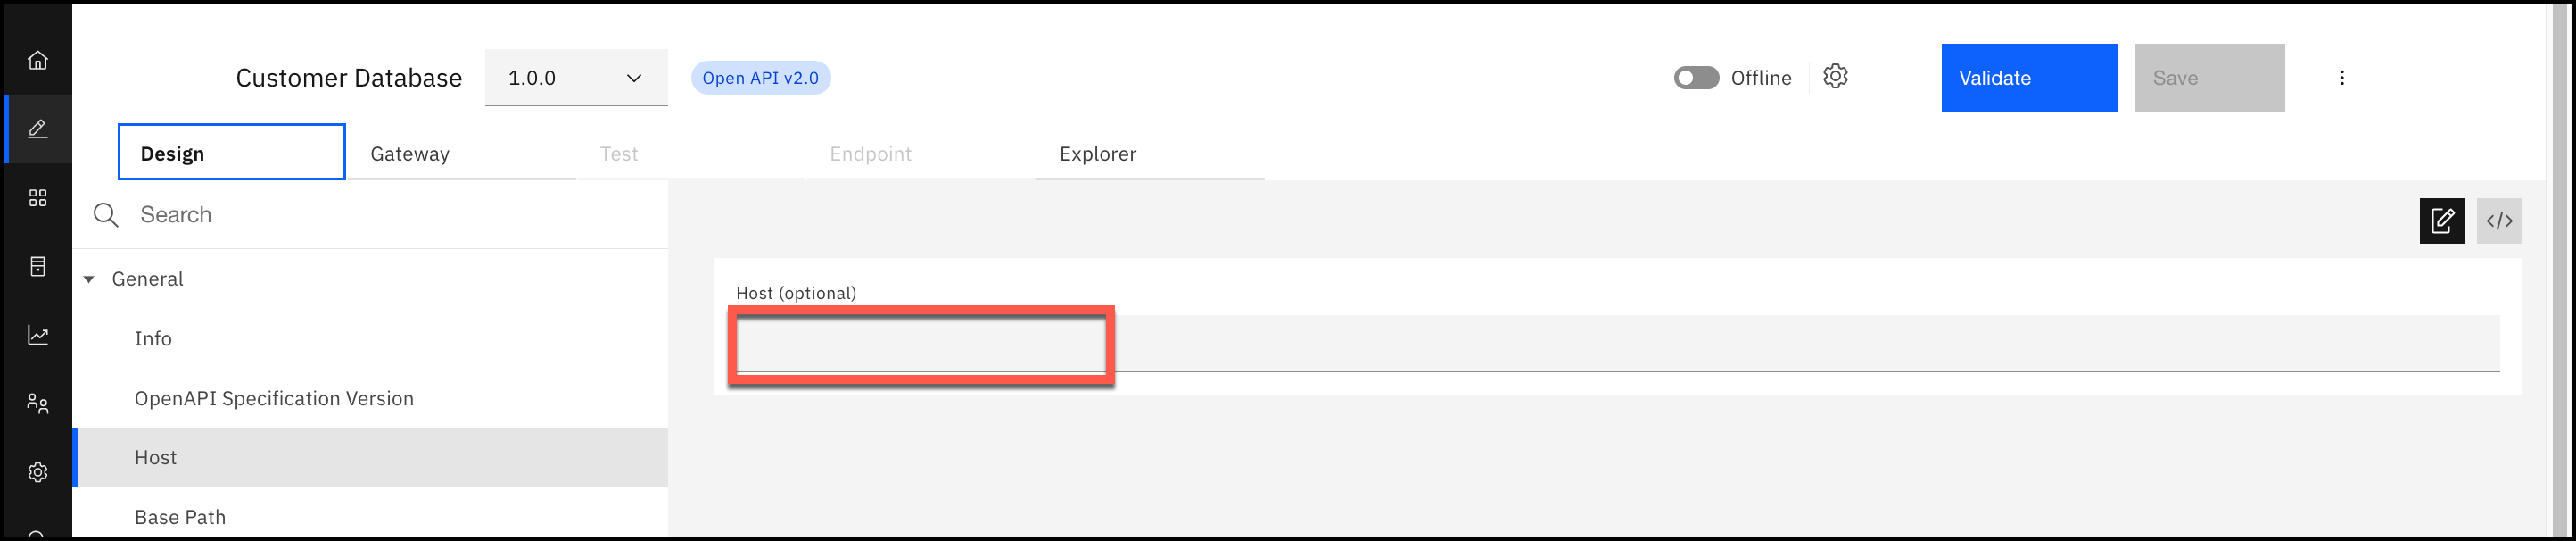
11. Click Save.
12. Once saved, you will see an indicator window appear that shows that Your API has been updated. Click on the X to close the window.
4c. Configure Proxy Call in Designer
1. Navigate to the Gateway tab.

2. Make sure the Gateway tab is selected and click on Policies.

3. Click on the Invoke task in the assembly panel.

4. Update the URL so that it reads $(target-url)$(request.path).
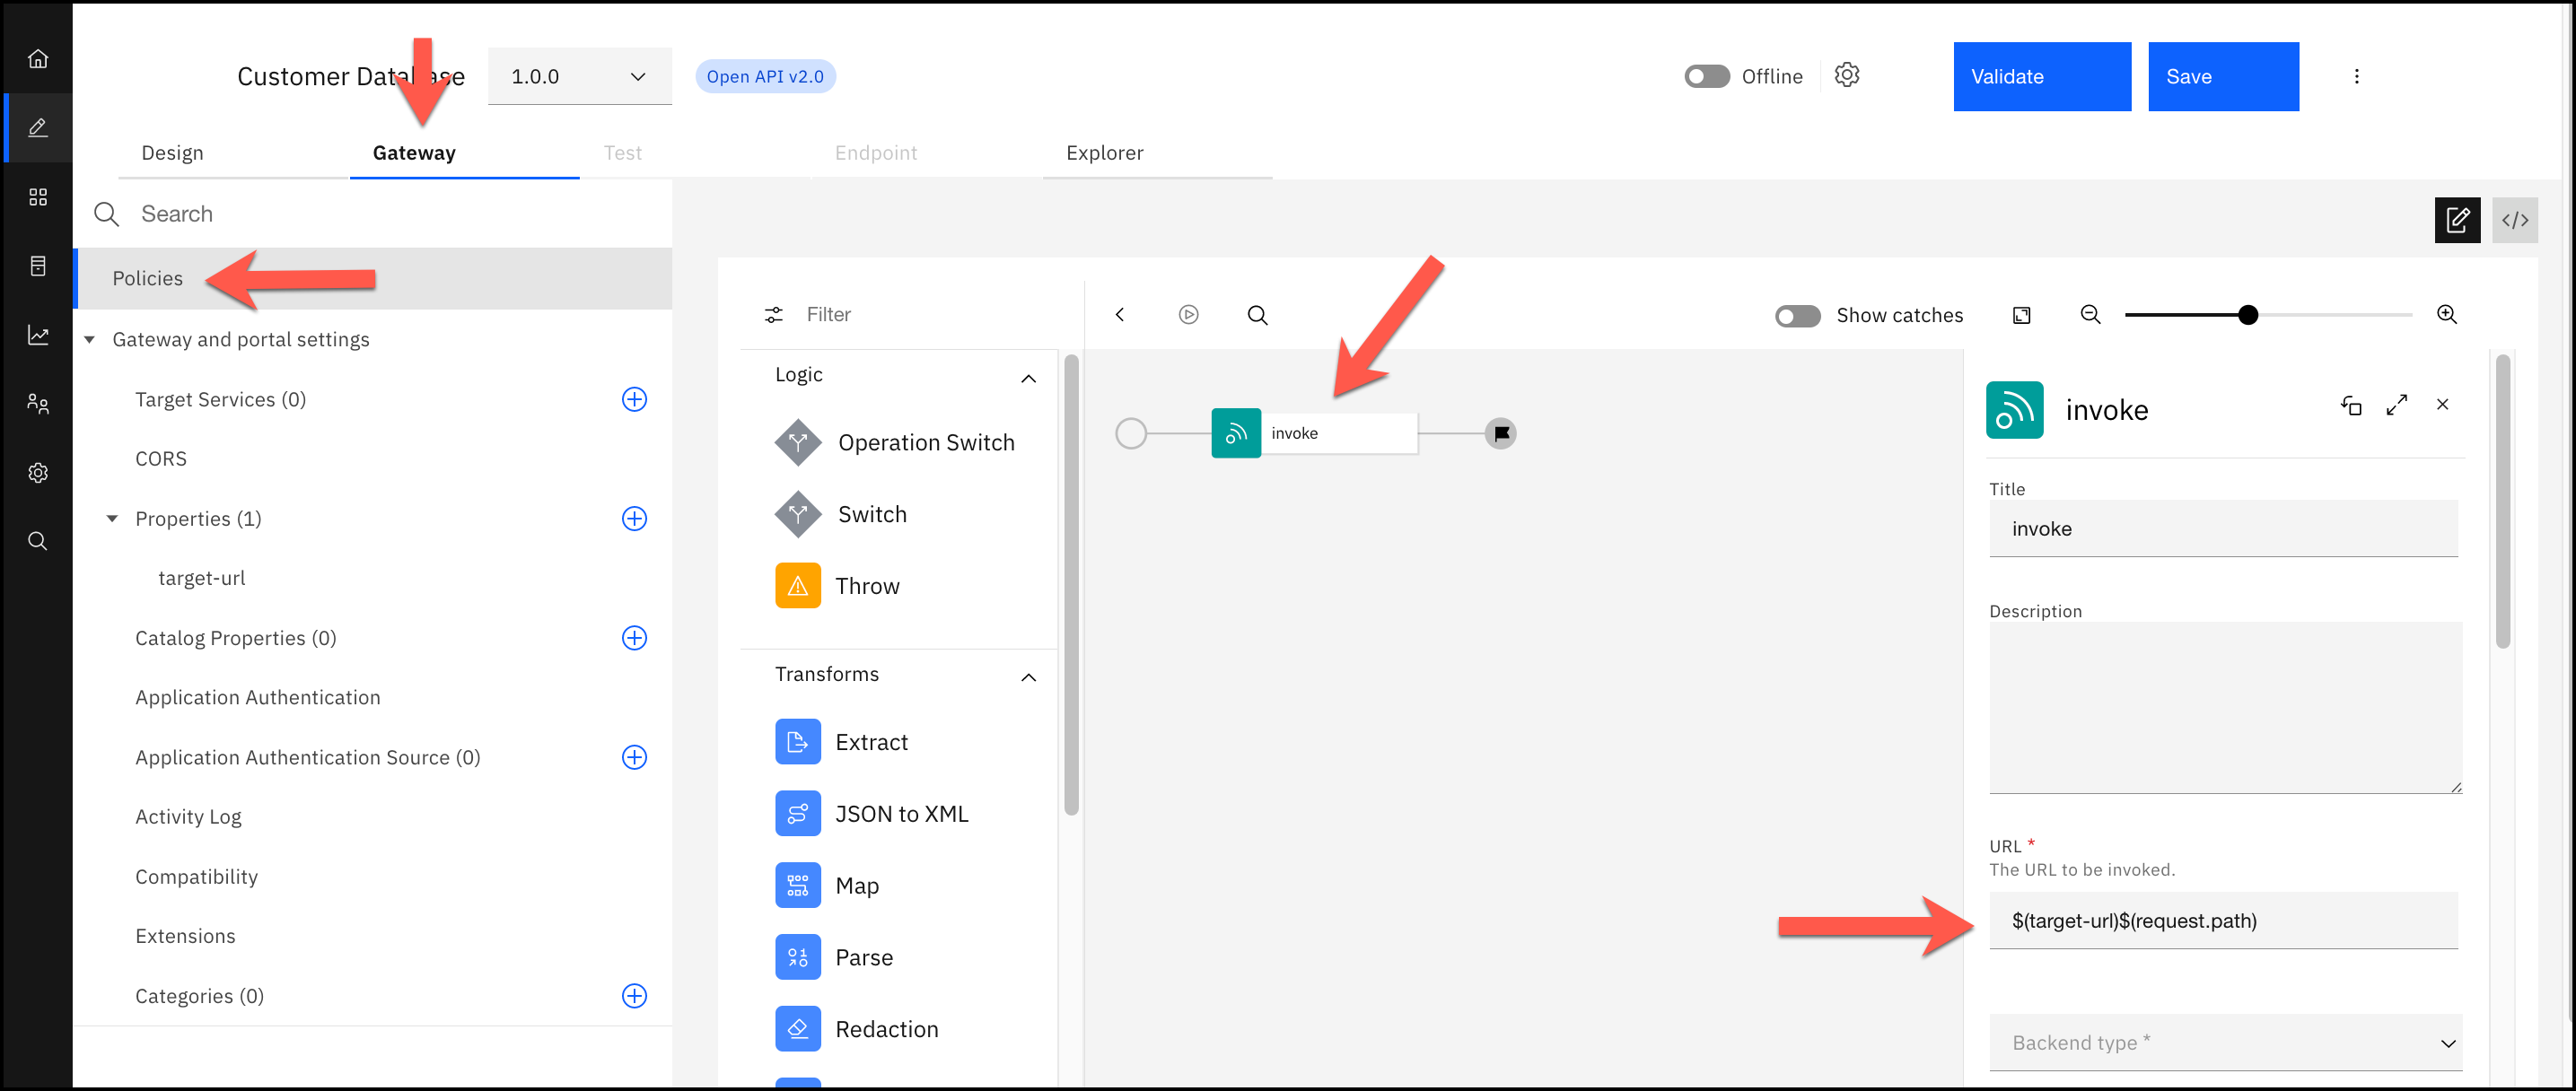
5. Click Save.

6. Once saved, you will see an indicator window appear that shows that Your API has been updated. Click on the X to close the window.

4. Test the API
In the API Designer, you have the ability to test the API immediately after creation in the Assemble view!
1. Switch the toggle from Offline to Online. This step automatically publishes the API.
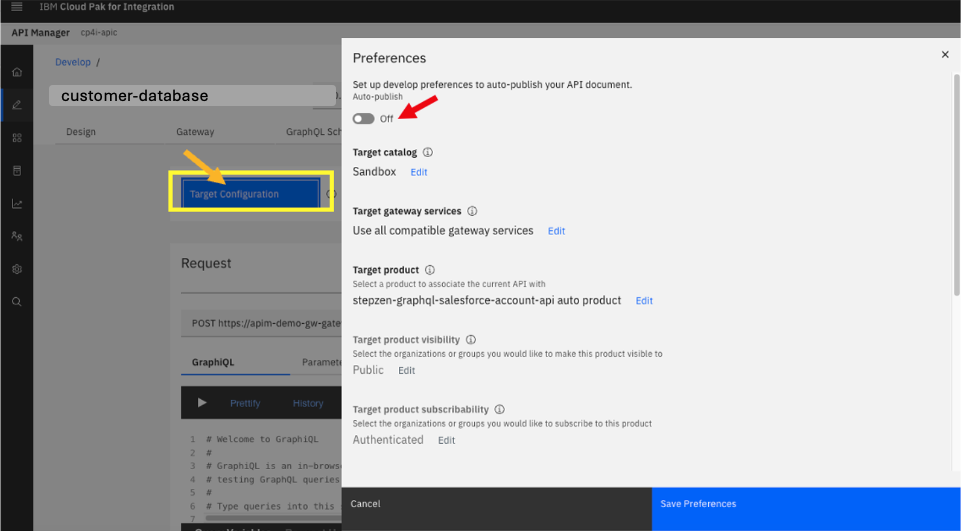
2. You will see an indicator window appear that shows that Your API has been updated. Click on the X to close the window. You should see that the API is now Online.

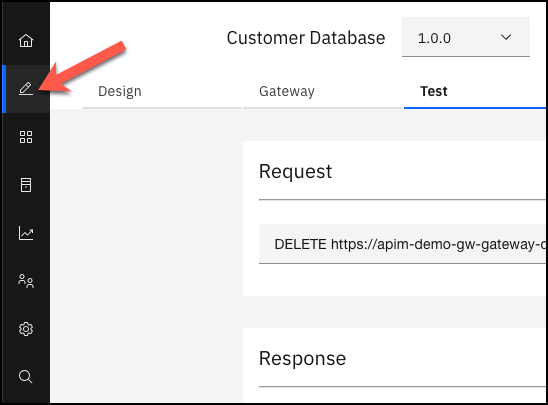
3. Click on the Test tab.

4. For the Request, select the request that begins with GET and ends in ../customerdb/v1/customers. Click Send.

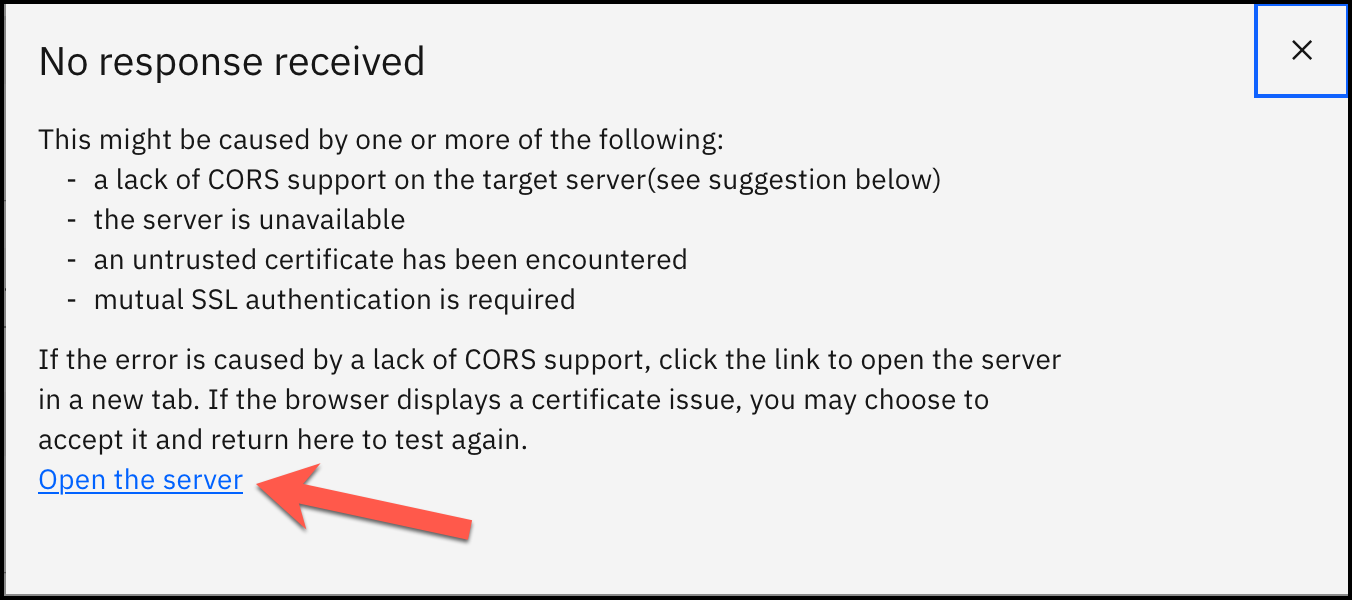
Note: If this is the first time testing the API after publishing it, you may get a No response received popup. Click Open the server and accept the certificate to see the 401 message.
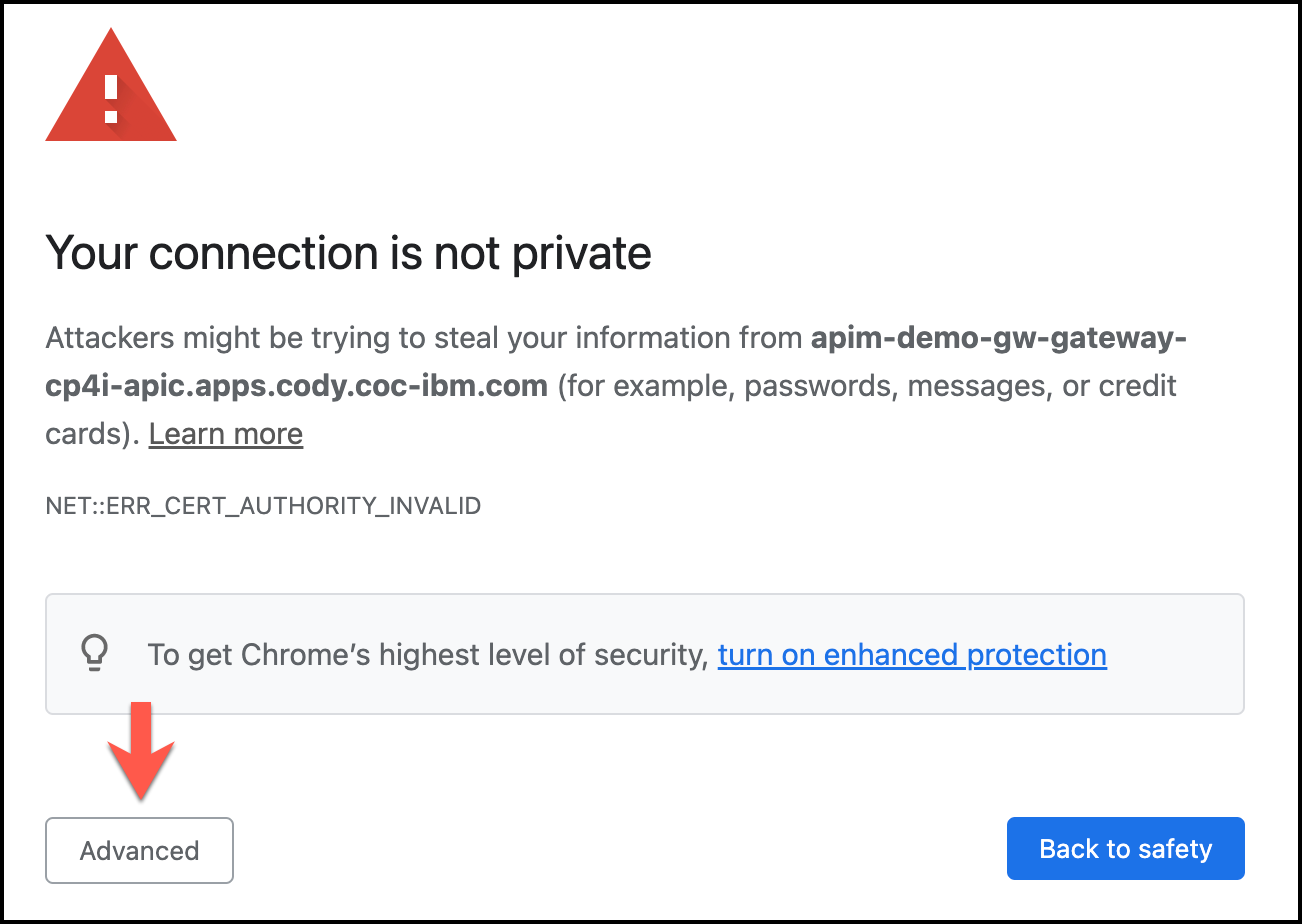
To add an exception in the Chrome browser, click on Advanced.
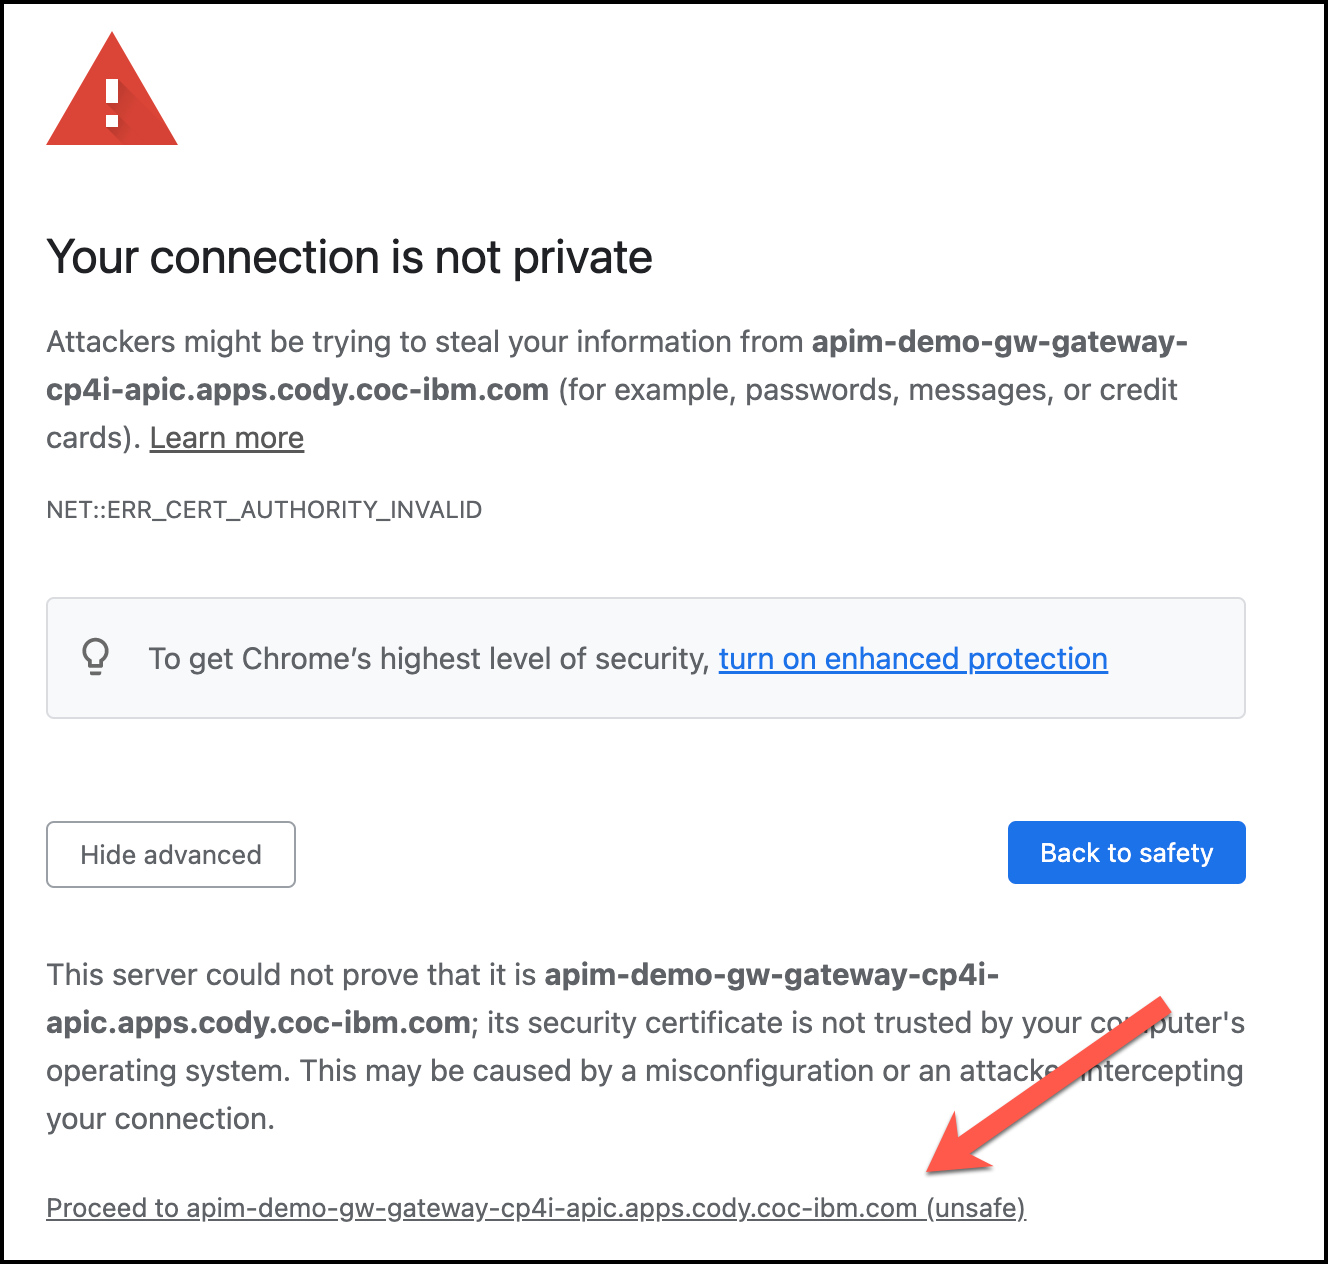
Click on Proceed to apim-demo…. This should direct you to a new page that states 401 - Unauthorized.

Navigate back to the API Connect browser window.
To add an exception in the Firefox browser, click Advanced and click Accept the Risk and Continue.
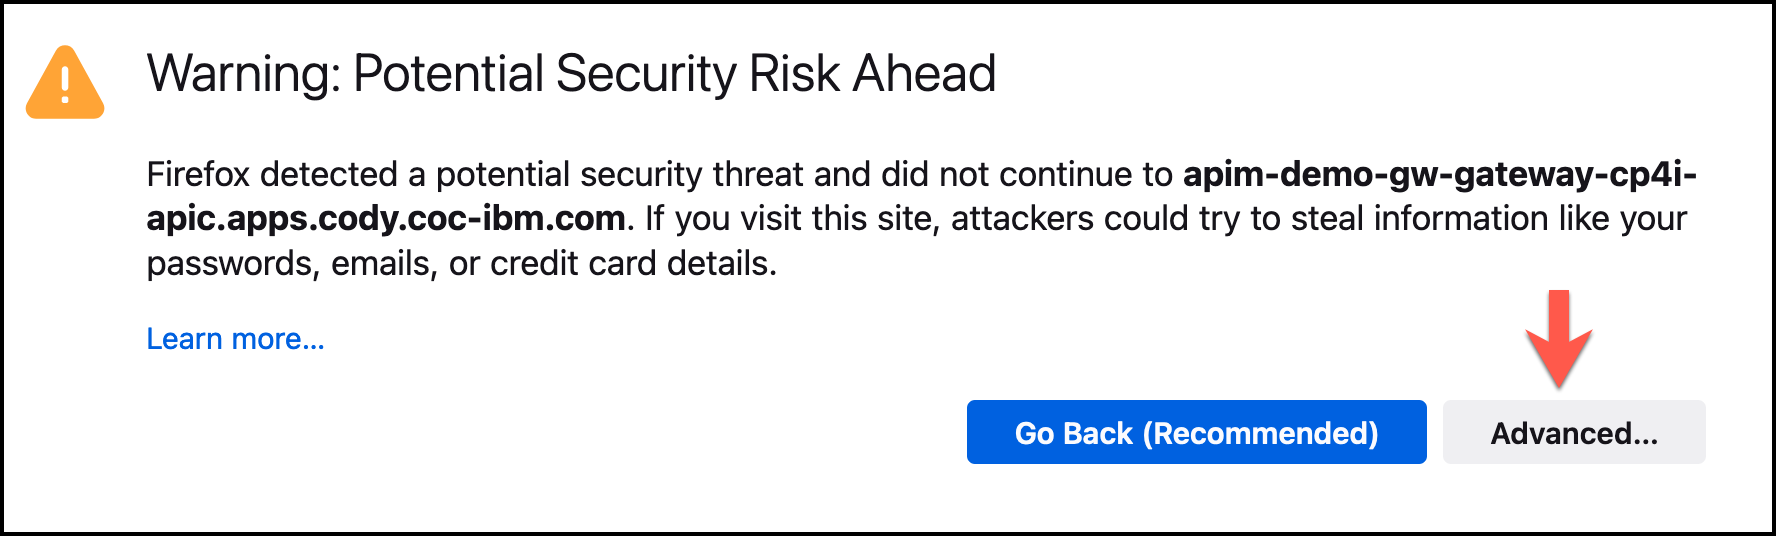
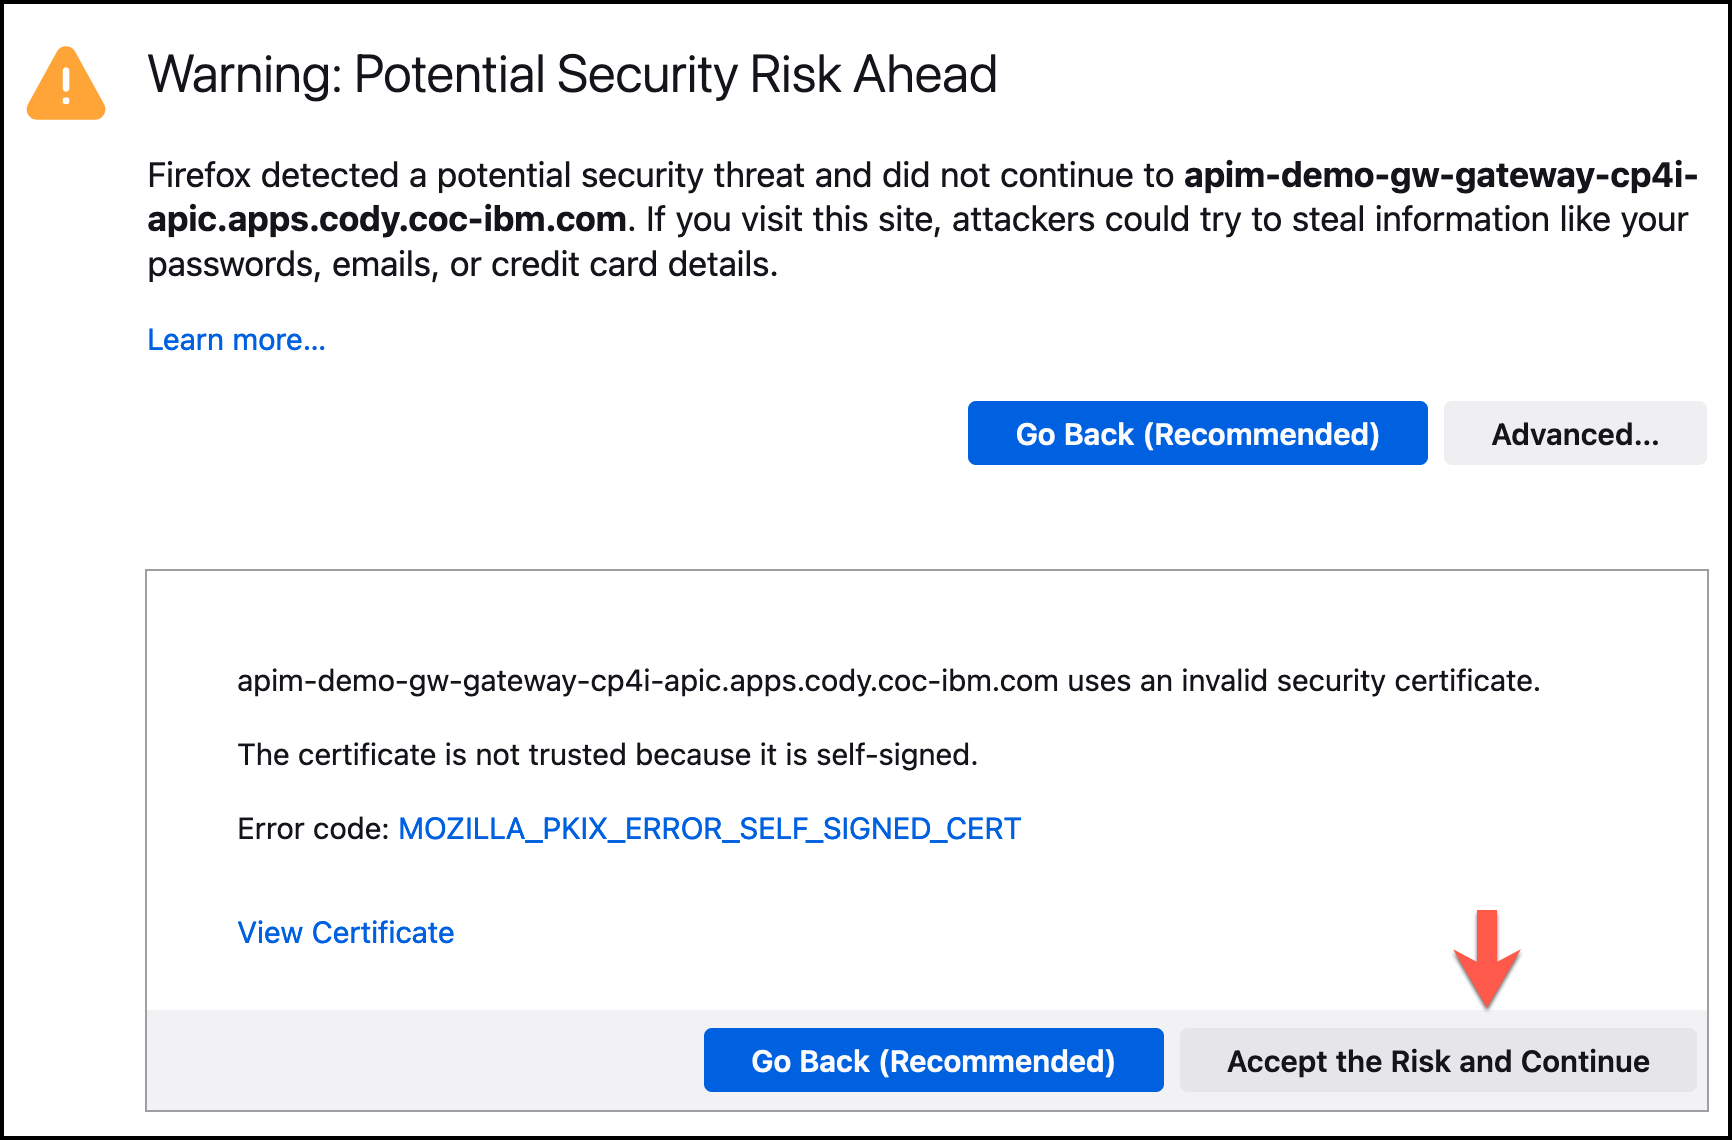
This will direct you to a new page that states 401 - Unauthorized.

Navigate back to the API Connect browser window.
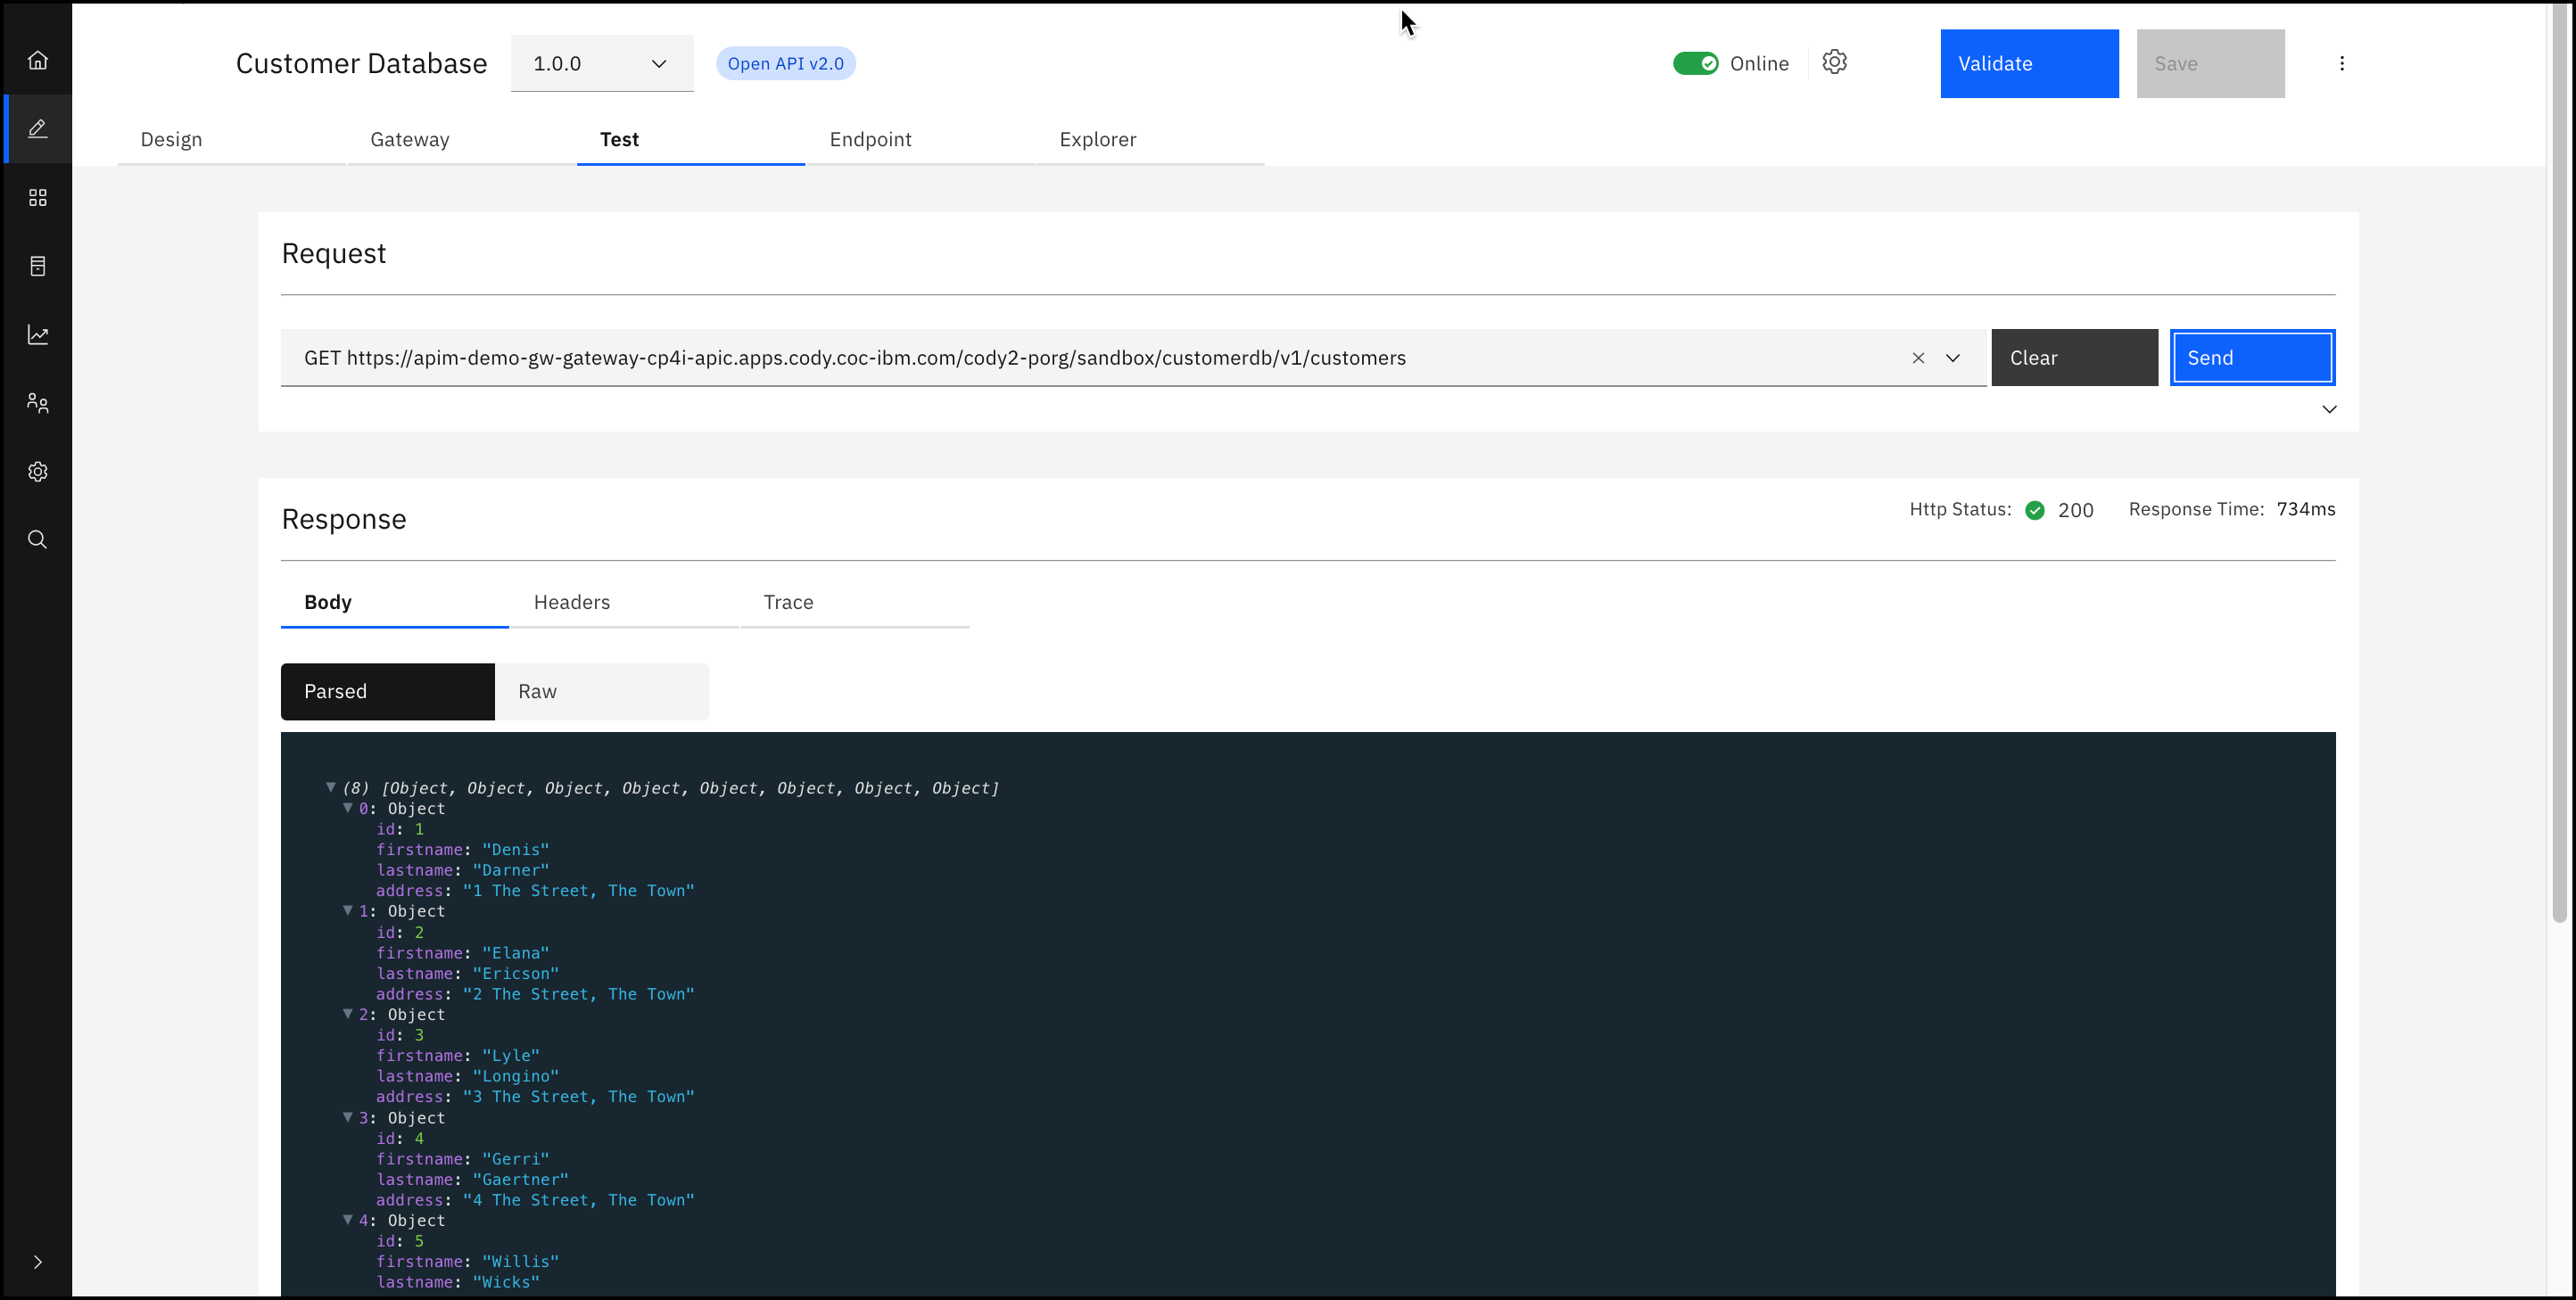
5. Click Send.
6. The Response will show all of the customers in the database.
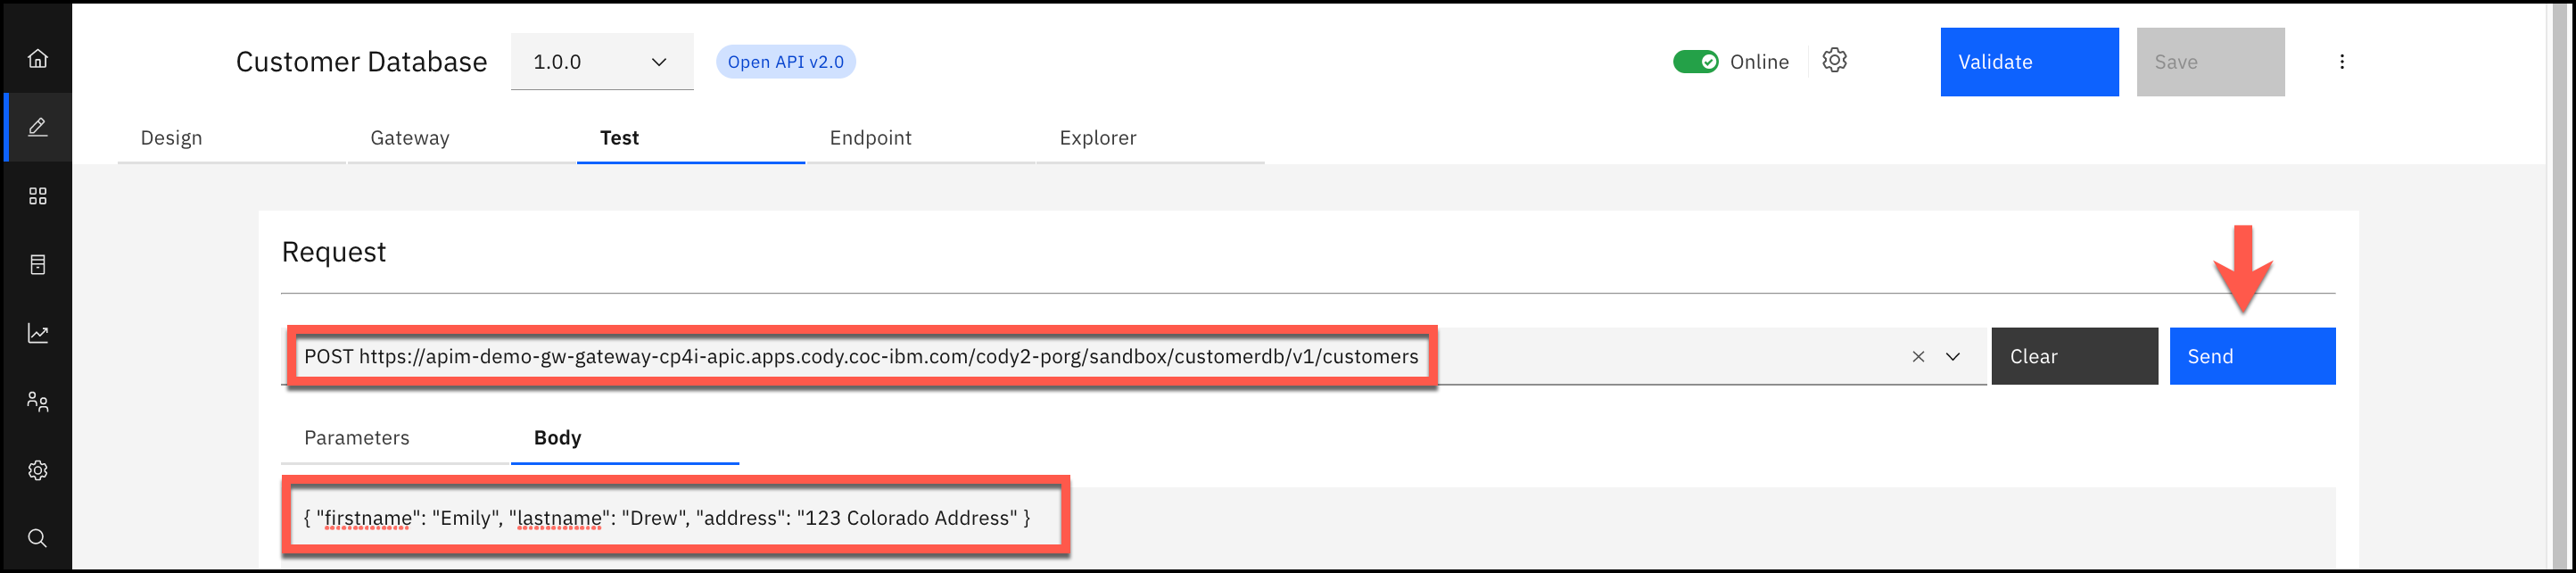
7. Now let’s add a record to the database. Click Clear.

8. For the Request, select the request that begins with POST and ends in ../customerdb/v1/customers. Click on the Body tab.
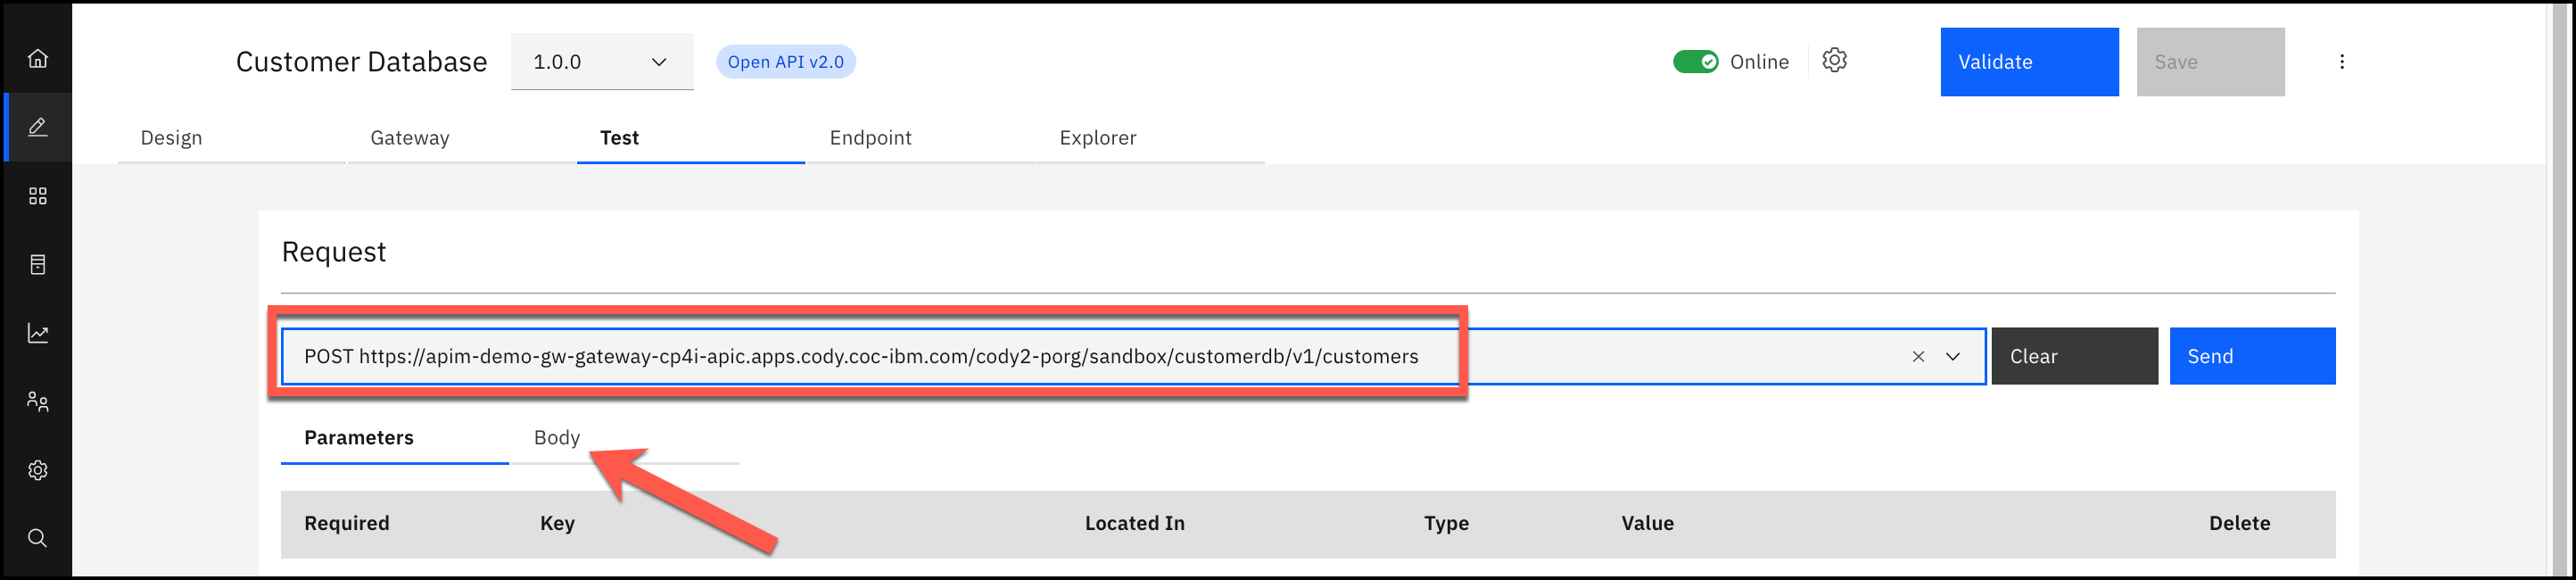
9. In the Body tab, enter some text in the following JSON format:
{
  "firstname": "Emily",
  "lastname": "Drew",
  "address": "123 Colorado Address"
}
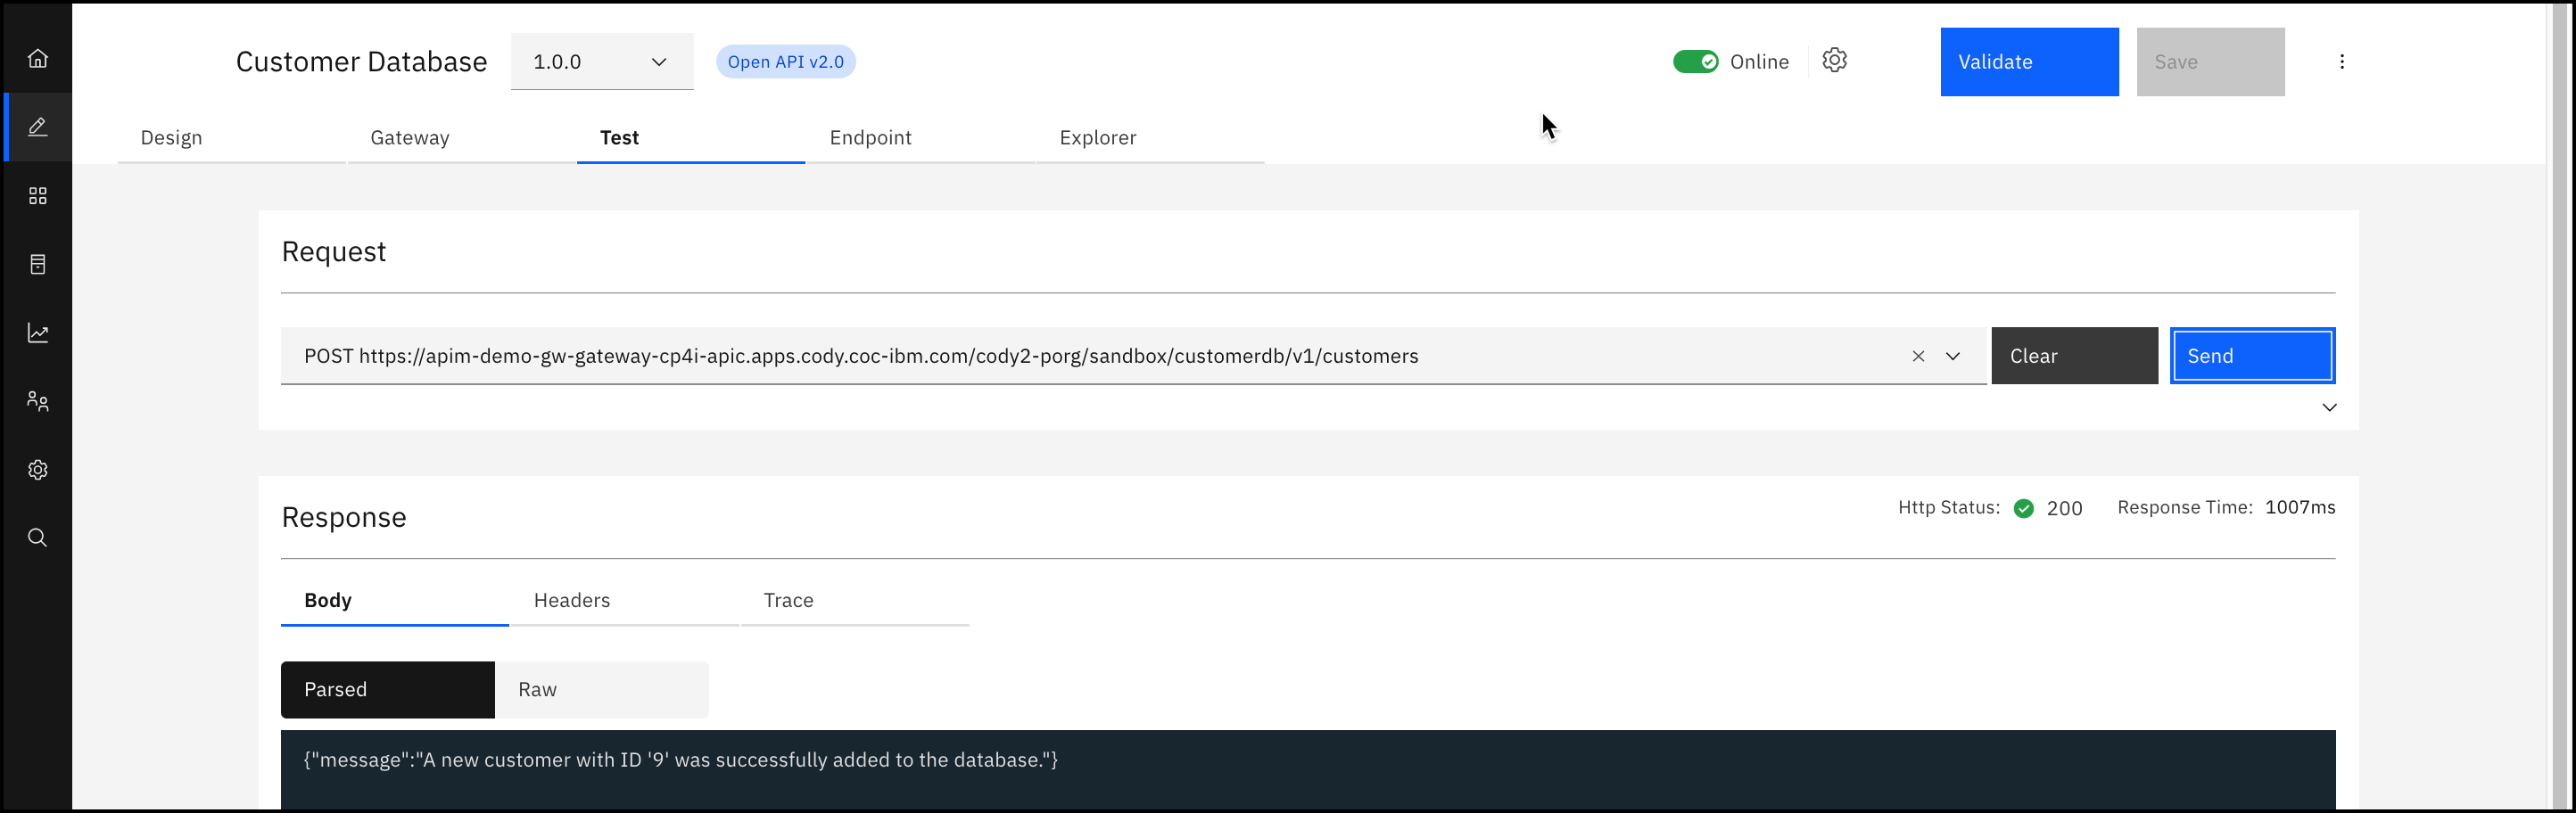
Click Send.
10. Make note of the ID number in the response. In the example below, the ID is 9.
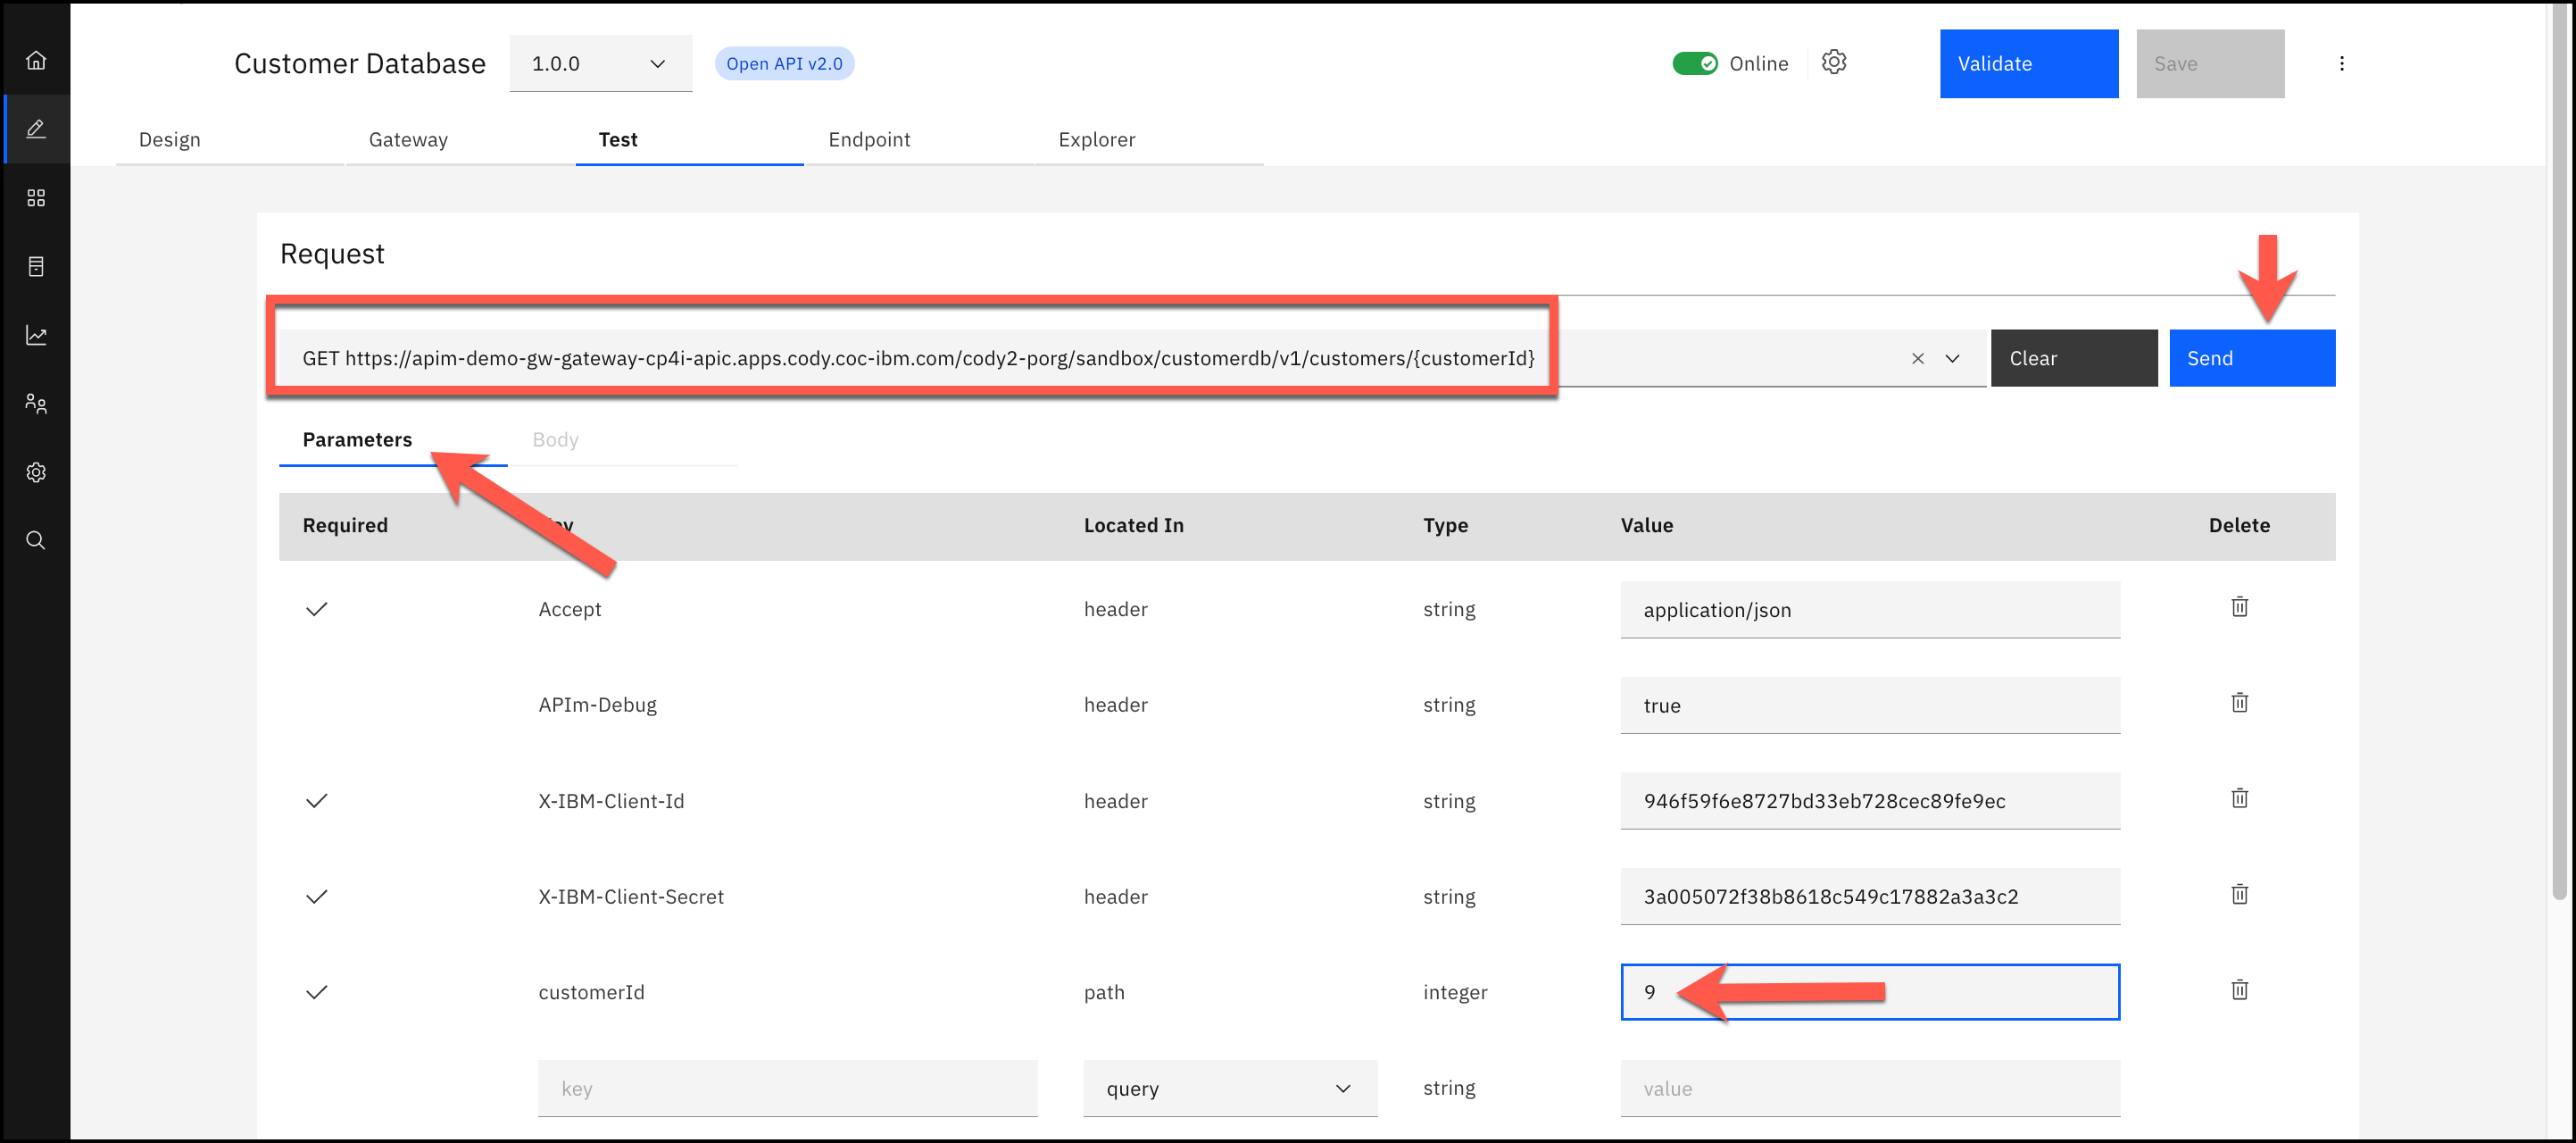
11. For the Request, select the request that begins with GET and ends in ../customerdb/v1/customers/{customerId} and click Clear.

12. Click on the Parameters tab and enter the ID that you noted in step 10. Click Send.
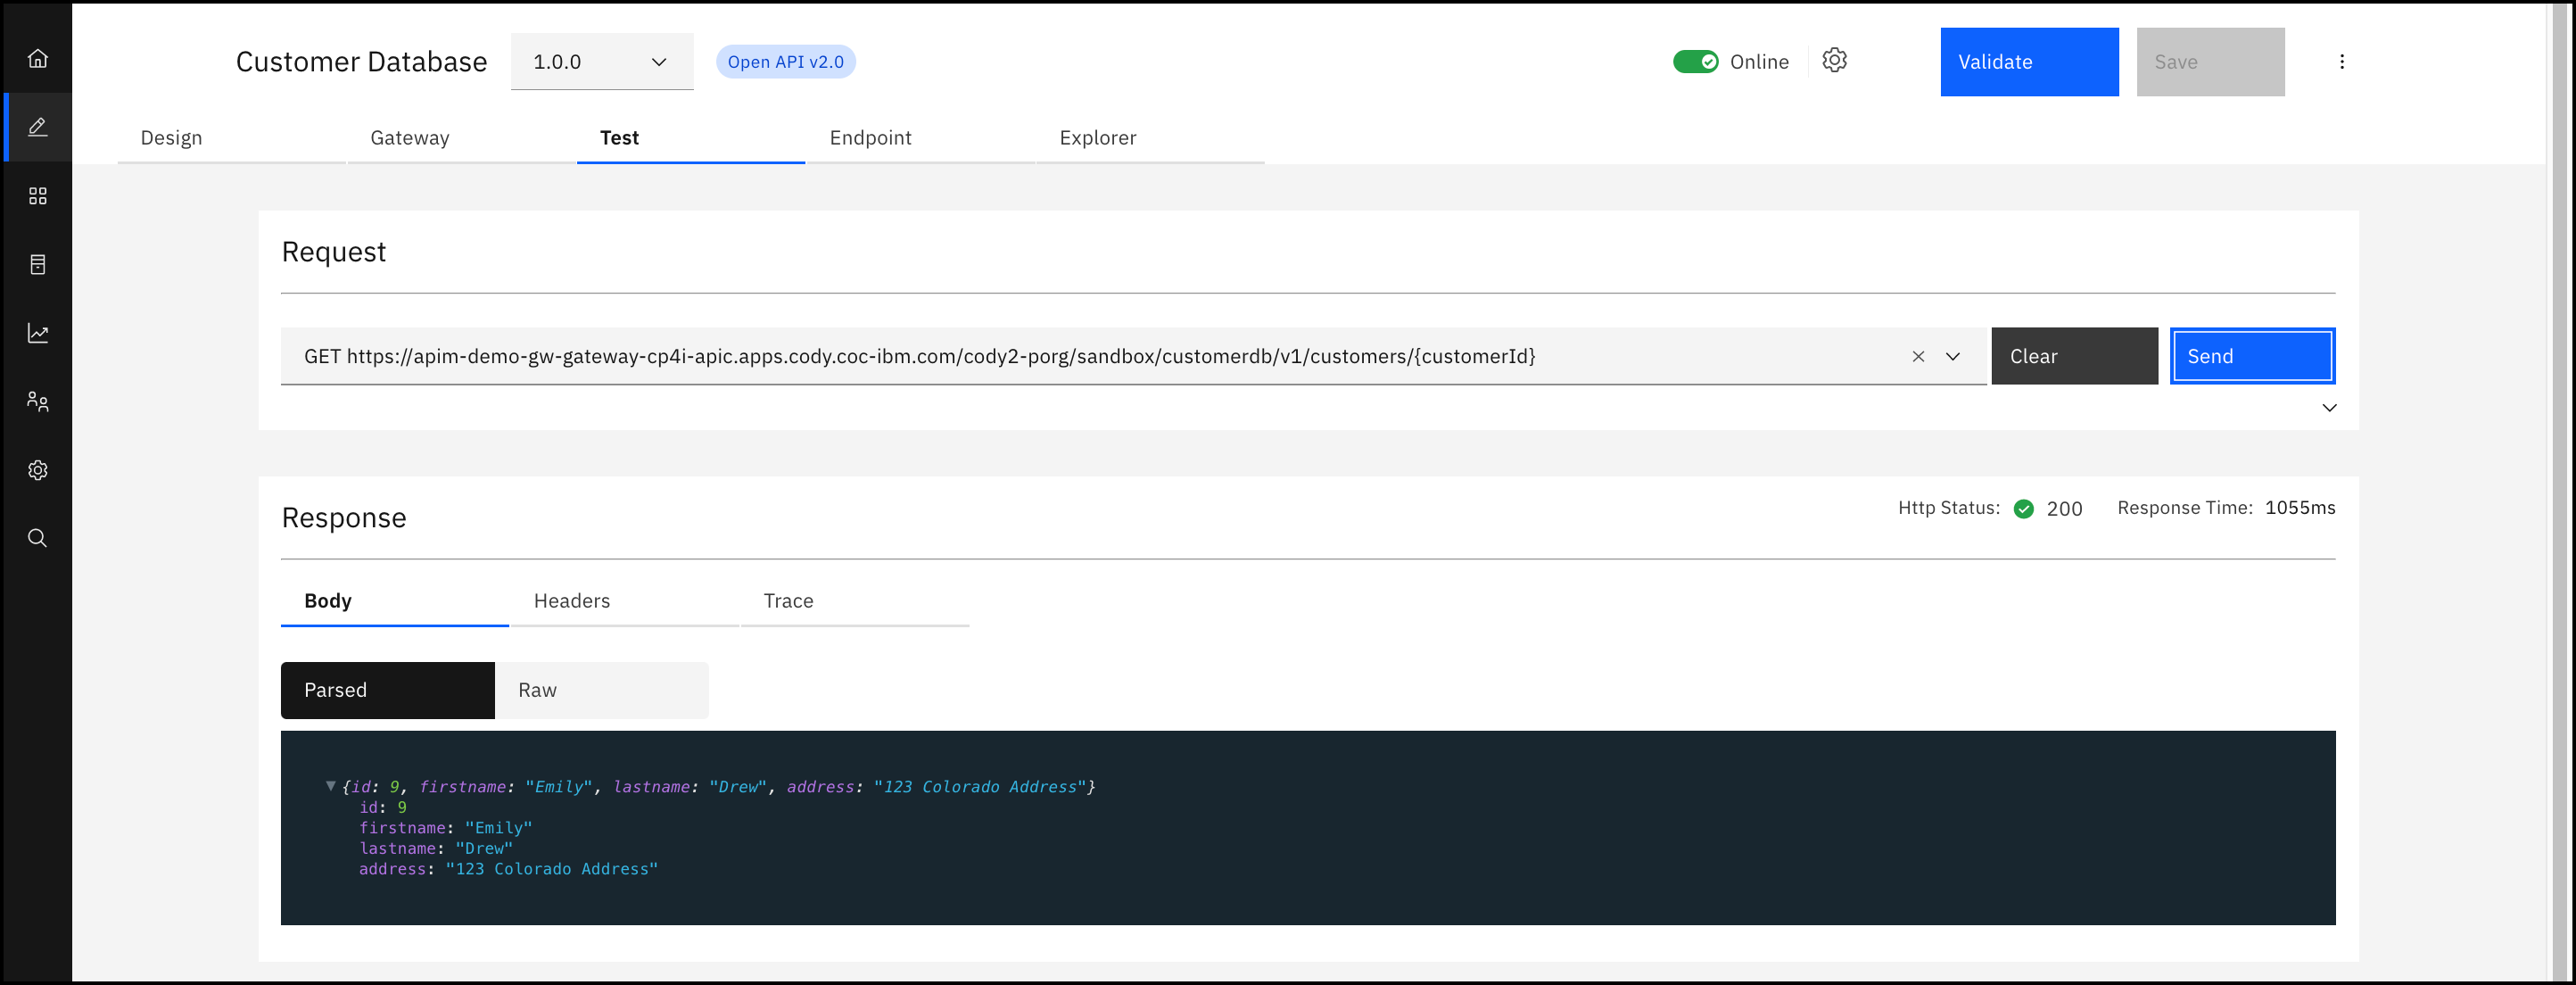
13. In the response, you will see the customer information that you entered in step 9.
14. We can now update the customer information. For the Request, select the request that begins with PUT and ends in ../customerdb/v1/customers/{customerId} and click Clear.

15. Enter the ID that you noted in step 10 under the Parameters tab and click on the Body tab.
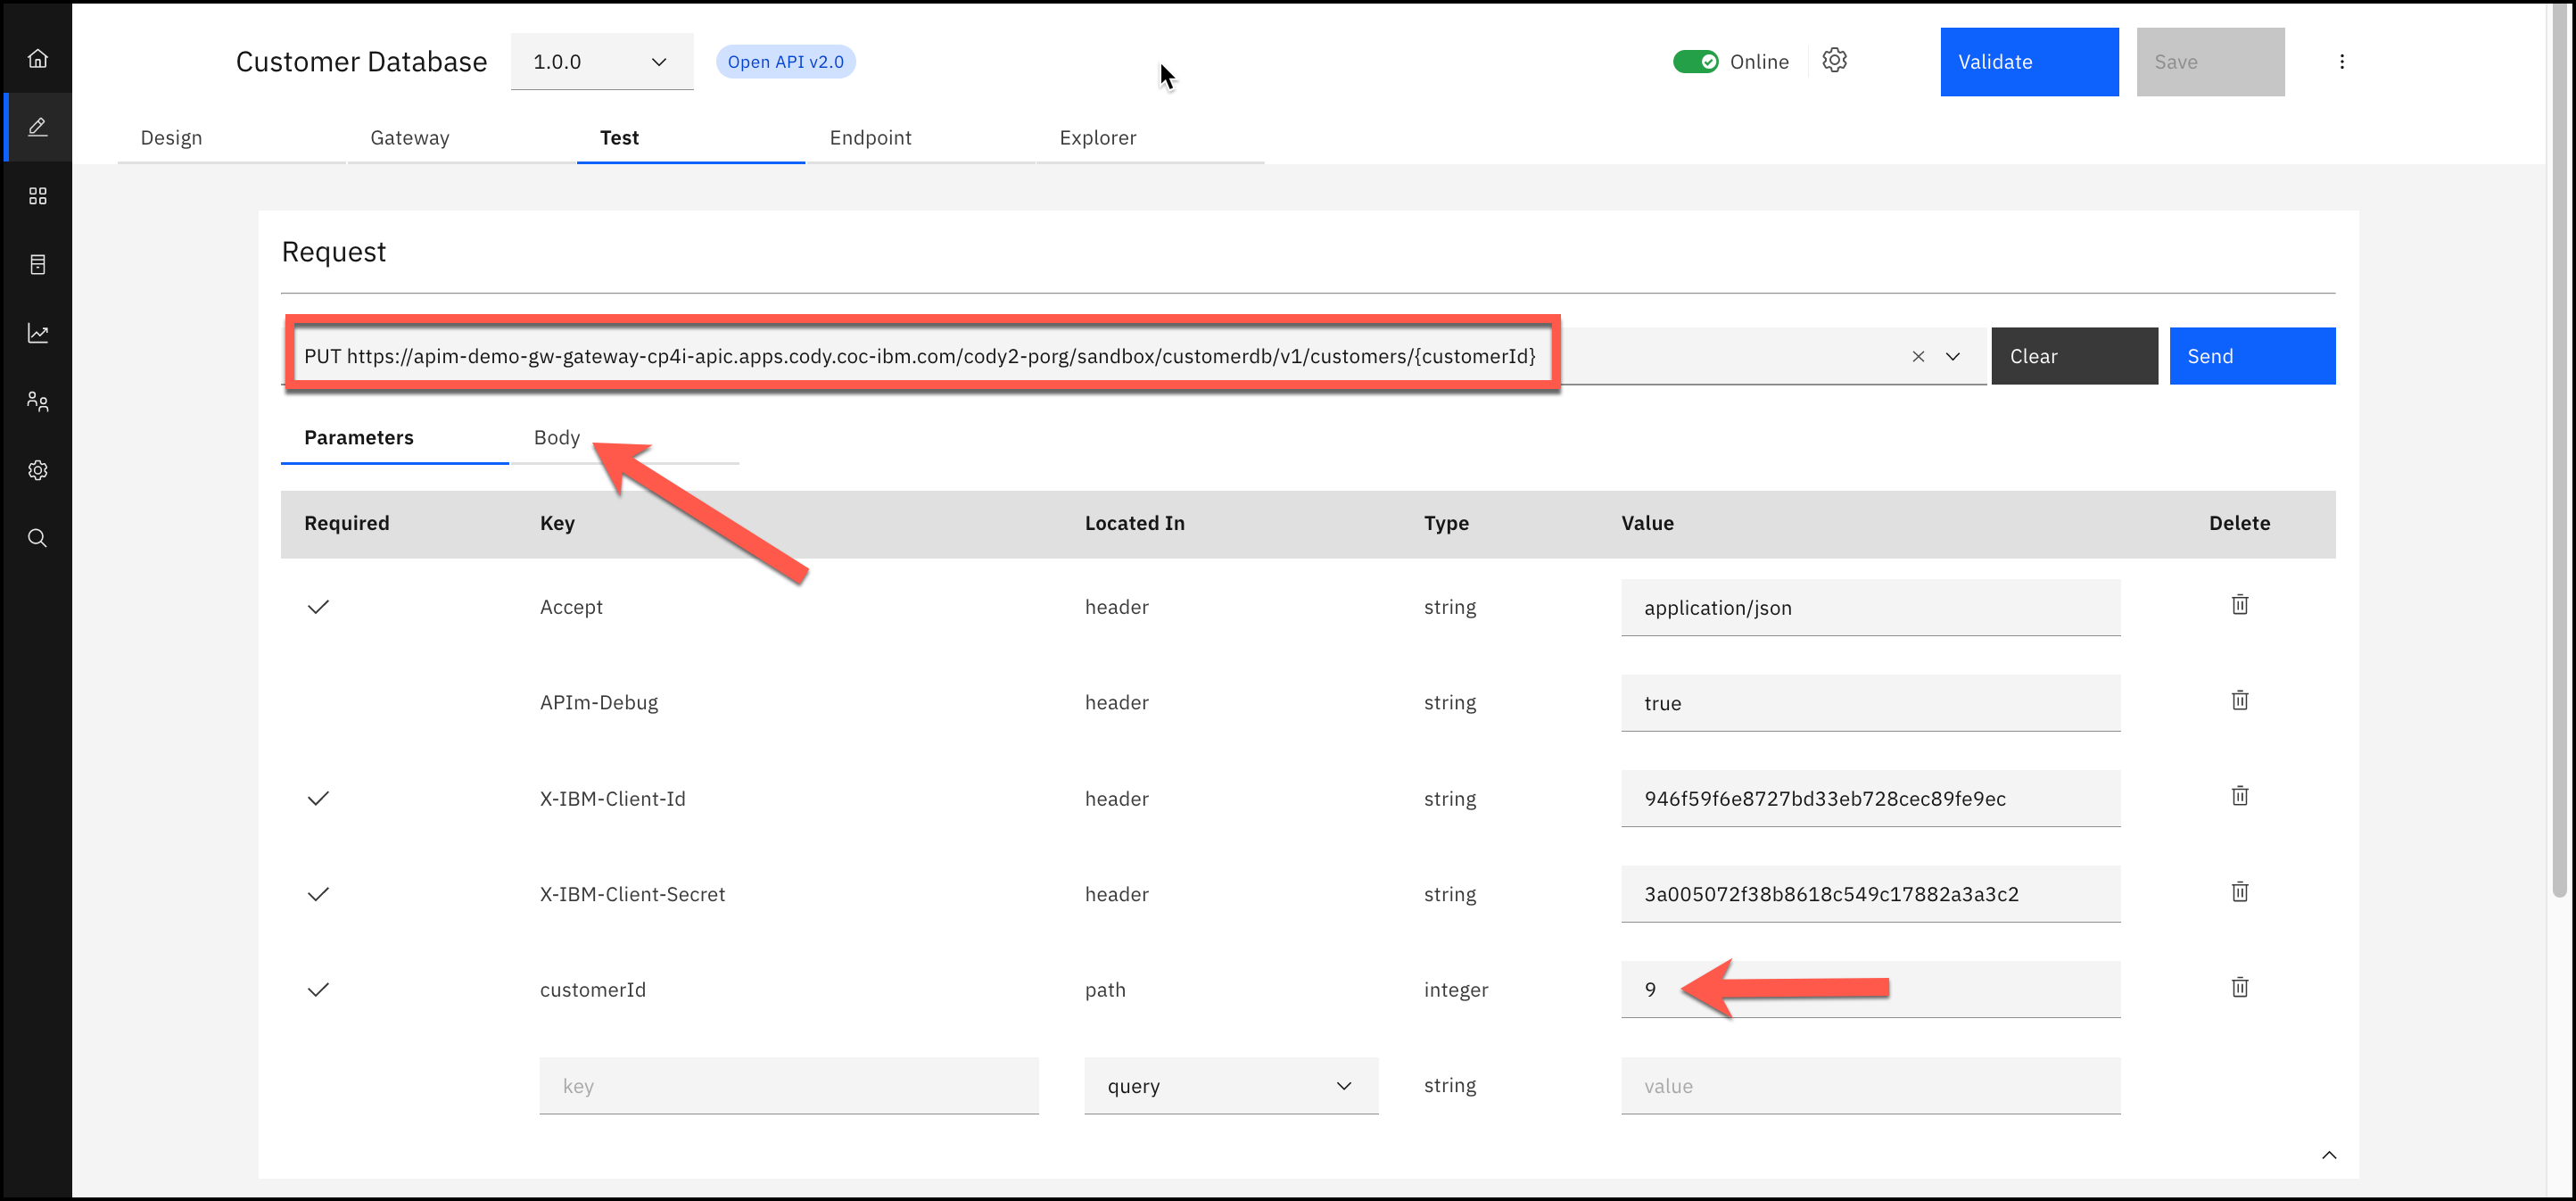
16. In the Body tab, enter some text in the following JSON format:
{
  "firstname": "Emily",
  "lastname": "Drew",
  "address": "123 Denver Address"
}
and click Send.
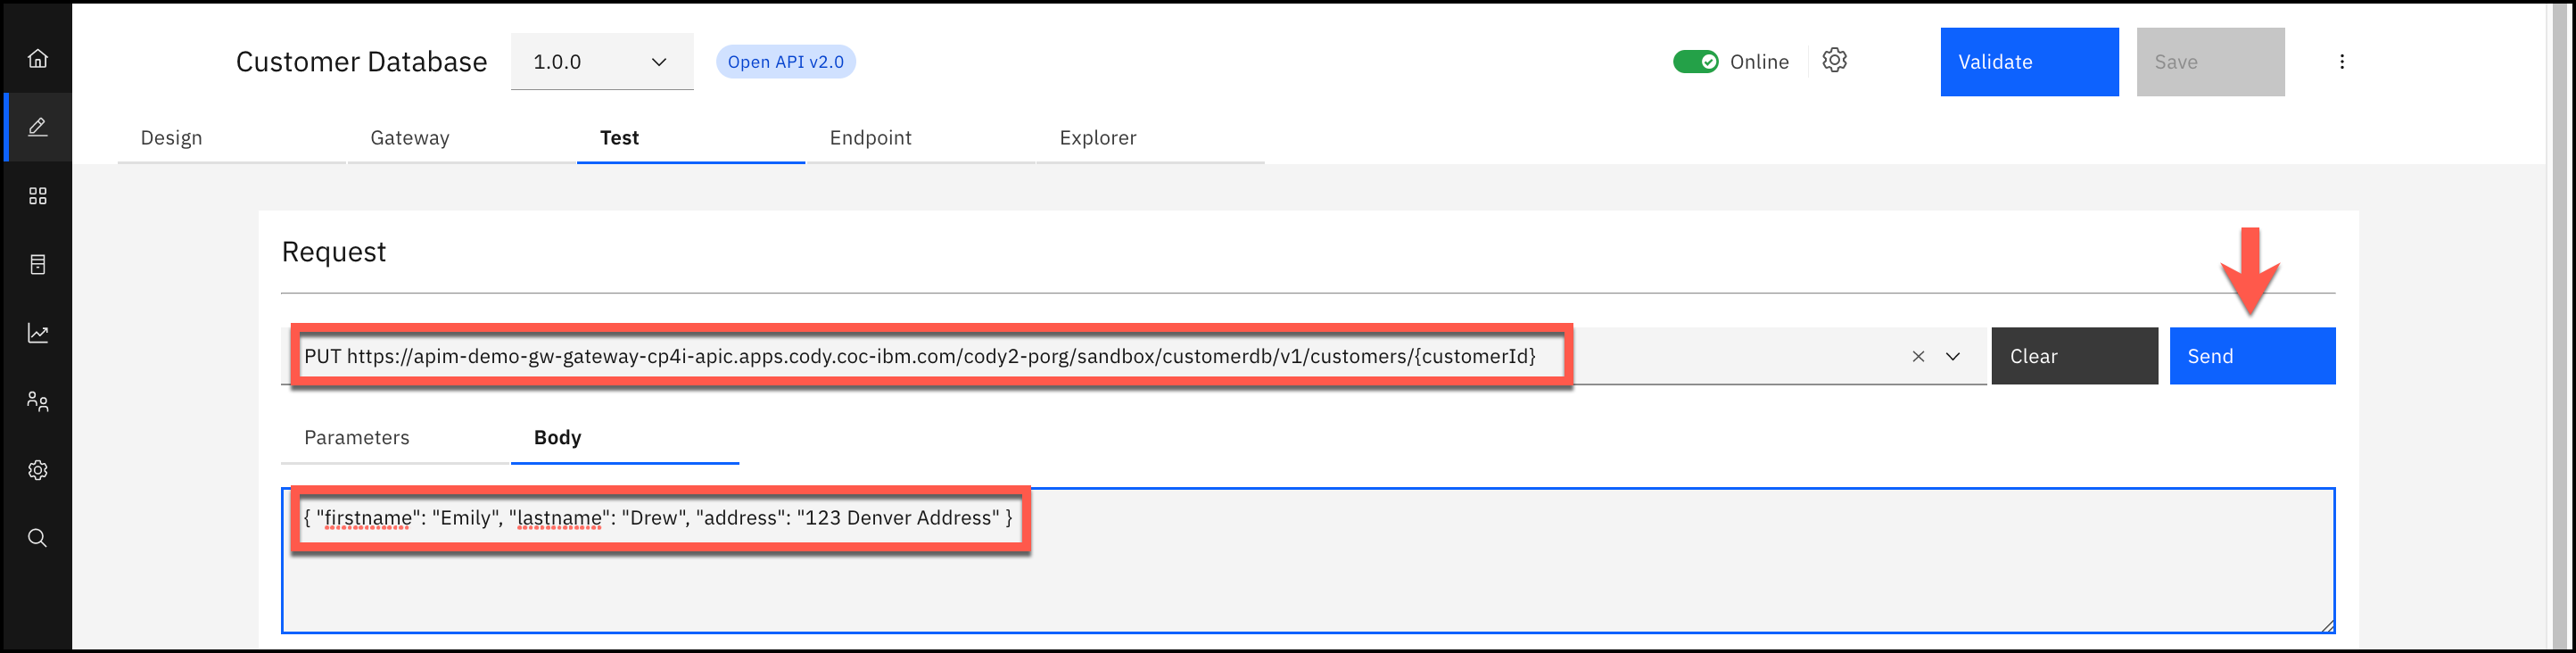
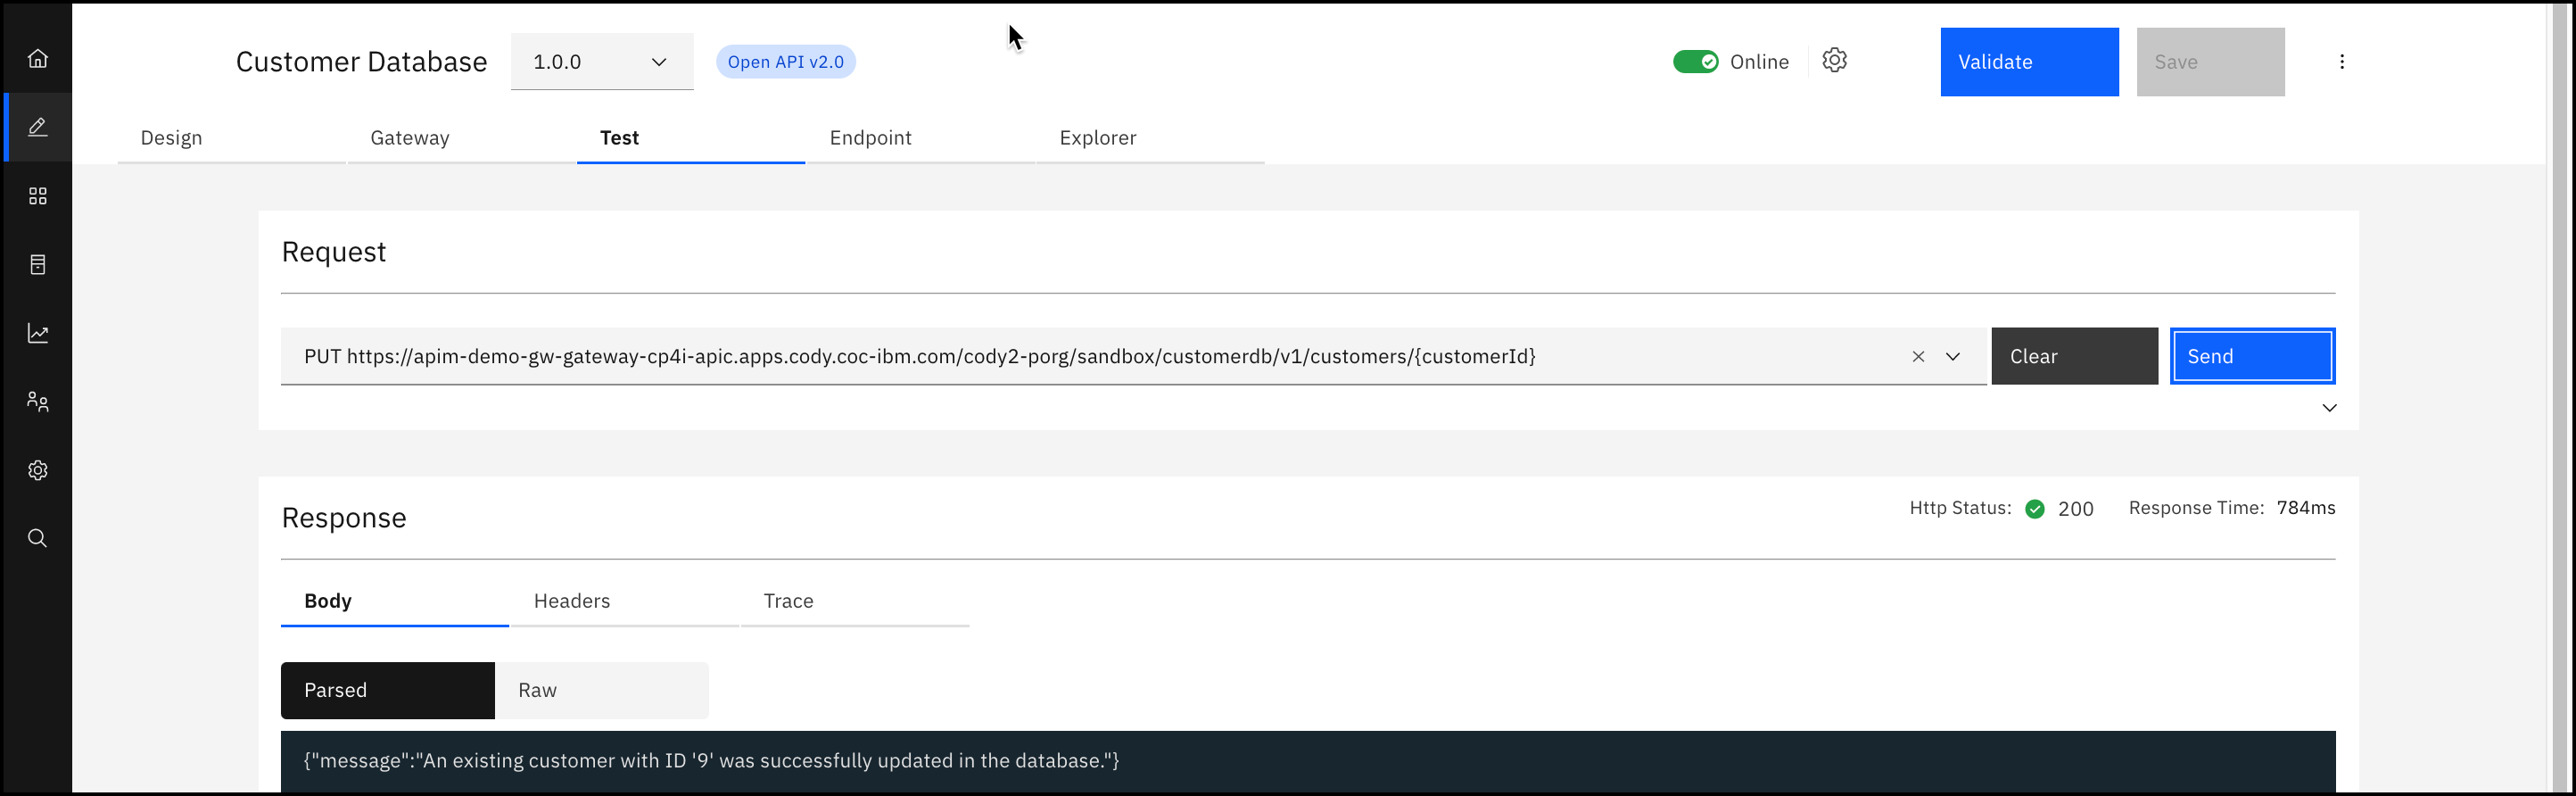
17. The response should show that the customer ID was updated.
18. For the Request, select the request that begins with GET and ends in ../customerdb/v1/customers/{customerId} and click Clear.
19. Make sure that the Parameters tab is selected and enter the ID that you noted in step 10. Click Send.
20. In the response, you will see the customer information that you entered in step 16.

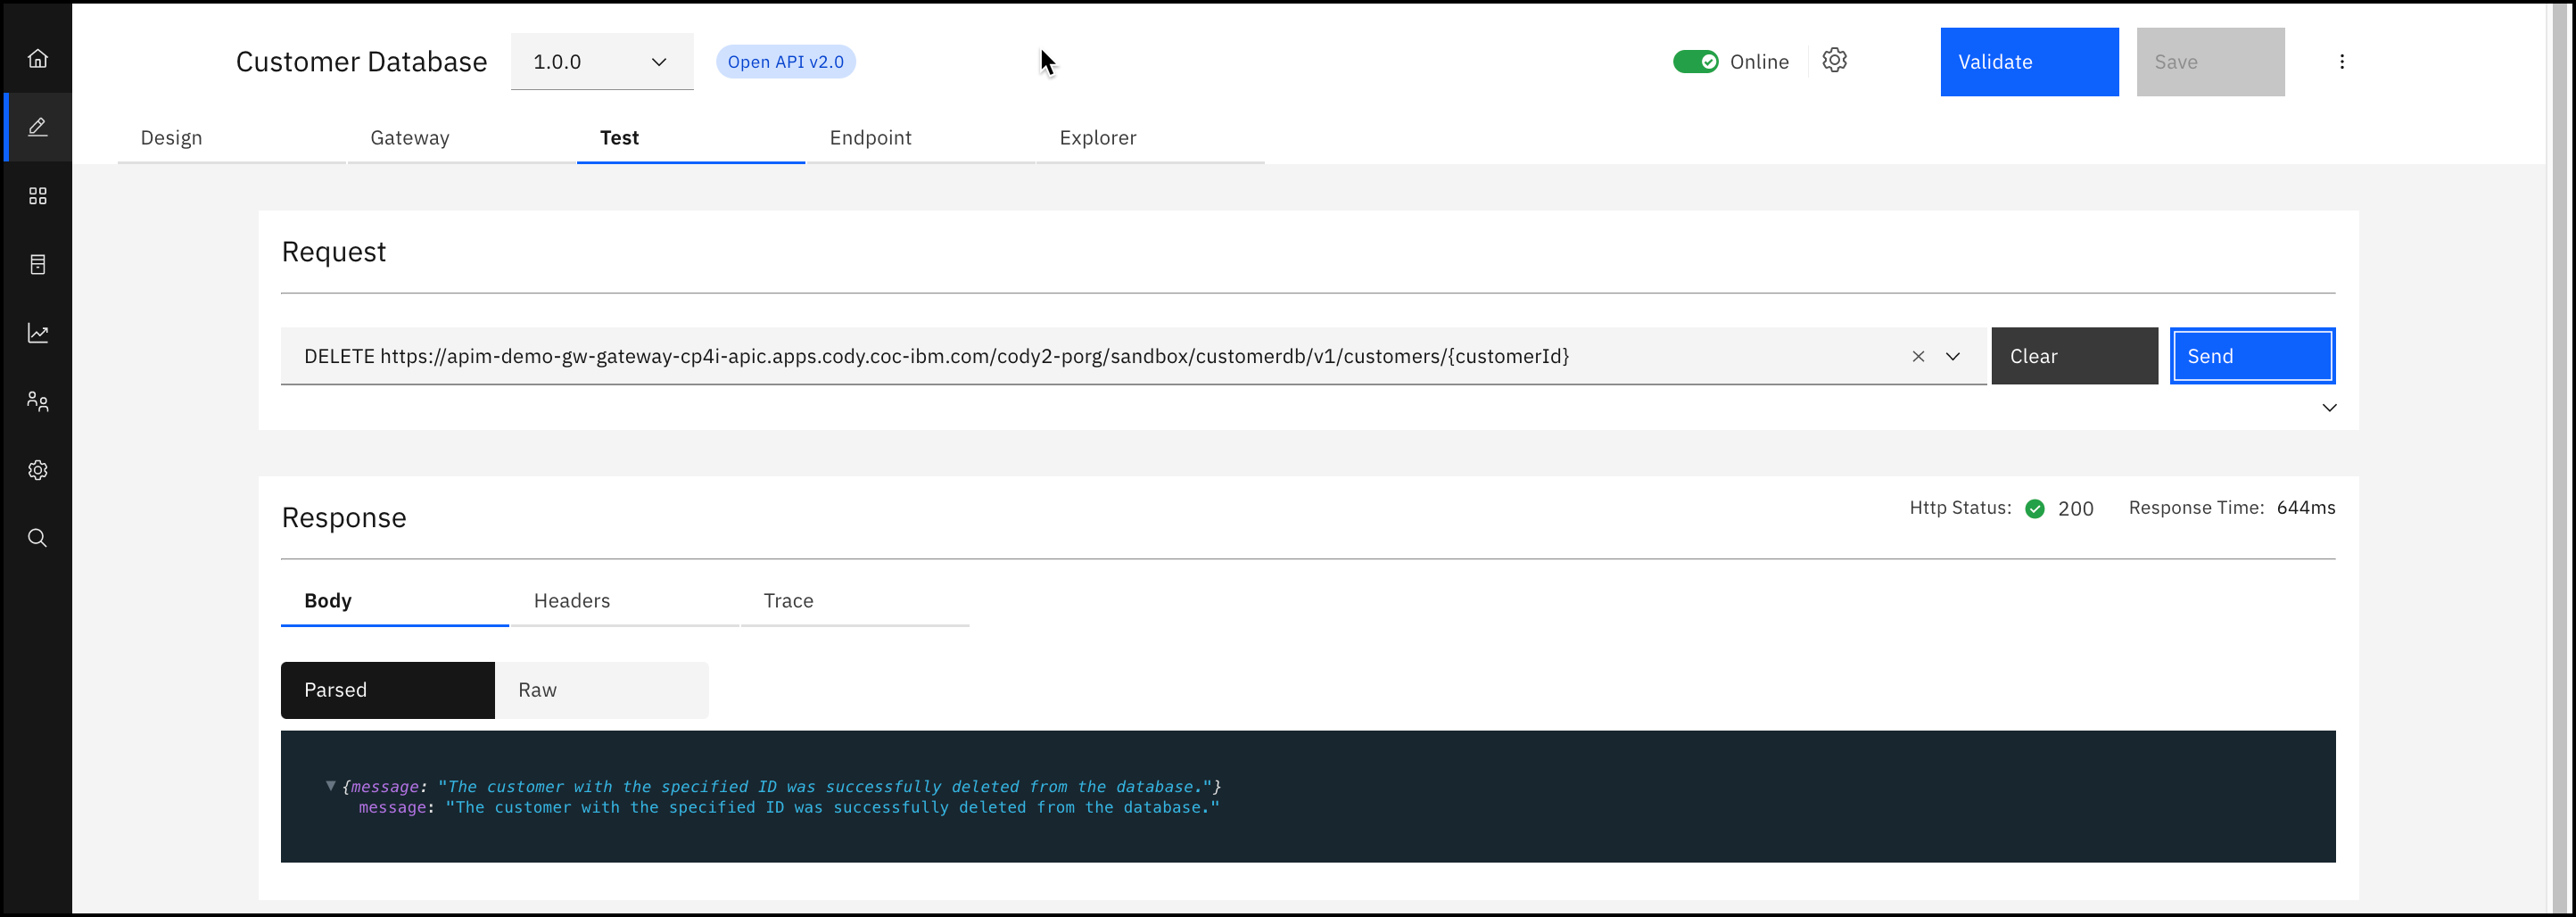
21. You can also delete a customer from the customer database. For the Request, select the request that begins with DELETE and ends in ../customerdb/v1/customers/{customerId} and click Clear.

22. Make sure that the Parameters tab is selected and enter the ID that you noted in step 10 and enter secr3t for Authorization. Click Send.
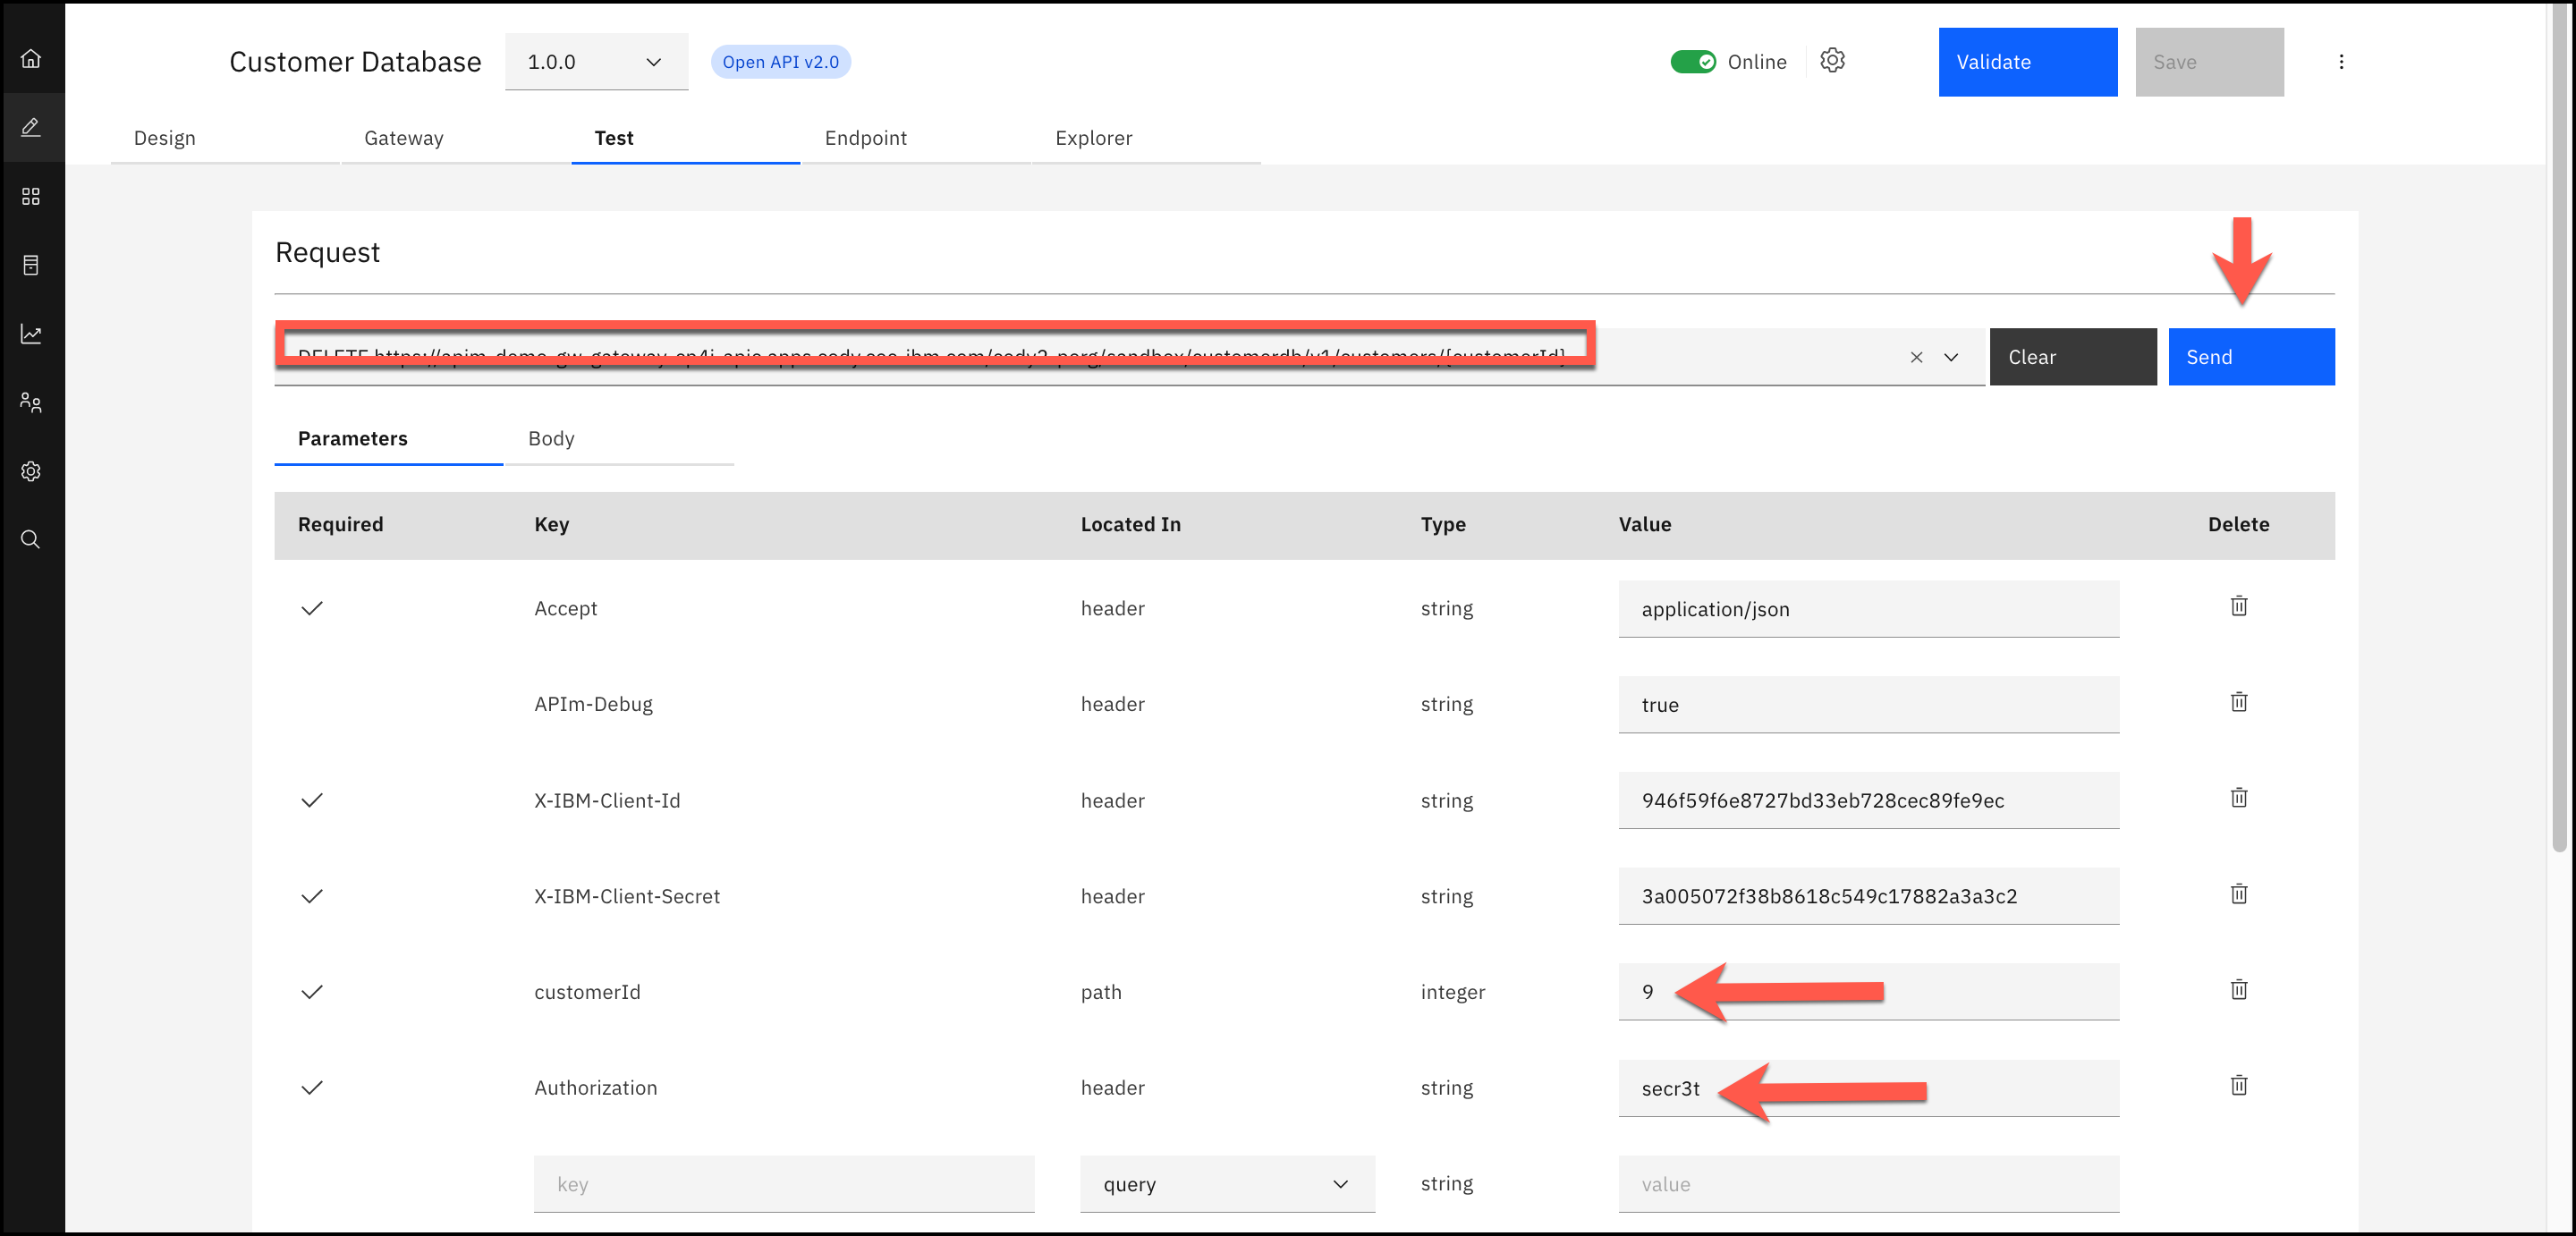
23. In the response, you will see the customer was deleted.
5. Publish API
In this lab, you will make the API available to developers. In order to do so, the API must be first put into a product and then published to the Sandbox catalog. A product dictates rate limits and API throttling.
When the product is published, the Invoke policy defined in the previous lab is written to the gateway.
5a. Create Customer Product and Add API
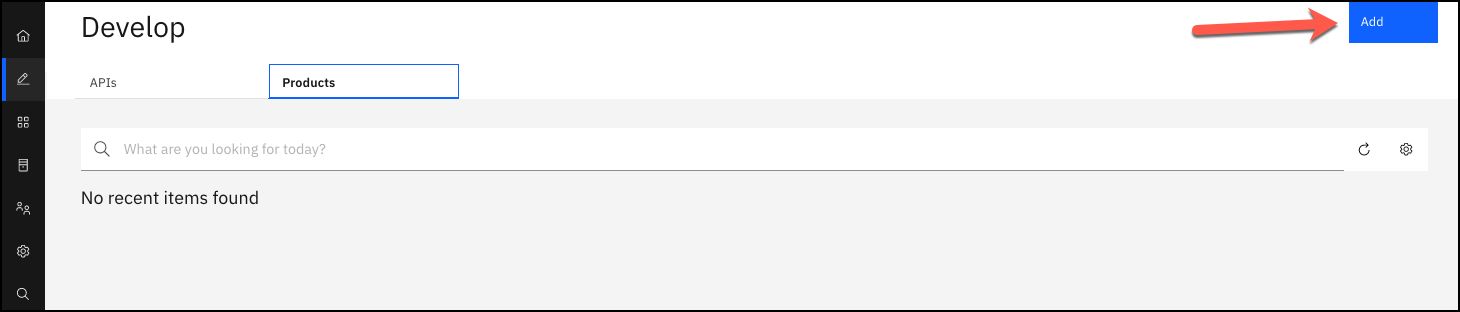
1. From the vertical navigation menu on the left, click Develop.
2. Click the Products tab.

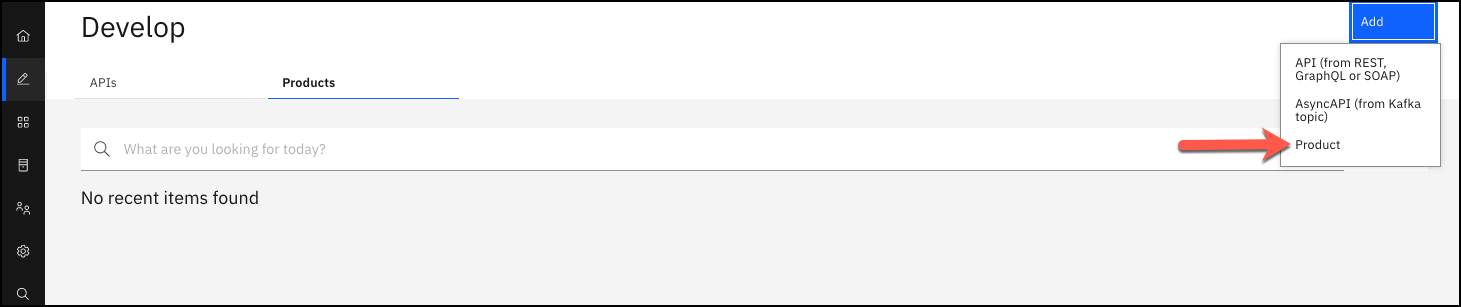
3. Click Add and click Product from the drop-down menu.
4. Click New product and click Next.

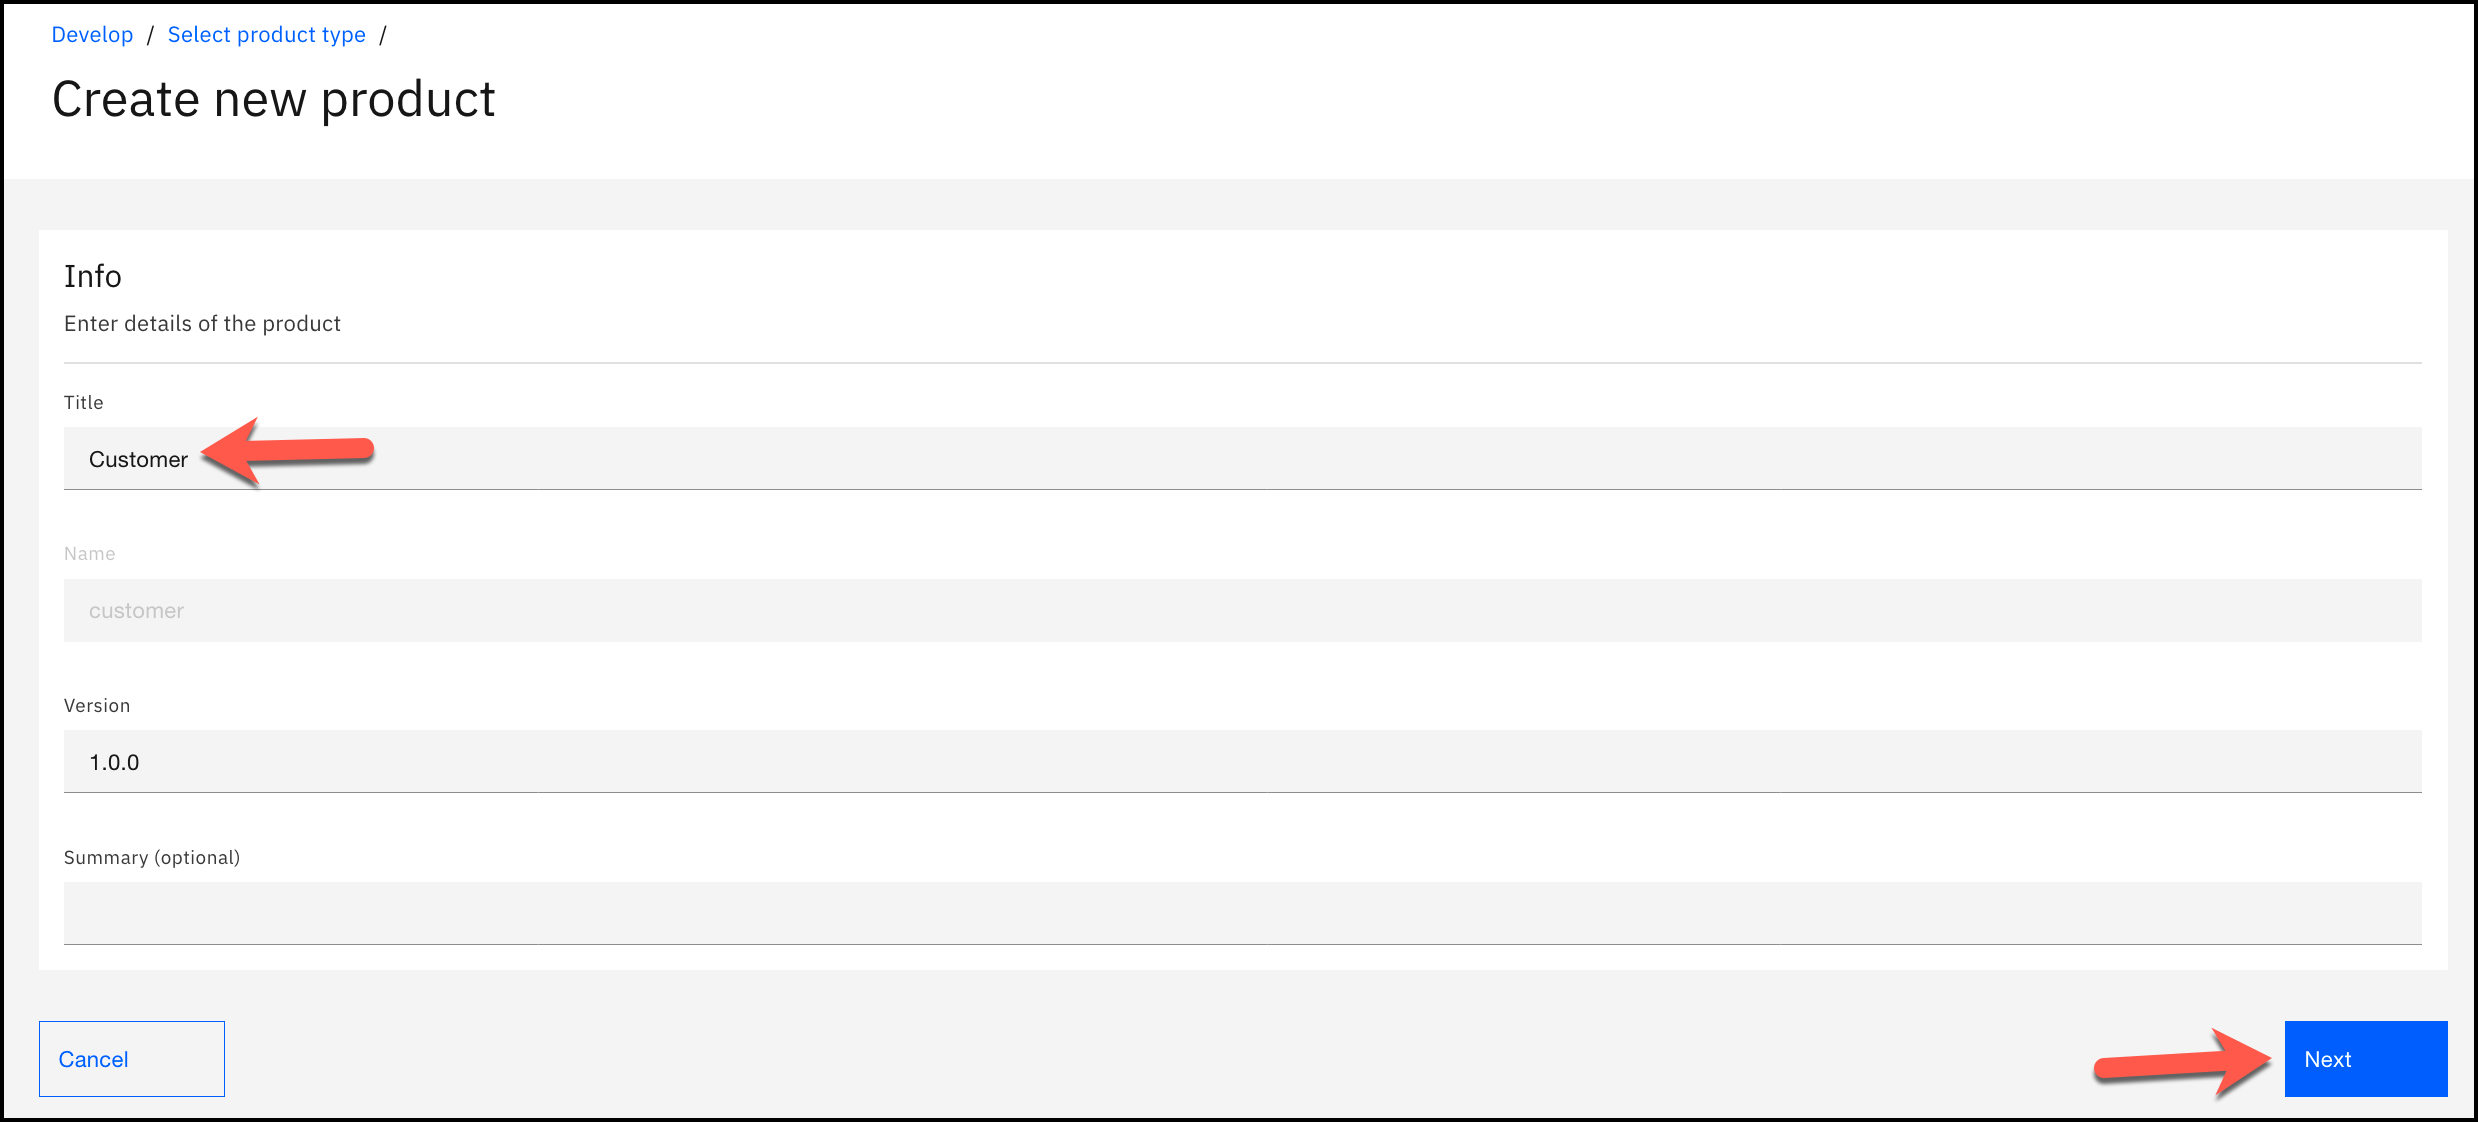
5. Enter Customer for the Title and click Next.
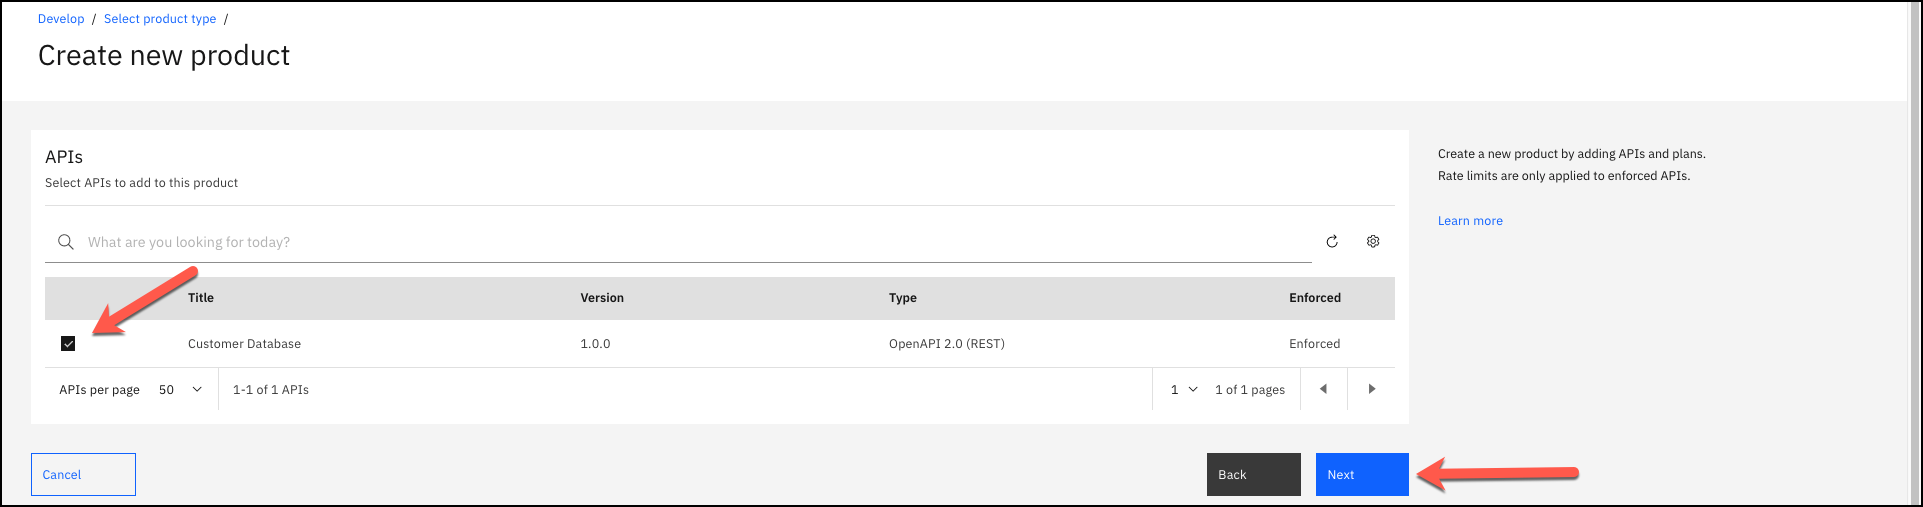
6. Select the Customer Database API and click Next.
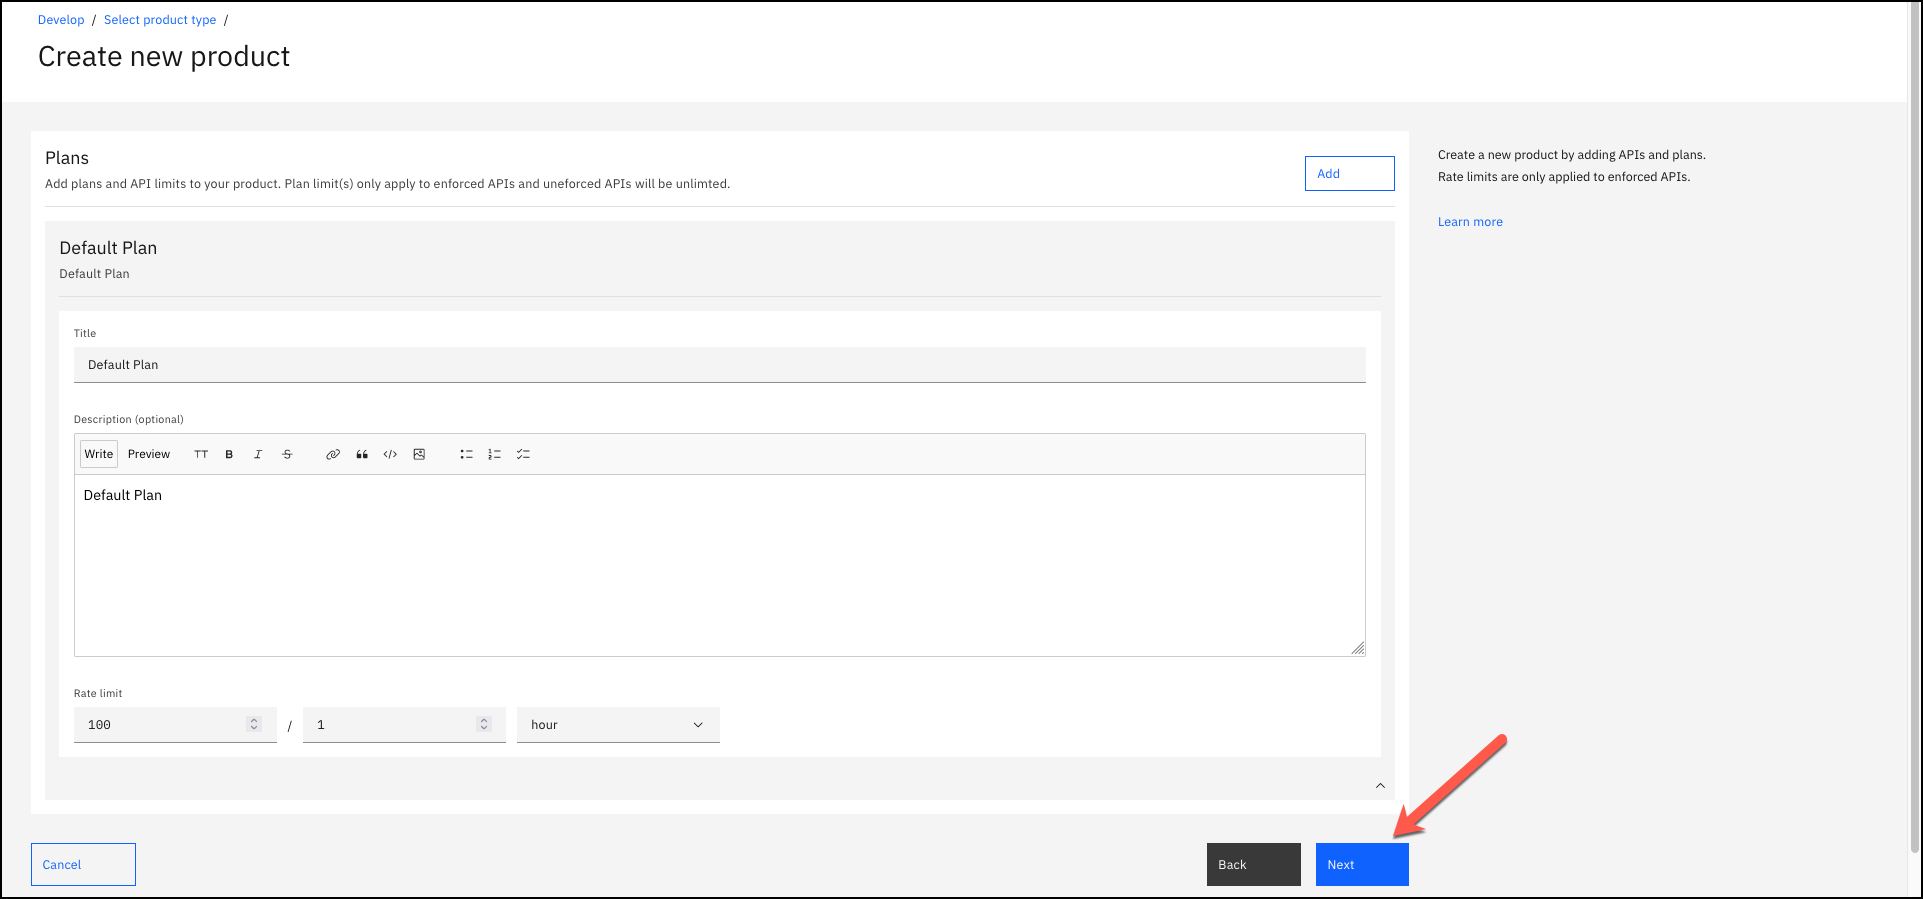
7. Keep the Default Plan as is and click Next.
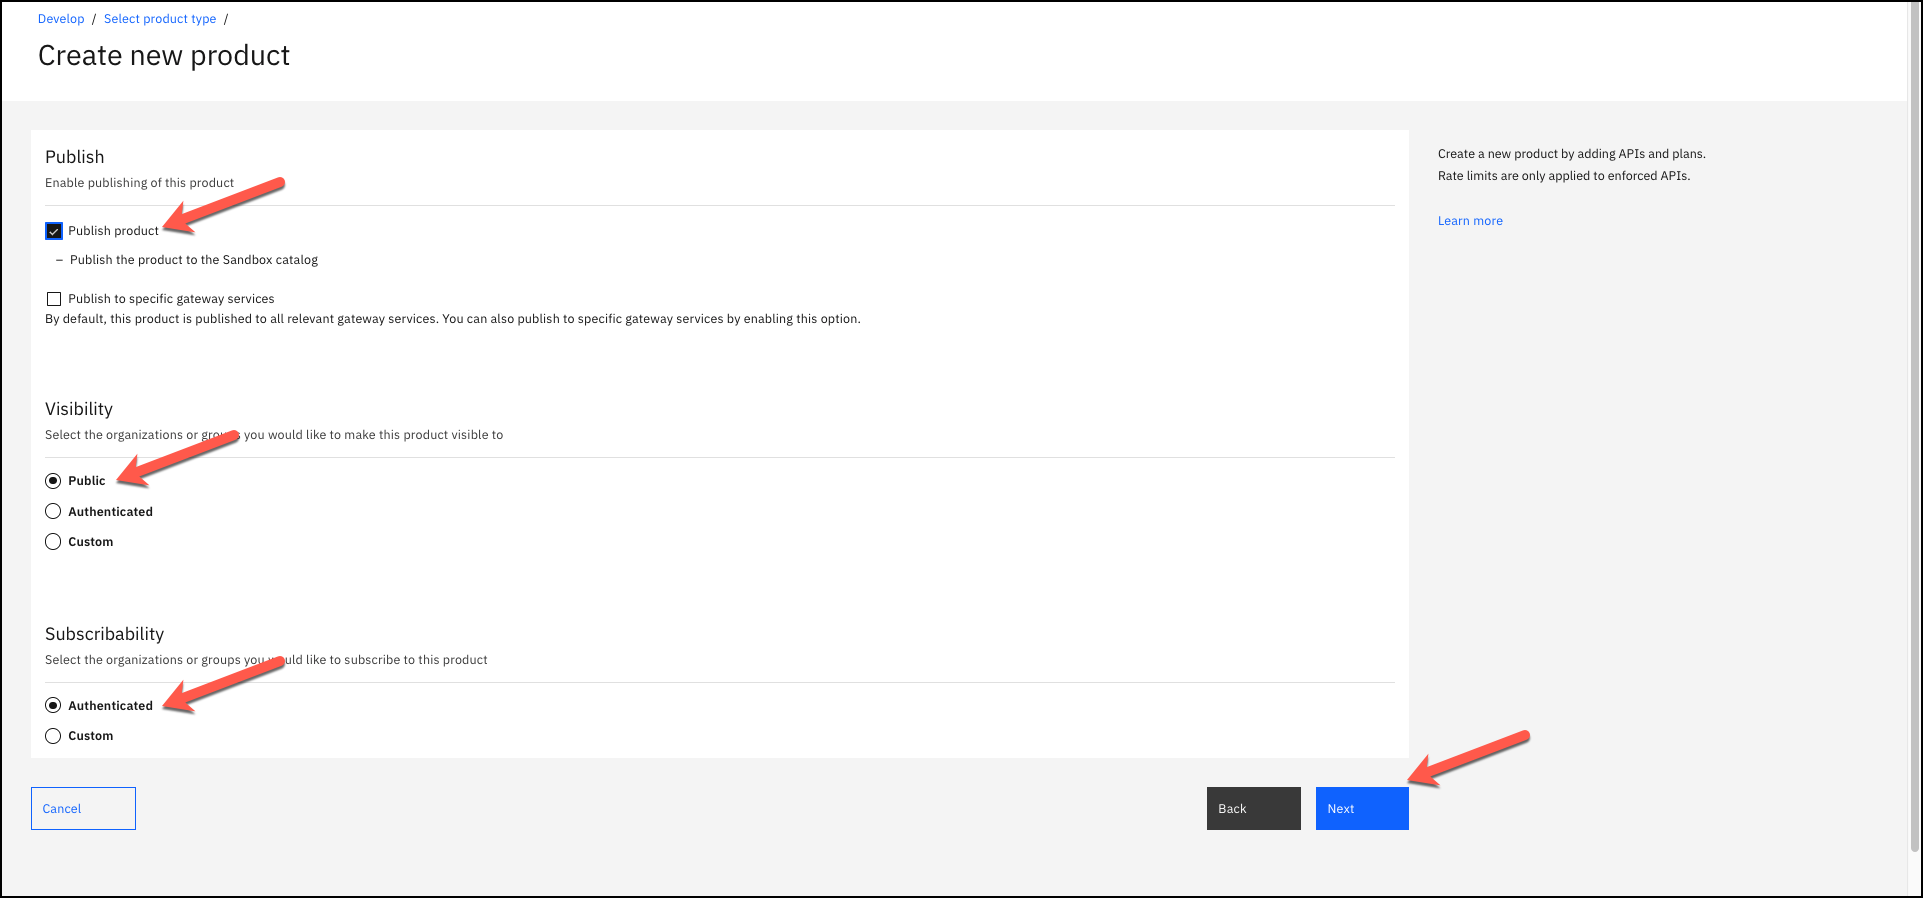
8. Select Publish product and confirm that Visibility is set to Public and Subscribability is set to Authenticated. Click Next.
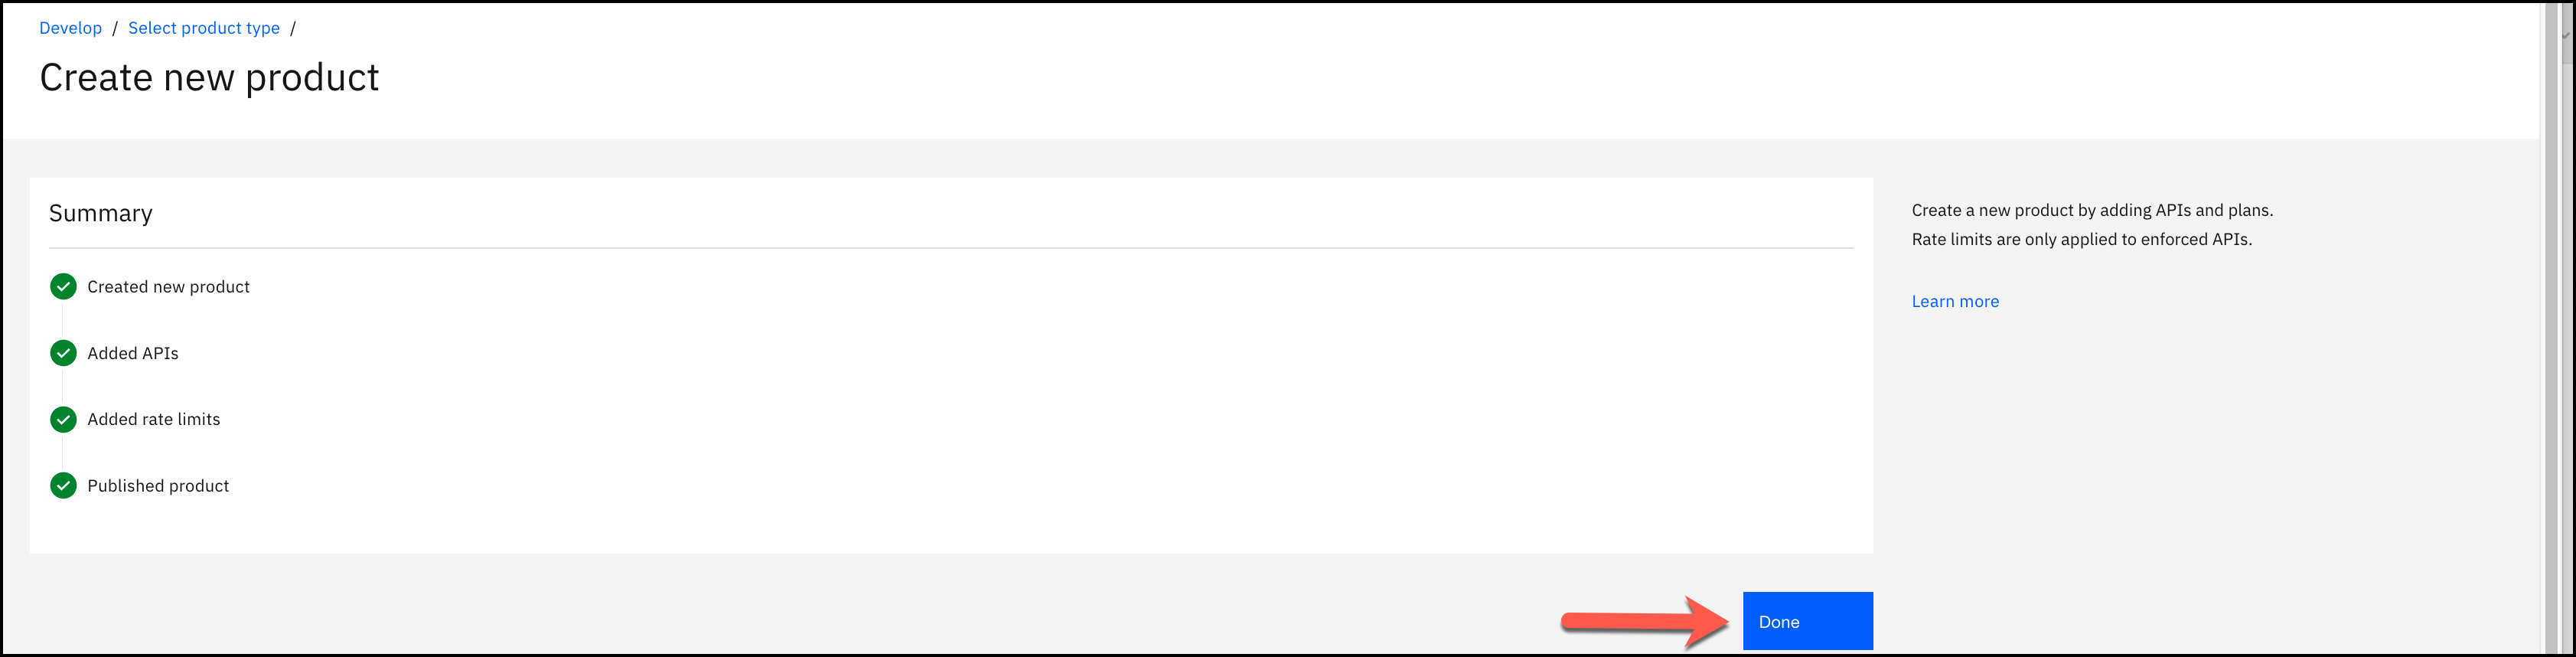
9. The Product is now published successfully with the API base URL listed and available for developers from the Developer Portal. Click Done.
6.Summary
Congratulations, you have completed the Create and Secure an API lab. Throughout the lab, you learned how to:
-
Create an API by importing an OpenAPI definition for an existing REST service
-
Configure ClientID/Secret Security, endpoints, and proxy to invoke endpoint
-
Test a REST API in the Developer Toolkit
-
Publish an API for developers