IBM Integration PoT Labs Home page
API Connect Experience Prereq
1. Add user to Common Services User Registry
1. In a browser, enter the URL for the Platform Navigator that is provided by your instructor.
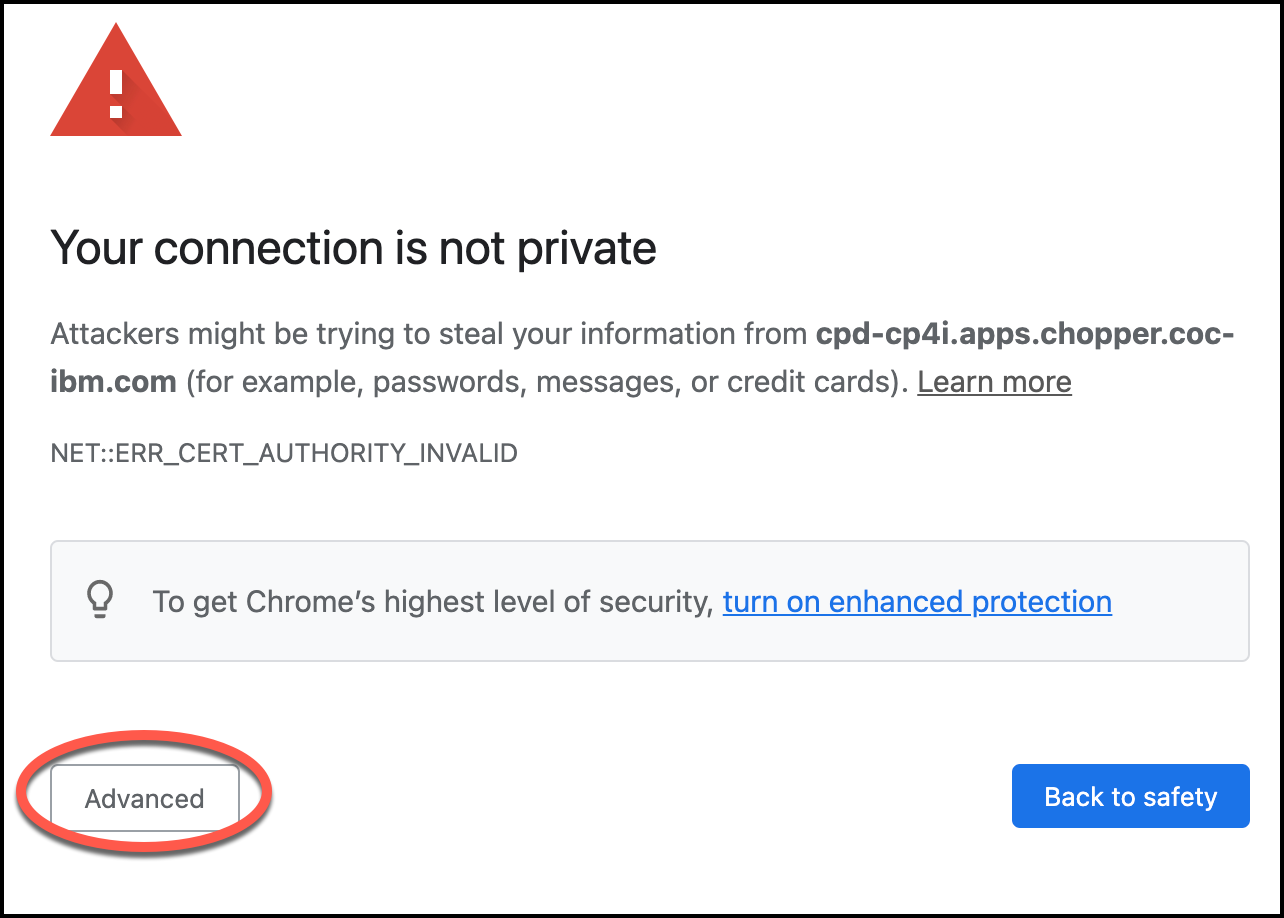
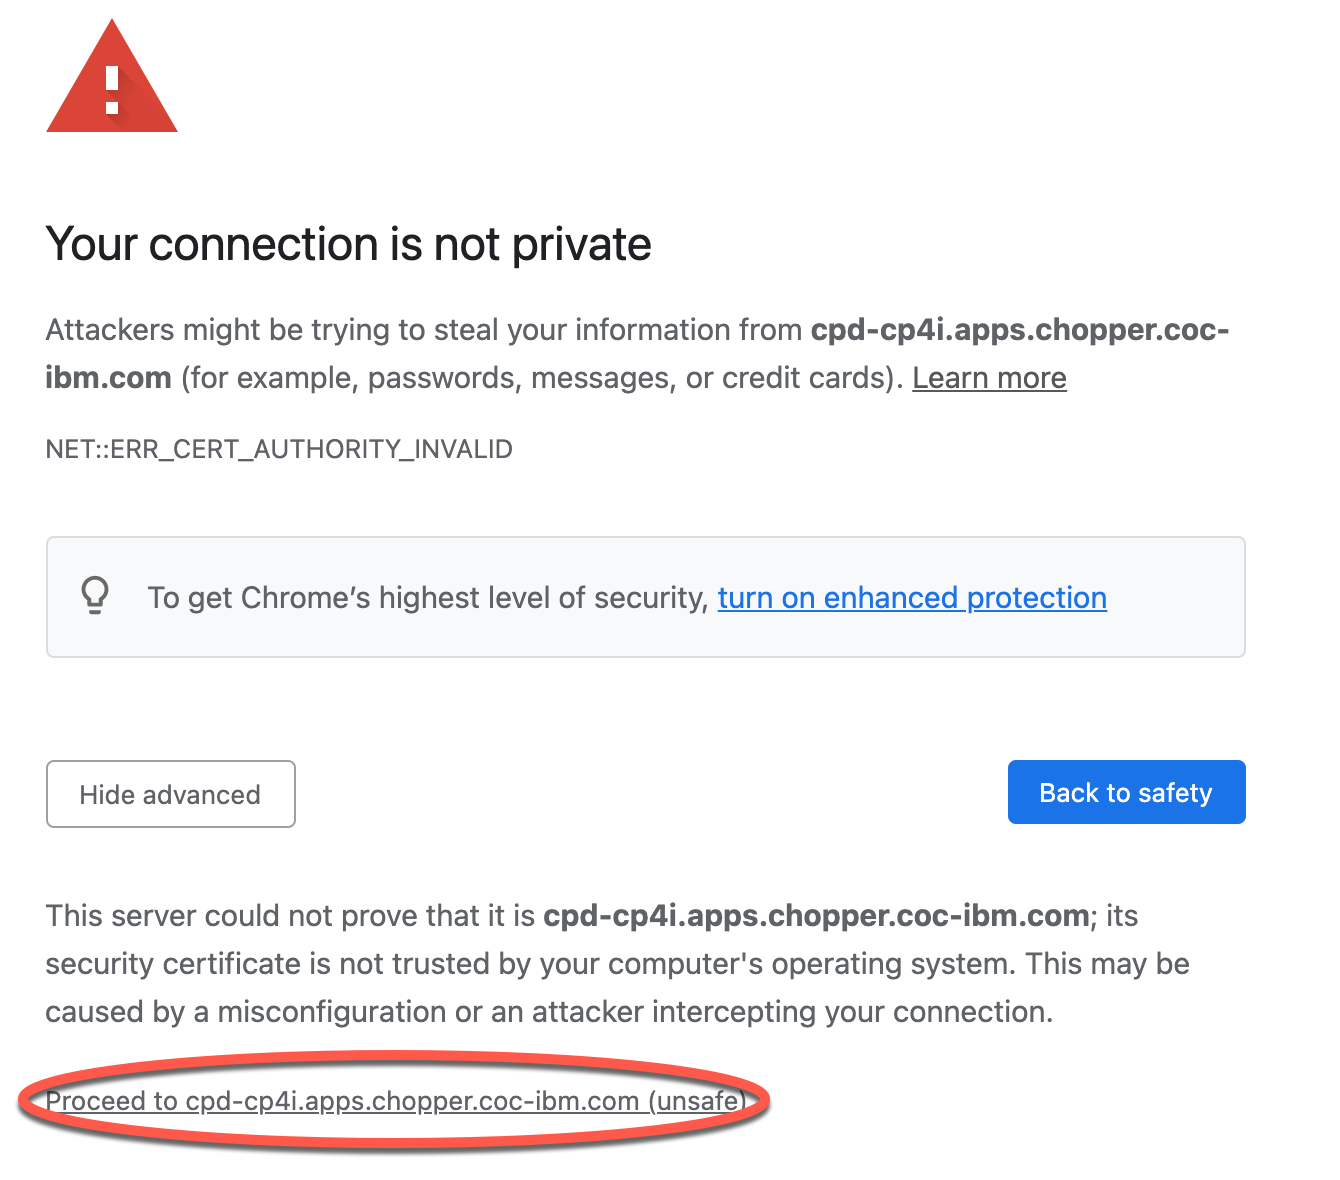
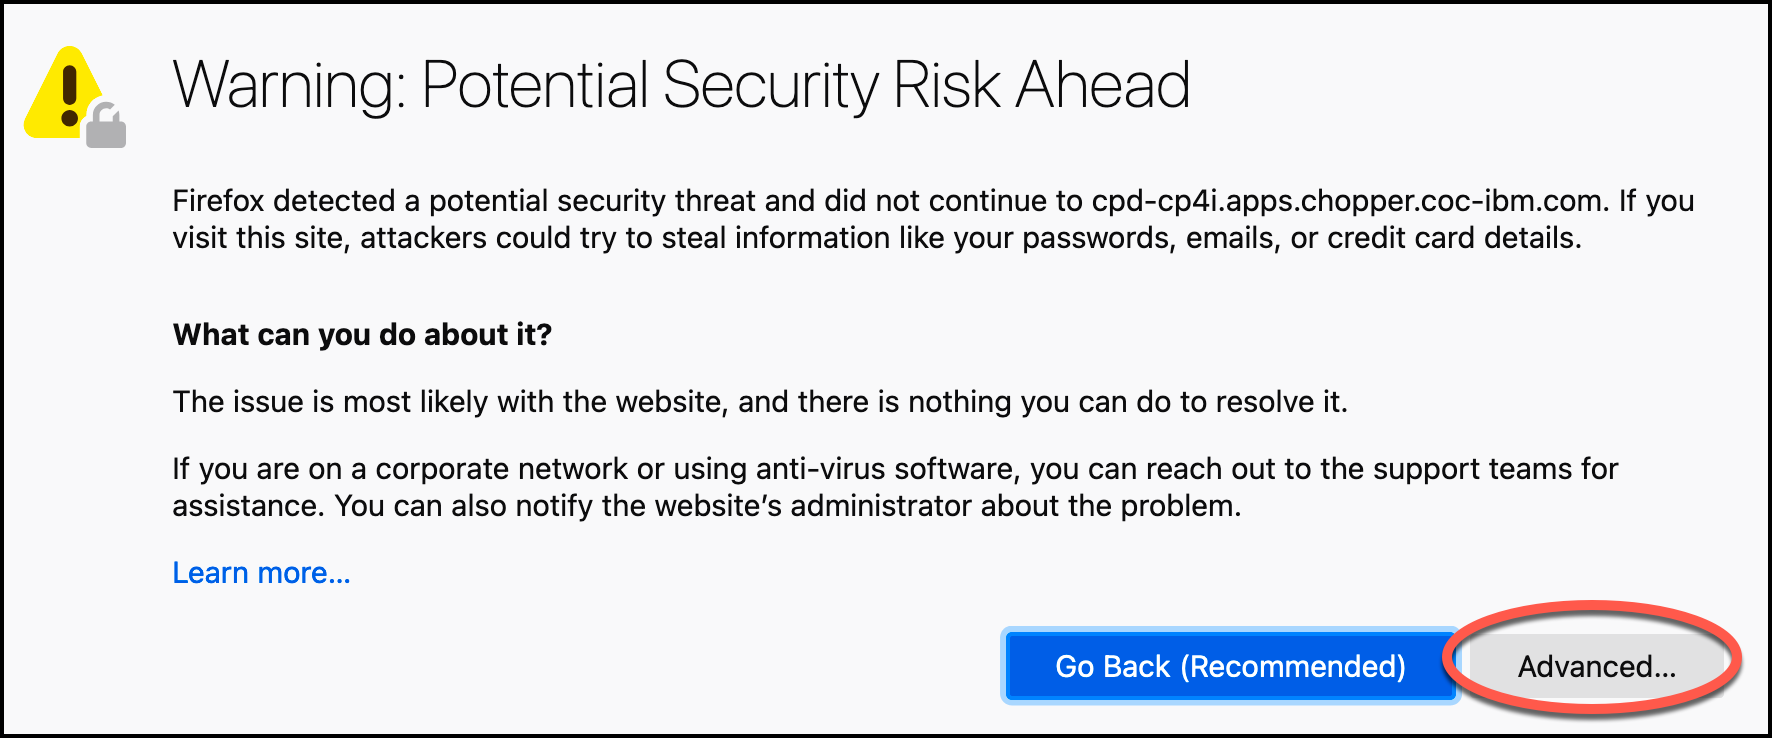
Note: You may get a warning message that your connection is not private. If you get this message, you can add an exception.
2. To add an exception in the Chrome browser, click Advanced and then click Proceed to the URL.
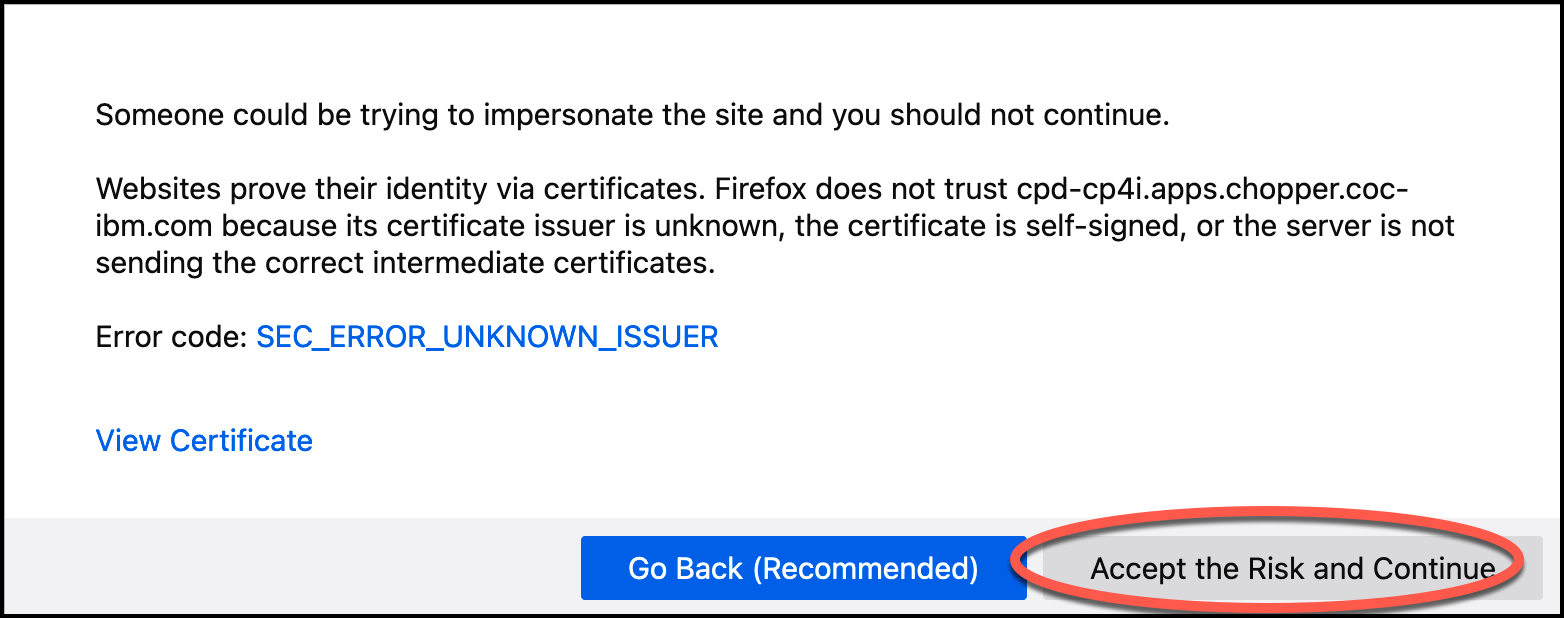
3. To add an exception in the Firefox browser, click Advanced and then click Accept the Risk and Continue.
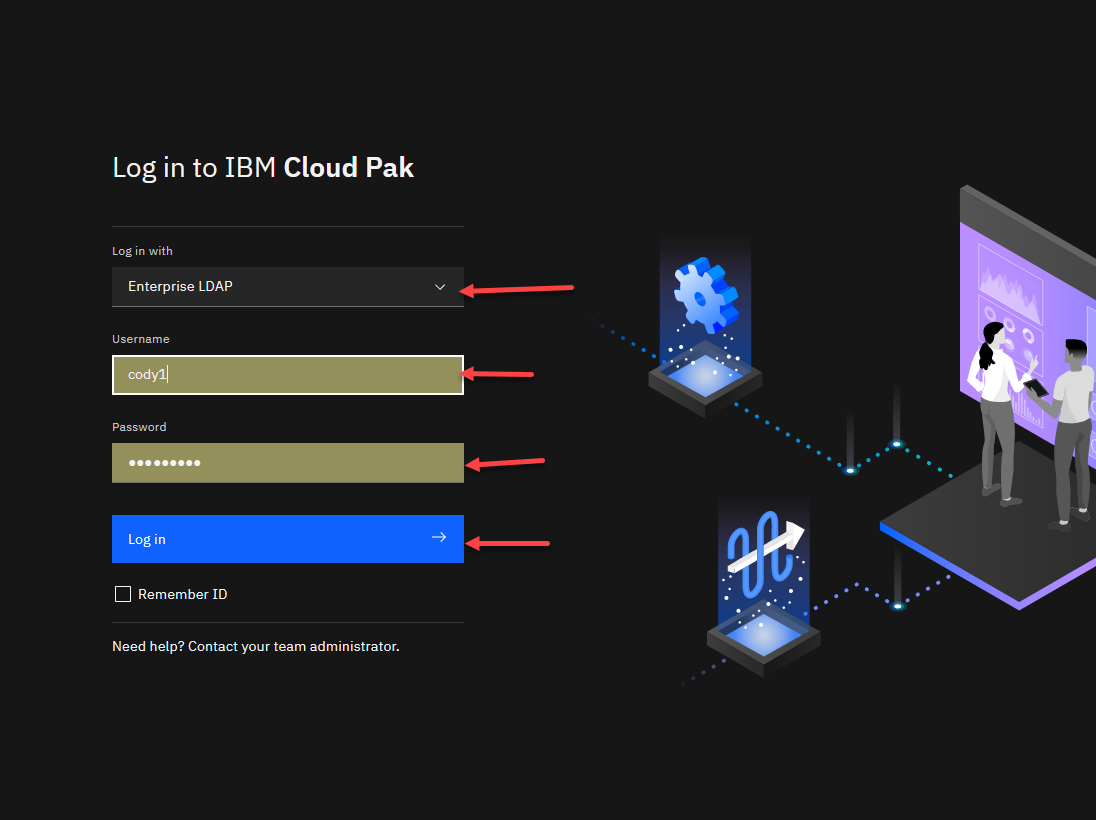
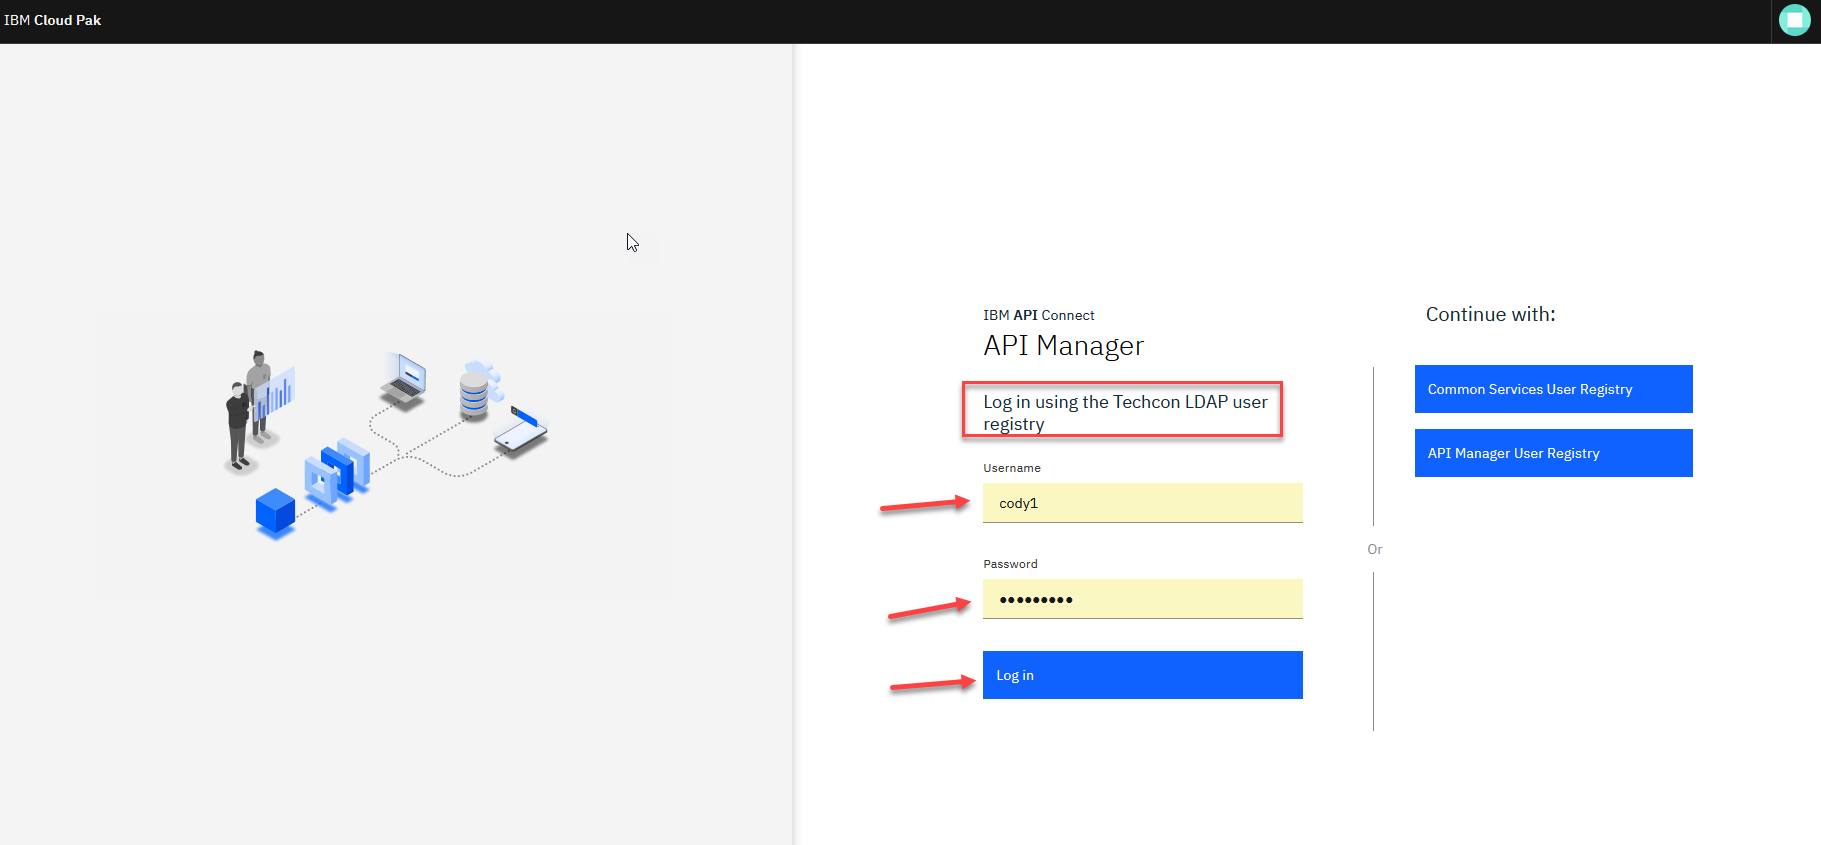
4. When prompted, Select the Enterprise LDAP. use the username and password provided to you for this lab. The username in the screenshots of this lab is cody1.
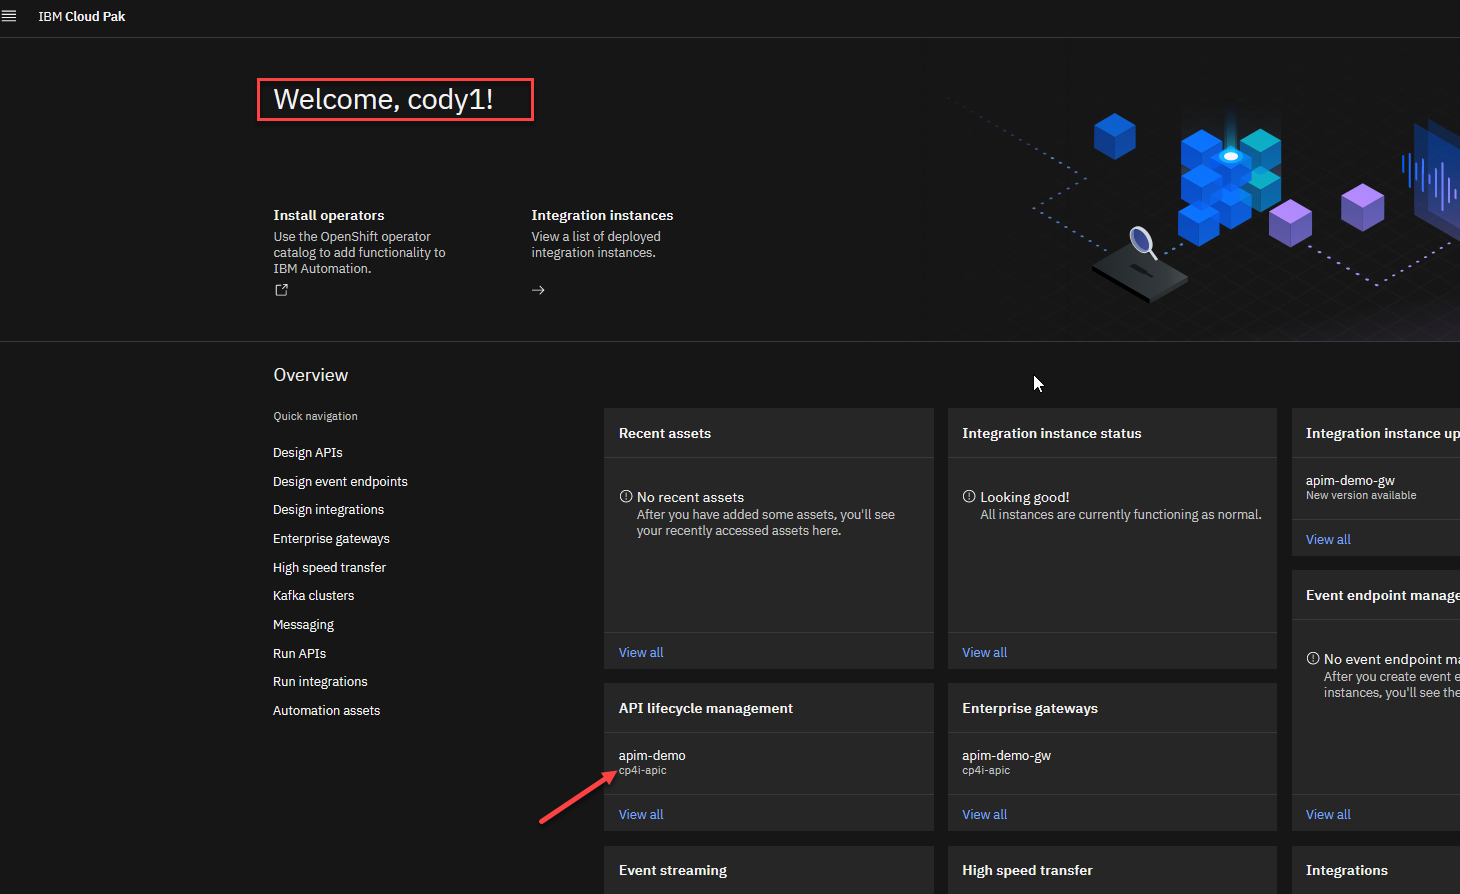
5. When you log in for the first time, you may see a Welcome, let’s get started window. Feel free to review the contents by clicking Start the tour or click on the X to close the window. Then from the home page select the apim-demo under the API lifecycle management tile.
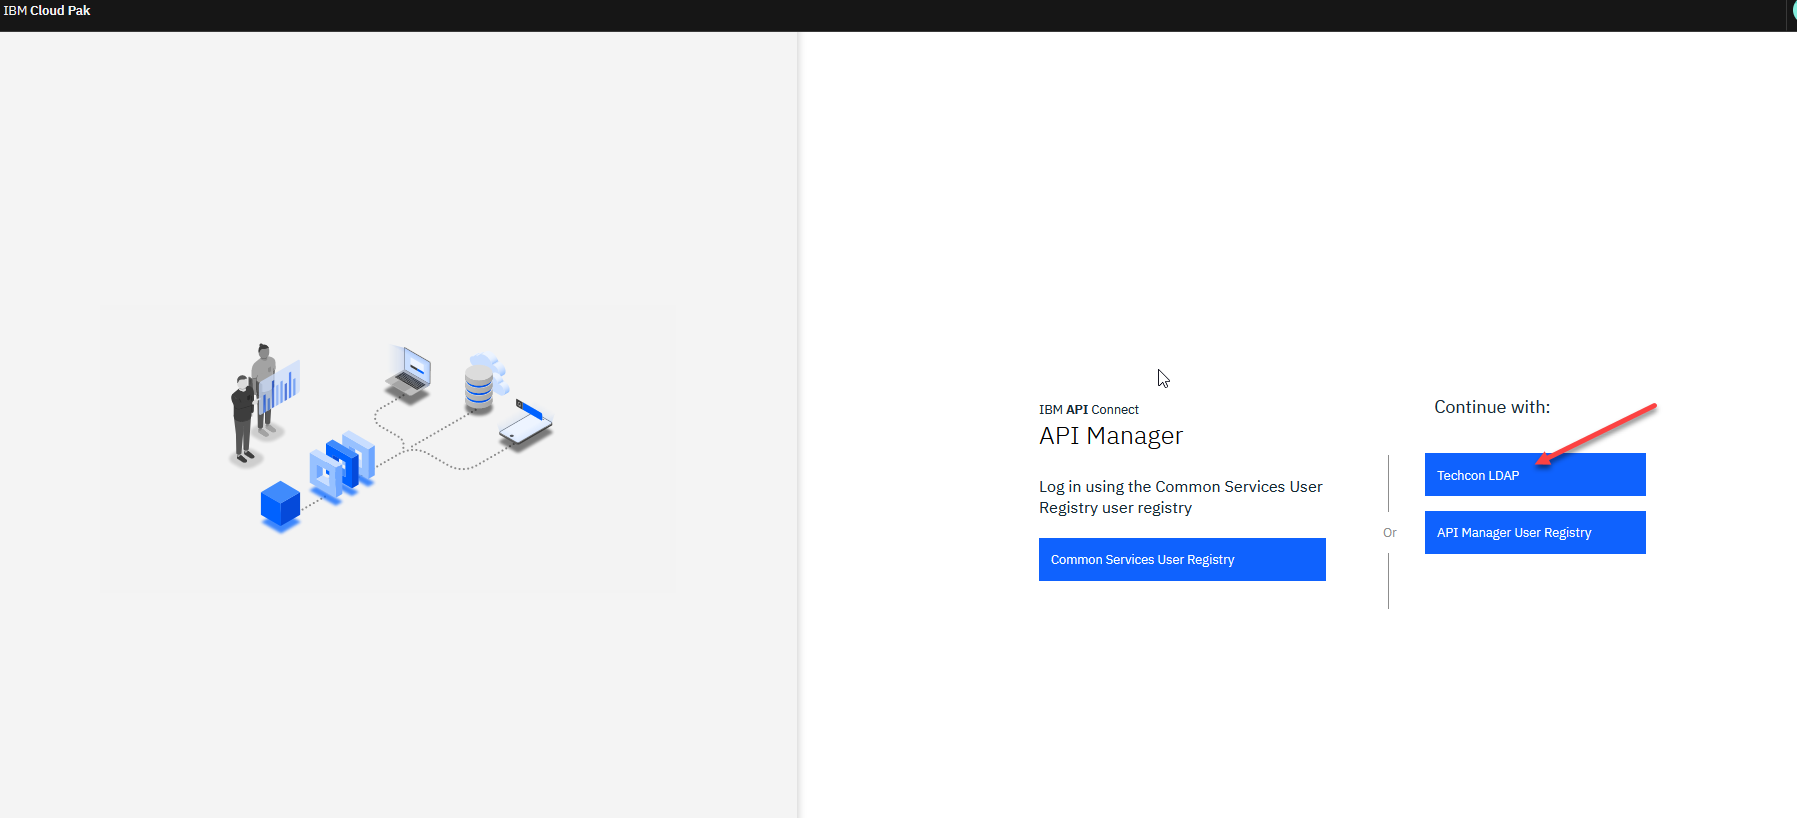
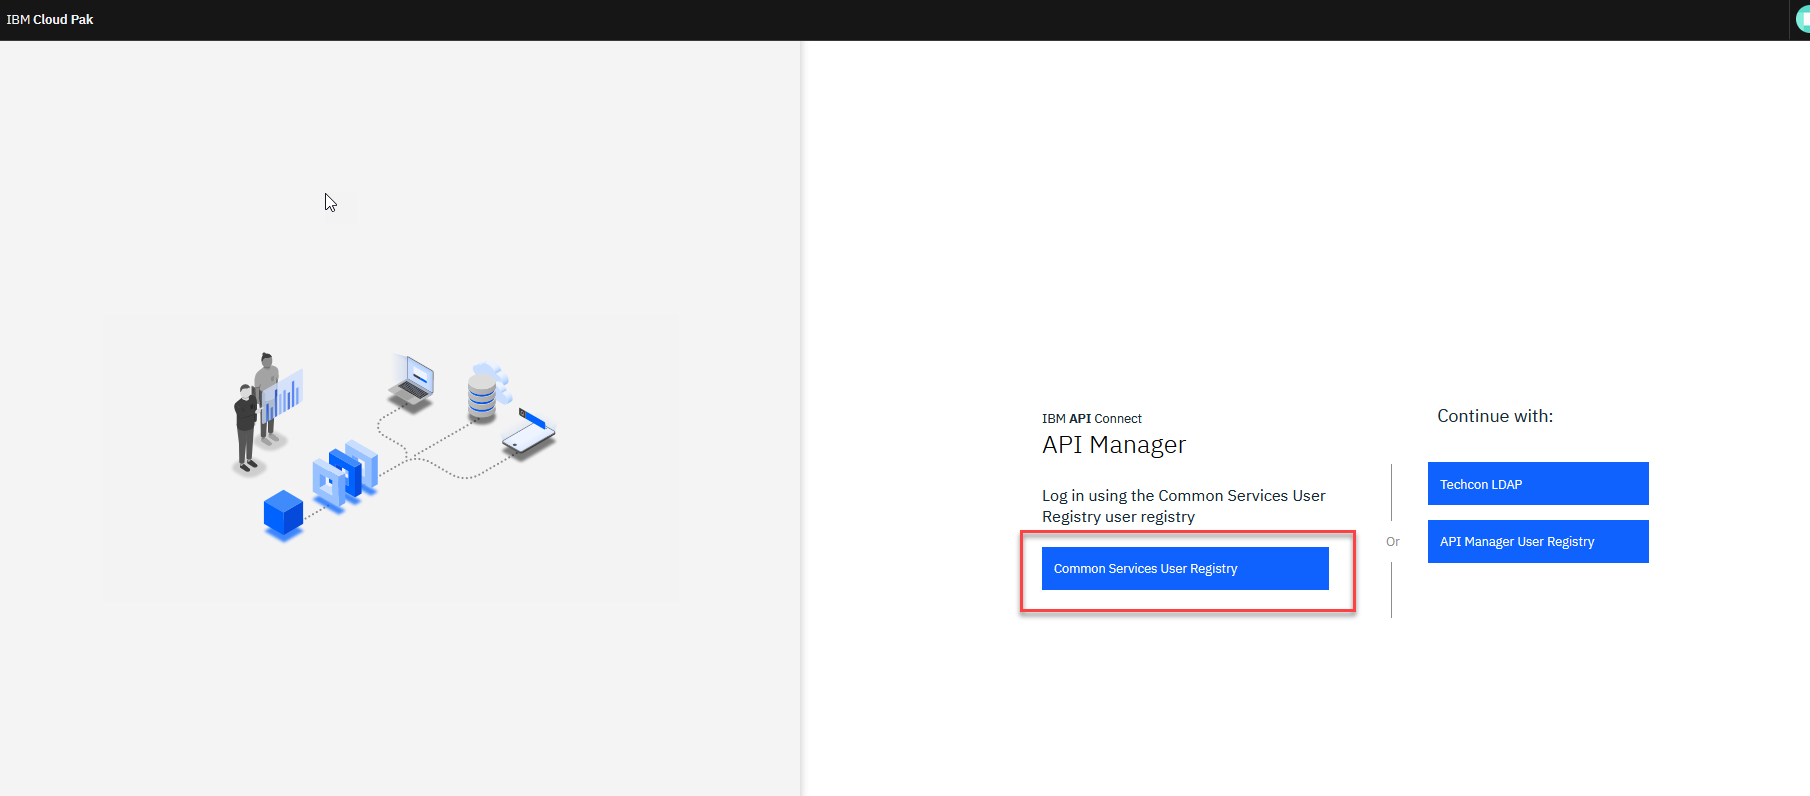
6. When you log in for the first time to the API Manager you will use the Techcon LDAP. Click on the Techcon LDAP and the login screen will open.
7. Now on the Login screen enter your assigned id and password and click Log in
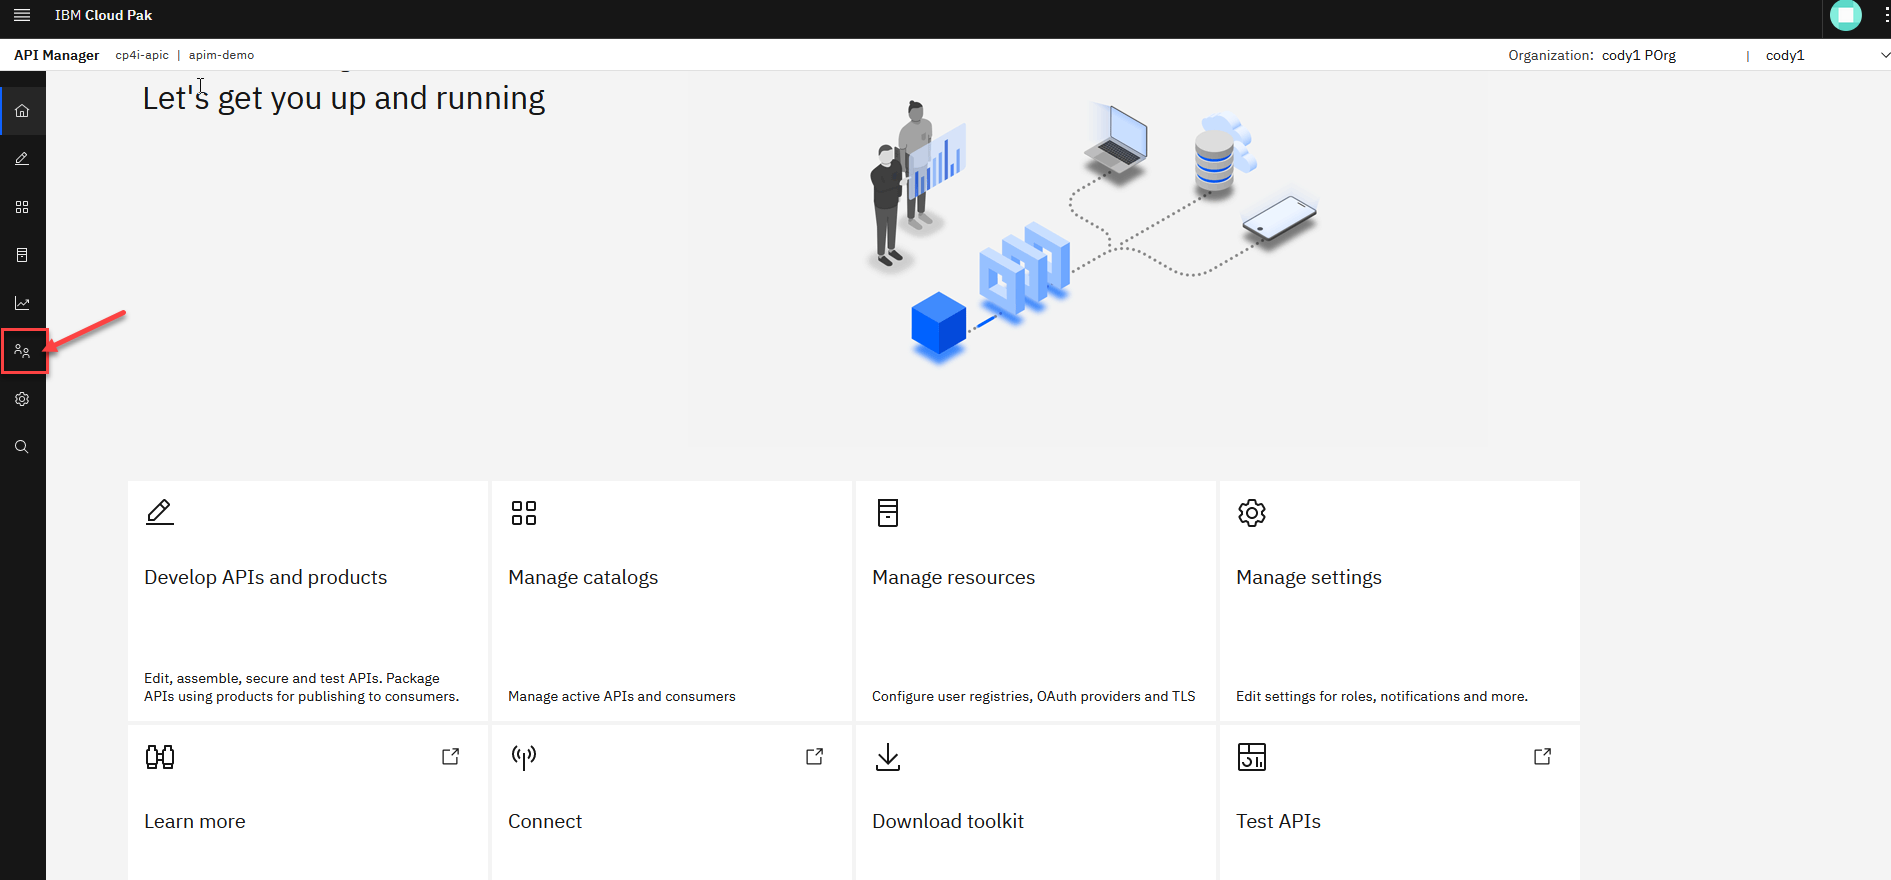
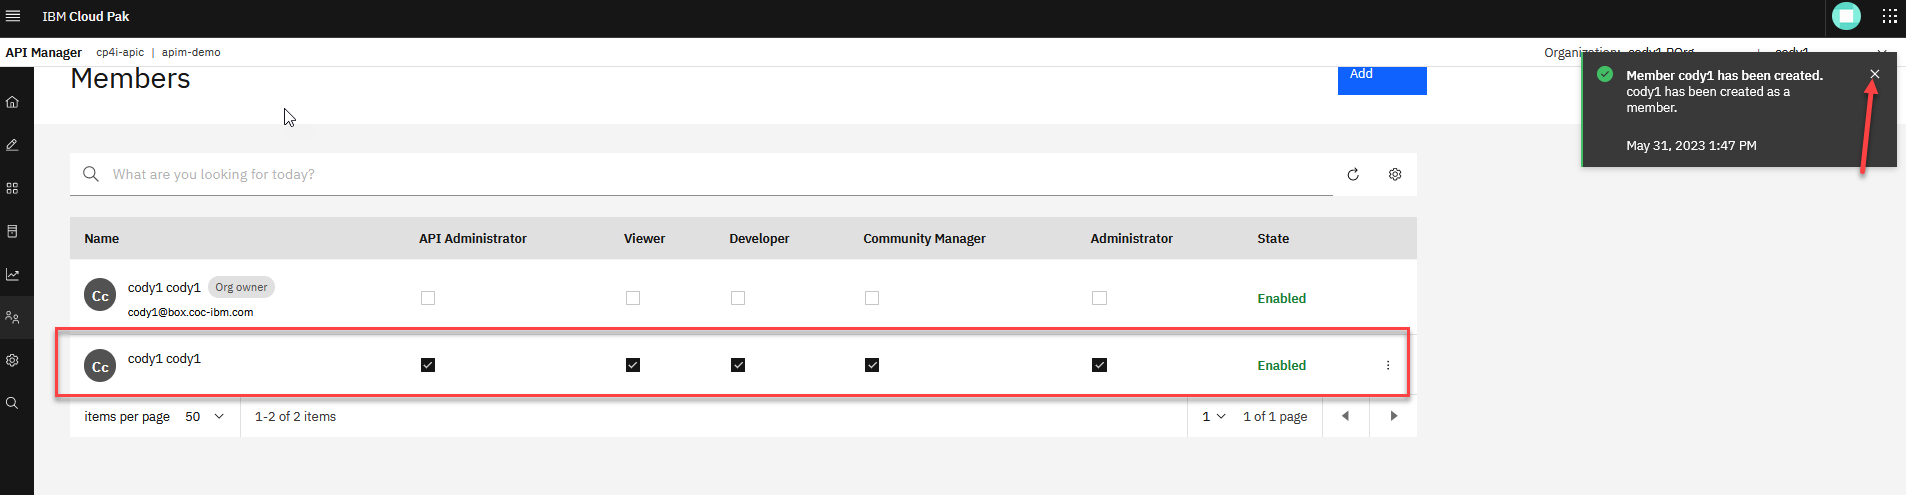
8. Now from the API manager home page on the left menu select the Member icon.
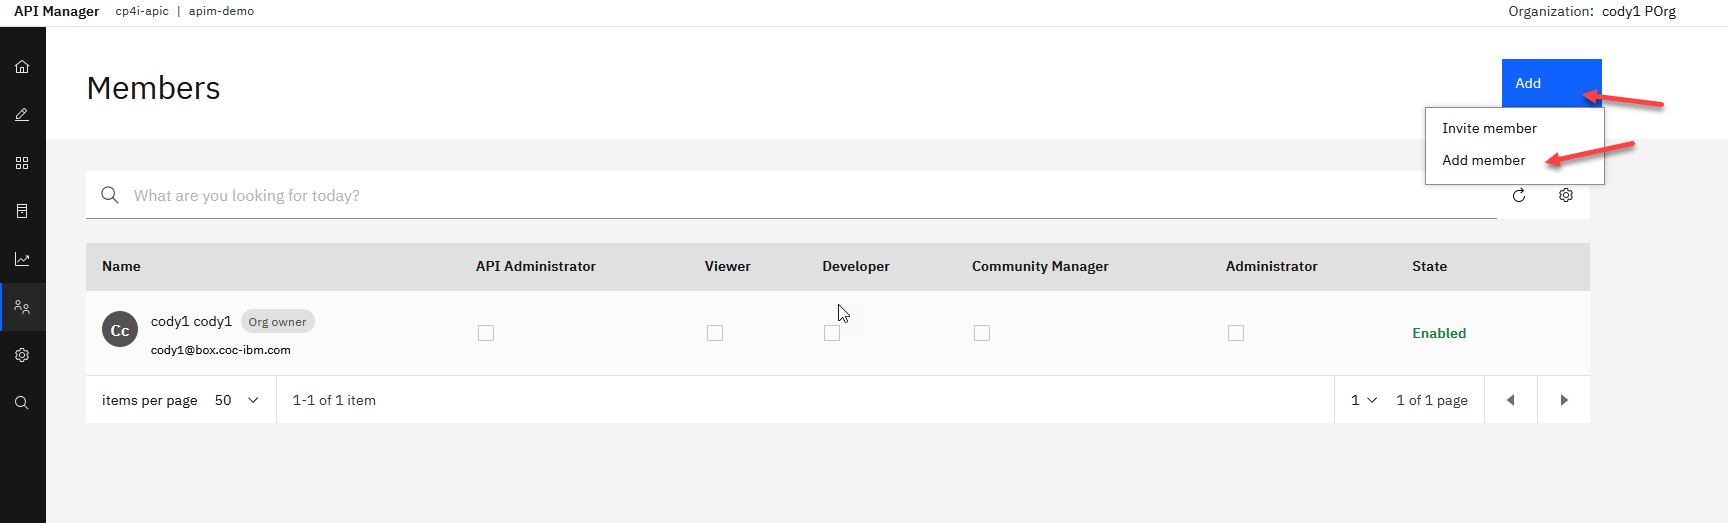
9. You will see your user id in the member list. We will now select Add and pick Add member
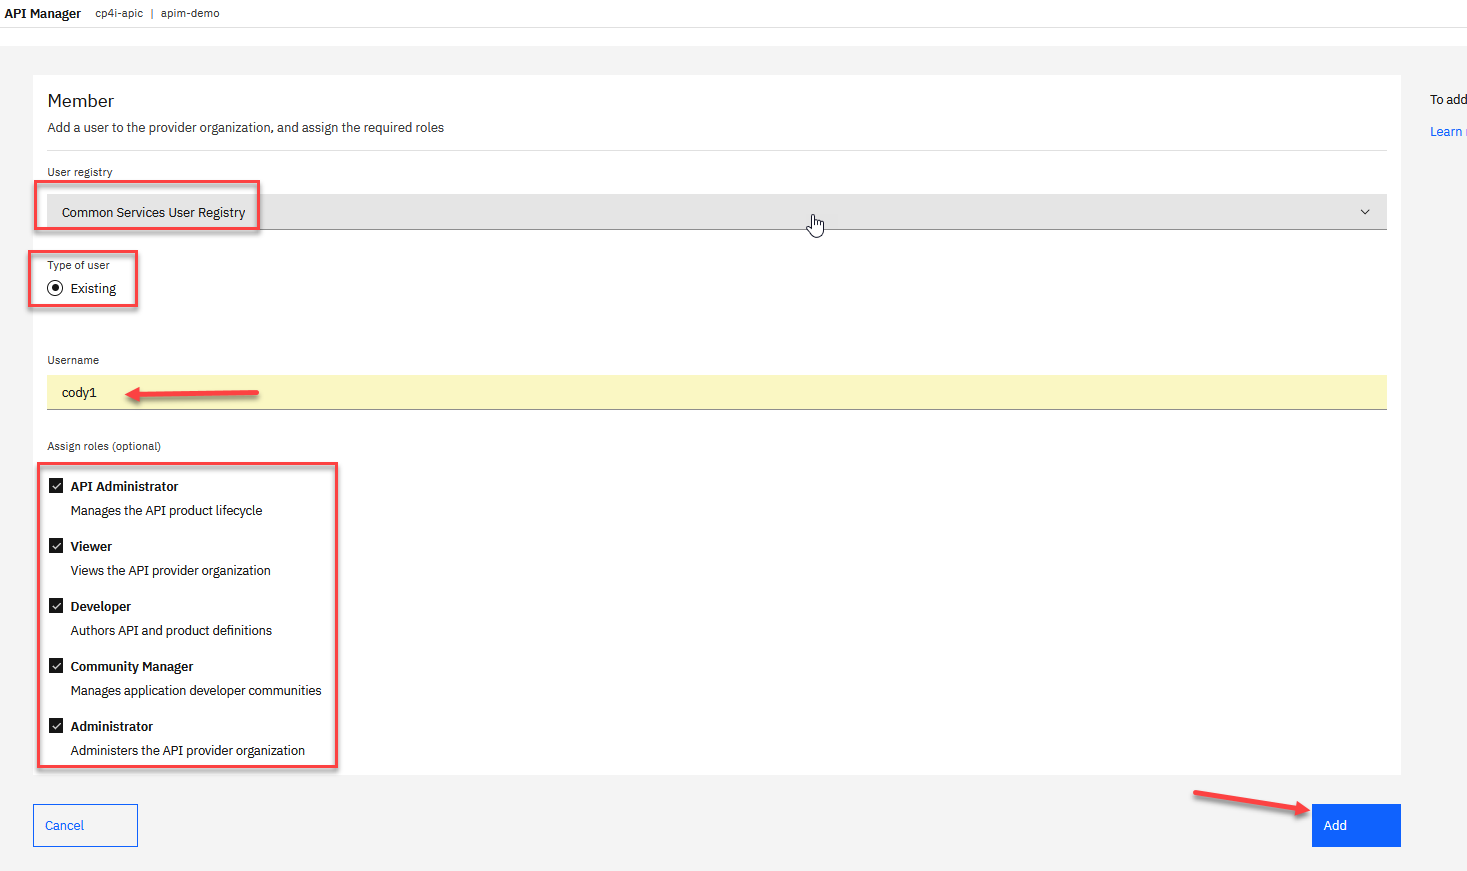
10. Now make sure the User registry shows Common Services User Registry and select type of user Existing.
For the Username, enter your assigned id and select all boxes for Assign roles and click Add.
11. You will now see the local member added to the local registry. Click on the X to close notification window.
12. While working through the API Connect Experience labs, make sure you use the Common Services User Registry when asked to log in. This will also enable the co-authoring between App Connect and API Connect.
2. Create Consumer Org user
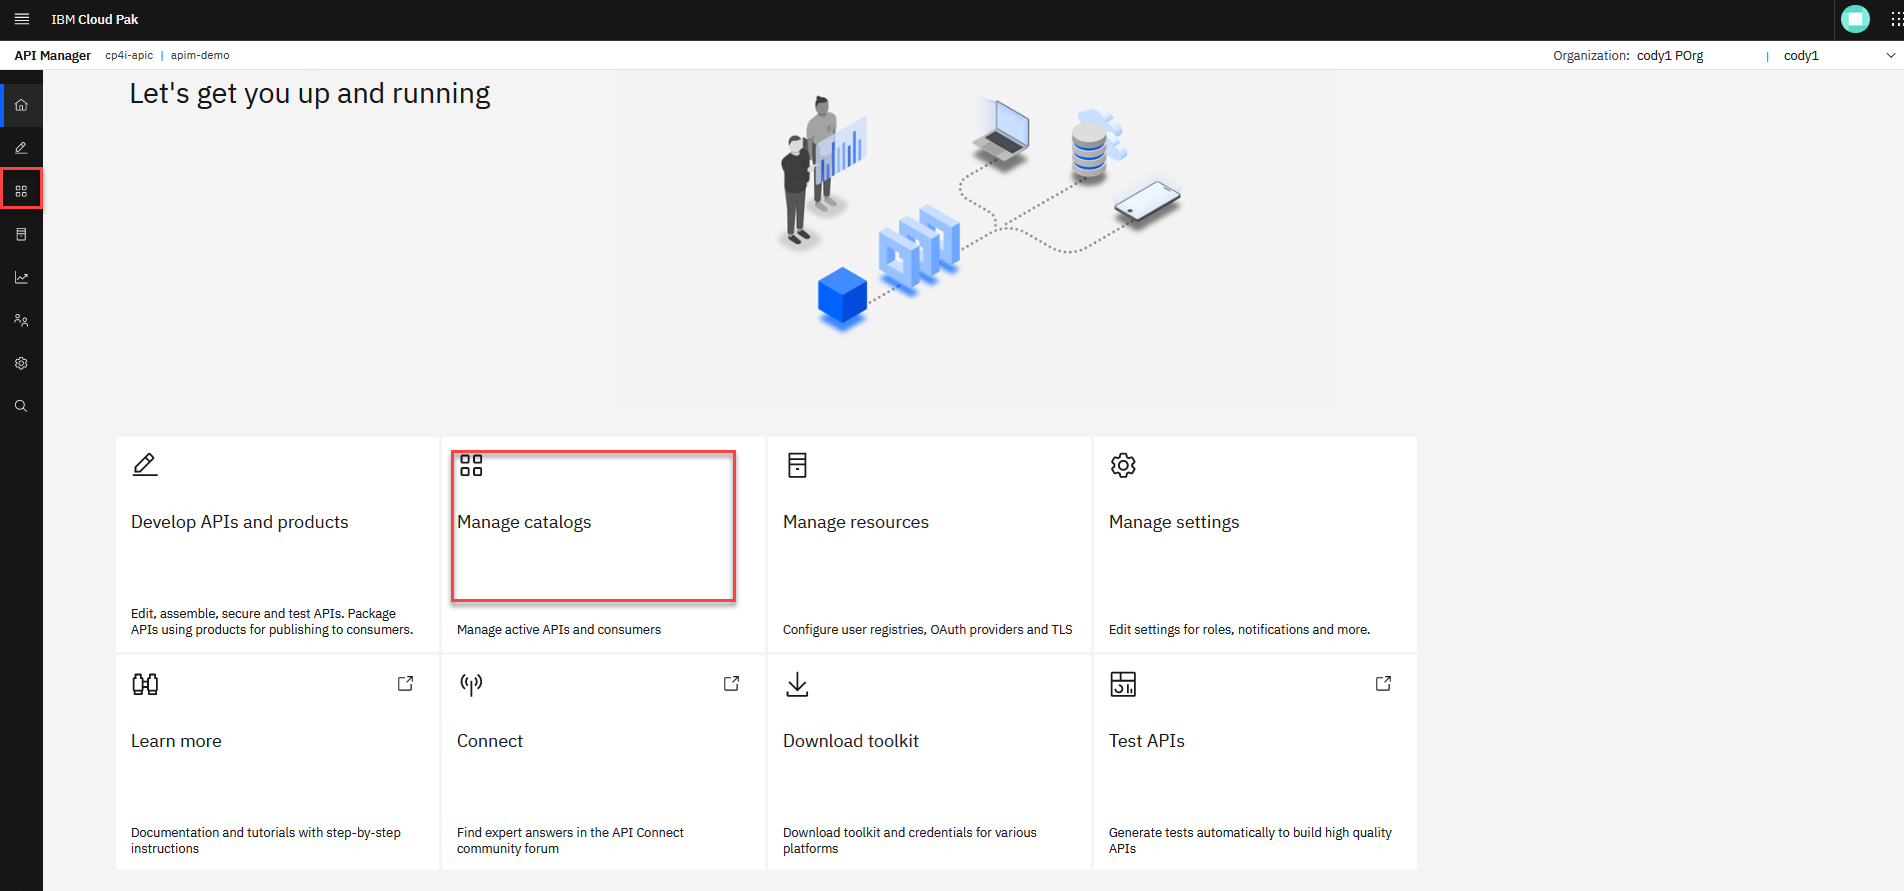
1. To navigate to the API Management home page, click on the Home icon in the left navigation.

2. Click on the Manage icon in the left navigation or the Manage catalogs tile from the main page.
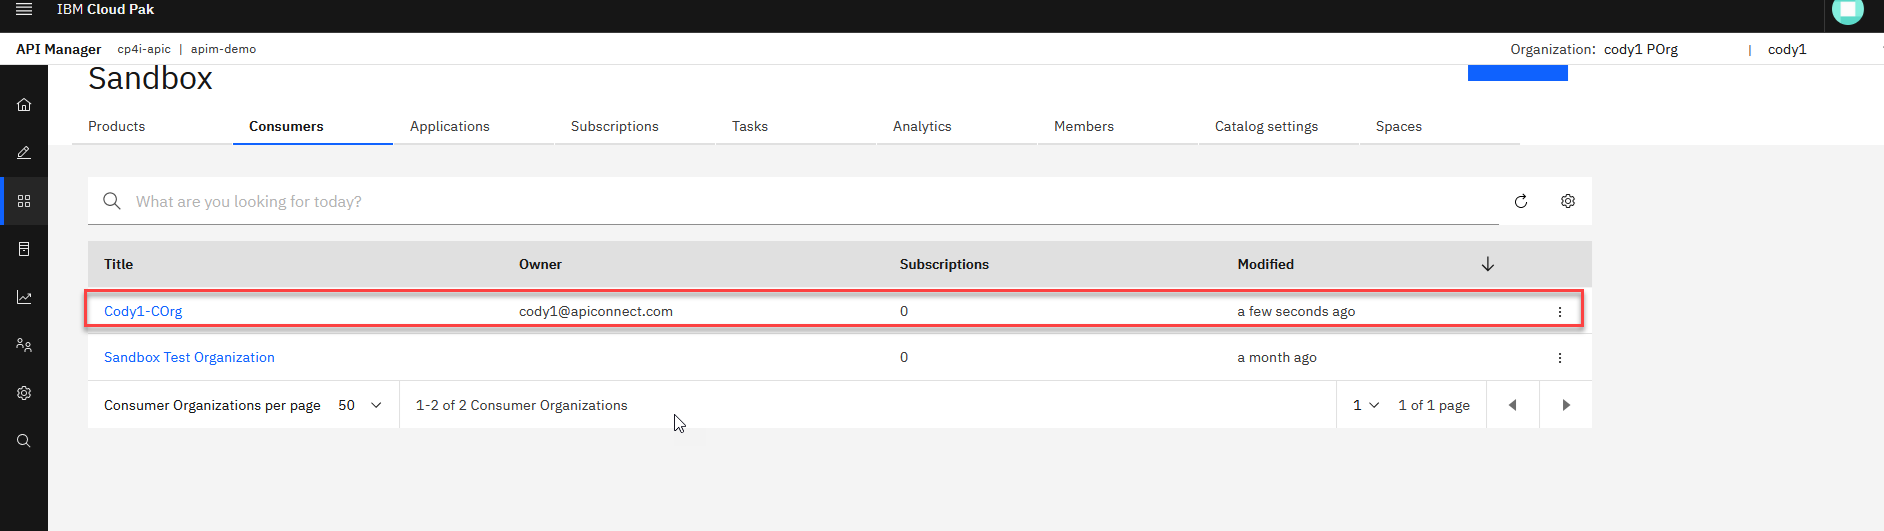
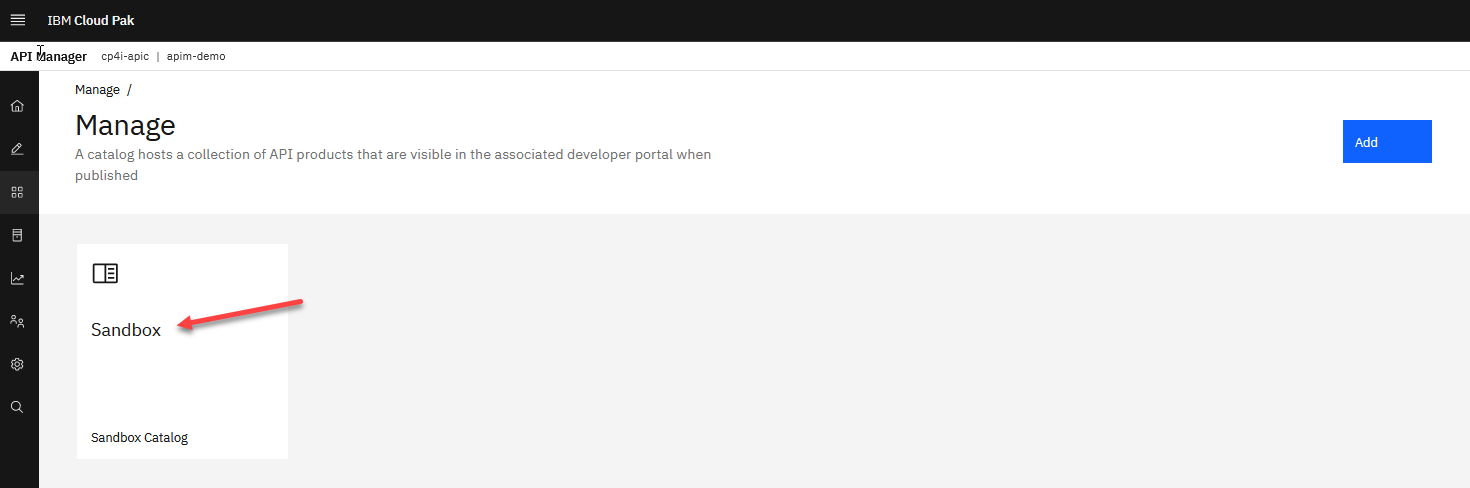
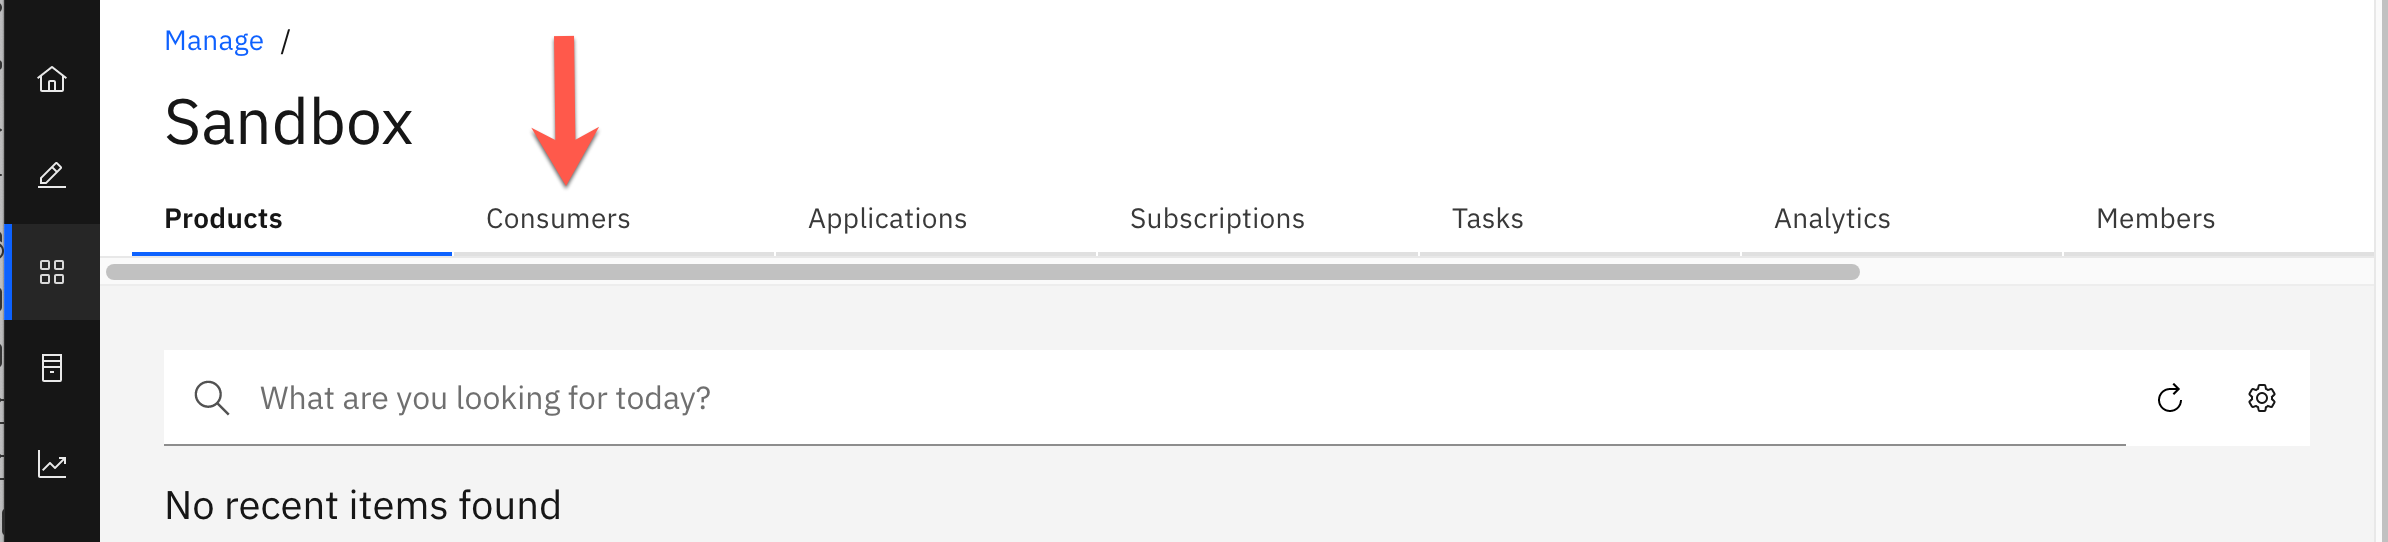
3. You will see your default Sandbox Catalog. Click on the Sandbox tile.
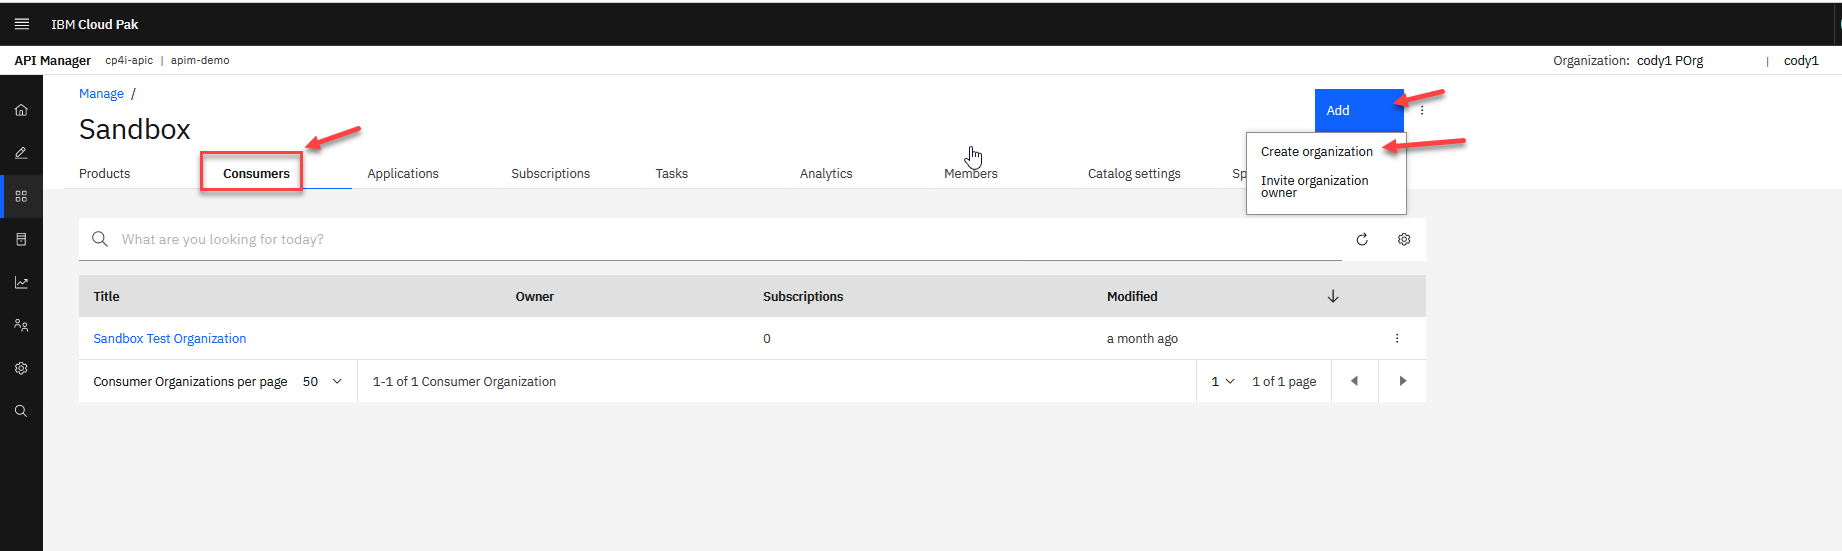
4. In the top menu, click Consumers.
5. Click Add and select Create organization.
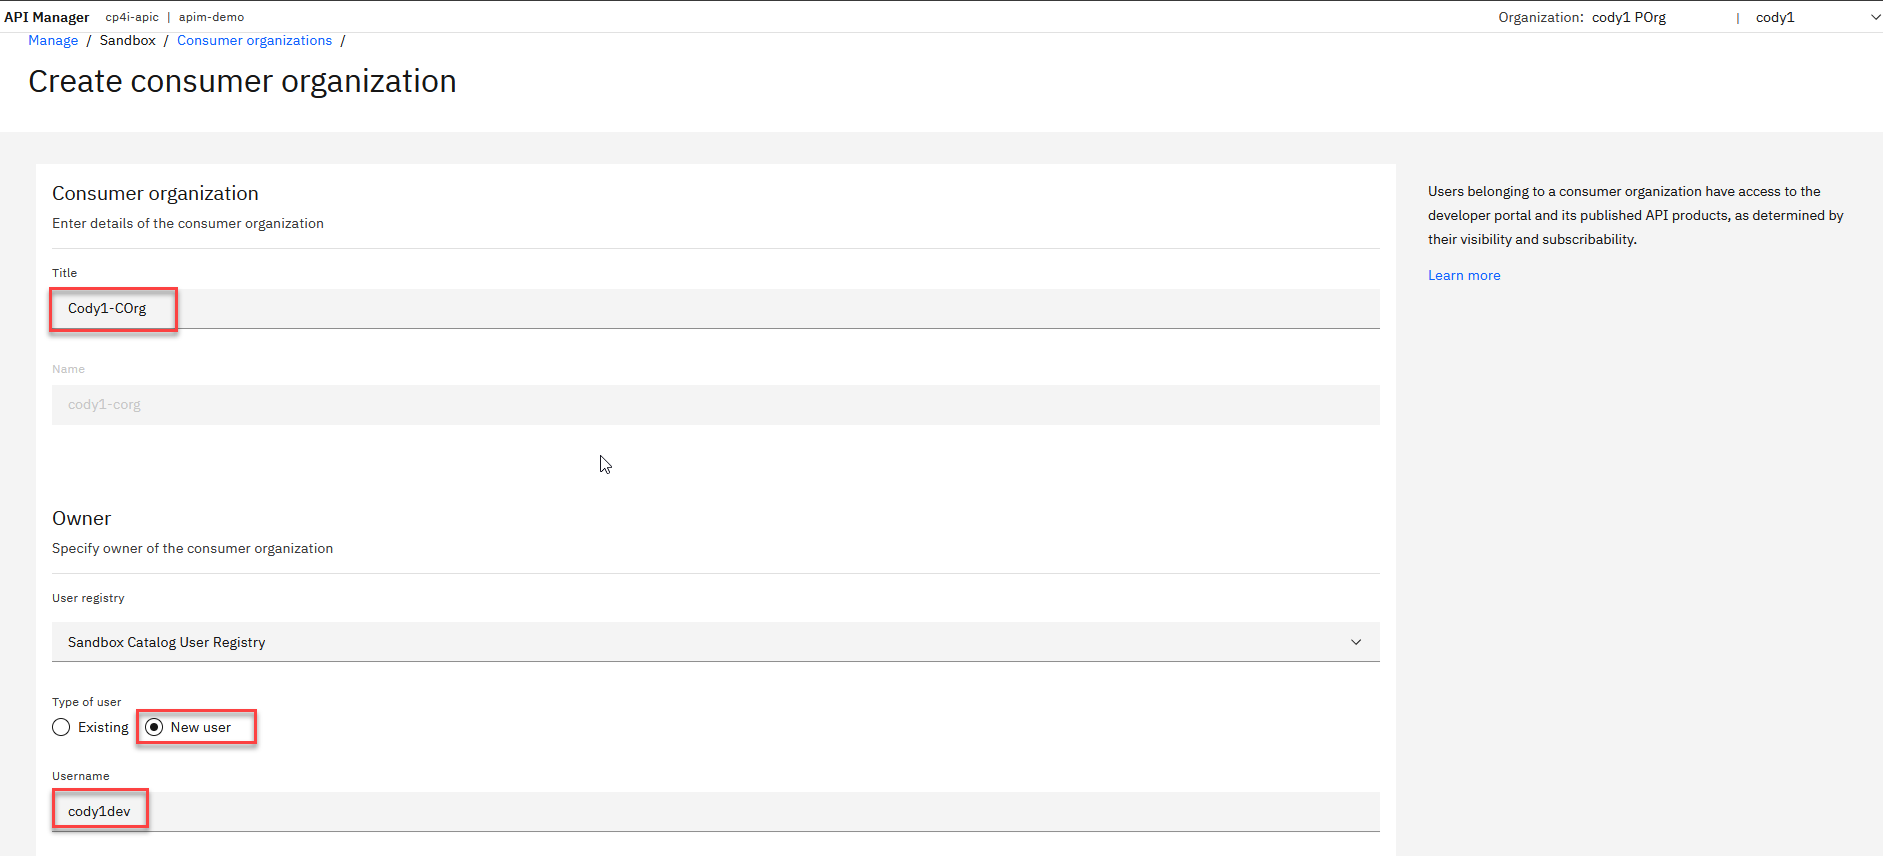
6. Now from the Create consumer organization screen, add your info. In this example, the user is cody1. Make sure to use your assigned userid.
For the Type of user, select New user.
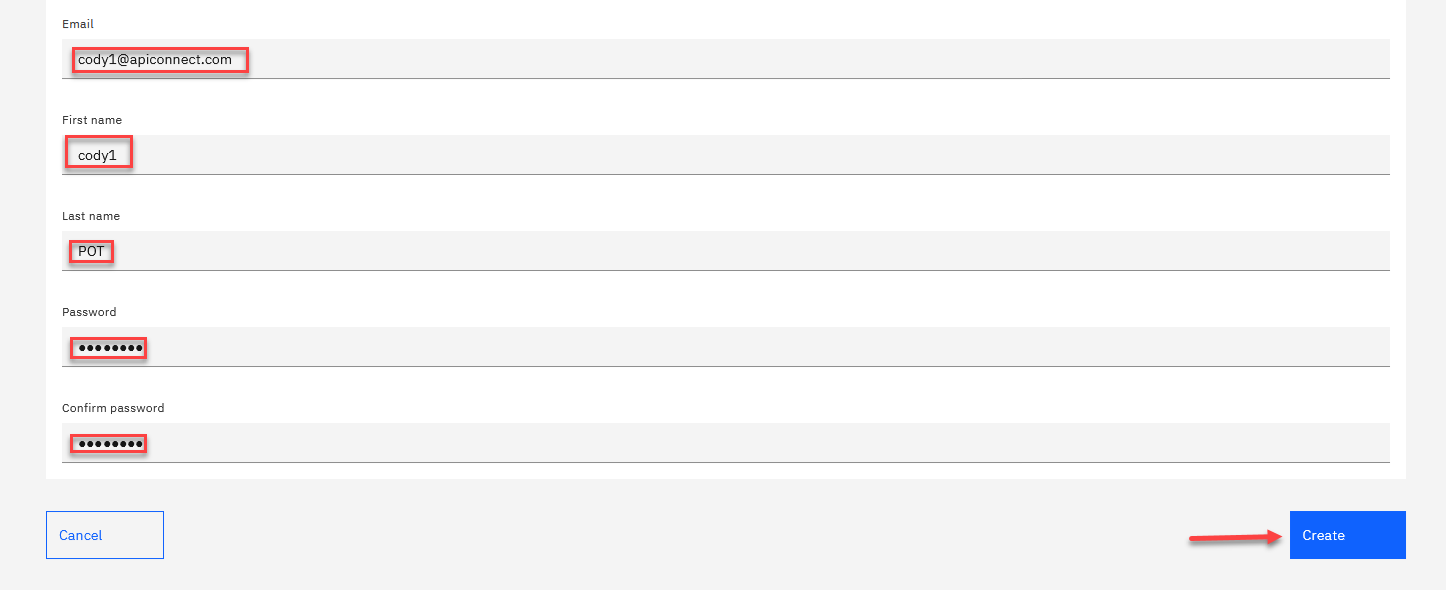
Note: For the password, you can use something simple like passw0rd.
When done, click Create.
7. You will see your new Consumer Org and this will be used to access the Devloper Portal in API Connect.